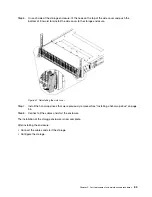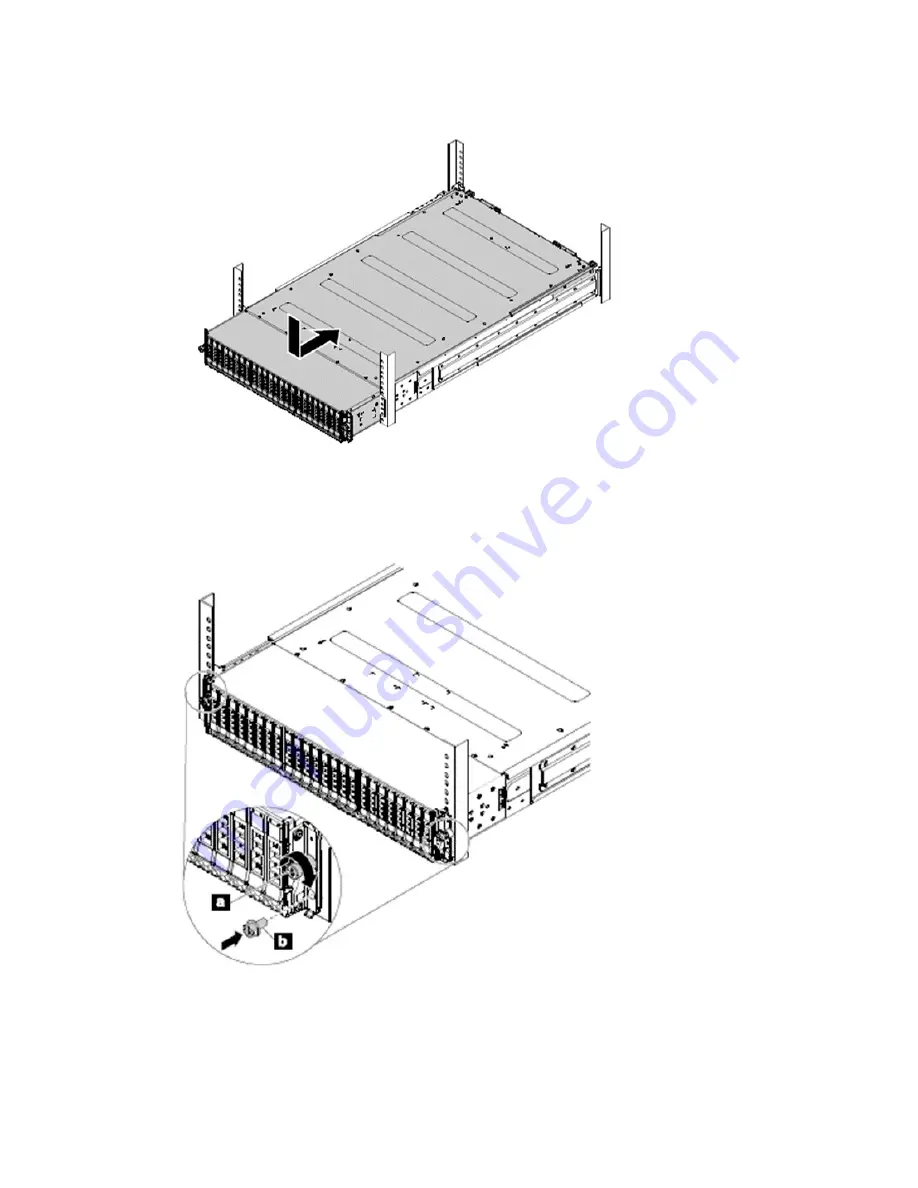
Step 4. Carefully slide the enclosure into the rack along the rails until the enclosure is fully inserted.
Figure 35. Installing the enclosure into the rack
Step 5. Secure the enclosure with the thumbscrews and the M5 screws on the front.
Figure 36. Installing screws on front of enclosure
82
Lenovo ThinkAgile CP Hardware Part Replacement and Component Maintenance Procedures
Summary of Contents for ThinkAgile CP
Page 4: ...ii Lenovo ThinkAgile CP Hardware Part Replacement and Component Maintenance Procedures ...
Page 6: ...iv Lenovo ThinkAgile CP Hardware Part Replacement and Component Maintenance Procedures ...
Page 8: ...vi Lenovo ThinkAgile CP Hardware Part Replacement and Component Maintenance Procedures ...
Page 30: ...22 Lenovo ThinkAgile CP Hardware Part Replacement and Component Maintenance Procedures ...
Page 33: ...Chapter 4 Managing Support Mode 25 ...
Page 80: ...72 Lenovo ThinkAgile CP Hardware Part Replacement and Component Maintenance Procedures ...
Page 158: ...150 Lenovo ThinkAgile CP Hardware Part Replacement and Component Maintenance Procedures ...
Page 160: ...152 Lenovo ThinkAgile CP Hardware Part Replacement and Component Maintenance Procedures ...
Page 161: ......
Page 162: ......


