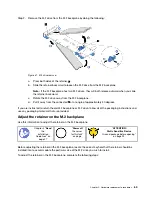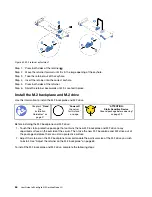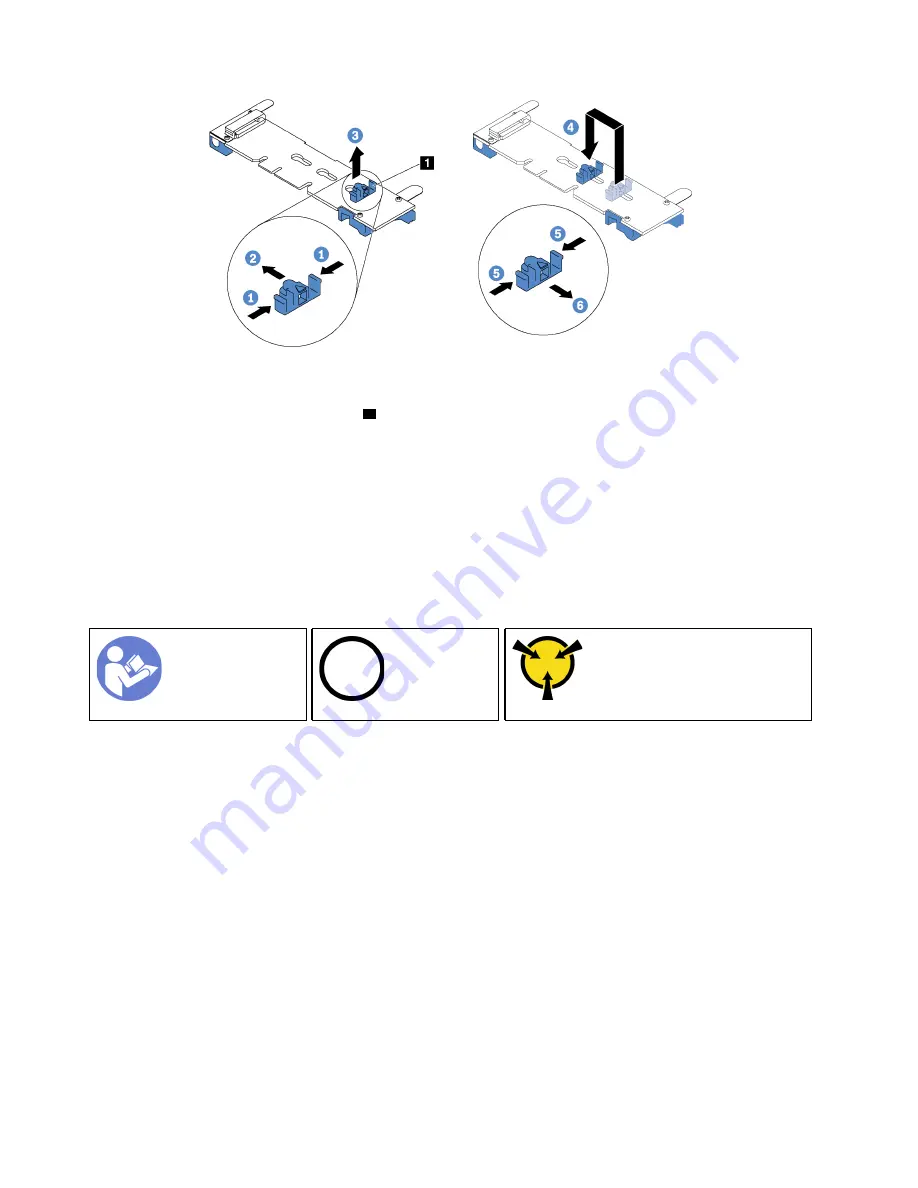
Figure 32. M.2 retainer adjustment
Step 1. Press both sides of the retainer
1
.
Step 2. Move the retainer forward until it is in the large opening of the keyhole.
Step 3. Take the retainer out of the keyhole.
Step 4. Insert the retainer into the correct keyhole.
Step 5. Press both sides of the retainer.
Step 6. Slide the retainer backwards until it is seated in place.
Install the M.2 backplane and M.2 drive
Use this information to install the M.2 backplane and M.2 drive.
“
Power off
the server
for this task”
on page
Ground package before opening”
Before installing the M.2 backplane and M.2 drive:
1. Touch the static-protective package that contains the new M.2 backplane and M.2 drive to any
unpainted surface on the outside of the server. Then, take the new M.2 backplane and M.2 drive out of
the package and place them on a static-protective surface.
2. Adjust the retainer on the M.2 backplane to accommodate the particular size of the M.2 drive you wish
to install. See “Adjust the retainer on the M.2 backplane” on page 63.
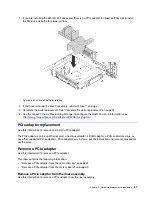
To install the M.2 backplane and M.2 drive, complete the following steps:
64
User Guide forThinkAgile MX Certified Node 2U
Summary of Contents for ThinkAgile MX Certified Node 2U
Page 1: ...User Guide for ThinkAgile MX Certified Node 2U Machine Type 7Z20 ...
Page 4: ...ii User Guide forThinkAgile MX Certified Node 2U ...
Page 14: ...10 User Guide forThinkAgile MX Certified Node 2U ...
Page 38: ...34 User Guide forThinkAgile MX Certified Node 2U ...
Page 94: ...90 User Guide forThinkAgile MX Certified Node 2U ...
Page 98: ...94 User Guide forThinkAgile MX Certified Node 2U ...
Page 100: ...96 User Guide forThinkAgile MX Certified Node 2U ...
Page 103: ......
Page 104: ......

