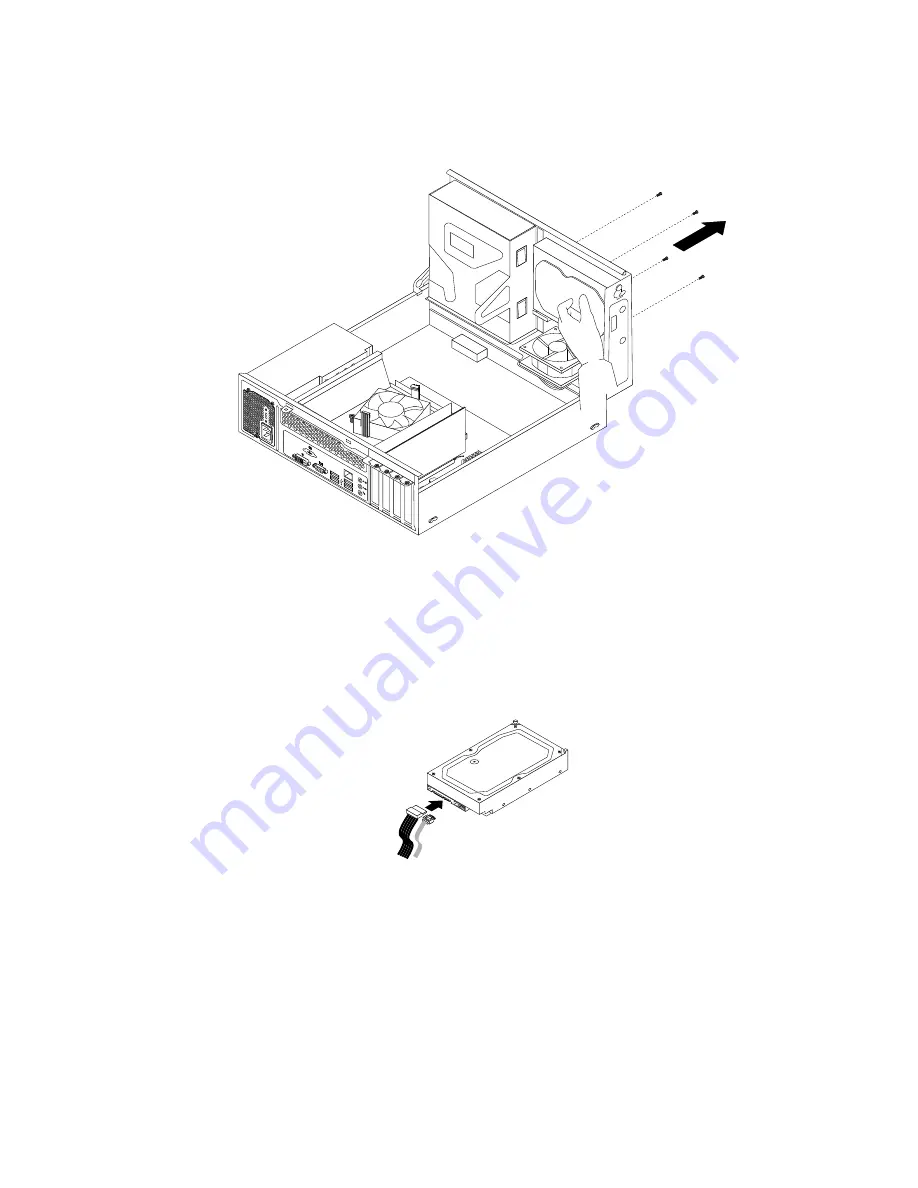
5. Hold the hard disk drive and remove the four screws that secure the hard disk drive. Then, remove
the hard disk drive from the drive bay assembly.
Figure 21. Removing the hard disk drive
6. Disconnect the signal cable and the power cable from the hard disk drive to completely remove the hard
disk drive from the chassis.
7. Connect one end of the signal cable to the rear of the new hard disk drive and the other end to an
available SATA connector on the system board. See “Locating parts on the system board” on page 12.
Then, locate an available five-wire power connector and connect it to the rear of the new hard disk drive.
Figure 22. Connecting a SATA hard disk drive
8. Position the new hard disk drive into the hard disk drive bay and align the screw holes in the new hard
disk drive with the corresponding holes in the drive bay. Then, install the four screws to secure the
new hard disk drive in place.
Chapter 5
.
Installing or replacing hardware
41
Summary of Contents for ThinkCentre 3493
Page 1: ...ThinkCentre User Guide Machine Types 3493 3496 and 3497 ...
Page 6: ...iv ThinkCentre User Guide ...
Page 12: ...x ThinkCentre User Guide ...
Page 32: ...20 ThinkCentre User Guide ...
Page 42: ...30 ThinkCentre User Guide ...
Page 88: ...76 ThinkCentre User Guide ...
Page 94: ...82 ThinkCentre User Guide ...
Page 102: ...90 ThinkCentre User Guide ...
Page 126: ...114 ThinkCentre User Guide ...
Page 132: ...120 ThinkCentre User Guide ...
Page 136: ...124 ThinkCentre User Guide ...
Page 142: ...130 ThinkCentre User Guide ...
Page 143: ......
Page 144: ......


