


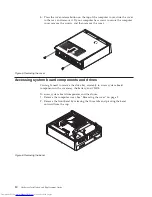

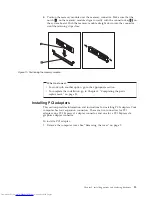
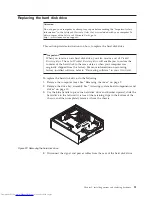

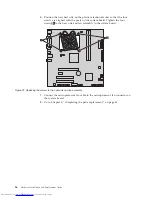
3.
In
some
models,
you
might
have
to
remove
the
PCI
adapters
to
gain
access
to
system
board
components.
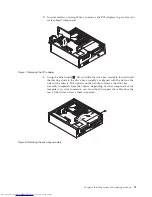
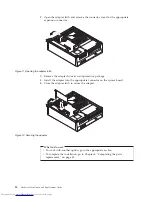
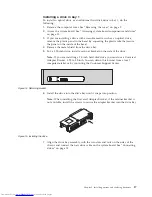
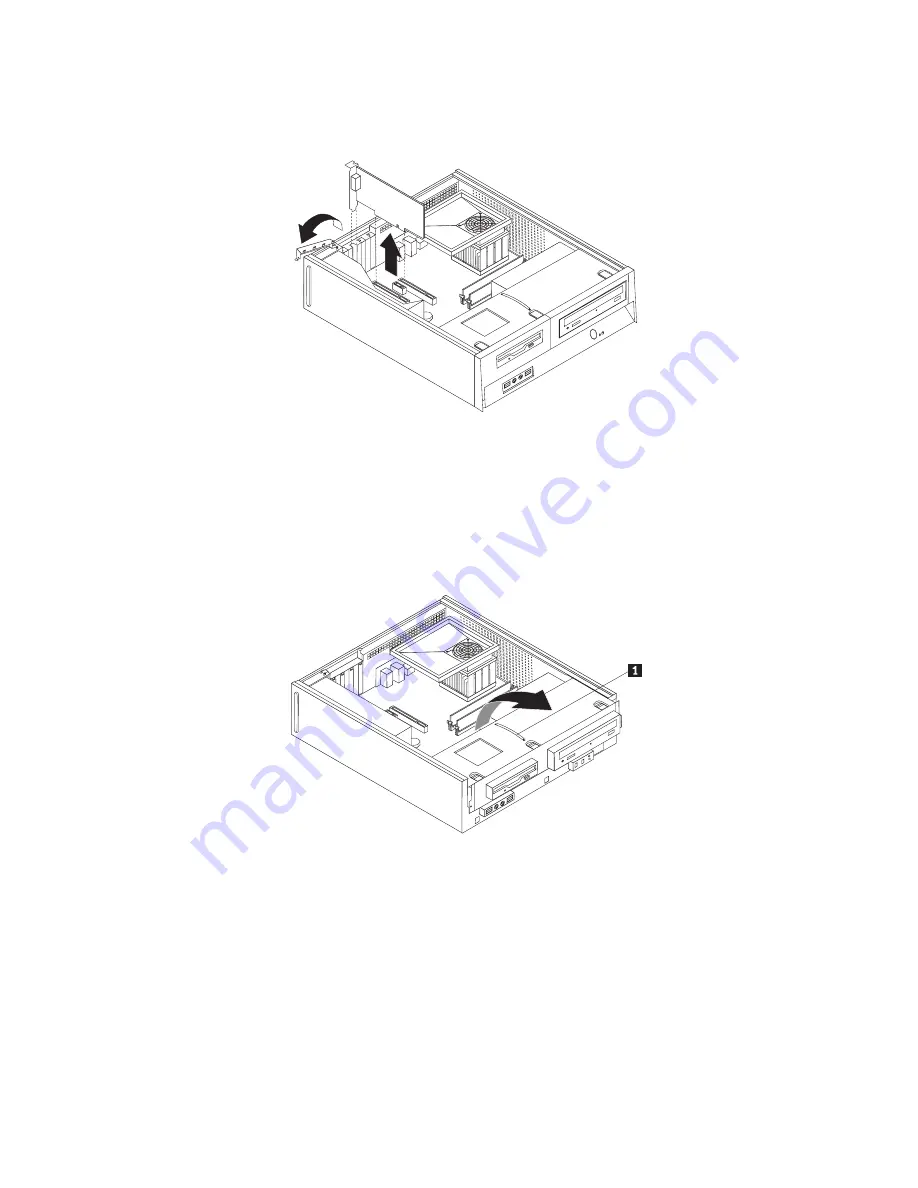
4.
Using
the
blue
handle
1
,
lift
and
slide
the
drive
bay
assembly
forward
until
the
locating
studs
in
the
drive
bay
assembly
are
aligned
with
the
slots
on
the
sides
of
the
chassis.
Pull
upward
on
the
handle
to
remove
the
drive
bay
assembly
completely
from
the
chassis.
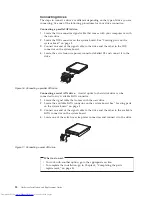
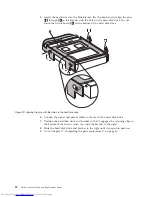
Depending
on
what
component
of
the
computer
you
want
to
remove,
you
can
either
disconnect
the
cables
from
the
rear
of
the
drives
or
leave
them
connected.
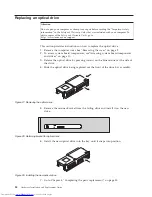
Figure
7.
Removing
the
PCI
adapter
Figure
8.
Removing
the
drive
bay
assembly
Chapter
3.
Installing
options
and
replacing
hardware
11
Summary of Contents for ThinkCentre 7096
Page 2: ......
Page 3: ...ThinkCentre Hardware Installation and Replacement Guide ...
Page 6: ...iv Hardware Installation and Replacement Guide ...
Page 8: ...vi Hardware Installation and Replacement Guide ...
Page 10: ...2 Hardware Installation and Replacement Guide ...
Page 40: ...32 Hardware Installation and Replacement Guide ...
Page 46: ...38 Hardware Installation and Replacement Guide ...
Page 49: ......
Page 50: ...Part Number 45C6431 Printed in USA 1P P N 45C6431 ...


