


Chapter
4.
Completing
the
parts
replacement
After
working
with
parts,
you
need
to
replace
the
computer
cover
and
reconnect
any
cables,
including
telephone
lines
and
power
cords.
Also,
depending
on
the
part
that
was
replaced,
you
might
need
to
confirm
the
updated
information
in
the
Setup
Utility
program.
This
section
provides
instructions
on
how
to
complete
the
parts
replacement.
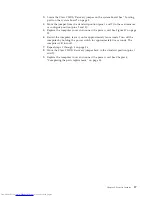
1.
Ensure
that
all
components
have
been
reassembled
correctly
and
that
no
tools
or
loose
screws
are
left
inside
your
computer.
2.
Reposition
any
cables
that
might
impede
the
replacement
of
the
computer
cover.
Important
Correctly
route
all
power
supply
cables
to
avoid
interference
with
the
drive
bay
assembly.
Keep
cables
clear
of
the
hinges
and
sides
of
the
computer
chassis.
3.
If
the
drive
bay
assembly
was
removed,
align
it
with
the
two
slots
and
rails
on
the
sides
of
the
chassis
and
reconnect
the
drive
cables
to
the
system
board.
4.
Slide
the
drive
bay
assembly
towards
the
rear
of
the
chassis
until
it
snaps
into
position.
5.
Reinstall
the
front
bezel
if
it
was
removed.
6.
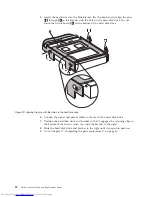
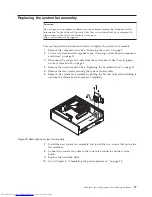
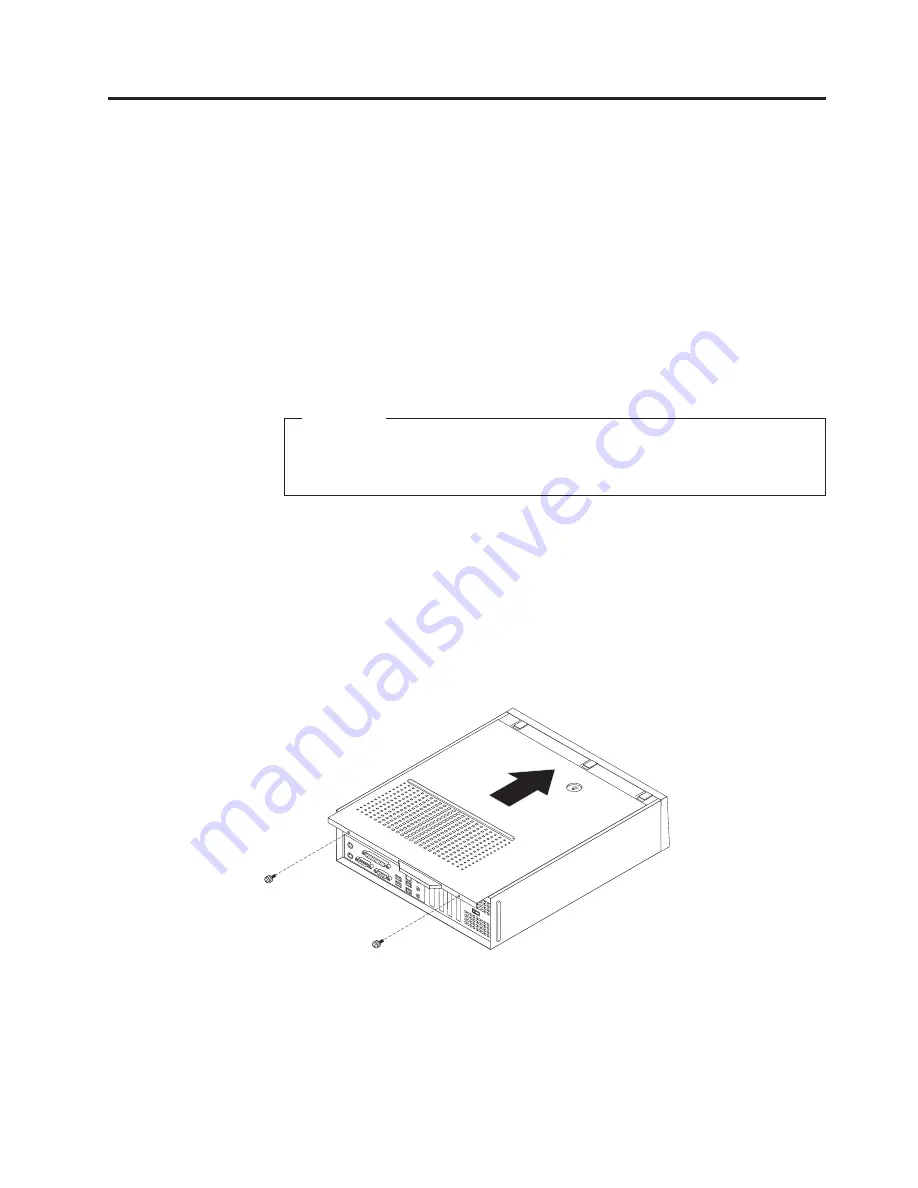
Position
the
computer
cover
on
the
chassis
so
that
the
rail
guides
on
the
sides
of
the
cover
engage
the
rails
and
push
the
cover
to
the
closed
position
until
it
snaps
into
position.
If
your
computer
has
screws
to
secure
the
computer
cover,
install
the
screws.
7.
Install
any
locking
devices
such
as
a
padlock
as
necessary.
8.
Reconnect
the
external
cables
and
power
cords
to
the
computer.
See
“Locating
connectors
on
the
rear
of
your
computer”
on
page
5.
9.
To
update
the
configuration,
see
“Using
the
Setup
Utility”
in
the
User
Guide
that
was
included
with
your
computer.
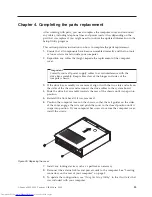
Figure
39.
Replacing
the
cover
©
Lenovo
2005,
2008.
Portions
©
IBM
Corp.
2005.
33
Summary of Contents for ThinkCentre 7096
Page 2: ......
Page 3: ...ThinkCentre Hardware Installation and Replacement Guide ...
Page 6: ...iv Hardware Installation and Replacement Guide ...
Page 8: ...vi Hardware Installation and Replacement Guide ...
Page 10: ...2 Hardware Installation and Replacement Guide ...
Page 40: ...32 Hardware Installation and Replacement Guide ...
Page 46: ...38 Hardware Installation and Replacement Guide ...
Page 49: ......
Page 50: ...Part Number 45C6431 Printed in USA 1P P N 45C6431 ...


