
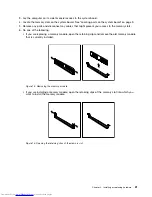

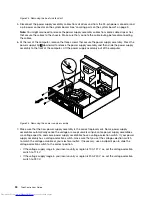
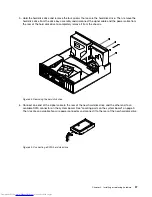

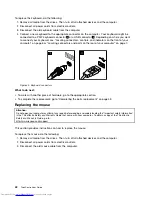


5. Disconnect the signal cable and the power cable from the optical drive.
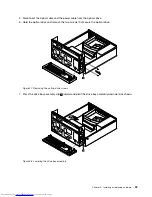
6. Hold the optical drive and remove the two screws that secure the optical drive.
Figure 27. Removing the optical drive screws
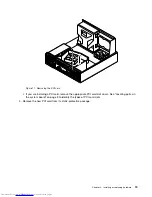
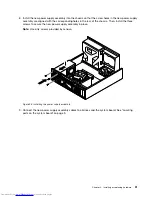
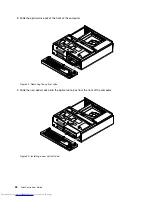
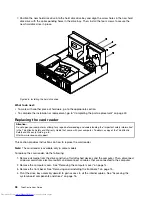
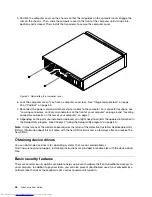
7. Press the drive bay assembly clip
1
inward and pivot the drive bay assembly downward as shown.
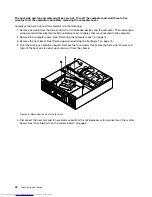
Figure 28. Lowering the drive bay assembly
Chapter 2
.
Installing or replacing hardware
33
Summary of Contents for ThinkCentre 7539
Page 1: ...ThinkCentre User Guide Machine Types 0104 0154 7539 and 7548 ...
Page 2: ......
Page 3: ...ThinkCentre User Guide Machine Types 0104 0154 7539 and 7548 ...
Page 8: ...vi ThinkCentre User Guide ...
Page 20: ...12 ThinkCentre User Guide ...
Page 56: ...48 ThinkCentre User Guide ...
Page 70: ...62 ThinkCentre User Guide ...
Page 74: ...66 ThinkCentre User Guide ...
Page 84: ...76 ThinkCentre User Guide ...
Page 85: ......
Page 86: ...Part Number 0A22638 Printed in USA 1P P N 0A22638 0A22638 ...


