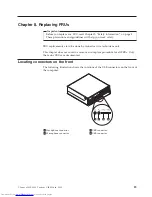
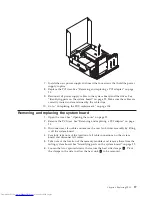
Removing
and
replacing
a
hard
disk
drive
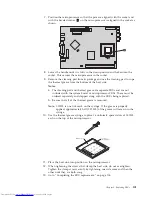
1.
Open
the
cover.
See
“Opening
the
cover”
on
page
90.
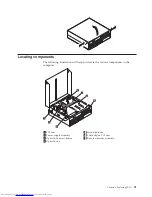
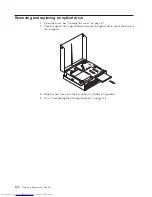
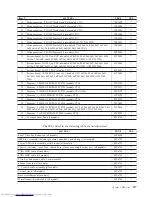
2.
Pivot
the
drive
bay
assembly
upward
to
gain
access
to
the
hard
disk
drive.
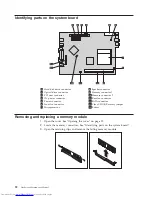
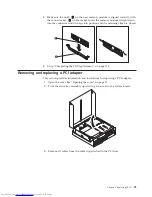
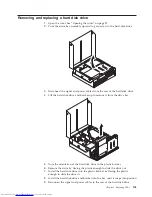
3.
Disconnect
the
signal
and
power
cables
from
the
rear
of
the
hard
disk
drive.
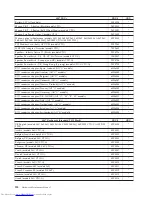
4.
Lift
the
hard
disk
drive
and
bracket
up
to
remove
it
from
the
drive
bay.
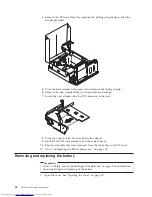
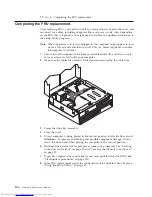
5.
Note
the
orientation
of
the
hard
disk
drive
in
the
plastic
bracket.
6.
Remove
the
drive
by
flexing
the
plastic
enough
to
slide
the
drive
out.
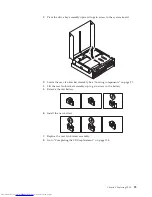
7.
Install
the
hard
disk
drive
into
the
plastic
bracket
by
flexing
the
plastic
enough
to
slide
the
drive
in.
8.
Install
the
hard
disk
drive
and
bracket
into
the
bay
until
it
snaps
into
position.
9.
Reconnect
the
signal
and
power
cables
to
the
rear
of
the
hard
disk
drive.
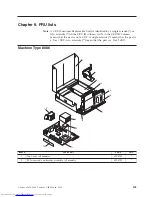
Chapter
8.
Replacing
FRUs
103
Summary of Contents for ThinkCentre 8086
Page 1: ...Hardware Maintenance Manual Types 8086 8087 8088 8089 Types 8090 8094 ...
Page 2: ......
Page 3: ...Hardware Maintenance Manual Types 8086 8087 8088 8089 Types 8090 8094 ...
Page 18: ...12 Hardware Maintenance Manual ...
Page 19: ...Chapter 2 Safety information 13 ...
Page 20: ... 18 kg 37 lbs 32 kg 70 5 lbs 55 kg 121 2 lbs 1 2 14 Hardware Maintenance Manual ...
Page 24: ...18 Hardware Maintenance Manual ...
Page 25: ...1 2 Chapter 2 Safety information 19 ...
Page 26: ...20 Hardware Maintenance Manual ...
Page 27: ...Chapter 2 Safety information 21 ...
Page 28: ...1 2 22 Hardware Maintenance Manual ...
Page 35: ...Chapter 2 Safety information 29 ...
Page 36: ...30 Hardware Maintenance Manual ...
Page 37: ...1 2 Chapter 2 Safety information 31 ...
Page 41: ...Chapter 2 Safety information 35 ...
Page 42: ...1 2 36 Hardware Maintenance Manual ...
Page 43: ...Chapter 2 Safety information 37 ...
Page 52: ...46 Hardware Maintenance Manual ...
Page 154: ...148 Hardware Maintenance Manual ...
Page 160: ...154 Hardware Maintenance Manual ...
Page 163: ......
Page 164: ...Part Number 19R2387 Printed in USA 1P P N 19R2387 ...


