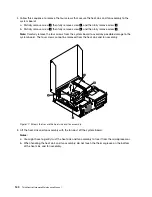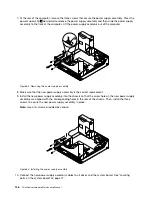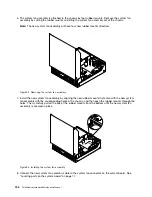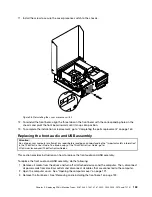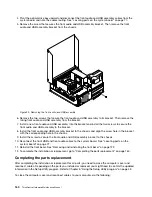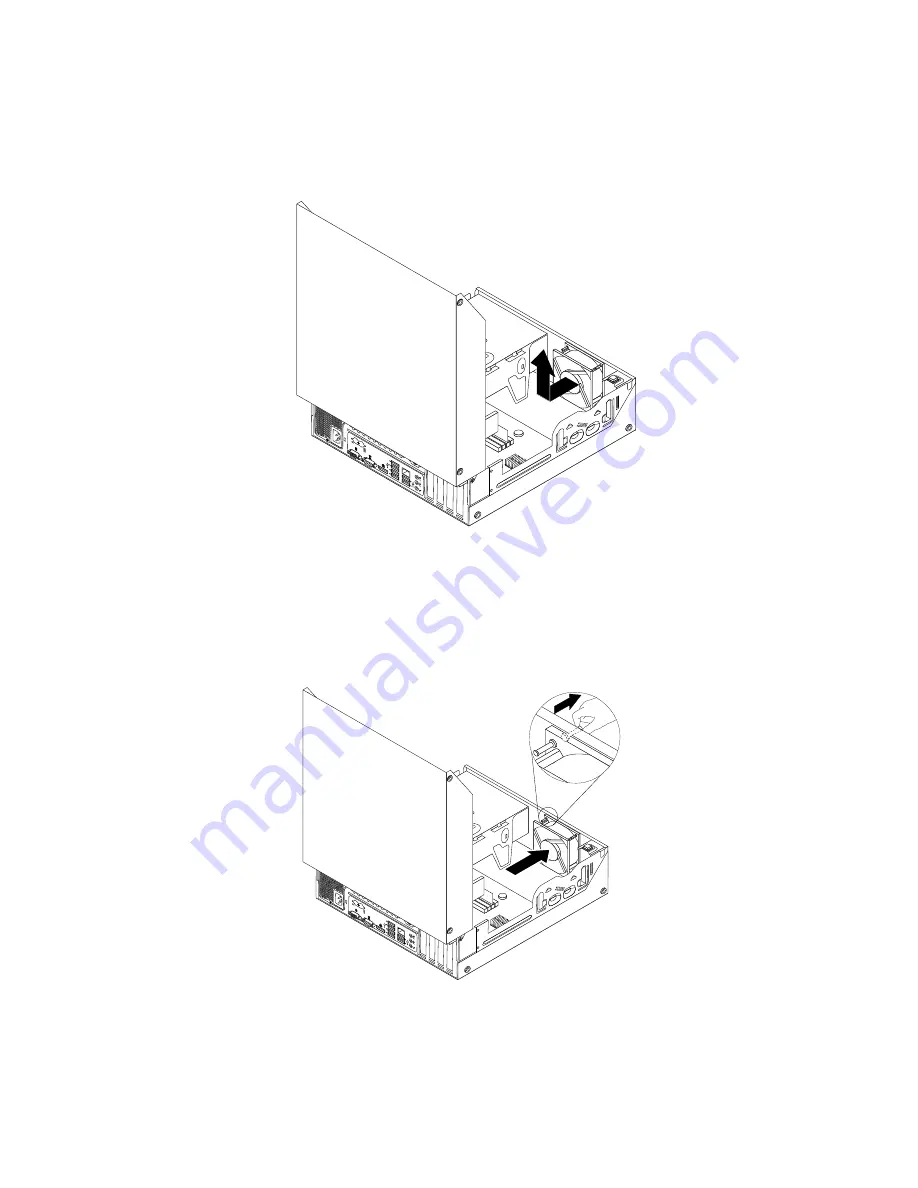
6. The system fan assembly is attached to the chassis by four rubber mounts. Remove the system fan
assembly by cutting the rubber mounts and lifting the system fan assembly out of the chassis.
Note:
The new system fan assembly will have four new rubber mounts attached.
Figure 92. Removing the system fan assembly
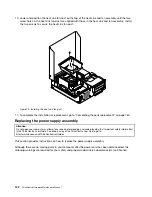
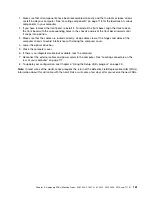
7. Install the new system fan assembly by aligning the new rubber mounts that came with the new system
fan assembly with the corresponding holes in the chassis, and then push the rubber mounts through the
holes. Then, carefully pull on the tips of the rubber mounts from the bottom until the new system fan
assembly is secured in place.
Figure 93. Installing the system fan assembly
8. Connect the new system fan assembly cable to the system fan connector on the system board. See
“Locating parts on the system board” on page 77.
154
ThinkCentre Hardware Maintenance Manual
Summary of Contents for ThinkCentre M81
Page 6: ...iv ThinkCentre Hardware Maintenance Manual ...
Page 15: ...Chapter 2 Safety information 9 ...
Page 16: ... 18 kg 37 lb 32 kg 70 5 lb 55 kg 121 2 lb 10 ThinkCentre Hardware Maintenance Manual ...
Page 20: ...14 ThinkCentre Hardware Maintenance Manual ...
Page 21: ...1 2 Chapter 2 Safety information 15 ...
Page 22: ...1 2 16 ThinkCentre Hardware Maintenance Manual ...
Page 28: ...22 ThinkCentre Hardware Maintenance Manual ...
Page 29: ...1 2 Chapter 2 Safety information 23 ...
Page 33: ...Chapter 2 Safety information 27 ...
Page 34: ...1 2 28 ThinkCentre Hardware Maintenance Manual ...
Page 38: ...32 ThinkCentre Hardware Maintenance Manual ...
Page 78: ...72 ThinkCentre Hardware Maintenance Manual ...
Page 168: ...162 ThinkCentre Hardware Maintenance Manual ...
Page 370: ...364 ThinkCentre Hardware Maintenance Manual ...
Page 374: ...368 ThinkCentre Hardware Maintenance Manual ...
Page 379: ......
Page 380: ...Part Number 0A74545 Printed in USA 1P P N 0A74545 0A74545 ...

