
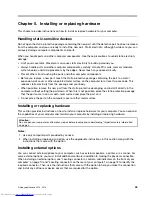

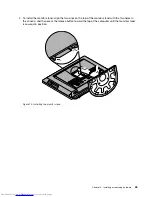
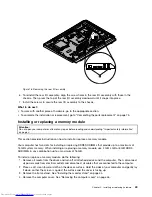


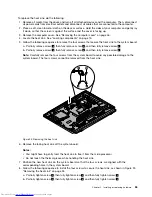


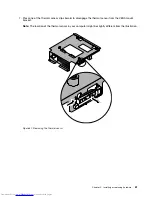

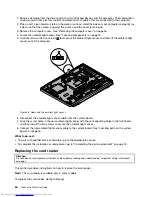

5. Press the optical drive release button
1
toward the top of the computer, and then slide the optical drive
out of the optical drive bay.
Figure 22. Removing the optical drive
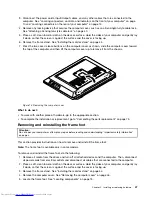
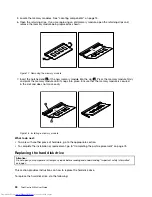
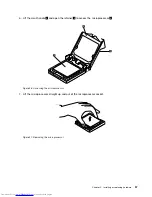
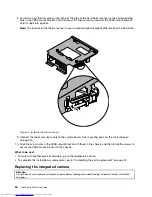
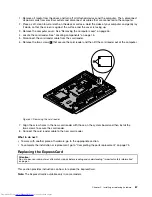
6. To install a new optical drive, slide the new optical drive into the optical drive bay until it snaps into
position.
Figure 23. Installing the optical drive
What to do next:
• To work with another piece of hardware, go to the appropriate section.
• To complete the installation or replacement, go to “Completing the parts replacement” on page 75.
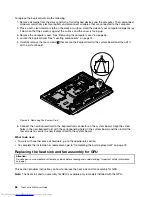
Replacing the converter board
Attention:
Do not open your computer or attempt any repair before reading and understanding “Important safety information”
on page v.
This section provides instructions on how to replace the converter board.
Chapter 5
.
Installing or replacing hardware
53
Summary of Contents for ThinkCentre M93z 10AC
Page 1: ...ThinkCentre M93z User Guide Machine Types 10AC 10AD 10AE and 10AF ...
Page 6: ...iv ThinkCentre M93z User Guide ...
Page 12: ...x ThinkCentre M93z User Guide ...
Page 42: ...30 ThinkCentre M93z User Guide ...
Page 50: ...38 ThinkCentre M93z User Guide ...
Page 110: ...98 ThinkCentre M93z User Guide ...
Page 132: ...120 ThinkCentre M93z User Guide ...
Page 138: ...126 ThinkCentre M93z User Guide ...
Page 142: ...130 ThinkCentre M93z User Guide ...
Page 145: ...Appendix E China Energy Label Copyright Lenovo 2013 2014 133 ...
Page 146: ...134 ThinkCentre M93z User Guide ...
Page 148: ...136 ThinkCentre M93z User Guide ...
Page 152: ...140 ThinkCentre M93z User Guide ...
Page 153: ......
Page 154: ......


