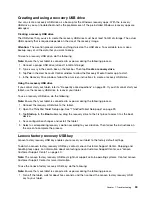
Creating and using a recovery USB drive
You can create a recovery USB drive as a backup for the Windows recovery apps. With the recovery
USB drive, you can troubleshoot and fix the problems even if the preinstalled Windows recovery apps are
damaged.
Creating a recovery USB drive
The USB drive that you use to create the recovery USB drive should be at least 16 GB of storage. The actual
USB capacity that is required depends on the size of the recovery image.
Attention:
The creation process deletes anything stored on the USB drive. To avoid data loss, make a
backup copy of all the data that you want to keep.
To create a recovery USB drive, do the following:
Note:
Ensure that your tablet is connected to ac power during the following process.
1. Swipe in from the right edge of the screen to display the charms and tap
Search
.
2. Type
recovery
in the
Search
field. Then tap
Create a recovery drive
.
3. Tap
Yes
in the User Account Control window to allow the Recovery Media Creator app to start.
4. Ensure that you select
Copy the recovery partition from the PC to the recovery drive
. Then tap
Next
.
5. Connect a proper USB drive, then tap
Next
.
6. Tap
Create
in the Recovery Drive window. The creation of the recovery USB drive starts.
7. When the creation of the recovery USB drive finishes, do one of the following:
• To keep the recovery partition on your tablet, tap
Finish
.
• To delete the recovery partition on your tablet, tap
Delete the recovery partition
.
Attention:
If you delete the recovery partition on your tablet, do keep the recovery USB drive in a
safe place. The Windows recovery apps will not be stored in your tablet anymore, and you need the
recovery USB drive to refresh or reset your tablet.
8. Remove the USB drive. The recovery USB drive is created successfully.
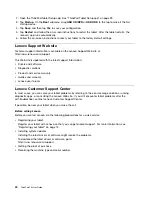
Using the recovery USB drive
If you cannot start your tablet, or if you cannot start the Windows recovery image on your tablet, use the
recovery USB drive to recover your tablet.
To use a recovery USB drive, do the following:
Note:
Ensure that your tablet is connected to ac power.
1. Connect the recovery USB drive to your tablet.
2. Open the ThinkPad Tablet Setup app. See “ThinkPad Tablet Setup app” on page 29.
3. Tap
Startup
. In the
Boot
submenu, drag the recovery drive to the first place to select it as the boot
device.
4. Save configuration changes and restart the tablet.
5. Follow the instructions on the screen to recover the tablet.
For more information about the recovery solutions provided by the Windows 8.1 operating system, go to:
http://go.microsoft.com/fwlink/?LinkID=263800
37
Summary of Contents for ThinkPad 10 20E3
Page 1: ...ThinkPad 10 User Guide Machine Types 20E3 and 20E4 ...
Page 18: ...6 ThinkPad 10 User Guide ...
Page 24: ...12 ThinkPad 10 User Guide ...
Page 40: ...28 ThinkPad 10 User Guide ...
Page 68: ...56 ThinkPad 10 User Guide ...
Page 70: ...58 ThinkPad 10 User Guide ...
Page 71: ......
Page 72: ......

