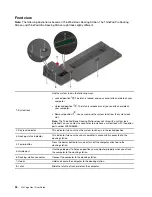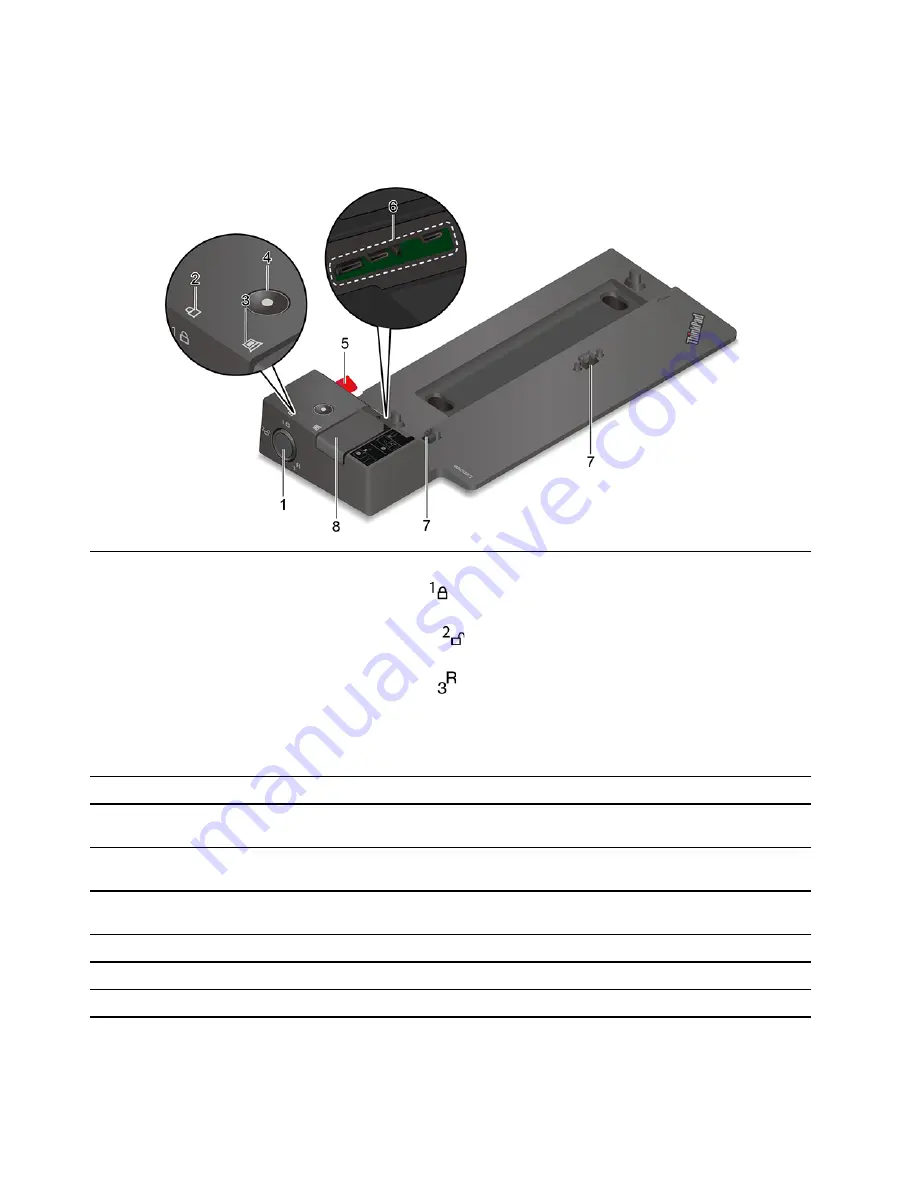
Front view
Note:
The following illustration is based on ThinkPad Basic Docking Station. The ThinkPad Pro Docking
Station and ThinkPad Ultra Docking Station might look slightly different.
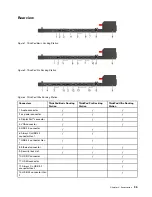
1. System lock
Use the system lock in the following ways:
• Locked position
: The latch is locked, and you cannot attach or detach your
computer.
• Unlocked position
: The latch is unlocked, and you can attach or detach
your computer.
• Removal position
: You can remove the system lock from the system-lock
slot.
Note:
The ThinkPad Basic Docking Station does not ship with a system lock
installed. You can contact Lenovo sales to purchase a system lock with the option
part number 4XE0Q56388.
2. Key lock indicator
This indicator turns on when the system lock key is in the locked position.
3. Docking status indicator
This indicator turns on when your computer is successfully connected to the
docking station.
4. Power button
Press the power button to turn on or turn off the computer attached to the
docking station.
5. Guide post
Use the guide post to help you position your computer properly when you attach
the computer to the docking station.
6. Docking-station connector
Connect the computer to the docking station.
7. Hooks
Hold and secure the computer to the docking station.
8. Latch
Slide the latch to attach or detach the computer.
34
X13 Yoga Gen 1 User Guide
Summary of Contents for ThinkPad X13 Yoga Gen 1
Page 1: ...X13 Yoga Gen 1 User Guide ...
Page 6: ...iv X13 Yoga Gen 1 User Guide ...
Page 8: ...2 X13 Yoga Gen 1 User Guide ...
Page 13: ...Chapter 1 Meet your computer 7 ...
Page 32: ...26 X13 Yoga Gen 1 User Guide ...
Page 38: ...32 X13 Yoga Gen 1 User Guide ...
Page 50: ...44 X13 Yoga Gen 1 User Guide ...
Page 54: ...48 X13 Yoga Gen 1 User Guide ...
Page 64: ...58 X13 Yoga Gen 1 User Guide ...
Page 72: ...66 X13 Yoga Gen 1 User Guide ...
Page 86: ...80 X13 Yoga Gen 1 User Guide ...
Page 90: ...84 X13 Yoga Gen 1 User Guide ...
Page 99: ...Appendix D Compliance and TCO Certified information 93 ...
Page 106: ...100 X13 Yoga Gen 1 User Guide ...
Page 109: ......
Page 110: ......

