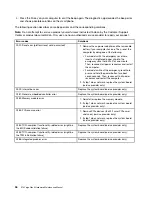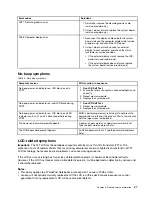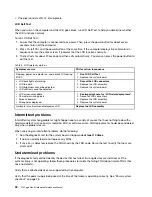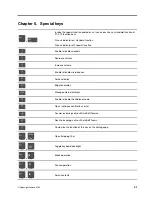
devices, the LCD, and system board buses. To use the bootable diagnostic program, you can create a
bootable diagnostic medium using a USB device or disc.
To create a bootable diagnostic medium, do the following:
1. Go to
2. Click
Lenovo Bootable Diagnostics
.
3. Follow the instructions on the Web site to create a bootable diagnostic medium on a USB device or disc.
To use the diagnostic medium you have created, do one of the following:
• If you have created the bootable diagnostic medium on a USB device, do the following:
1. Attach the USB device to the computer.
2. Turn on the computer. If the computer cannot be turned on, go to “Power system checkout” on page
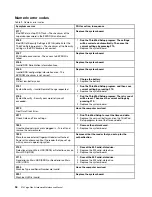
26, and check the power sources. If an error code is displayed, go to “Symptom-to-FRU index” on
page 33 for error code descriptions and troubleshooting hints.
3. When the logo screen is displayed, repeatedly press and release the F12 key. When the Boot Menu
window opens, release the F12 key.
4. Use the arrow keys to select
USB HDD
and then press Enter. The diagnostic program launches.
5. Follow the instructions on the screen to use the diagnostic program.
• If you have created the bootable diagnostic medium using a disc, do the following:
1. Turn on the computer. If the computer cannot be turned on, go to “Power system checkout” on page
26, and check the power sources. If an error code is displayed, go to “Symptom-to-FRU index” on
page 33 for error code descriptions and troubleshooting hints.
2. Insert the disc into the optical drive.
3. Restart the computer.
4. When the logo screen is displayed, repeatedly press and release the F12 key. When the Boot Menu
window opens, release the F12 key.
5. Use the arrow keys to select
ATAPI CDx
(x: 0, 1, ...) and then press Enter. The diagnostic program
launches.
6. Follow the instructions on the screen to use the diagnostic program.
Power system checkout
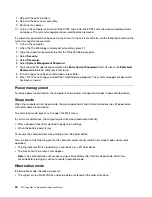
To verify if a battery or an ac power adapter is functional, do the following:
1. Turn off the computer.
2. Connect the ac power adapter.
3. Turn on the computer. If the computer can be turned on, it means that either the battery or the ac power
adapter is functional.
4. Insert a straightened paper clip into the emergency-reset hole to reset the computer. If the computer is
still powered on, it means that the ac power adapter is functional.
5. Turn off the computer.
6. Disconnect the ac power adapter and turn on the computer. If the computer can be turned on, it means
that the battery is functional.
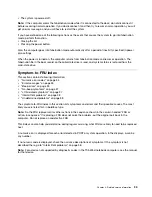
If you suspect a power problem, see the appropriate one of the following power supply checkouts:
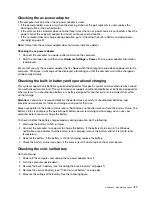
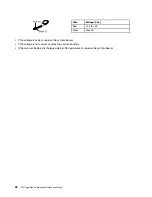
• “Checking the ac power adapter” on page 27
• “Checking the built-in battery and operational charging” on page 27
• “Checking the coin-cell battery” on page 27
26
X13 Yoga Gen 3 Hardware Maintenance Manual
Summary of Contents for Thinkpad X13 Yoga Gen 3
Page 1: ...X13 Yoga Gen 3 Hardware Maintenance Manual ...
Page 6: ...iv X13 Yoga Gen 3 Hardware Maintenance Manual ...
Page 11: ...DANGER DANGER DANGER DANGER DANGER DANGER Chapter 1 Safety information 5 ...
Page 12: ...DANGER 6 X13 Yoga Gen 3 Hardware Maintenance Manual ...
Page 13: ...PERIGO Chapter 1 Safety information 7 ...
Page 14: ...PERIGO PERIGO PERIGO PERIGO 8 X13 Yoga Gen 3 Hardware Maintenance Manual ...
Page 15: ...PERIGO PERIGO PERIGO DANGER DANGER Chapter 1 Safety information 9 ...
Page 16: ...DANGER DANGER DANGER DANGER DANGER 10 X13 Yoga Gen 3 Hardware Maintenance Manual ...
Page 17: ...DANGER VORSICHT VORSICHT VORSICHT VORSICHT Chapter 1 Safety information 11 ...
Page 18: ...VORSICHT VORSICHT VORSICHT VORSICHT 12 X13 Yoga Gen 3 Hardware Maintenance Manual ...
Page 19: ...Chapter 1 Safety information 13 ...
Page 20: ...14 X13 Yoga Gen 3 Hardware Maintenance Manual ...
Page 21: ...Chapter 1 Safety information 15 ...
Page 22: ...16 X13 Yoga Gen 3 Hardware Maintenance Manual ...
Page 23: ...Chapter 1 Safety information 17 ...
Page 24: ...18 X13 Yoga Gen 3 Hardware Maintenance Manual ...
Page 25: ...Chapter 1 Safety information 19 ...
Page 26: ...20 X13 Yoga Gen 3 Hardware Maintenance Manual ...
Page 46: ...40 X13 Yoga Gen 3 Hardware Maintenance Manual ...
Page 51: ...Bottom Speaker Emergency reset hole Chapter 6 Locations 45 ...
Page 53: ...Major FRUs and CRUs d a b c Chapter 6 Locations 47 ...
Page 60: ...54 X13 Yoga Gen 3 Hardware Maintenance Manual ...
Page 66: ...60 X13 Yoga Gen 3 Hardware Maintenance Manual ...
Page 94: ...88 X13 Yoga Gen 3 Hardware Maintenance Manual ...
Page 96: ...90 X13 Yoga Gen 3 Hardware Maintenance Manual ...
Page 100: ...94 X13 Yoga Gen 3 Hardware Maintenance Manual ...
Page 101: ......
Page 102: ...Part Number SP41G21701 Printed in China 1P P N SP41G21701 1PSP41G21701 ...

