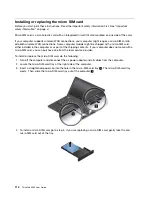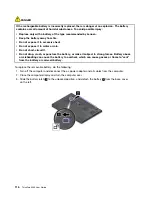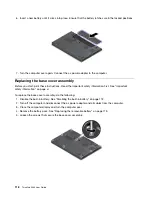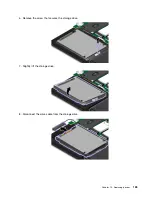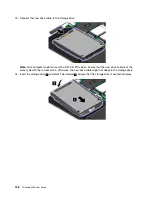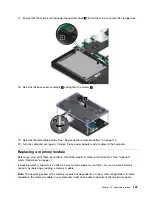
14. Reinstall the base cover assembly
1
and tighten the screws
2
.
15. Reinstall the removable battery. See “Replacing the removable battery” on page 115.
16. Turn the computer over again. Connect the ac power adapter and all cables to the computer.
Replacing the internal-storage-drive cable and cable bracket
Before you start, print these instructions. Read the important safety information first. See “Important
safety information” on page vi.
To replace the internal-storage-drive cable and cable bracket, do the following:
Note:
Depending on the computer model, the internal storage drive and drive cable that come with your
computer might look different from the illustrations in this topic.
1. Disable the built-in battery. See “Disabling the built-in battery” on page 113.
2. Turn off the computer and disconnect the ac power adapter and all cables from the computer.
3. Close the computer display and turn the computer over.
4. Remove the removable battery. See “Replacing the removable battery” on page 115.
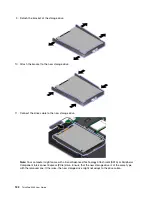
5. Loosen the screws that secure the base cover assembly
1
. Then remove the base cover assembly
2
.
124
ThinkPad X260 User Guide
Summary of Contents for ThinkPad X260
Page 1: ...ThinkPad X260 User Guide ...
Page 6: ...iv ThinkPad X260 User Guide ...
Page 66: ...50 ThinkPad X260 User Guide ...
Page 78: ...62 ThinkPad X260 User Guide ...
Page 96: ...80 ThinkPad X260 User Guide ...
Page 102: ...86 ThinkPad X260 User Guide ...
Page 120: ...104 ThinkPad X260 User Guide ...
Page 128: ...112 ThinkPad X260 User Guide ...
Page 154: ...138 ThinkPad X260 User Guide ...
Page 158: ...142 ThinkPad X260 User Guide ...
Page 168: ...152 ThinkPad X260 User Guide ...
Page 170: ...China RoHS 154 ThinkPad X260 User Guide ...
Page 175: ......
Page 176: ......


