This section provides information about the supported smart card type and instructions on how to install
or remove a smart card. For more information about using the smart card, see the documentation that
comes with the smart card.
Supported smart card type
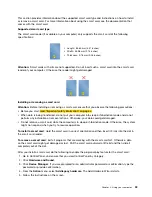
The smart card reader (if available on your computer) only supports the smart card of the following
specifications:
• Length: 85.60 mm (3.37 inches)
• Width: 53.98 mm (2.13 inches)
• Thickness: 0.76 mm (0.03 inches)
Attention:
Smart cards with slits are not supported. Do not insert such a smart card into the smart card
reader of your computer. Otherwise the reader might get damaged.
Installing or removing a smart card
Attention:
Before installing or removing a smart card, ensure that you observe the following precautions:
• Before you start, read “Important safety information” on page v.
• When data is being transferred, do not put your computer into sleep or hibernation mode and do not
perform any installation or removal actions. Otherwise, your data could get damaged.
• Do not remove a smart card while the computer is in sleep or hibernation mode. Otherwise, the system
might not respond when you try to resume operation.
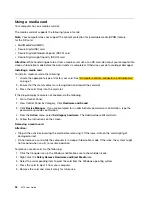
To install a smart card
: Hold the smart card in correct orientation and then insert it firmly into the slot in
the smart card reader.
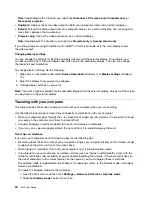
To remove a smart card
: Exit all programs that are working with the smart card first. Otherwise, data
on the smart card might get damaged or lost. Pull the smart card outward a little bit and then slide it
completely out of the slot.
After you install a smart card, do the following to enable the plug-and-play feature for the smart card:
1. Go to Control Panel, and ensure that you view Control Panel by Category.
2. Click
Hardware and Sound
.
3. Click
Device Manager
. If you are prompted for an administrator password or confirmation, type the
password or provide confirmation.
4. From the
Action
menu, select
Add legacy hardware
. The Add Hardware Wizard starts.
5. Follow the instructions on the screen.
33
Summary of Contents for ThinkPad X270
Page 1: ...X270 User Guide ...
Page 6: ...iv X270 User Guide ...
Page 54: ...38 X270 User Guide ...
Page 68: ...52 X270 User Guide ...
Page 74: ...58 X270 User Guide ...
Page 82: ...66 X270 User Guide ...
Page 124: ...108 X270 User Guide ...
Page 148: ...132 X270 User Guide ...
Page 150: ...134 X270 User Guide ...
Page 156: ...140 X270 User Guide ...
Page 162: ...China RoHS 146 X270 User Guide ...
Page 163: ...Taiwan RoHS Appendix D Restriction of Hazardous Substances RoHS Directive 147 ...
Page 164: ...148 X270 User Guide ...
Page 166: ...5 Clear the Allow this device to wake the computer check box 6 Click OK 150 X270 User Guide ...
Page 170: ...154 X270 User Guide ...
Page 171: ......
Page 172: ......


