• Secure Digital High-Capacity (SDHC) card
Attention:
When transferring data to or from a media card, such as an SD card, do not put your computer to
sleep or hibernation mode before the data transfer is completed. Otherwise, your data could get damaged.
Installing a media card
To install a media card, do the following:
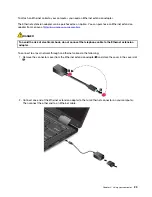
1. Locate the appropriate type of slot for your card. See “Computer controls, connectors, and indicators”
2. Ensure that the metal contacts are facing down and toward the card slot.
3. Press the card firmly into the card slot.
If the plug-and-play feature is not enabled, do the following:
1. Go to Control Panel.
2. View Control Panel by Category. Click
Hardware and Sound
.
3. Click
Device Manager
. If you are prompted for an administrator password or confirmation, type the
password or provide confirmation.
4. From the
Action
menu, select
Add legacy hardware
. The Add Hardware Wizard starts.
5. Follow the instructions on the screen.
Removing a media card
Attention:
• Stop all the activities involving the card before removing it. Otherwise, data on the card might get
damaged or lost.
• Do not remove a card when the computer is in sleep or hibernation mode. Otherwise, the system might
not respond when you try to resume operation.
To remove a media card, do the following:
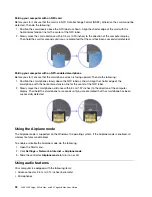
1. Click the triangular icon in the Windows notification area to show hidden icons.
2. Right-click the
Safely Remove Hardware and Eject Media
icon.
3. Select the corresponding item to eject the card from the Windows operating system.
4. Press the card to eject it from your computer.
5. Remove the card and store it safely for future use.
Note:
If you do not remove the card from your computer after you eject the card from the Windows
operating system, the card can no longer be accessed. To access the card, you must remove it first, and
then insert it again.
Using an external display
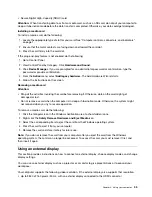
This section provides instructions on how to connect an external display, choose display modes, and change
display settings.
You can use an external display such as a projector or a monitor to give presentations or to expand your
workspace.
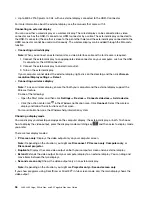
Your computer supports the following video resolution, if the external display also supports that resolution.
• Up to 3840 x 2160 pixels / 30 Hz, with an external display connected to the HDMI connector
.
35
Summary of Contents for ThinkPad Yoga 11e Chromebook 3rd Gen
Page 1: ...L380 L380 Yoga S2 3rd Gen and S2 Yoga 3rd Gen User Guide ...
Page 6: ...iv L380 L380 Yoga S2 3rd Gen and S2 Yoga 3rd Gen User Guide ...
Page 56: ...38 L380 L380 Yoga S2 3rd Gen and S2 Yoga 3rd Gen User Guide ...
Page 60: ...42 L380 L380 Yoga S2 3rd Gen and S2 Yoga 3rd Gen User Guide ...
Page 66: ...48 L380 L380 Yoga S2 3rd Gen and S2 Yoga 3rd Gen User Guide ...
Page 88: ...70 L380 L380 Yoga S2 3rd Gen and S2 Yoga 3rd Gen User Guide ...
Page 124: ...106 L380 L380 Yoga S2 3rd Gen and S2 Yoga 3rd Gen User Guide ...
Page 126: ...108 L380 L380 Yoga S2 3rd Gen and S2 Yoga 3rd Gen User Guide ...
Page 132: ...114 L380 L380 Yoga S2 3rd Gen and S2 Yoga 3rd Gen User Guide ...
Page 138: ...120 L380 L380 Yoga S2 3rd Gen and S2 Yoga 3rd Gen User Guide ...
Page 139: ...Taiwan RoHS Appendix D Restriction of Hazardous Substances RoHS Directive 121 ...
Page 140: ...122 L380 L380 Yoga S2 3rd Gen and S2 Yoga 3rd Gen User Guide ...
Page 146: ...128 L380 L380 Yoga S2 3rd Gen and S2 Yoga 3rd Gen User Guide ...
Page 147: ......
Page 148: ......


