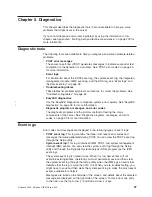
POST error codes
When you turn on the server, it performs a series of tests to check the operation of
the server components and some optional devices in the server. This series of tests
is called the power-on self-test, or POST.
If a power-on password is set, you must type the password and press Enter, when
you are prompted, for POST to run.
If POST is completed without detecting any problems, the server startup is
completed.
If POST detects a problem, an error message is sent to the POST event log.
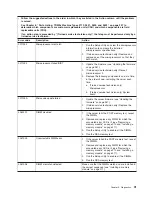
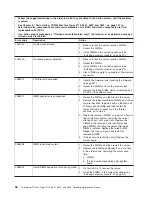
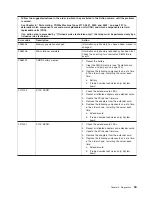
The following table describes the POST error codes and suggested actions to
correct the detected problems. These errors can appear as severe, warning, or
informational.
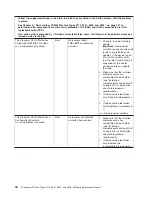
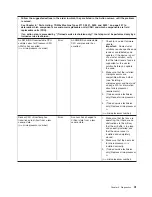
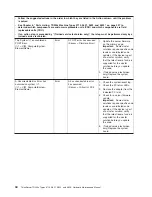
v
Follow the suggested actions in the order in which they are listed in the Action column until the problem
is solved.
v
See Chapter 8, “Parts Listing, TD200x Machine Types 3719, 3821, 3822, and 3823,” on page 237 to
determine which components are customer replaceable units (CRU) and which components are field
replaceable units (FRU).
v
If an action step is preceded by “(Trained service technician only),” that step must be performed only by a
trained service technician.
Error code
Description
Action
0010002
Microprocessor not supported
1. Reseat the following components one at a time,
in the order shown, restarting the server each
time:
a. (Trained service technician only)
Microprocessor 1
b. (Trained service technician only)
Microprocessor 2 (if one is installed)
2. (Trained service technician only) Remove
microprocessor 2 and restart the server.
3. (Trained service technician only) Remove
microprocessor 1 and install microprocessor 2 in
the microprocessor 1 connector. Restart the
server. If the error is corrected, microprocessor 1
is bad and must be replaced.
4. Replace the following components one at a time,
in the order shown, restarting the server each
time:
a. (Trained service technician only)
Microprocessor 1
b. (Trained service technician only)
Microprocessor 2
c. (Trained service technician only) System
board
0011000
Invalid microprocessor type
1. Update the firmware (see “Updating the firmware”
on page 267).
2. (Trained service technician only) Remove and
replace the affected microprocessor (error LED is
lit) with a supported type.
30
ThinkServer TD200x Types 3719, 3821, 3822, and 3823: Hardware Maintenance Manual
Summary of Contents for THINKSERVER 3719
Page 1: ...ThinkServer TD200x Machine Types 3719 3821 3822 and 3823 Hardware Maintenance Manual ...
Page 2: ......
Page 3: ...ThinkServer TD200x Types 3719 3821 3822 and 3823 Hardware Maintenance Manual ...
Page 12: ...4 ThinkServer TD200x Types 3719 3821 3822 and 3823 Hardware Maintenance Manual ...
Page 22: ...14 ThinkServer TD200x Types 3719 3821 3822 and 3823 Hardware Maintenance Manual ...
Page 28: ...20 ThinkServer TD200x Types 3719 3821 3822 and 3823 Hardware Maintenance Manual ...
Page 34: ...26 ThinkServer TD200x Types 3719 3821 3822 and 3823 Hardware Maintenance Manual ...
Page 244: ...236 ThinkServer TD200x Types 3719 3821 3822 and 3823 Hardware Maintenance Manual ...
Page 258: ...250 ThinkServer TD200x Types 3719 3821 3822 and 3823 Hardware Maintenance Manual ...
Page 282: ...274 ThinkServer TD200x Types 3719 3821 3822 and 3823 Hardware Maintenance Manual ...
Page 286: ...278 ThinkServer TD200x Types 3719 3821 3822 and 3823 Hardware Maintenance Manual ...
Page 296: ...288 ThinkServer TD200x Types 3719 3821 3822 and 3823 Hardware Maintenance Manual ...
Page 303: ......
Page 304: ...Part Number XXXXXX Printed in USA 1P P N XXXXXX ...

