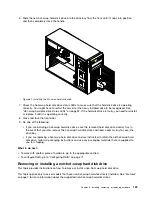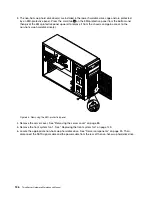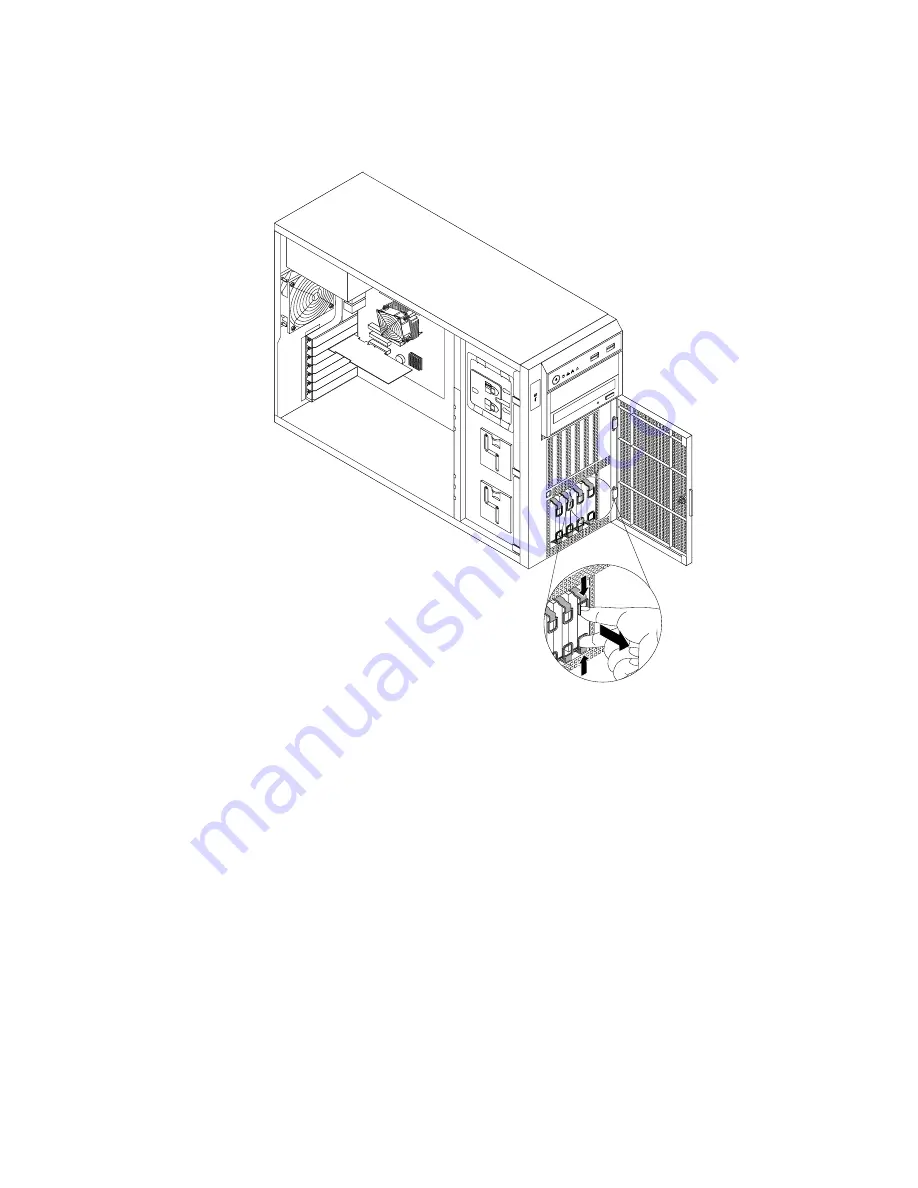
7. Insert two fingers into the holes in the two tabs on the front of the blue bracket. Then, press the tabs
towards each other and carefully slide the non-hot-swap hard disk drive out of the front of the chassis.
CPU
MEM
PSU
CPU
MEM
PSU
1
2
Figure 64. Sliding the non-hot-swap hard disk drive out of the bay
8. Flex the sides of the blue bracket to remove the non-hot-swap hard disk drive from the bracket. Save
the bracket for future use.
Note:
Do not touch the circuit board on the hard disk drive.
9. Reinstall the front system fan 1. See “Replacing the front system fan” on page 149.
Chapter 6
.
Installing, removing, or replacing hardware
127
Summary of Contents for THINKSERVER 387
Page 16: ...4 ThinkServer Hardware Maintenance Manual ...
Page 18: ...6 ThinkServer Hardware Maintenance Manual ...
Page 94: ...82 ThinkServer Hardware Maintenance Manual ...
Page 190: ...178 ThinkServer Hardware Maintenance Manual ...
Page 228: ...216 ThinkServer Hardware Maintenance Manual ...
Page 246: ...234 ThinkServer Hardware Maintenance Manual ...
Page 247: ......
Page 248: ......


