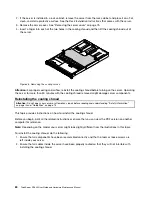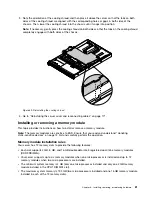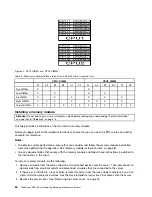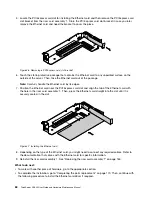
To install the required device driver for the Ethernet card, do one of the following:
Note:
You do not need to use the driver disc that might come with the Ethernet card.
• If you are using a Windows operating system, run the
ThinkServer EasyStartup
DVD that comes with
your server and follow the instructions on the screen to download and install the required Ethernet
card driver to the server. For more information, see “Using the ThinkServer EasyStartup program on a
Windows operating system” on page 62.
• If you are using a Linux operating system, run the
ThinkServer EasyStartup
DVD that comes with your
server on a computer with a Windows operating system and download the required Ethernet card driver
to a removable storage device. Then, transfer the Ethernet card driver from the removable storage device
to your server and run the driver file to install the driver.
The most up-to-date device drivers for various server models are always available for download on the
Lenovo Support Web site at:
http://www.lenovo.com/drivers
Removing the Ethernet card
Attention:
Do not open your server or attempt any repair before reading and understanding “Safety information”
on page iii and “Guidelines” on page 73.
This topic provides instructions on how to remove the Ethernet card.
Before you begin, print all the related instructions or ensure that you can view the PDF version on another
computer for reference.
Notes:
• Use any documentation that comes with the Ethernet card and follow those instructions in addition to
the instructions in this topic.
• Depending on the specific type, the Ethernet card might look different from the illustration in this topic.
To remove the Ethernet card, do the following:
1. Remove all media from the drives and turn off all attached devices and the server. Then, disconnect all
power cords from electrical outlets and disconnect all cables that are connected to the server.
2. If the server is installed in a rack cabinet, remove the server from the rack cabinet and place it on a flat,
clean, and static-protective surface. See the
Rack Installation Instructions
that comes with the server.
3. Remove the server cover. See “Removing the server cover” on page 75.
4. Remove the riser card assembly 1 and lay it upside down on a flat, clean, and static-protective surface.
See “Replacing the riser card assembly 1” on page 160.
Note:
Usually an Ethernet card is installed on the riser card assembly 1 and also can be installed in
any PCI Express card slot that supports it. See “Rear view of the server” on page 23 to identify the
PCI Express card slots of your server.
Installing, removing, or replacing hardware
89
Summary of Contents for ThinkServer RD340
Page 18: ...6 ThinkServer RD340 User Guide and Hardware Maintenance Manual ...
Page 84: ...72 ThinkServer RD340 User Guide and Hardware Maintenance Manual ...
Page 188: ...176 ThinkServer RD340 User Guide and Hardware Maintenance Manual ...
Page 198: ...186 ThinkServer RD340 User Guide and Hardware Maintenance Manual ...
Page 214: ...202 ThinkServer RD340 User Guide and Hardware Maintenance Manual ...
Page 215: ......
Page 216: ......

