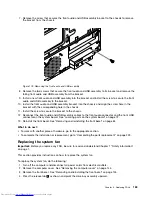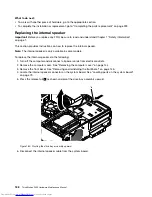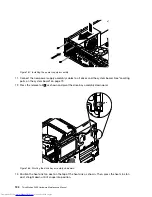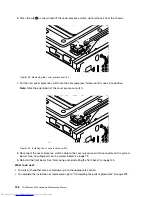
7. Push the metal tab
1
on the top of the internal speaker outward and slide the internal speaker upward
to completely remove it from the chassis.
Figure 181. Removing the internal speaker
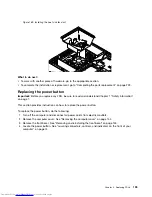
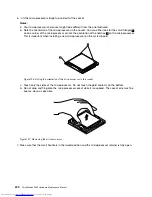
8. Position the new internal speaker into the four metal clips
1
and push the internal speaker downward
until it is secured in place.
Figure 182. Installing a new internal speaker
9. Connect the internal speaker cable to the system board. See “Locating parts on the system board”
on page 79.
Chapter 8
.
Replacing FRUs
189
Summary of Contents for ThinkStation P300
Page 1: ...ThinkStation P300 Hardware Maintenance Manual Machine Types 30AG 30AH 30AJ and 30AK ...
Page 6: ......
Page 13: ...Chapter 1 Safety information 7 ...
Page 17: ...Chapter 1 Safety information 11 ...
Page 18: ...1 2 12 ThinkStation P300 Hardware Maintenance Manual ...
Page 19: ...1 2 Chapter 1 Safety information 13 ...
Page 24: ...1 2 18 ThinkStation P300 Hardware Maintenance Manual ...
Page 25: ...1 2 Chapter 1 Safety information 19 ...
Page 28: ...22 ThinkStation P300 Hardware Maintenance Manual ...
Page 32: ...26 ThinkStation P300 Hardware Maintenance Manual ...
Page 72: ...66 ThinkStation P300 Hardware Maintenance Manual ...
Page 76: ...Figure 3 Locating major FRUs and CRUs 70 ThinkStation P300 Hardware Maintenance Manual ...
Page 88: ...82 ThinkStation P300 Hardware Maintenance Manual ...
Page 236: ...230 ThinkStation P300 Hardware Maintenance Manual ...
Page 242: ...236 ThinkStation P300 Hardware Maintenance Manual ...
Page 243: ......
Page 244: ......

