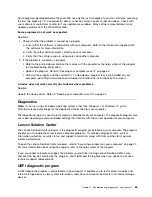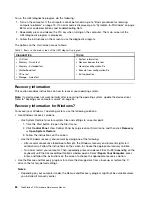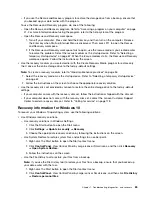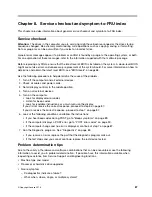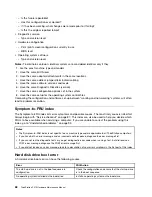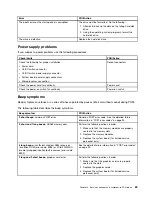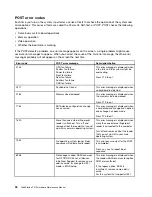
To run the UEFI diagnostic program, do the following:
1. Turn on the computer. If the computer cannot be turned on, go to “Basic procedure for resolving
computer problems” on page 75. If an error code is displayed, go to “Symptom-to-FRU index” on page
88 for error code descriptions and troubleshooting hints.
2. Repeatedly press and release the F10 key when turning on the computer. The main screen of the
UEFI diagnostic program is displayed.
3. Follow the instructions on the screen to use the diagnostic program.
The options on the main screen are as follows:
Table 1. Items on the main screen of the UEFI diagnostic program
DIAGNOSTICS
TOOLS
• LCD test
• Memory - Quick test
• Memory - Extended test
• Motherboard test
• PCI-e test
• Storage - Quick test
• System information
• Recover bad sectors tool
• Generate configuration file
• Execute from configuration file
• Exit application
Recovery information
This section provides instructions on how to recover your operating system.
Note:
If a device does not work normally after recovering the operating system, update the device driver.
Refer to “Keeping your computer current” on page 54.
Recovery information for Windows 7
To recover your Windows 7 operating system, use the following solutions:
• Use Windows recovery solutions.
– Use System Restore to restore system files and settings to an earlier point.
1. Click the Start button to open the Start menu.
2. Click
Control Panel
. View Control Panel by Large icons or Small icons, and then click
Recovery
➙
Open System Restore
.
3. Follow the instructions on the screen.
– Use the Windows recovery environment by doing one of the following:
– After several consecutive failed boot attempts, the Windows recovery environment might start
automatically. Follow the instructions on the screen to choose the appropriate recovery solution.
– Turn on or restart your computer. Then, repeatedly press and release F8 or Fn+F8 (depending on the
keyboard) until the Advanced Boot Options window opens. Select
Repair Your Computer
, press
Enter, and follow the instructions on the screen to choose the appropriate recovery solution.
• Use the Rescue and Recovery program to restore the storage drive from a backup, or restore the C
drive to the factory-default settings.
Notes:
– Depending on your computer model, the Rescue and Recovery program might not be available unless
you installed it manually earlier.
84
ThinkStation P410 Hardware Maintenance Manual
Summary of Contents for ThinkStation P410
Page 1: ...ThinkStation P410 Hardware Maintenance Manual Machine Types 30B2 and 30B3 ...
Page 6: ...iv ThinkStation P410 Hardware Maintenance Manual ...
Page 8: ...vi ThinkStation P410 Hardware Maintenance Manual ...
Page 16: ...8 ThinkStation P410 Hardware Maintenance Manual ...
Page 20: ...12 ThinkStation P410 Hardware Maintenance Manual ...
Page 21: ...1 2 Chapter 1 Read this first Important safety information 13 ...
Page 22: ...1 2 14 ThinkStation P410 Hardware Maintenance Manual ...
Page 27: ...1 2 Chapter 1 Read this first Important safety information 19 ...
Page 28: ...1 2 20 ThinkStation P410 Hardware Maintenance Manual ...
Page 31: ...Chapter 1 Read this first Important safety information 23 ...
Page 52: ...44 ThinkStation P410 Hardware Maintenance Manual ...
Page 64: ...56 ThinkStation P410 Hardware Maintenance Manual ...
Page 102: ...94 ThinkStation P410 Hardware Maintenance Manual ...
Page 184: ...176 ThinkStation P410 Hardware Maintenance Manual ...
Page 188: ...180 ThinkStation P410 Hardware Maintenance Manual ...
Page 190: ...182 ThinkStation P410 Hardware Maintenance Manual ...
Page 192: ...184 ThinkStation P410 Hardware Maintenance Manual ...
Page 200: ...192 ThinkStation P410 Hardware Maintenance Manual ...
Page 204: ...196 ThinkStation P410 Hardware Maintenance Manual ...
Page 207: ......
Page 208: ......

