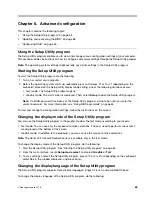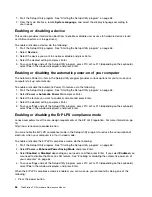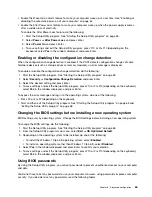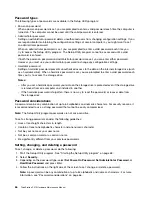
Chapter 6. Advanced configuration
This chapter contains the following topics:
•
“Using the Setup Utility program” on page 63
•
“Updating and recovering the BIOS” on page 68
•
Using the Setup Utility program
The Setup Utility program enables you to view and change various configuration settings of your computer.
This section provides instructions on how to configure some major settings through the Setup Utility program.
Note:
The operating system settings might override any similar settings in the Setup Utility program.
Starting the Setup Utility program
To start the Setup Utility program, do the following:
1. Turn on or restart your computer.
2. Before the operating system starts up, repeatedly press and release F1 or Fn+F1 (depending on the
keyboard). Based on the Setup Utility display mode setting, one of the following situations occurs:
• Text mode: The Setup Utility program opens.
• Graphic mode: The start screen is displayed. Then, select
Setup
to open the Setup Utility program.
Note:
If a BIOS password has been set, the Setup Utility program will not open until you enter the
correct password. For more information, see “Using BIOS passwords” on page 65.
To view and change the configuration settings, follow the instructions on the screen.
Changing the display mode of the Setup Utility program
You can use the Setup Utility program in the graphic mode or the text mode according to your needs.
• Text mode: You can use only the keyboard to make selections. The keys used to perform various tasks
are displayed at the bottom of the screen.
• Graphic mode: In addition to the keyboard, you also can use the mouse to make selections.
Note:
The Serial Port Console Redirection item is available only in the text mode.
To change the display mode of the Setup Utility program, do the following:
1. Start the Setup Utility program. See “Starting the Setup Utility program” on page 63.
2. From the main interface, locate
Setup mode select
, and select
Graphic
or
Text
.
3. To save settings and exit the Setup Utility program, press F10 or Fn+F10 (depending on the keyboard),
select
Yes
in the window displayed, and press Enter.
Changing the display language of the Setup Utility program
The Setup Utility program supports three display languages: English, French, and simplified Chinese.
To change the display language of the Setup Utility program, do the following:
© Copyright Lenovo 2016
63
Summary of Contents for ThinkStation P410
Page 1: ...ThinkStation P410 Hardware Maintenance Manual Machine Types 30B2 and 30B3 ...
Page 6: ...iv ThinkStation P410 Hardware Maintenance Manual ...
Page 8: ...vi ThinkStation P410 Hardware Maintenance Manual ...
Page 16: ...8 ThinkStation P410 Hardware Maintenance Manual ...
Page 20: ...12 ThinkStation P410 Hardware Maintenance Manual ...
Page 21: ...1 2 Chapter 1 Read this first Important safety information 13 ...
Page 22: ...1 2 14 ThinkStation P410 Hardware Maintenance Manual ...
Page 27: ...1 2 Chapter 1 Read this first Important safety information 19 ...
Page 28: ...1 2 20 ThinkStation P410 Hardware Maintenance Manual ...
Page 31: ...Chapter 1 Read this first Important safety information 23 ...
Page 52: ...44 ThinkStation P410 Hardware Maintenance Manual ...
Page 64: ...56 ThinkStation P410 Hardware Maintenance Manual ...
Page 102: ...94 ThinkStation P410 Hardware Maintenance Manual ...
Page 184: ...176 ThinkStation P410 Hardware Maintenance Manual ...
Page 188: ...180 ThinkStation P410 Hardware Maintenance Manual ...
Page 190: ...182 ThinkStation P410 Hardware Maintenance Manual ...
Page 192: ...184 ThinkStation P410 Hardware Maintenance Manual ...
Page 200: ...192 ThinkStation P410 Hardware Maintenance Manual ...
Page 204: ...196 ThinkStation P410 Hardware Maintenance Manual ...
Page 207: ......
Page 208: ......

