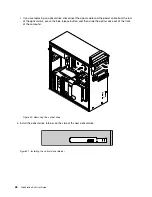

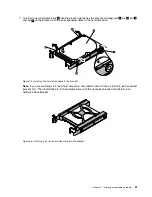

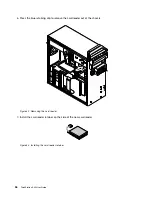


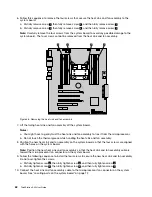

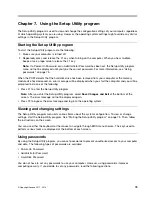
5. Lay the computer on its side and remove the five screws at the rear of the chassis that secure the
power supply assembly.
Figure 37. Removing the screws for the power supply assembly
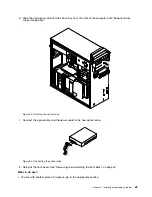
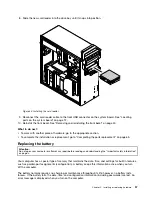
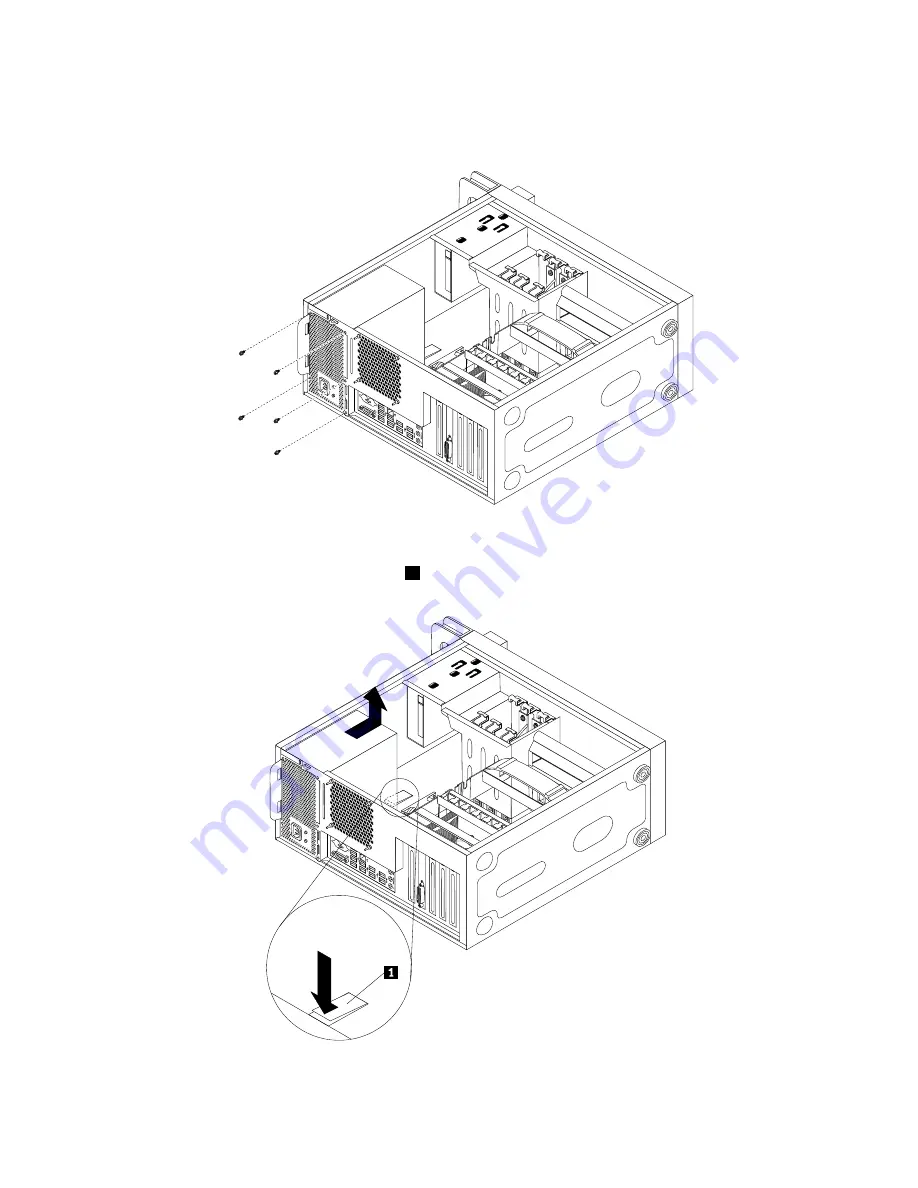
6. Depress the power supply assembly latch
1
. Slide the power supply assembly to the front of the
computer and then lift it out of the chassis.
7. Ensure that the new power supply assembly is the correct replacement.
60
ThinkStation S30 User Guide
Summary of Contents for ThinkStation S30
Page 1: ...ThinkStation S30 User Guide ...
Page 6: ...iv ThinkStation S30 User Guide ...
Page 12: ...x ThinkStation S30 User Guide ...
Page 28: ...16 ThinkStation S30 User Guide ...
Page 44: ...32 ThinkStation S30 User Guide ...
Page 50: ...38 ThinkStation S30 User Guide ...
Page 78: ...66 ThinkStation S30 User Guide ...
Page 92: ...80 ThinkStation S30 User Guide ...
Page 102: ...90 ThinkStation S30 User Guide ...
Page 128: ...116 ThinkStation S30 User Guide ...
Page 136: ...124 ThinkStation S30 User Guide ...
Page 140: ...128 ThinkStation S30 User Guide ...
Page 144: ...132 ThinkStation S30 User Guide ...
Page 148: ...136 ThinkStation S30 User Guide ...
Page 149: ......
Page 150: ......


