


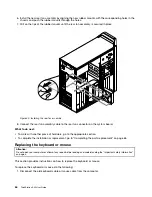
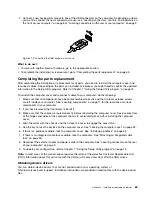

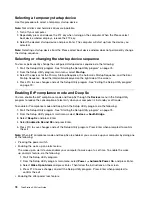

2. Connect a new keyboard or mouse to one of the USB connectors on the computer. Depending on where
you want to connect the new keyboard or mouse, see “Locating connectors, controls, and indicators on
the front of your computer” on page 8 or “Locating connectors on the rear of your computer” on page 9.
Figure 41. Connecting the USB keyboard or mouse
What to do next:
• To work with another piece of hardware, go to the appropriate section.
• To complete the installation or replacement, go to “Completing the parts replacement” on page 65.
Completing the parts replacement
After completing the installation or replacement for all parts, you need to reinstall the computer cover and
reconnect cables. Depending on the parts you installed or replaced, you might need to confirm the updated
information in the Setup Utility program. Refer to Chapter 7 “Using the Setup Utility program” on page 75.
To reinstall the computer cover and reconnect cables to your computer, do the following:
1. Make sure that all components have been reassembled correctly and that no tools or loose screws
are left inside your computer. See “Locating components” on page 11 for the locations of various
components in your computer.
2. If you have removed the front bezel, reinstall it.
3. Make sure that the cables are routed correctly before reinstalling the computer cover. Keep cables clear
of the hinges and sides of the computer chassis to avoid interference with reinstalling the computer
cover.
4. Align the cover with the chassis and then close the cover to engage the cover latch.
5. Use the key to lock the keylock on the computer cover. See “Locking the computer cover” on page 34.
6. If there is a padlock available, lock the computer cover. See “Installing a padlock” on page 35.
7. If there is an integrated cable lock available, lock the computer. See “Attaching an integrated cable
lock” on page 36.
8. Reconnect the external cables and power cords to the computer. See “Locating connectors on the rear
of your computer” on page 9.
9. To update your configuration, refer to Chapter 7 “Using the Setup Utility program” on page 75.
Note:
In most areas of the world, Lenovo requires the return of the defective Customer Replaceable Unit
(CRU). Information about this will come with the CRU or will come a few days after the CRU arrives.
Obtaining device drivers
You can obtain device drivers that are not preinstalled in your operating system at
http://www.lenovo.com/support. Installation instructions are provided in readme files with the device-driver
files.
Chapter 5
.
Installing or replacing hardware
65
Summary of Contents for ThinkStation S30
Page 1: ...ThinkStation S30 User Guide ...
Page 6: ...iv ThinkStation S30 User Guide ...
Page 12: ...x ThinkStation S30 User Guide ...
Page 28: ...16 ThinkStation S30 User Guide ...
Page 44: ...32 ThinkStation S30 User Guide ...
Page 50: ...38 ThinkStation S30 User Guide ...
Page 78: ...66 ThinkStation S30 User Guide ...
Page 92: ...80 ThinkStation S30 User Guide ...
Page 102: ...90 ThinkStation S30 User Guide ...
Page 128: ...116 ThinkStation S30 User Guide ...
Page 136: ...124 ThinkStation S30 User Guide ...
Page 140: ...128 ThinkStation S30 User Guide ...
Page 144: ...132 ThinkStation S30 User Guide ...
Page 148: ...136 ThinkStation S30 User Guide ...
Page 149: ......
Page 150: ......