background image

ThinkSystem Analog 1x8 KVM Switch

(SM27A17643)

User Guide

Machine Types:

 1754-A1T (1754-HC5)

Summary of Contents for ThinkSystem 1754-A1T

Page 1: ...ThinkSystem Analog 1x8 KVM Switch SM27A17643 User Guide Machine Types 1754 A1T 1754 HC5 ...

Page 2: ......

Page 3: ...o com warrantylookup warrantypolicy Check the warranty and maintenance agreement status for your server hardware which can be done at http datacentersupport lenovo com warrantylookup If you require assistance please check https support lenovo com documents LNVO CALL prior to calling Lenovo Technical Support Lenovo Data Center phone numbers are available at https datacentersupport lenovo com suppor...

Page 4: ...ation 12 Login 12 Accessing a Server 13 Using the Channel Selection Menu 13 Using Hot Keys 14 Logout 14 Chapter 4 Using the On Screen Display Interface 15 OSD Layout 15 Login Screen 15 Selection Menu 16 2nd tier Selection Menu 17 Channel ID 18 Generic channel ID 18 2nd tier channel ID 18 Specifying Channel Names 19 Changing channel names 19 User Management 20 Managing user names and passwords 20 C...

Page 5: ...41 Active ThinkSystem VGA to DVI Conversion Cable 41 ThinkSystem USB Conversion Cable for Analog KVM 41 Replacement part numbers 42 Table explanations 42 Tier 1 CRU 42 Tier 2 CRU 42 Additional remarks 42 Passive DVI to VGA converter 43 Appendix A Specifications 44 Appendix B Frequently asked questions 46 Appendix C Getting help and technical assistance 48 Before you call 48 Attempt to resolve the ...

Page 6: ...rskrifterne før du installerer dette produkt Lees voordat u dit product installeert eerst de veiligheidsvoorschriften Ennen kuin asennat tämän tuotteen lue turvaohjeet kohdasta Safety Information Avant d installer ce produit lisez les consignes de sécurité Vor der Installation dieses Produkts die Sicherheitshinweise lesen π π Πριν εγκαταστήσετε το ροιόν αυτό διαβάστε τις ληροφορίες ασφάλειας הבטיח...

Page 7: ...мтесь з інформацією по безпеці Pred inštaláciou tohto zariadenia si pečítaje Bezpečnostné predpisy Pred namestitvijo tega proizvoda preberite Varnostne informacije Antes de instalar este producto lea la información de seguridad Läs säkerhetsinformationen innan du installerar den här produkten ཐ ོ ན རྫས འདི བེད སྤྱ ོད མ བྱས ག ོང སྐ ོར གྱི ཡིད གཟབ བྱ འདྲ མིན ཡོད པའི འ ོད སྡེར བལྟ དག ོས ᠡᠨᠠᠬᠦ ᠪᠦᠲᠦᠭᠡᠭ...

Page 8: ...nt For example if a caution statement is labelled Statement 1 translations for that caution statement are in the Safety Information document under Statement 1 Be sure to read all caution and danger statements in this documentation before you perform the procedures Read any additional safety information that comes with your system or optional device before you install the device Attention In order ...

Page 9: ... equipment when there is evidence of fire water or structural damage Disconnect the attached power cords telecommunications systems networks and modems before you open the device covers unless instructed otherwise in the installation and configuration procedures Connect and disconnect cables as described in the following table when installing moving or opening covers on this product or attached de...

Page 10: ...em has a module containing a lithium battery replace it only with the same module type made by the same manufacturer The battery contains lithium and can explode if not properly used handled or disposed of Do not Throw or immerse into water Heat to more than 100 C 212 F Repair or disassemble Dispose of the battery as required by local ordinances or regulations vii ...

Page 11: ...ts inside the device Use of controls or adjustments or performance of procedures other than those specified herein might result in hazardous radiation exposure Some laser products contain an embedded Class 3A or Class 3B laser diode Note the following Laser radiation when open Do not stare into the beam do not view directly with optical instruments and avoid direct exposure to the beam Class 1 Las...

Page 12: ...ectrical current supplied to the device The device also might have more than one power cord To remove all electrical current from the device ensure that all power cords are disconnected from the power source Statement 6 CAUTION If you install a strain relief bracket option over the end of the power cord that is connected to the device you must connect the other end of the power cord to an easily a...

Page 13: ...gy levels are present inside any component that has this label attached There are no serviceable parts inside these components If you suspect a problem with one of these parts contact a service technician Statement 12 CAUTION The following label indicates a hot surface nearby Statement 26 CAUTION Do not place any object on top of rack mounted devices x ...

Page 14: ...ion Statement 2 Always lower the levelling pads on the rack cabinet Always install stabilizer brackets on the rack cabinet Always install servers and optional devices starting from the bottom of the rack cabinet Always install the heaviest devices in the bottom of the rack cabinet xi ...

Page 15: ... serious or fatal electrical shock Explosive hazards such as a damaged CRT face or a bulging capacitor Mechanical hazards such as loose or missing hardware To inspect the product for potential unsafe conditions complete the following steps 1 Make sure that the power is off and the power cords are disconnected 2 Make sure that the exterior cover is not damaged loose or broken and observe any sharp ...

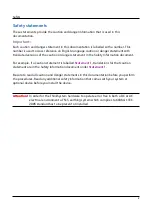
Page 16: ...Safety xiii ...

Page 17: ...rm a mechanical inspection work near power supplies or remove or install main units Before you work on the equipment disconnect the power cord If you cannot disconnect the power cord have the customer power off the wall box that supplies power to the equipment and lock the wall box in the off position Never assume that power has been disconnected from a circuit Check it to make sure that it has be...

Page 18: ...e caution or danger statement with translated versions of the caution or danger statement in the Safety Information document For example if a danger statement is labelled D005 translations for that caution statement are in the Safety Information document under D005 Be sure to read all caution and danger statements in this documentation before you perform the procedures Read any additional safety i...

Page 19: ... has this label attached Do not open any cover or barrier that contains this label There are no serviceable parts inside these components If you suspect a problem with one of these parts contact a service technician DO NOT open up the chassis of any UPS unit This will void the unit warranty L001 xvi ...

Page 20: ...tached to this product to properly wired outlets When possible use one hand only to connect or disconnect signal cables Never turn on any equipment when there is evidence of fire water or structural damage Disconnect the attached power cords telecommunications systems networks and modems before you open the device covers unless instructed otherwise in the installation and configuration procedures ...

Page 21: ... burn Exchange only with the Lenovo approved part Recycle or discard the battery as instructed by local regulations In the United States Lenovo has a process for the collection of this battery For information call 1 800 426 4333 Have the Lenovo part number for the battery unit available when you call C004 DO NOT mix old and new batteries in an Uninterruptible Power Supply unit DO NOT open up any b...

Page 22: ...t is between 18 and 32 kg 39 7 and 70 5 lb It takes two persons to safely lift this part or unit C009 CAUTION 32 kg 70 5 lb 55 kg 121 2 lb The weight of this part or unit is between 32 and 55 kg 70 5 lb and 121 2 lb It takes three persons to safely lift this part or unit C010 xix ...

Page 23: ...121 2 lb It takes specially trained persons a lifting device or both to safely lift this part or unit C011 C022 CAUTION This product might be equipped with a hard wired power cable Ensure that a licensed electrician performs the installation per the national electrical code C022 xx ...

Page 24: ...Safety R001 Important The following general safety information should be used for all rack mounted devices DANGER xxi ...

Page 25: ...al power requirement of the supply circuit For sliding drawers Do not pull out or install any drawer or feature if the rack stabilizer brackets are not attached to the rack Do not pull out more than one drawer at a time The rack might become unstable if you pull out more than one drawer at a time For fixed drawers This drawer is a fixed drawer and must not be moved for servicing unless specified b...

Page 26: ...sily accessible so that the uninterruptible power supply UPS can be disconnected quickly To reduce the risk of fire connect only to a circuit provided with branch circuit over current protection with an ampere rating in accordance with the National Electrical Code NEC ANSI NFPA 70 or your local electrical code xxiii ...

Page 27: ...wered system and to the actual electrical consumption of all the equipment to be connected to the system For PLUGGABLE EQUIPMENT the socket outlet shall be installed near the equipment and shall be easily accessible Never install the system near liquids or in an excessively damp environment Never let a foreign body penetrate inside the system Never block the ventilation grates of the system Never ...

Page 28: ... OF A HYPERLINKED WEB SITE IS AT YOUR SOLE RISK ALL INFORMATION IS PROVIDED BY LENOVO ON AN AS IS BASIS ONLY LENOVO PROVIDES NO REPRESENTATIONS OR WARRANTIES EXPRESS OR IMPLIED INCLUDING THE IMPLIED WARRANTIES OF FITNESS FOR A PARTICULAR PURPOSE MERCHANTABILITY TITLE AND NONINFRINGEMENT WITHOUT LIMITING THE GENERALITY OF THE FOREGOING LENOVO MAKES NO WARRANTY THAT THE DOCUMENT WILL MEET YOUR REQUI...

Page 29: ...ors agents and employees harmless from and against any and all claims liabilities damages losses costs expenses fees including reasonable attorneys fees to the extent attributable to your use of the document including any Content on the document This provision shall survive the termination of this Agreement and remain in full force and effect xxvi ...

Page 30: ...A1T or SM27A17643 1754 A1T switch is the most user friendly 1U KVM switch for accessing 8 servers If establishing a two tier 1754 A1T KVM system you can even access a maximum of 64 servers In addition your 1754 A1T KVM system will support audio transmission with the use of ThinkSystem USB conversion cables for Analog KVM 1 ...

Page 31: ...ble 1754 A1T KVM parts 1754 A1T switch ThinkSystem USB conversion cables for Analog KVM p n 4X97A11106 Active ThinkSystem VGA to DVI Conversion Cable p n 4X97A11108 This cable is only needed if the KVM video output is to be connected to a display with a DVI D port Product Features A user can control multiple servers per unit 1754 A1T switch supports a maximum of 8 servers Total number of accessibl...

Page 32: ... Password protection prevents unauthorized access to 1754 A1T switches and servers one administrator and 127 user accounts Easy firmware upgrade Package Contents 1754 A1T KVM switch x 1 Power cord x 1 Rackmount kit x 1 including brackets and associated screws DVI I to VGA adapter x 1 Note This adapter can be used for connecting a 2nd tier 1754 A1T switch via ThinkSystem USB Conversion Cable for An...

Page 33: ...ont and Back View This section provides a brief introduction to the components on the front and rear sides of the 1754 A1T switch Front View Note For the definition of inactive and active channels see Active and Inactive Channels on page 33 4 ...

Page 34: ...A ports at USB 2 0 speed Connect a USB keyboard and mouse b Connect audio input devices such as speakers or headphone c Connect a monitor If your monitor does not have a DVI connector an appropriate video converter or adapter is required 3 Reset button Power cycles the 1754 A1T switch Note that users are forced to log out on reset 4 Firmware upgrade connector Connect a Windows based computer for u...

Page 35: ... Analog KVM cable See Available Settings and Options on page 24 Rackmount Procedure 1754 A1T switches can only be vertically mounted in 1U 1 75 4 4 cm in a standard 19 rack To rack mount it use the brackets and screws that come with the device Step 1 Attach the Cable Support Bar You can install the cable support bar onto the rack mount brackets to bear all cables connected to the 1754 A1T switch T...

Page 36: ...k Mount the 1754 A1T When rack mounting the 1754 A1T switch you can let it face either to the front or the rear of the rack to meet your needs Rack mounting the 1754 A1T 1 Slide the 1754 A1T switch between the two rackmount brackets 2 Align two little holes of the bracket with two threaded holes on one side of the 1754 A1T switch 3 Secure the bracket to the 1754 A1T switch with two of the included...

Page 37: ...alling the 1754 A1T It is very important to locate this product in a suitable environment The surface for placing and fixing this product should be stable and level or mounted into a suitable cabinet Make sure the place has good ventilation is out of direct sunlight away from sources of excessive dust dirt heat water moisture and vibration Convenience for connecting this product to related facilit...

Page 38: ...the 1754 A1T switch and servers 2 Connect a keyboard mouse and monitor to the Console connectors on the 1754 A1T switch If using a VGA monitor use the included passive DVI to VGA converter plug For additional information see Connecting a display on page 11 The headphone or speakers are optional 9 ...

Page 39: ... video connector into the server s video port Optionally plug the ThinkSystem USB conversion cables for Analog KVM cable s audio connector into the server s audio output port 2 Connect the server to the 1754 A1T switch ThinkSystem USB conversion cables for Analog KVM cable Simply plug the RJ 45 end of the ThinkSystem USB conversion cables for Analog KVM cable into any channel port 3 Repeat the abo...

Page 40: ... has a DVI D port Use the active ThinkSystem VGA to DVI Conversion Cable part number 4X97A11108 Important In order to avoid any display problems on monitor with a DVI D port the power cable of the active ThinkSystem VGA to DVI Conversion Cable must be connected Connect the power cable shipped with the ThinkSystem VGA to DVI Conversion Cable to one of the USB ports on the KVM switch as shown in the...

Page 41: ...ls and press Enter User credentials are case sensitive User Name admin Default Password lenovo 2 The Selection Menu displays indicating the login is successful To select a channel see Using the Channel Selection Menu on page 13 Important It is strongly recommended to change the default password for the security of your 1754 A1T system For details refer to User Management on page 20 in the User Gui...

Page 42: ...list of channels 2 If the desired channel is not shown on the current page press Page Down or Page Up key 3 Press or to select one of the active channels and press Enter Channels with channel names displayed are active channels The default name is PC See Active and Inactive Channels on page 33 The channel that is connected to a 1754 A1T switch is marked with See Chapter 5 Setting up a Two Tier Sys...

Page 43: ...nnel switching occurs 3 The video of the accessed server displays onscreen Now you can control the server with the keyboard and mouse To access the next or prior active channel using hot keys 1 Make sure there is no OSD shown onscreen 2 To select the next active channel press the RIGHT Ctrl key twice 3 To select the prior active channel press the LEFT Ctrl key twice Logout After completing your ta...

Page 44: ...nnel scan OSD Layout This section explains the main elements displayed on the OSD images Login Screen 1 Device ID The name of the ThinkSystem Analog 1x8 KVM Switch 1754 A1T KVM switch displayed as SM27A17643 2 User Port The ID number of your console 01 refers to Console 1 3 User Name and Password input fields The fields for entering user login credentials For details see Login on page 12 15 ...

Page 45: ...nel that is being accessed 3 Channel numbers 8 channel numbers of current page 4 Channel names Available channel names of current page Per default an active channel s name is PC The channel name can be customised See Specifying Channel Names on page 19 The channel with a 2nd tier 1754 A1T KVM switch SM27A17643 connected is marked with the symbol For example CH003 in the above diagram 5 Operation k...

Page 46: ...alog 1x8 KVM Switch 1754 A1T switch s model name 2 1st tier channel The number of the 1st tier channel where the 2nd tier SM27A17643 ThinkSystem Analog 1x8 KVM Switch 1754 A1T switch is connected 3 Selected 2nd tier channel The number of the 2nd tier channel that is being accessed 4 2nd tier channel names 2nd tier channel names Per default an active channel s name is PC The channel name can be cus...

Page 47: ...D on a stand alone switch or on the base switch of a two tier system looks similar to the following Note For information on two tier systems see Chapter 5 Setting up a Two Tier System on page 35 1 Channel number which is being selected 2 Channel name of the selected channel 2nd tier channel ID On a two tier system if you select the channel of a 2nd tier switch its channel ID looks like the followi...

Page 48: ...r or be moved to another port if you move the 1754 A1T to a different port Changing channel names 1 If the OSD is not displayed press the hot key 3 times The default hot key is Scroll Lock To change it see System Settings on page 23 2 On the Selection Menu select an active channel and press F3 If the desired channel is not shown on the current page press Page Up or Page Down 3 The RENAME page disp...

Page 49: ...user001 through user127 Default passwords are NOT available You CANNOT remove the built in administrator and user accounts but you can change their passwords or rename any user accounts Only the administrator can rename user accounts or change passwords Managing user names and passwords 1 Log in as the KVM administrator For details see Login on page 12 2 On the Selection Menu press F1 The SETUP pa...

Page 50: ...the user accounts changes press Esc to exit the User Configuration page Changing the administrator s password Important It is strongly recommended to change the admin password Then note it down and keep it in a secure place If you forget the password the 1754 A1T has to be replaced This replacement is NOT covered by warranty or maintenance contract 1 In the New Password field type the new password...

Page 51: ...up to 16 characters To keep the user name unchanged simply press Enter without typing any characters 2 In the New Password field type the new password and press Enter A password comprises up to 8 characters 3 Re type the password and press Enter To abort the changes press Esc instead Important It is recommended to note down all user names and passwords and keep the data in a secure location 22 ...

Page 52: ...permission to change system settings Changing system settings 1 Log in as the KVM administrator For details see Login on page 12 2 On the Selection Menu press F1 The SETUP page displays 3 Press or to select the desired setting For details see Available Settings and Options on page 24 4 Press or to select the preferred option 5 To save changes and exit the SETUP page press Esc 23 ...

Page 53: ...ch channel s video is displayed during the channel scan ID Display 5 to 25 seconds or ALL This determines how long each channel s ID appears onscreen after selecting any channel See Channel ID on page 18 Position Menu or ID Select Menu or ID in order to adjust its position on the screen Menu Main OSD pages such as Selection Menu and the login screen ID Channel ID For instructions see Adjusting the...

Page 54: ...sition Adjusting the OSD position 1 Log in as the KVM administrator For details see Login on page 12 2 On the Selection Menu press F1 The SETUP page displays 3 Press or to select the desired option in the Position field Menu or ID Menu Main OSD pages such as Selection Menu and the login screen ID Channel ID Note Any user and the 1754 A1T administrator can change the channel ID name 25 ...

Page 55: ...ing mode which is indicated by the presence of either diagram shown below Menu ID 5 Now move it to the position you prefer by pressing the arrow keys 6 To confirm the new position press Esc Then the OSD returns to the SETUP page shown in step 7 To exit the SETUP page press Esc 26 ...

Page 56: ...ss the hot key 3 times The default hot key is Scroll Lock To change it see System Settings on page 23 2 On the Selection Menu press F2 to activate the scan mode 3 The scan starts from the channel next to the currently selected channel A channel ID including the word SCAN will be displayed for each scanned channel The following illustrates the channel IDs during scanning Generic channel ID comprisi...

Page 57: ...screen See Accessing a Server on page 13 2 Press the hot key twice then the letter c and finally press Enter With the default hot key Scroll Lock you should press Scroll Lock Scroll Lock C Enter 3 The following video properties appear on screen 4 Press or to select the video brightness or contrast Brightness Contrast 5 Press or to adjust the value after the cursor is located in the desired video p...

Page 58: ...ny given time The ThinkSystem USB Conversion Cable for Analog KVM does not require to be disconnected from the 1754 A1T KVM Switch The USB connector of the ThinkSystem USB Conversion Cable for Analog KVM has to be connected to the Windows based computer that contains all code for updating the ThinkSystem USB Conversion Cable for Analog KVM Do not use a USB hub as else the software may not detect t...

Page 59: ...ion 4 In the column Serial Number the firmware version of the ThinkSystem USB Conversion Cable for Analog KVM will be displayed 5 Double clicking on that entry will display more detailed information Display results with dongle firmware v1 31 a After program launch b Details Note The ThinkSystem USB Conversion Cable for Analog KVM firmware v1 31 is the initial release version of the firmware It is ...

Page 60: ...Chapter4UsingtheOn ScreenDisplayInterface Display results with dongle firmware v2 00 a After program launch b Details 31 ...

Page 61: ...Chapter4UsingtheOn ScreenDisplayInterface Display results with dongle firmware v2 1 0 a After program launch b Details 32 ...

Page 62: ...The following message appears 3 Press Enter to proceed with the factory reset The following message appears Press Esc in order to cancel out of this selection 4 Wait until the Login screen re appears indicating the reset is completed More Channel Information Active and inactive channels are determined with the power status of the connected ThinkSystem USB conversion cables for Analog KVM cable The...

Page 63: ...cognizes a channel as being inactive when it does not detect the presence of a powered ThinkSystem USB conversion cables for Analog KVM cable which involves these scenarios No ThinkSystem USB conversion cables for Analog KVM cable is connected to that channel port A ThinkSystem USB conversion cables for Analog KVM cable is connected to that channel port but it is unpowered because the server is tu...

Page 64: ...tem just connect one or multiple ThinkSystem Analog 1x8 KVM 1754 A1T SM27A17643 switches to a ThinkSystem Analog 1x8 KVM 1754 A1T SM27A17643 switch All SM27A17643 switches connected to the same ThinkSystem Analog 1x8 KVM 1754 A1T SM27A17643 switch are the SECOND TIER devices and the FIRST TIER ThinkSystem Analog 1x8 KVM 1754 A1T SM27A17643 switch that connects these second tier devices is the base...

Page 65: ...To cascade ThinkSystem Analog 1x8 KVM 1754 A1T SM27A17643 switches 1 Turn OFF all SM27A17643 switches including the base switch 2 Connect the 2nd tier SM27A17643 switch to the base switch a Connect the passive DVI I to VGA adapter shipped with the KVM to the ThinkSystem Analog 1x8 KVM 1754 A1T SM27A17643 cable Plug the adapter s VGA end into the VGA connector of the ThinkSystem Analog 1x8 KVM 1754...

Page 66: ...d tier switches prior to the base switch so that the base switch downloads up to date channel data from the 2nd tier Step b Connect a Keyboard Mouse Monitor and Audio Device You must connect one set of keyboard mouse and monitor to the base switch For details on connecting keyboards mice monitors and optional audio input devices see Step A Connect the Keyboard Mouse Monitor on page 9 37 ...

Page 67: ...y channel ports in the two tier system including those on the base and second tier switches Note In the above image the server can either be connected to the base or the tiered switch but NOT to both at the same time For details on server connections see Basic Installation on page 8 38 ...

Page 68: ...tch is not listed on the current page press Page Down or Page Up 3 Press Enter The Selection Menu of the selected 2nd tier switch appears showing a list of 2nd tier channels To identify a 2nd tier switch s Selection Menu see Selection Menu on page 16 4 Select the desired channel and press Enter 5 The video of the selected channel displays on the screen with its channel ID shown for seconds See Cha...

Page 69: ...Analog KVM Switch 1754 A1T users may notice that the display which is attached to the ThinkSystem 1x8 Analog KVM Switch will unexpectedly blink Information This issue is not very often observed It mainly occurs when a server s power cord is hot plugged whilst the server is up and running and the ThinkSystem 1x8 Analog KVM Switch is attached to the same power source than the server This issue is ma...

Page 70: ...r part numbers 1754 A1T KVM Order part number 1754A1T or FC 1754 HC5 B38H or 4M27A11781 Active ThinkSystem VGA to DVI Conversion Cable Order part number 4X97A11108 includes power cable ThinkSystem USB Conversion Cable for Analog KVM Order part number 4X97A11106 41 ...

Page 71: ...stem KVM linecord 02YH062 Tier 1 Rail kit ThinkSystem Analog 1x8 KVM n a 01PE292 Tier 2 Table explanations p n Part Number CRU Customer Replacement Unit Tier 1 CRU A Tier 1 CRU does not require any tools when replacing the affected part Tier 2 CRU A Tier 2 CRU requires one tool e g a screw driver when replacing the affected part Additional remarks CRUs Customer Replacement Units are to be replaced...

Page 72: ...Chapter7PartNumberOverview Passive DVI to VGA converter The passive DVI to VGA converter is shipped with the Lenovo ThinkSystem Analog 1x8 KVM Switch 1754 A1T 43 ...

Page 73: ...rter included 1 Keep Alive feature in Conversion Option Yes AC socket 1 Power switch 1 Channel LEDs white but turn green when accessed 8 Power LED blue 1 Maximum number of servers with a two tier system comprising the same models 64 Maximum number of target systems Daisy chained None Video support 1920 x 1200 75Hz VGA 1920 x 1080 60Hz DVI DDC2B Max power input AC 100 240V 1 5A DC12V 5 42A Power co...

Page 74: ...AppendixASpecifications Items 1754 A1T SM27A17643 KVM switch Safety CE FCC VCCI UL Password protection Yes no auto logout MTBF 300 000 Hours 45 ...

Page 75: ...m Analog 1x8 KVM Switch Components ThinkSystem Analog 1x8 KVM Switch consists of two components the matrix switch 1754 A1T and VGA KVM Combo cables SC17A30048 and mouse ports of each server will have fail safe server access with keyboard mouse emulation What interfaces does ThinkSystem Analog 1x8 KVM Switch support ThinkSystem Analog 1x8 KVM Switch supports audio USB keyboards mouse interfaces and...

Page 76: ...rator password Call Lenovo support or contact your local dealer for replacement You will be charged for the replacement KVM switch What is my Lenovo support phone number For a list of Lenovo support phone numbers visit https datacentersupport lenovo com supportphonelist 47 ...

Page 77: ...e gather the information that will be needed by the service technician to more quickly resolve your problem Attempt to resolve the problem yourself You can solve many problems without outside assistance by following the troubleshooting procedures that Lenovo provides in the online help or in the Lenovo product documentation The Lenovo product documentation also describes the diagnostic tests that ...

Page 78: ...ncountered a similar problem You can solve many problems without outside assistance by following the troubleshooting procedures that Lenovo provides in the online help or in the Lenovo product documentation The Lenovo product documentation also describes the diagnostic tests that you can perform The documentation for most systems operating systems and programs contains troubleshooting procedures a...

Page 79: ...wing tools unless stated otherwise in this document Lenovo XClarity Provisioning Manager Use the Collect Service Data function of Lenovo XClarity Provisioning Manager to collect system service data You can collect existing system log data or run a new diagnostic to collect new data Lenovo XClarity Controller You can use the BMC Web user interface or the CLI to collect service data for the server T...

Page 80: ...vo product specifications or warranties Nothing in this document shall operate as an express or implied license or indemnity under the intellectual property rights of Lenovo or third parties All information contained in this document was obtained in specific environments and is presented as an illustration The result obtained in other operating environments may vary Lenovo may use or distribute an...

Page 81: ...the products and services currently available in your area Any reference to a Lenovo product program or service is not intended to state or imply that only that Lenovo product program or service may be used Any functionally equivalent product program or service that does not infringe any Lenovo intellectual property right may be used instead However it is the user s responsibility to evaluate and ...

Page 82: ...u may be charged for that service Lenovo and or IBM may release changes to the Machine Code The Machine Code changes are available for download by selecting your product from either a Lenovo support web site or from IBM FixCentral You may also obtain updated code by contacting your Lenovo or IBM representative If the machine does not function as warranted and your problem can be resolved through y...

Page 83: ...ks owned by Lenovo at the time this information was published Such trademarks may also be registered or common law trademarks in other countries A current list of Lenovo trademarks is available on the Web at https www lenovo com us en legal copytrade The following terms are trademarks of Lenovo in the United States other countries or both BladeCenter Lenovo System x Flex System Lenovo logo ThinkSy...

Page 84: ...d ISO 216 The below illustration shows the difference of a DIN A4 sheet versus a US Letter sheet and the associated sizes in millimetres and inches Paper Format Width Height Width Height DIN A4 210 mm 297 mm 8 268 in 11 693 in US Letter 215 9 mm 279 4 mm 8 5 in 11 in Values with decimals are approximate values When printing this document it may be necessary to scale the output to fit the printer m...

Page 85: ... anybody to read this document as easy as possible The following people have helped Sharon Duncan Dyslexia Scotland http www dyslexiascotland org uk Helped with chosing the right standard fonts and providing additional helpful information on the subject matter Joanne Marttila Pierson Ph D CCC SLP Project Manager DyslexiaHelp http www dyslexiahelp umich edu Helped with providing information which m...

Page 86: ...ront View 4 I Initial OSD Operation 8 12 installation 6 8 30 38 54 Introduction 1 4 K Known issues 40 L Login 12 13 14 15 20 23 24 25 33 Login screen 12 14 15 24 25 33 Logout 14 33 45 M More Channel Information 33 P Package Contents 3 Part Number Overview 41 Product Features 2 Product Overview 2 R Rack Mount the 1754 A1T 7 Rackmount Procedure 6 8 Rear View 5 Resetting to Factory Defaults 33 S Sele...

Page 87: ......

Page 88: ......

Reviews: