
Lenovo ThinkSystem DM Series NVMe 2U24 SIR rail kit
installation instructions
This guide describes how to use SM17A56607 to install a DM NVMe 2U 24-drive chassis in a four-post rack
for ship-in-rack enablement purpose.
Before you begin
Before you begin the installation, check the parts contained in SM17A56607.
SM17A56607: Ship-In-Rack Rail kit ASM (1 pcs), which contains the following in the package:
Lenovo PN
Vendor PN
Description
Quantity
SM17A56611
400-01267
Left Rail
1
SM17A56612
400-01268
Right Rail
1
SM17A56613
340-12807
Flange screw with Loctite, M5x16
4
340-12808
φ6 washer, 2 mm thick
2
340-12876
Flat head screw, M5x6 mm
2
SP47A30387
SIR rail kit installation instructions
1
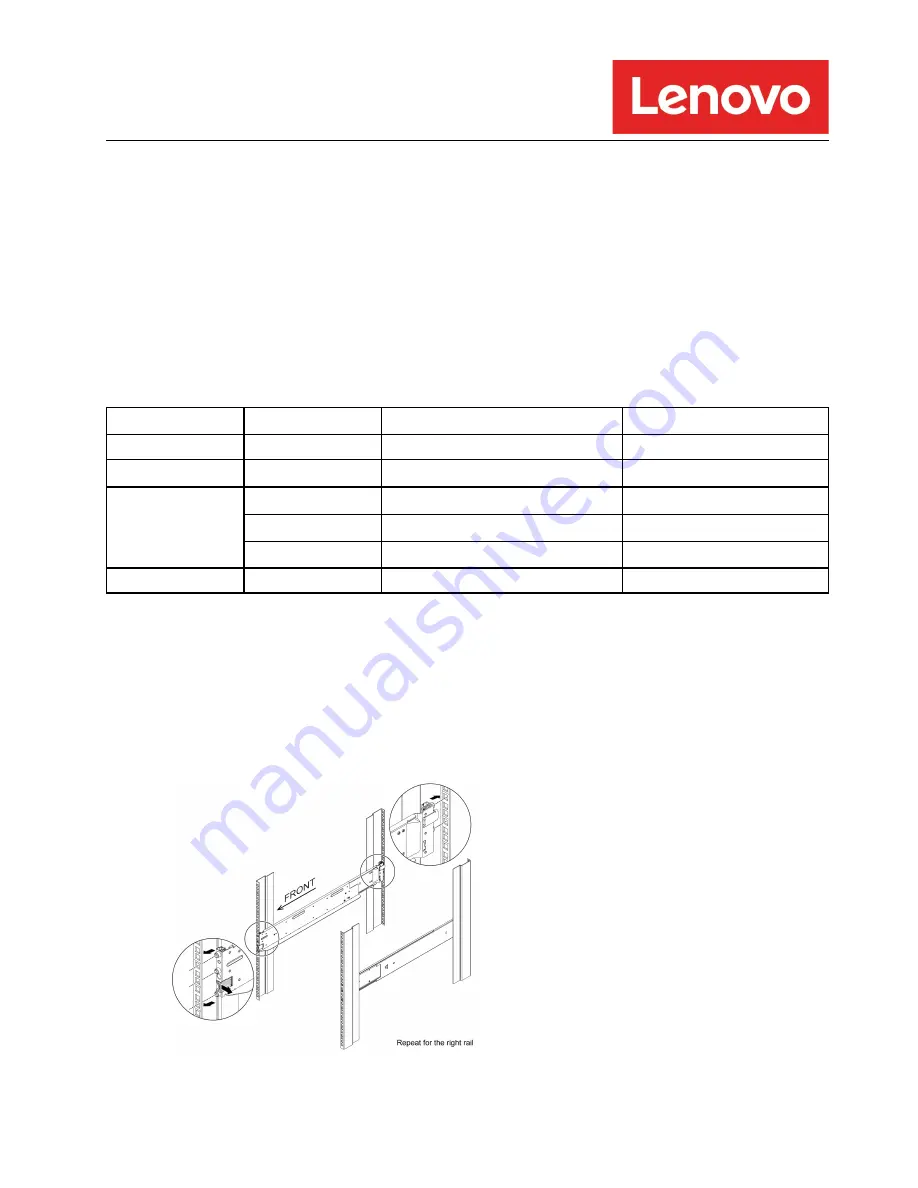
Procedure
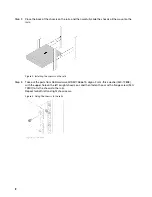
Step 1. Take out the parts from SM17A56607, and then adjust and install the left rail (SM17A56611) on the
left rack posts.
Repeat for the right rail (SM17A56612).
Note:
This type of rail kit has a toolless design, so no screws need to be assembled for now.
Figure 1. Installing the rails
1
1
Summary of Contents for ThinkSystem DM Series
Page 5: ......


