24
2.2.2 Rack handles replacement
Do not proceed before reading and understanding the "Safety Precautions" section of this chapter and "Read Me First".
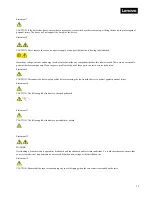
CAUTION:
Do not place any object on top of rack-mounted products.
The power-control button on the device may put the device in standby mode instead of turning off the device. In
addition, the device may have multiple connections to DC power. To remove all electrical current from the device,
ensure that all connections to DC power are disconnected at the DC power input terminals.
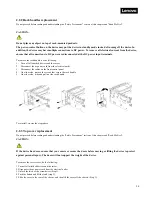
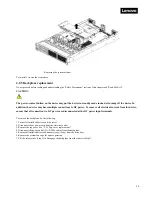
To remove the rack handle, do the following:
1.
Turn off all attached devices and the server.
2.
Disconnect the ac power cord from the electrical outlet.
3.
Disconnect the cables on the front control panel.
4.
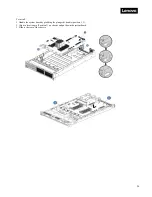
On either side, remove the screws that secure the rack handle.
5.
On either side, slide and pull-out the rack handle.
To reinstall, reverse the steps above.
2.2.3 Top cover replacement
Do not proceed before reading and understanding the "Safety Precautions" section of this chapter and "Read Me First".
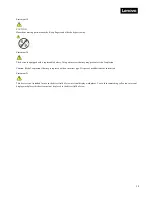
CAUTION:
If the device has doors, ensure that you remove or secure the doors before moving or lifting the device to protect
against personal injury. The doors will not support the weight of the device.
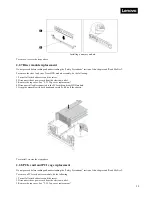
To remove the server cover, do the following:
1.
Turn off all attached devices and the server.
2.
Disconnect the ac power cord from the electrical outlet.
3.
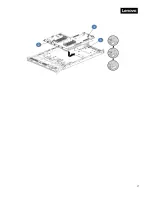
Unlock the latch with a screwdriver (Step 1).
4.
Push the button and lift the latch (step 2).
5.
Slide the cover to the rear of the chassis, and then lift the cover off the chassis. (Step 3).
Summary of Contents for ThinkSystem HR350A
Page 37: ...37 ...
Page 55: ...55 3 4 7 2 PCI Express GEN 2 Settings ...
Page 59: ...59 ...
Page 62: ...62 ...
Page 66: ...66 Entering this menu item will allow users to configure the device parameters ...
Page 71: ...71 Patrol Scrub Enable disable Patrol Scrub for DDR controller ...
Page 85: ...85 3 9 3 View FRU Information ...
Page 89: ...89 ...
Page 97: ...97 Figure 2 Configuring IE ESC step 2 Figure 3 Configuring IE ESC step 3 ...
Page 118: ...118 3 Select Restore Configuration and upload the downloaded backup files ...
Page 120: ...120 ...
Page 123: ...123 Select OK to continue ...


