© Copyright Lenovo 2017
Chapter 4: Removing and Replacing Components
61
Removing and Replacing a Power Supply Module
The
rear
panel
of
the
NE1032T
has
two
bays
for
hot
‐
swap
power
supply
modules.
Two
active
power
supply
modules
are
required
for
load
‐
sharing
and
redundancy.
If
one
power
supply
module
fails,
you
can
replace
it
without
powering
off
the
switch
or
disrupting
switch
functions.
For
proper
airflow
when
operating
the
switch
with
only
one
power
supply
module,
the
empty
power
supply
bay
must
be
closed
by
a
blank
power
filler
plate.
Removing the Power Supply Module
Statement 5
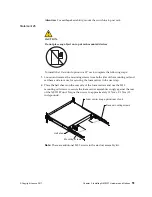
CAUTION:
The
power
control
button
on
the
device
and
the
power
switch
on
the
power
supply
do
not
turn
off
the
electrical
current
supplied
to
the
device.
The
device
also
might
have
more
than
one
power
cord.
To
remove
all
electrical
current
from
the
device,
ensure
that
all
power
cords
are
disconnected
from
the
power
source.
1
2
Summary of Contents for ThinkSystem NE1032T
Page 1: ...Lenovo ThinkSystem NE1032T RackSwitch Installation Guide For Lenovo Cloud Network OS ...
Page 6: ...6 Lenovo G8296 Installation Guide ...
Page 14: ...14 NE1032T Installation Guide ...
Page 18: ...18 NE1032T Installation Guide ...
Page 32: ...32 NE1032T Installation Guide ...
Page 78: ...78 NE1032T Installation Guide ...
Page 94: ...94 NE1032T Installation Guide ...
Page 100: ...100 NE1032T Installation Guide ...
Page 120: ...120 NE1032T Installation Guide ...

