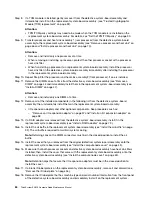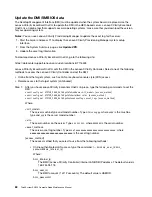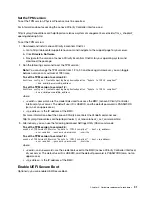
Physical Presence must be asserted if you are going to enable UEFI Secure Boot. See “Assert Physical
Presence” on page 90.
For information about accessing the Lenovo XClarity Controller interface, see:
There are two methods available to enable UEFI Secure Boot:
• From Lenovo XClarity Provisioning Manager
To enable UEFI Secure Boot from Lenovo XClarity Provisioning Manager:
1. Start the server and when prompted, press F1 to display Lenovo XClarity Provisioning Manager.
2. If the power-on Administrator password is required, enter the password.
3. From the UEFI Setup page, click
System Settings
➙
Security
➙
Secure Boot
.
4. Enable Secure Boot and save the settings.
• From Lenovo XClarity Essentials OneCLI
To enable UEFI Secure Boot from Lenovo XClarity Essentials OneCLI:
1. Download and install Lenovo XClarity Essentials OneCLI.
To download Lenovo XClarity Essentials OneCLI, go to the following site:
https://datacentersupport.lenovo.com/us/en/solutions/HT116433
2. Run the following command to enable Secure Boot:
OneCli.exe config set SecureBootConfiguration.SecureBootSetting Enabled --override
--bmc
<userid>
:
<password>
@
<ip_address>
where:
–
<userid>:<password>
are the credentials used to access the BMC (Lenovo XClarity Controller
interface) of your server. The default user ID is USERID, and the default password is PASSW0RD
(zero, not an uppercase o)
–
<ip_address>
is the IP address of the BMC.
For more information about the Lenovo XClarity Essentials OneCLI sseett command, see:
http://sysmgt.lenovofiles.com/help/topic/toolsctr_cli_lenovo/onecli_r_set_command.html
Trusted Cryptographic Module (TCM) replacement
Use the following information to remove and install the Trusted Cryptographic Module (TCM).
Remove the Trusted Cryptographic Module (TCM)
Use this information to remove the Trusted Cryptographic Module (TCM).
Before you remove the TCM, complete the following steps:
1. Read “Safety” on page iii and “Installation Guidelines” on page 21 to ensure that you work safely.
2. Power off the corresponding compute node that you are going to perform the task on.
3. Remove the compute node from the chassis (see “Remove the compute node from the chassis” on page
4. Carefully lay the compute node on a flat, static-protective surface, orienting the compute node with the
bezel pointing toward you.
5. Remove the compute node cover (see “Remove the compute node cover” on page 42).
92
ThinkSystem SN550 Compute Node Maintenance Manual
Summary of Contents for ThinkSystem SN550
Page 1: ...ThinkSystem SN550 Compute Node Maintenance Manual Machine Type 7X16 ...
Page 8: ...vi ThinkSystem SN550 Compute Node Maintenance Manual ...
Page 28: ...20 ThinkSystem SN550 Compute Node Maintenance Manual ...
Page 124: ...116 ThinkSystem SN550 Compute Node Maintenance Manual ...
Page 128: ...120 ThinkSystem SN550 Compute Node Maintenance Manual ...
Page 137: ......
Page 138: ...Part Number SP47A10572 Printed in China 1P P N SP47A10572 1PSP47A10572 ...


