Memory problems
Use this information to resolve issues related to memory.
• “Displayed system memory less than installed physical memory” on page 103
Displayed system memory less than installed physical memory
Complete the following steps until the problem is solved.
1. Make sure that:
a. You have installed the correct type of memory (see “Specifications” on page 2).
b. Memory mirroring or memory sparing mode does not account for the discrepancy.
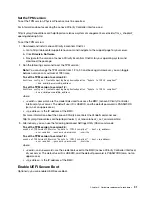
To determine the status of a DIMM, restart the compute node and press F1 to display theLenovo
XClarity Provisioning Manager interface. Then, click
System settings
➙
Memory
.
2. If new memory has recently been installed, make sure that no configuration events are reported in the
event log. If there are any events, resolve them.
Note:
DIMMs are verified as authentic Lenovo or IBM modules by the UEFI software. If any non-
authentic DIMMs are detected, an informational message appears in the system event log and memory
performance might be limited. Non-authentic DIMMs are not covered by your Lenovo warranty.
3. If the compute node was recently installed, moved, or serviced, make sure that the DIMMs are correctly
seated in the connectors (see “Install a DIMM” on page 47).
4. Make sure that all DIMMs are enabled. The compute node might have automatically disabled a DIMM
when it detected a problem, or a DIMM might have been manually disabled.
To determine the status of a DIMM, restart the compute node and press F1 to display theLenovo
XClarity Provisioning Manager interface. Then, click
System settings
➙
Memory
.
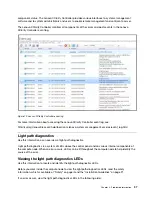
5. Run memory diagnostics. When you start a compute node and press F1, the Lenovo XClarity
Provisioning Manager interface is displayed by default. You can perform memory diagnostics from this
interface. From the Diagnostic page, click
Run Diagnostic
➙
Memory test
.
6. Remove DIMMs until the compute node is showing the correct amount of memory. Install one DIMM at a
time until you can determine which DIMM is not working properly. Remove that DIMM and replace it with
a good DIMM.
Note:
After you install or remove a DIMM, you must change and save the new configuration information
by using the Setup utility. When you turn on the compute node, a message indicates that the memory
configuration has changed. Press F1 to display the Lenovo XClarity Provisioning Manager interface.
Then, save the configuration.
7. If the problem remains, contact Lenovo Support.
Network problems
Use this information to resolve issues related to networking, such as issues with ping, communications, or
login.
Access problems
Use this information to resolve issues related to logging in to the CMM or an I/O module.
• “Cannot log in to CMM” on page 103
• “Cannot log in to I/O module” on page 104
Cannot log in to CMM
Complete the following steps until the problem is solved:
103
Summary of Contents for ThinkSystem SN550
Page 1: ...ThinkSystem SN550 Compute Node Maintenance Manual Machine Type 7X16 ...
Page 8: ...vi ThinkSystem SN550 Compute Node Maintenance Manual ...
Page 28: ...20 ThinkSystem SN550 Compute Node Maintenance Manual ...
Page 124: ...116 ThinkSystem SN550 Compute Node Maintenance Manual ...
Page 128: ...120 ThinkSystem SN550 Compute Node Maintenance Manual ...
Page 137: ......
Page 138: ...Part Number SP47A10572 Printed in China 1P P N SP47A10572 1PSP47A10572 ...


