Watch the procedure
. A video of the process is available:
• Youtube:
https://www.youtube.com/watch?v=pIb0bIyfkDY&=PLYV5R7hVcs-Ak9fT8QAx8fLbEivizjRtp
• Youku:
http://v.youku.com/v_show/id_XMzMyODU3NTY2NA==.html?spm=a2hzp.8253876.0.0&f=51276390
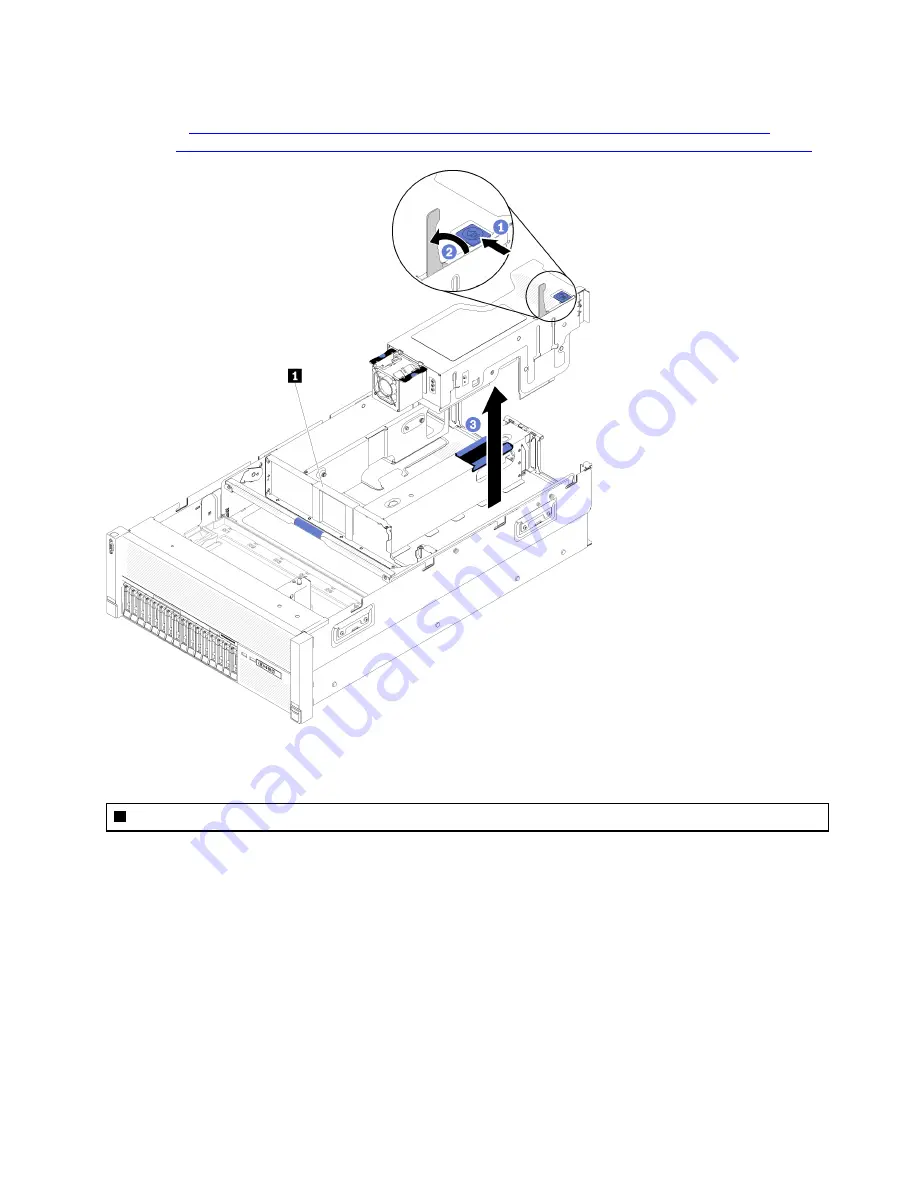
Figure 143. 4U PCIe riser assembly removal
Table 53. 4U PCIe riser assembly filler
1
4U PCIe riser assembly filler
Step 1. Open the release latch.
Step 2. Rotate the lever to disengage the 4U PCIe riser assembly from the slot.
Step 3. Lift the 4U PCIe riser assembly out of the PCIe expansion tray.
Note:
To maintain proper system cooling, if only one 4U PCIe riser assembly is installed, the 4U
PCIe riser assembly filler must be installed to operate the server.
If you are instructed to return the component or optional device, follow all packaging instructions, and use
any packaging materials for shipping that are supplied to you.
Install a 4U PCIe riser assembly
Use this procedure to install a 4U PCIe riser assembly.
.
Hardware replacement procedures
153
Summary of Contents for ThinkSystem SR860
Page 1: ...ThinkSystem SR860 Maintenance Manual Machine Type 7X69 7X70 ...
Page 8: ...vi ThinkSystem SR860 Maintenance Manual ...
Page 63: ...Figure 48 Server components Chapter 2 Server components 55 ...
Page 200: ...192 ThinkSystem SR860 Maintenance Manual ...
Page 210: ...202 ThinkSystem SR860 Maintenance Manual ...
Page 211: ......
Page 212: ...Part Number SP47A30805 Printed in China 1P P N SP47A30805 1PSP47A30805 ...


