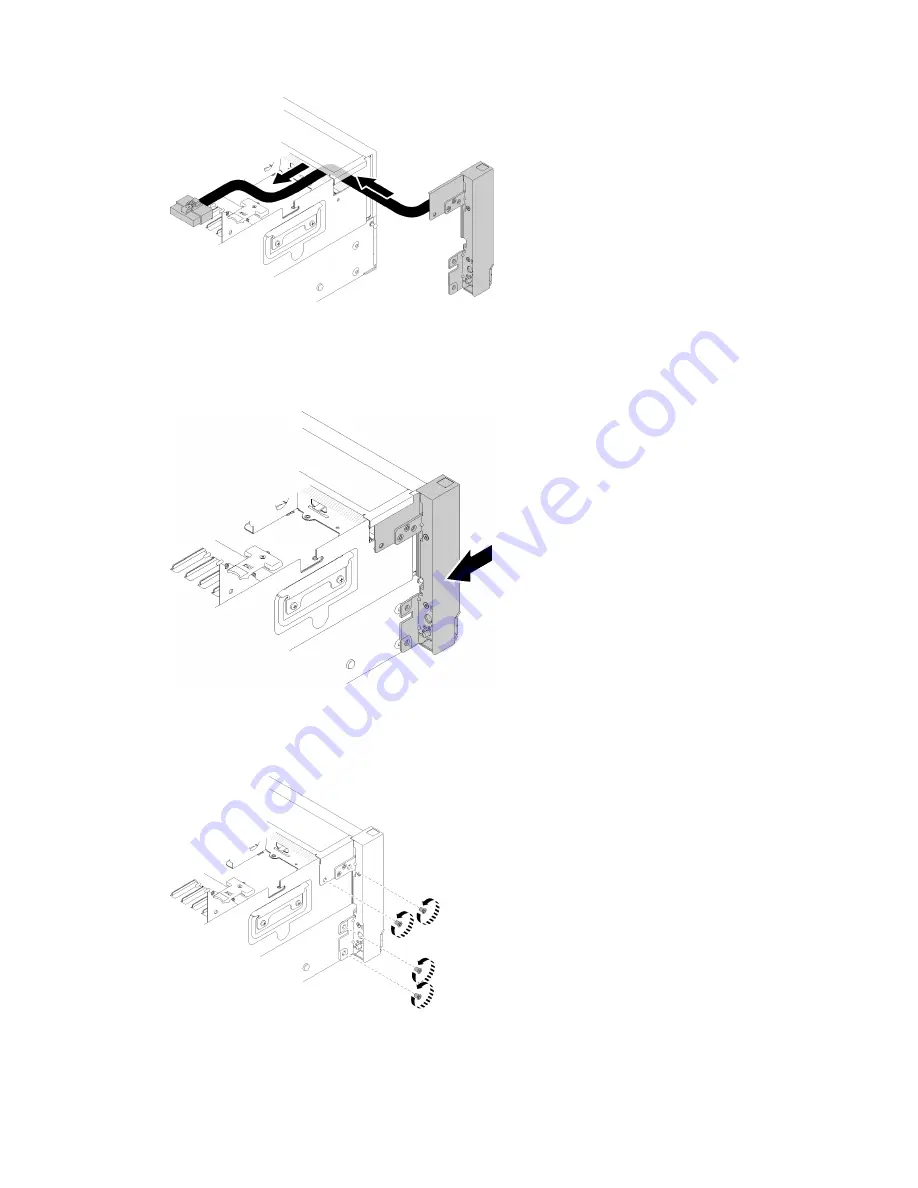
Figure 65. Front VGA assembly installation
Step 3. Slide the front VGA assembly into place. Make sure the screw holes on the front VGA assembly and
chassis align with each other.
Figure 66. Front VGA assembly installation
Step 4. Fasten the screws.
Figure 67. Front VGA assembly installation
Step 5. Connect the front video cable to the system board and route the cable into the clip.
.
Hardware replacement procedures
79
Summary of Contents for ThinkSystem SR860
Page 1: ...ThinkSystem SR860 Maintenance Manual Machine Type 7X69 7X70 ...
Page 8: ...vi ThinkSystem SR860 Maintenance Manual ...
Page 63: ...Figure 48 Server components Chapter 2 Server components 55 ...
Page 200: ...192 ThinkSystem SR860 Maintenance Manual ...
Page 210: ...202 ThinkSystem SR860 Maintenance Manual ...
Page 211: ......
Page 212: ...Part Number SP47A30805 Printed in China 1P P N SP47A30805 1PSP47A30805 ...


