Switches, jumpers, and buttons
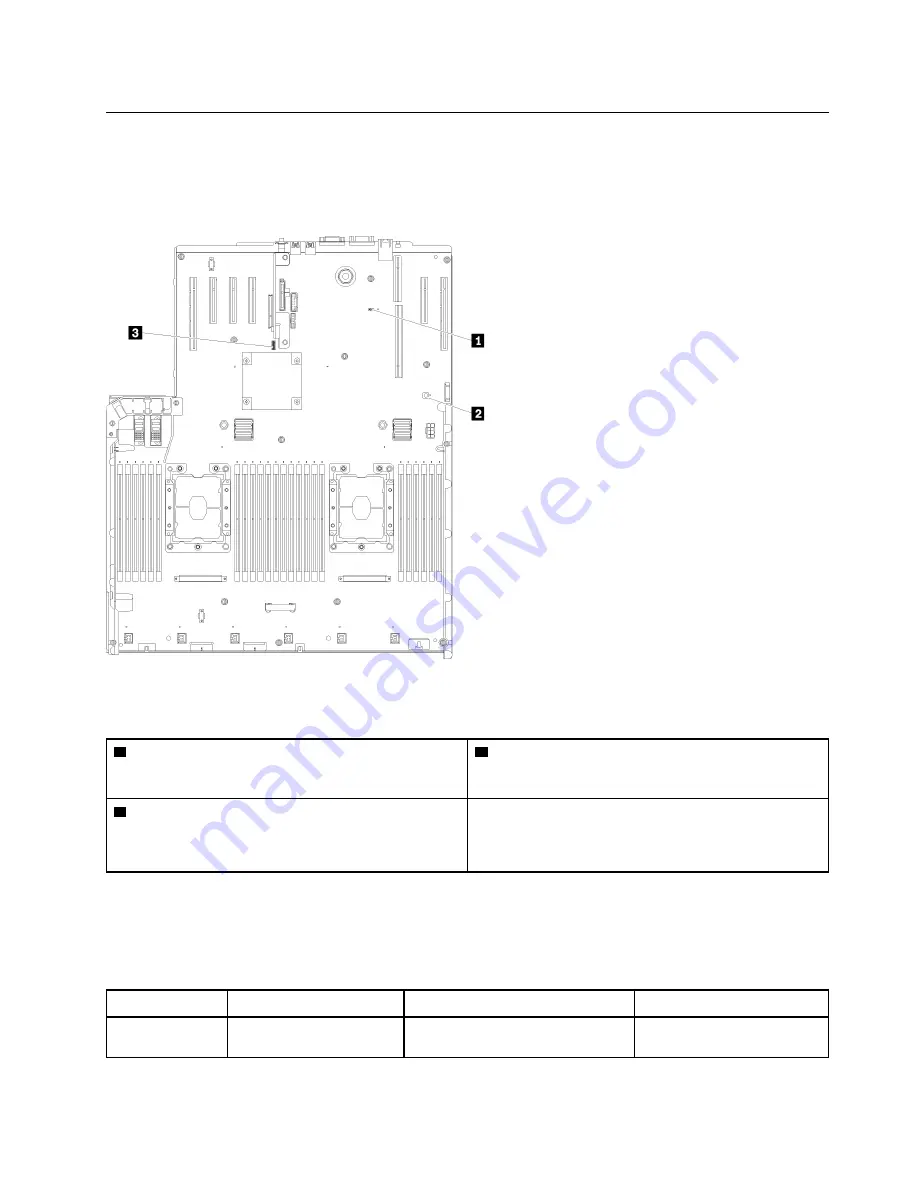
The following illustrations show the location of the switches, jumpers, and buttons on the server.
Note:
If there is a clear protective sticker on the top of the switch block, you must remove and discard it to
access the switch.
Figure 13. Switches, jumpers and buttons
Table 9. System-board switches, jumpers, and buttons
1
J20
3
Switch block (SW13)
See Table 10 “System-board SW13 switch block
descriptions” on page 25 for more details.
2
Light path button
Press this button to light the LEDs on the system board
when the power source has been removed from the
server.
The following table describes the functions of the SW13 switch block on the system board.
The following table describes the functions of the SW613 switch block on the system board.
Table 10. System-board SW13 switch block descriptions
Switch number
Default position
Off
On
1
Off
Host TPM Physical Presence
disable
Host TPM Physical Presence
enable
.
25
Summary of Contents for ThinkSystem SR860
Page 1: ...ThinkSystem SR860 Maintenance Manual Machine Type 7X69 7X70 ...
Page 8: ...vi ThinkSystem SR860 Maintenance Manual ...
Page 63: ...Figure 48 Server components Chapter 2 Server components 55 ...
Page 200: ...192 ThinkSystem SR860 Maintenance Manual ...
Page 210: ...202 ThinkSystem SR860 Maintenance Manual ...
Page 211: ......
Page 212: ...Part Number SP47A30805 Printed in China 1P P N SP47A30805 1PSP47A30805 ...


