


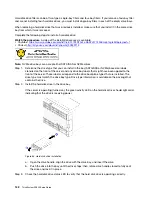
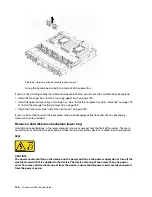


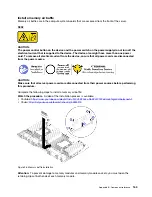
Note:
Existing cables might need to be removed from their retaining clips or moved to the side to
install the backplane.
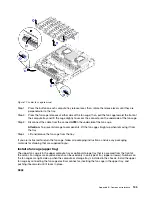
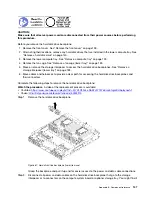
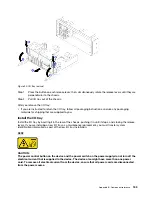
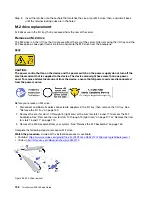
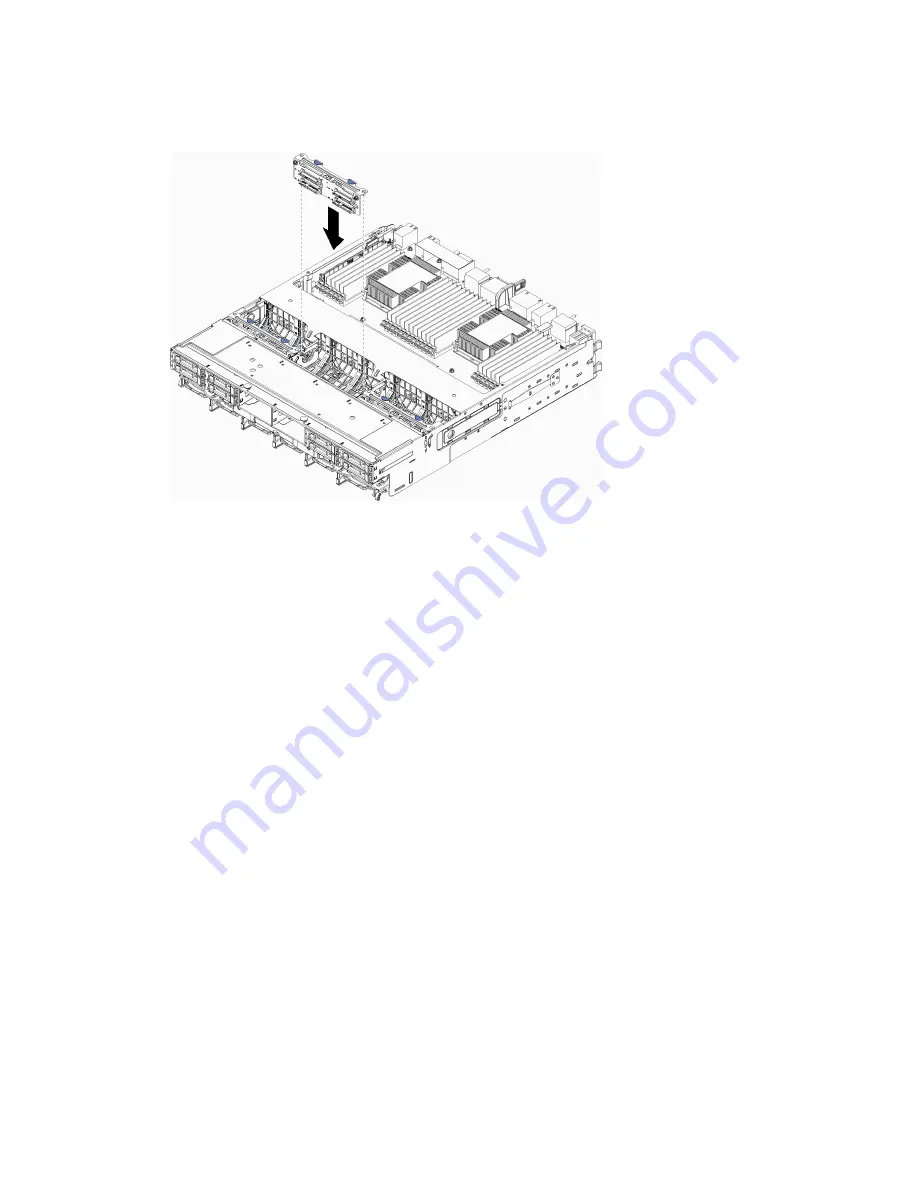
Figure 88. Hard disk drive backplane (upper) installation
Align the backplane with its location in the tray; then, insert the backplane and push it down until it
is fully seated.
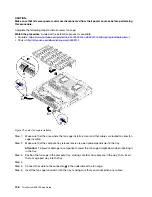
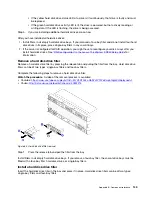
Step 3. Connect the data cables to the backplane. (SAS backplanes have only one data cable. NVME
backplanes have two data cables.) See “Cable routing for drives” on page 29.
Step 4. Repeat Step 1 on page 148, Step 2 on page 148, and Step 3 on page 149 for each hard disk drive
backplane being installed in the upper tray.
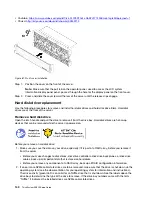
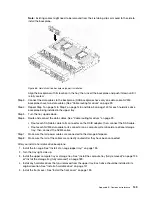
Step 5. Turn the tray upside down.
Step 6. Route and connect the data cables. See “Cable routing for drives” on page 29.
• Route each SAS data cable to its connector on the RAID adapter; then, connect the SAS cable.
• Route each NVME data cable to its connector on a compute system board or optional storage
tray; then, connect the NVME cable.
Step 7. Make sure that all power cables are connected to the storage interposer.
Step 8. Make sure that all of the cables are correctly routed after they have been connected.
After you install a hard disk drive backplane:
1. Install the fan cage. See “Install a fan cage (upper tray)” on page 135.
2. Turn the tray right-side up.
3. Install the upper compute tray or storage tray. See “Install the compute tray (fully removed)” on page 125
or “Install the storage tray (fully removed)” on page 189.
4. Install any hard disk drives that you removed from the upper tray. Each drive should be installed in its
original location. See “Install a hard disk drive” on page 141.
5. Install the front cover. See “Install the front cover” on page 139.
Appendix B. Component reference
149
Summary of Contents for ThinkSystem SR950 7X11
Page 1: ...ThinkSystem SR950 Setup Guide Machine Types 7X12 7X11 and 7X13 ...
Page 4: ...ii ThinkSystem SR950 Setup Guide ...
Page 18: ...14 ThinkSystem SR950 Setup Guide ...
Page 44: ...Figure 22 Server components 40 ThinkSystem SR950 Setup Guide ...
Page 48: ...44 ThinkSystem SR950 Setup Guide ...
Page 98: ...94 ThinkSystem SR950 Setup Guide ...
Page 106: ...102 ThinkSystem SR950 Setup Guide ...
Page 166: ...162 ThinkSystem SR950 Setup Guide ...
Page 199: ...X XCC management front USB configuration 87 Copyright Lenovo 2017 195 ...
Page 200: ...196 ThinkSystem SR950 Setup Guide ...
Page 201: ......
Page 202: ......


