Chapter 3. Server hardware setup
To set up the server, install any options that have been purchased, cable the server, configure and update
the firmware, and install the operating system.
Server setup checklist
Use the server setup checklist to ensure that you have performed all tasks that are required to set up your
server.
The server setup procedure varies depending on the configuration of the server when it was delivered. In
some cases, the server is fully configured and you just need to connect the server to the network and an
input power source, and then you can power on the server. In other cases, the server needs to have
hardware options installed, requires hardware and firmware configuration, and requires an operating system
to be installed.
The following steps describe the general procedure for setting up a server:
1. Unpack the server package. See “Server package contents” on page 1.
2. Set up the server hardware.
a. Install any required hardware or server options. See the related topics in “Install server hardware
b. If necessary, install the server into a standard rack cabinet by using the rail kit shipped with the
server. See the
Rack Installation Instructions
that comes with optional rail kit.
c. Connect the Ethernet cables and power cords to the server. See “Rear view” on page 21 to locate
the connectors. See “Cable the server” on page 84 for cabling best practices.
d. Power on the server. See “Power on the server (connect input power)” on page 85.
Note:
You can access the management processor interface to configure the system without
powering on the server. Whenever the server is connected to power, the management processor
interface is available. For details about accessing the management server processor, see:
e. Validate that the server hardware was set up successfully. See “Validate server setup” on page 85.
3. Configure the system.
a. Connect the Lenovo XClarity Controller to the management network. See “Set the network
connection for the Lenovo XClarity Controller” on page 87.
b. Update the firmware for the server, if necessary. See “Update the firmware” on page 88.
c. Configure the firmware for the server. See “Configure the firmware” on page 91.
The following information is available for RAID configuration:
•
https://lenovopress.com/lp0578-lenovo-raid-introduction
•
https://lenovopress.com/lp0579-lenovo-raid-management-tools-and-resources
d. Install the operating system. See “Install the operating system” on page 93.
e. Back up the server configuration. See “Back up the server configuration” on page 93.
f. Install the applications and programs for which the server is intended to be used.
© Copyright Lenovo 2017
45
Summary of Contents for ThinkSystem SR950 7X11
Page 1: ...ThinkSystem SR950 Setup Guide Machine Types 7X12 7X11 and 7X13 ...
Page 4: ...ii ThinkSystem SR950 Setup Guide ...
Page 18: ...14 ThinkSystem SR950 Setup Guide ...
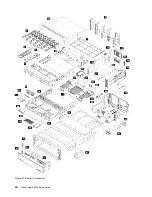
Page 44: ...Figure 22 Server components 40 ThinkSystem SR950 Setup Guide ...
Page 48: ...44 ThinkSystem SR950 Setup Guide ...
Page 98: ...94 ThinkSystem SR950 Setup Guide ...
Page 106: ...102 ThinkSystem SR950 Setup Guide ...
Page 166: ...162 ThinkSystem SR950 Setup Guide ...
Page 199: ...X XCC management front USB configuration 87 Copyright Lenovo 2017 195 ...
Page 200: ...196 ThinkSystem SR950 Setup Guide ...
Page 201: ......
Page 202: ......

