CAUTION:
Make sure that all server power cords are disconnected from their power sources before performing
this procedure.
Before you remove the M.2 backplane:
1. Disconnect and label all cables connected to adapters in the I/O tray; then, remove the I/O tray. See
“Remove the I/O tray” on page 334.
2. Remove the riser for slot 10 to 15 (riser 2) or the riser for slot 16 to 17 to access the M.2 backplane. See
“Remove the riser for slot 10 to 15 (riser 2)” on page 359 or “Remove the riser for slot 16 to 17 (riser 3)”
on page 362.
Complete the following steps to remove the M.2 backplane.
Watch the procedure
. A video of the installation process is available:
•
•
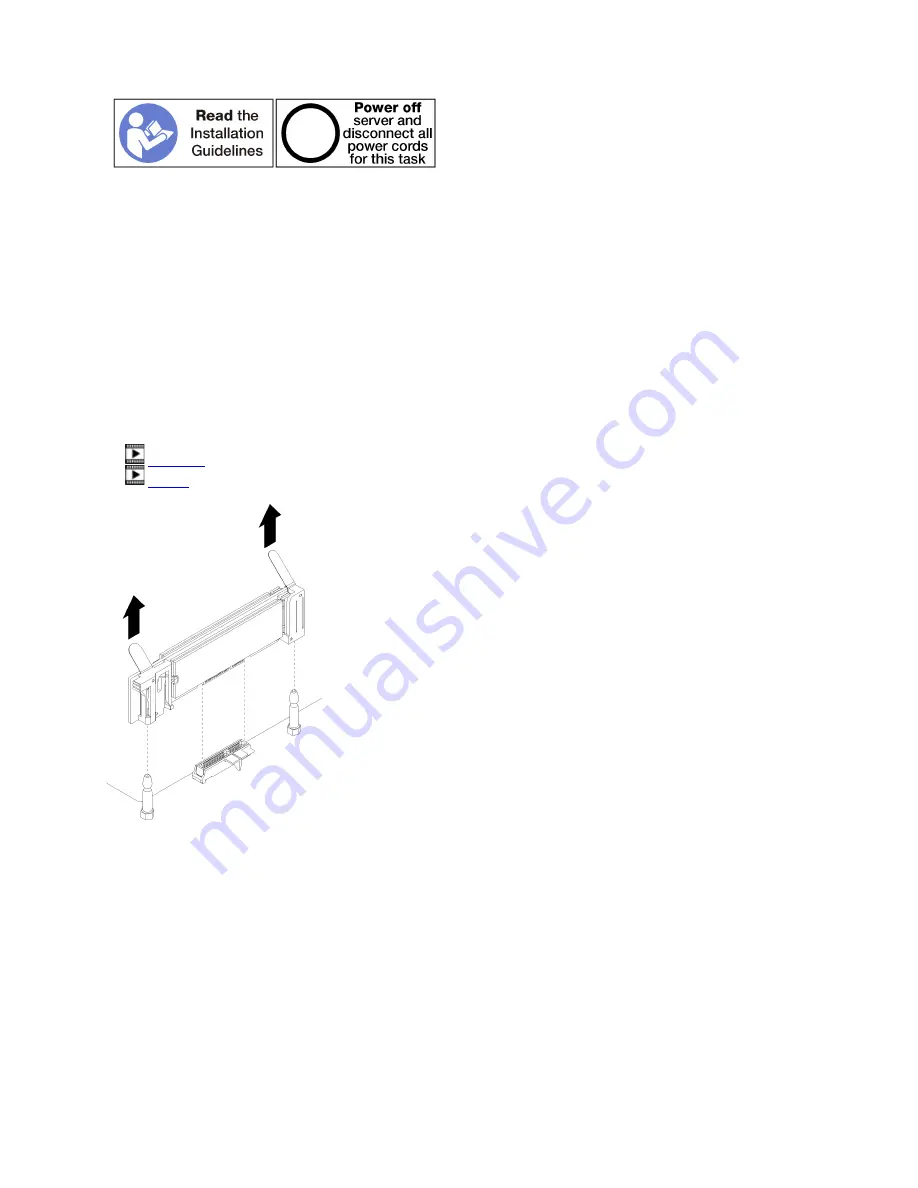
Figure 99. M.2 backplane removal
Step 1. Remove the M.2 backplane from the system board by pulling up on both ends of the backplane at
the same time.
Note:
Pull the M.2 backplane straight up when removing it from the system board.
After you remove the M.2 backplane:
• If you are replacing the M.2 backplane, remove any M.2 drives installed in the backplane. See “Remove an
• If you are removing the M.2 backplane and are not installing a replacement:
Appendix B. Component reference
343
Summary of Contents for ThinkSystem SR950
Page 1: ...ThinkSystem SR950 Setup Guide Machine Types 7X12 7X11 and 7X13 ...
Page 55: ...Figure 22 Server components Chapter 2 Server components 51 ...
Page 276: ...272 ThinkSystem SR950 Setup Guide ...
Page 282: ...278 ThinkSystem SR950 Setup Guide ...
Page 286: ...282 ThinkSystem SR950 Setup Guide ...
Page 389: ......
Page 390: ......


