CAUTION:
Make sure that all server power cords are disconnected from their power sources before performing
this procedure.
Before you remove an upper storage interposer:
1. Remove the front cover. See “Remove the front cover” on page 322.
2. Remove the upper compute tray or storage tray. See “Remove a compute tray” on page 305 or
“Remove a storage tray” on page 375.
3. If you removed a compute tray and it has one or more compute system boards installed or a system
board filler, remove the system boards or system board filler. See “Remove a system board” on page
309.
4. Turn the tray upside down and remove the upper fan cage. See “Remove a fan cage (upper tray)” on
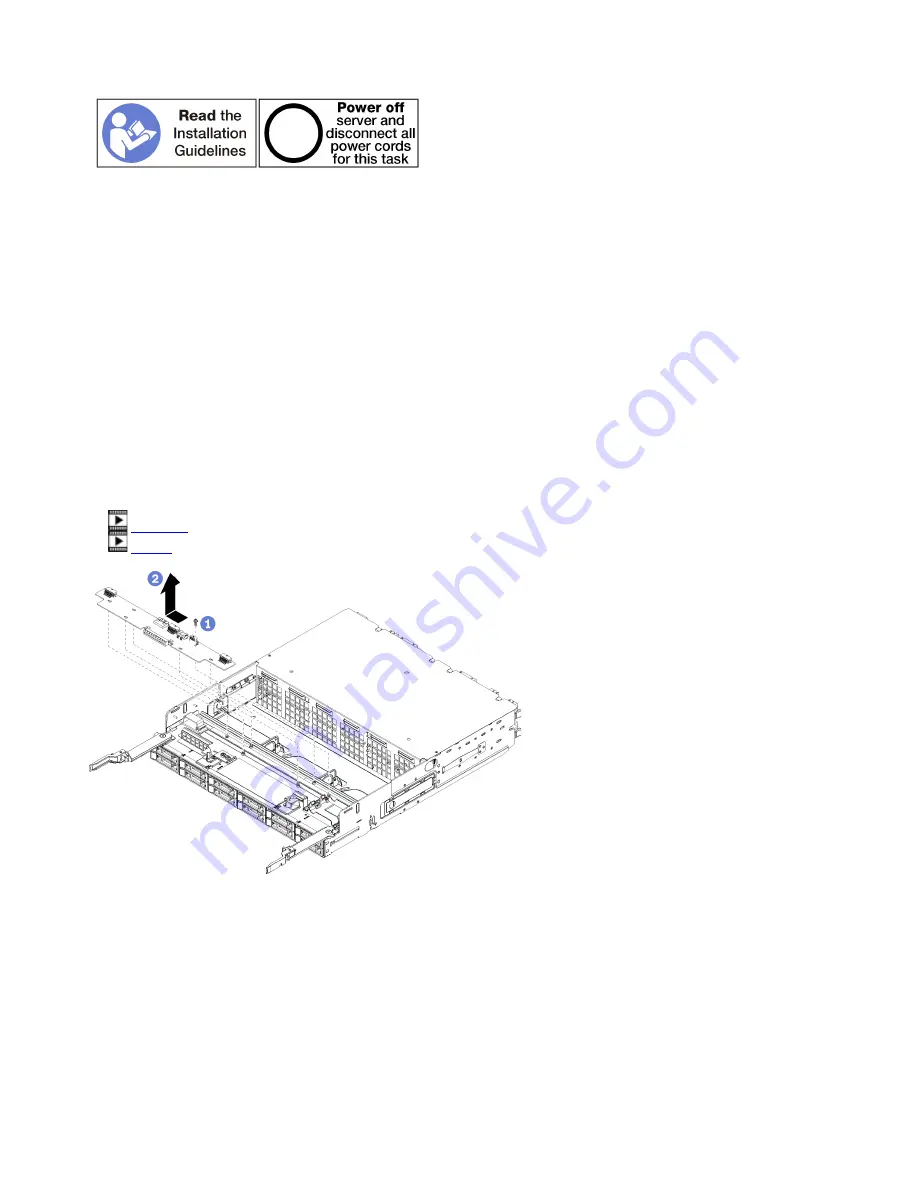
Complete the following steps to remove an upper storage interposer.
Watch the procedure
. A video of the installation process is available:
•
•
Figure 118. Upper storage interposer removal
Step 1. Disconnect all power and data cables from the storage interposer.
Step 2. Slide the RAID card forward to disconnect the RAID card from the storage interposer; then, rotate
the RAID card upward. (Leave the three cables connected to the RAID card.)
Step 3. Remove the screw securing the storage interposer in place.
Step 4. Slide the storage interposer to the left and remove it from the tray.
370
ThinkSystem SR950 Setup Guide
Summary of Contents for ThinkSystem SR950
Page 1: ...ThinkSystem SR950 Setup Guide Machine Types 7X12 7X11 and 7X13 ...
Page 55: ...Figure 22 Server components Chapter 2 Server components 51 ...
Page 276: ...272 ThinkSystem SR950 Setup Guide ...
Page 282: ...278 ThinkSystem SR950 Setup Guide ...
Page 286: ...282 ThinkSystem SR950 Setup Guide ...
Page 389: ......
Page 390: ......


