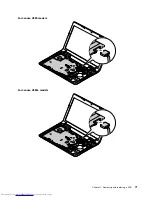
•
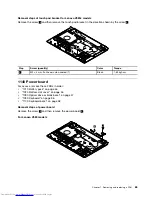
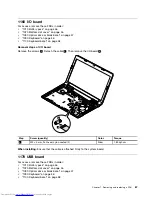
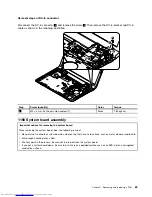
“1090 Keyboard” on page 56
•
“1100 Keyboard bezel” on page 58
•
“1150 Microphone assembly” on page 66
•
“1190 System board assembly” on page 69
•
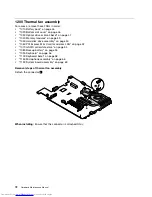
“1200 Thermal fan assembly” on page 72
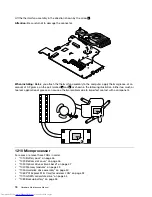
Attention:
The microprocessor is extremely sensitive. When you service the microprocessor, avoid any
kind of rough handling.
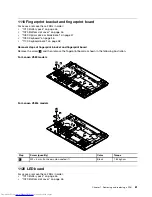
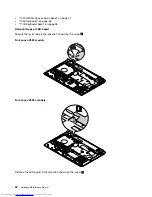
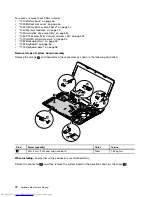
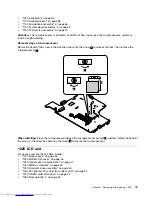
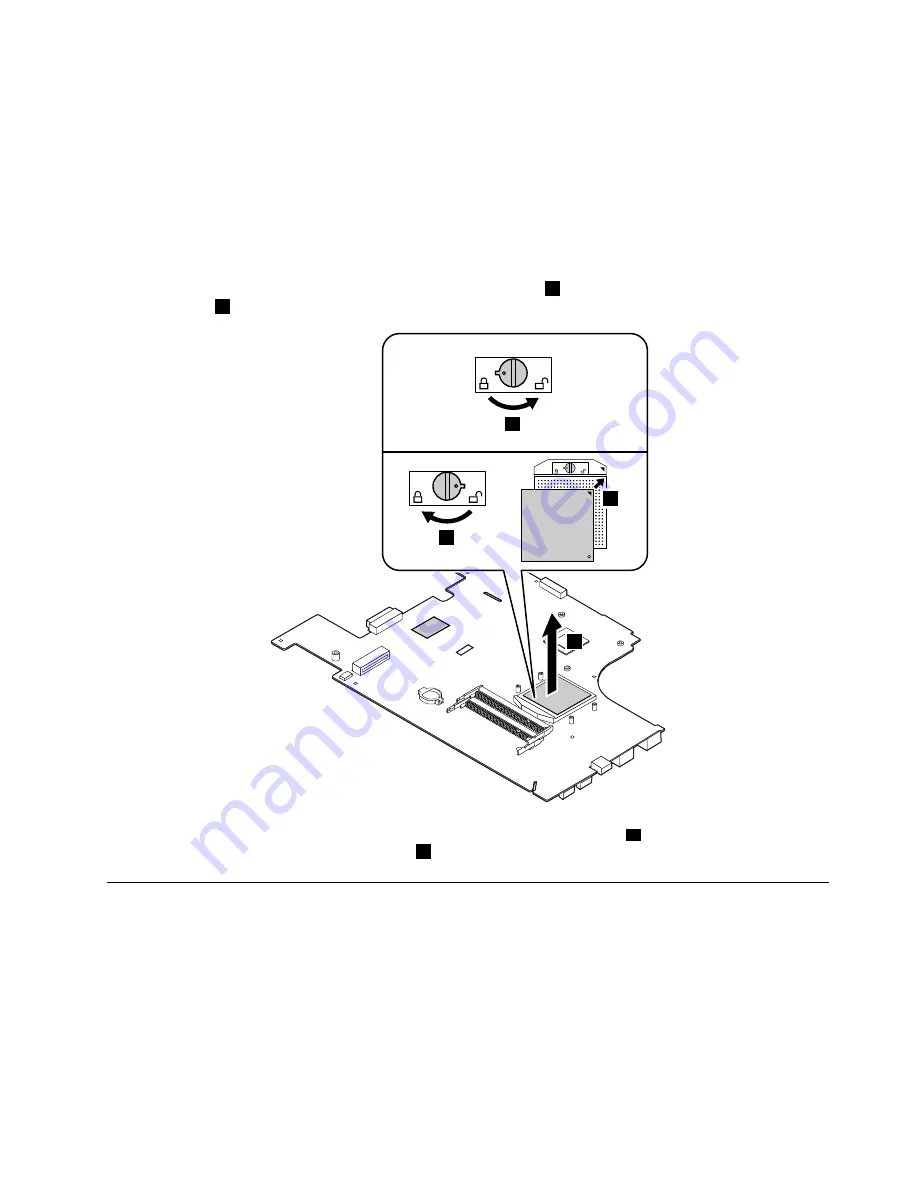
Removal steps of microprocessor
Rotate the head of the screw in the direction shown by the arrow
1
to release the lock, then remove the
microprocessor
2
.
2
2
a
b
1
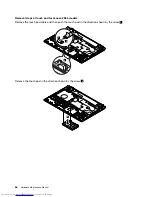
When installing:
Place the microprocessor above the microprocessor socket
a
, and then rotate the head of
the screw in the direction shown by the arrow
b
to secure the microprocessor.
1220 LCD unit
For access, remove these FRUs in order:
•
“1010 Battery pack” on page 46
•
“1020 Bottom slot cover” on page 46
•
“1030 Optical drive or blank bezel” on page 47
•
“1040 Memory modules” on page 49
•
“1050 Hard disk drive assembly” on page 50
•
“1060 PCI Express Mini Card for wireless LAN” on page 52
•
“1070 mSATA solid-state drive” on page 54
•
“1080 Backup battery” on page 55
Chapter 7
.
Removing and replacing a FRU
75
Summary of Contents for V580
Page 1: ...Hardware Maintenance Manual Lenovo V580 and V580c ...
Page 4: ...ii Hardware Maintenance Manual ...
Page 6: ...iv Hardware Maintenance Manual ...
Page 11: ...DANGER DANGER DANGER DANGER DANGER Chapter 1 Safety information 5 ...
Page 12: ...DANGER 6 Hardware Maintenance Manual ...
Page 13: ...Chapter 1 Safety information 7 ...
Page 14: ...PERIGO PERIGO PERIGO PERIGO PERIGO PERIGO 8 Hardware Maintenance Manual ...
Page 15: ...PERIGO PERIGO DANGER DANGER DANGER Chapter 1 Safety information 9 ...
Page 16: ...DANGER DANGER DANGER DANGER DANGER VORSICHT 10 Hardware Maintenance Manual ...
Page 17: ...VORSICHT VORSICHT VORSICHT VORSICHT Chapter 1 Safety information 11 ...
Page 18: ...VORSICHT VORSICHT VORSICHT 12 Hardware Maintenance Manual ...
Page 19: ...Chapter 1 Safety information 13 ...
Page 20: ...14 Hardware Maintenance Manual ...
Page 21: ...Chapter 1 Safety information 15 ...
Page 22: ...16 Hardware Maintenance Manual ...
Page 23: ...Chapter 1 Safety information 17 ...
Page 24: ...18 Hardware Maintenance Manual ...
Page 26: ...20 Hardware Maintenance Manual ...
Page 27: ...Chapter 1 Safety information 21 ...
Page 28: ...22 Hardware Maintenance Manual ...
Page 29: ...Chapter 1 Safety information 23 ...
Page 30: ...24 Hardware Maintenance Manual ...
Page 31: ...Chapter 1 Safety information 25 ...
Page 32: ...26 Hardware Maintenance Manual ...
Page 38: ...32 Hardware Maintenance Manual ...
Page 42: ...36 Hardware Maintenance Manual ...
Page 48: ...42 Hardware Maintenance Manual ...
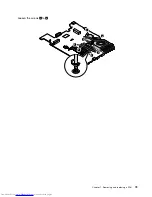
Page 79: ...Loosen the screws 2 to 8 2 3 4 5 7 6 8 Chapter 7 Removing and replacing a FRU 73 ...
Page 94: ...88 Hardware Maintenance Manual ...
Page 112: ...106 Hardware Maintenance Manual ...
Page 115: ......
Page 116: ......

