background image

User’s Manual                                        Lenovo USB Video Docking VDK8726 

20


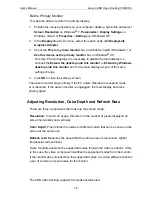
1.  Position the mouse anywhere on your computer desktop, right-click and select 

Screen Resolution

 on Windows

®

 7, 

Personalize

 > 

Display Settings

 on 

Windows Vista

®

 or 

Properties

 > 

Settings

 on Windows

®

 XP. 

2.  In the 

Display

 drop-down menu, select the option ends with

 DisplayLink 

Graphics Adapter

3.  To change the screen resolution or color quality, select those options on the 

screen. Be sure to select one of the supported resolutions and color quality 
numbers in the table above. For an add-on monitor, you can also select any 
resolution or color quality supported by that monitor. 

4.  To change the refresh rate, click 

Advanced…

 and then click 

Monitor

5.  Select a refresh rate from the 

Screen

 refresh rate drop-down list and then click 

Apply

6. Click 

OK

 to close the settings screen. 


Disconnecting the Docking Station 

If the docking station is unplugged from the computer, the add-on monitor goes 
blank. All windows and icons move to the primary screen. 

On reconnection of the docking station, the docking station returns to the same 
mode as it was before disconnection. However, windows and icons that were 
previously on the screen will not be moved back. 


Summary of Contents for VDK8726

Page 1: ...LENOVO USB VIDEO DOCKING User s Manual VDK8726 ...

Page 2: ...g Ltd will not be responsible for any data loss caused by malfunction of hardware and software repair and other situations nor will we be responsible for associated indirect loss Please backup your data properly The content of this user s guide is protected by the law of copyright Without a written authorization from Lenovo Beijing Ltd you cannot copy excerpt transmit through wired or wireless net...

Page 3: ...necting Microphone and Speaker Headphones 12 3 Using the Lenovo USB Video Docking 13 USB 2 0 Host Ports 13 Audio Ports 13 Configuring Windows Audio Device 14 Configuring Instant Messaging Software Audio Device 14 Ethernet Port 14 Video Port 15 Display Modes 15 Adjusting Resolution Color Depth and Refresh Rate 18 Disconnecting the Docking Station 20 How Standby or Hibernating Mode Affects Devices A...

Page 4: ...Docking Station with Video User s Manual iii Federal Communications Commission FCC Declaration of Conformity 30 ICES 31 WEEE Information 31 ...

Page 5: ...can be connected to one more monitor LCD or projector The connected monitor can be configured to either mirror your primary screen or extend the Windows desktop allowing visibility of more applications at the same time No more stacking windows within the confines of a single display As to the housing aside from the impressive sailboat like appearance the upright design of the body helps to spare y...

Page 6: ...stem reboot Resumes from hibernation and suspend modes System Requirements With CPU at 1 6 GHz Atom Celeron or higher processor Intel Pentium Celeron family or AMD K6 Athlon Duron family or compatible processor 512 MB of RAM USB 2 0 host port 30MB of available disk space Windows XP 32 bit Windows Vista 32 64 bit Windows 7 32 64 bit To play DVD on the add on monitor in addition to the requirements ...

Page 7: ...For connection to USB peripherals 3 5 mm stereo microphone input port For connection to an external microphone for recording 3 5 mm stereo audio output port For connection to stereo headphones or speakers USB Hub LED Glows when any of the four USB downstream ports is connected to a USB device ...

Page 8: ...ot provided in package USB upstream port For connection to the USB port of the host computer DVI video output port For connection to a DVI monitor If you want to connect to a VGA monitor use the DVI to VGA adapter for connection Power jack For connection to the provided power adapter The Docking Station always needs external power supply for operation as it does not take power from the USB upstrea...

Page 9: ...lease follow the steps described in this manual to install the drivers first and then make the connection A On Windows XP Windows Vista To install the Driver 1 Insert the provided CD into your disc drive locate and double click the Setup exe file under E Driver where E is your disc drive letter Click Next to the next step for installation ...

Page 10: ...ase click I Accept after reading the statement of SOFTWARE END USER LICENCE AGREEMENT FOR DISPPLAYLINK MIRROR DRIVER and DISPLAYLINK GRAPHICS ADAPTER SOFTWARE Do not connect the docking station to your computer at this stage Please proceed to next section to continue with the video component installation ...

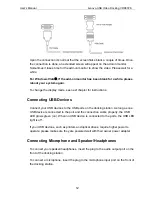
Page 11: ... looks like a monitor as below Click on the icon to bring up the menu Actual strings depend on your operation system These screen shots are from Windows XP SP2 and Windows Vista it might vary slightly for each operation system Extend Mode The add on screen is part of the extended desktop Mirror Mode The add on screen copies the contents of the primary screen Off Mode The add onscreen is black Set ...

Page 12: ...cking VDK8726 8 B On Windows 7 To install the Driver 1 Insert the provided CD into your disc drive locate and double click the Setup exe file under E Driver where E is your disc drive letter Click Next to the next step for installation ...

Page 13: ...ement of SOFTWARE END USER LICENCE AGREEMENT FOR DISPPLAYLINK MIRROR DRIVER and DISPLAYLINK GRAPHICS ADAPTER SOFTWARE 3 Please wait while Windows configures DisplayLink Core Software Your screens may temporarily go black or flash during this process ...

Page 14: ...ls are available in Windows 7 Orientation Portrait landscape rotated portrait rotated landscape 5 To control the behavior of an extended screen it is possible to use Windows Key P to display a menu and cycle through it to allow Disconnect Projector Duplicate Extend Projector Only Actual strings depend on your operation system These screen shots are from Windows 7 and might vary slightly for each o...

Page 15: ...iver software installation is successful Then the docking station is ready for use D Connecting Devices to the Docking Station Now the installation is complete You can connect the peripherals monitor to appropriate ports on the docking station as required If required you can connect and disconnect the peripherals monitor any time without disconnecting the docking station from the USB port on your ...

Page 16: ... Devices Connect your USB devices to the USB ports on the docking station As long as one USB device is connected to the port and the connection works properly the USB LED glows green on When no USB device is connected to the ports the USB LED light is off If your USB devices such as printers and optical drives require higher power to operate please make sure they are powered well with their owner ...

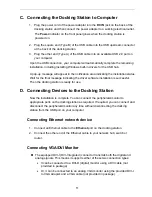
Page 17: ...ed well with their owner power adapter Audio Ports Prior to using the speaker microphone connected to the docking station you have to correctly configure your application to use USB Multimedia Audio Device i e the audio components of the docking station When the docking station is connected to your computer the audio devices named USB Multimedia Audio Device are automatically installed and may ove...

Page 18: ...oftware Audio Device To chat via instant messaging software using the headphone and microphone connected to the docking station make sure the instant messaging software such as MSN messenger Yahoo messenger or Skype are configure to use USB Multimedia Audio Device as the audio in and out devices Ethernet Port The Ethernet port supports Ethernet 10 100 Mbps function To connect your computer to a ne...

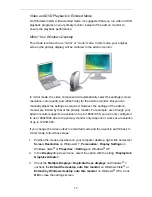
Page 19: ...osition the mouse anywhere on your computer desktop right click and select Screen Resolution on Windows 7 Personalize Display Settings on Windows Vista or Properties Settings on Windows XP 2 In the Display drop down menu select the option with the string DisplayLink Graphics Adapter 3 Check the Multiple Displays Extend these displays on Windows 7 Extend the desktop onto this monitor box on Windows...

Page 20: ...rt display on the extended desktop Cursor disappeared If you re in extneded mode but the add on monitor is not connected the desktop still pans to the add on monitor and it s possible that your cursor has moved to the extended desktop so that you cannot find it on the primary display To solve the problem in such a case connect the add on monitor to the docking station or keep moving your mouse to ...

Page 21: ...he primary monitor For example even though your add on monitor supports a resolution of up to 1680x1050 you can only configure it to use 1280x1024 due to the primary monitor only supports or works at a resolution of up to 1280x1024 If you change the video output to extended mode and then want to switch back to mirror mode follow these steps 1 Position the mouse anywhere on your computer desktop ri...

Page 22: ...ck OK to close the settings screen The add on monitor stays primary if the PC enters hibernate or suspend mode or is rebooted If the add on monitor is unplugged the main display becomes primary again Adjusting Resolution Color Depth and Refresh Rate There are three components that make up the screen mode Resolution In common usage this refers to the number of pixels displayed on screen horizontall...

Page 23: ...mponent of the docking station The primary monitor and the add on monitor The primary video card on your computer and installed drivers Therefore for example if your add on monitor doesn t support a resolution of 1600x1200 then 1600x1200 is not possible though your dokcing station s video component supports 1600x1200 This ensures that the monitor cannot be put into an unsupported mode which might ...

Page 24: ...numbers in the table above For an add on monitor you can also select any resolution or color quality supported by that monitor 4 To change the refresh rate click Advanced and then click Monitor 5 Select a refresh rate from the Screen refresh rate drop down list and then click Apply 6 Click OK to close the settings screen Disconnecting the Docking Station If the docking station is unplugged from th...

Page 25: ...y on the external monitor will not move back to that secondary monitor Also if the add on monitor is in extended mode and the computer requires a login after standby or hibernating mode the login screen appears on the primary computer monitor not the external monitor If the computer is shut down restarted and logged in again the add on monitor returns to the same mode as it was before shutdown Oth...

Page 26: ...Drive 1 Open the Control Panel and double click Uninstall a Program on Windows 7 Programs and Features on Windows Vista or Add or Remove Programs on Windows XP 2 Select DisplayLink Graphics and click Uninstall or Remote 3 Click Yes to confirm the removal 4 Click Yes to restart your computer You can also disconnect the video connection now ...

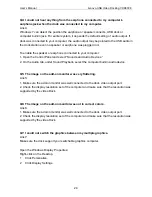
Page 27: ...indows Vista on a computer and running Windows Media Center in full screen mode on one monitor in a multiple monitor setup To work around this issue switch Windows Media Center from full screen mode to windowed mode Then manually resize the Windows Media Center window to fit the monitor s screen Q3 I could not drag an application window to extended display under Window XP Windows Vista Ans3 In Win...

Page 28: ... the Audio tab under Sound Playback select the computer built in audio device Q5 The image on the add on monitor was very fluttering Ans5 1 Make sure the add on monitor was well connected to the dock video output port 2 Check the display resolution set of the computer and make sure that the resolution was supported by the video Dock Q6 The image on the add on monitor was not in correct colors Ans6...

Page 29: ...site to obtain the latest DisplayLink driver On selecting Check for updates the DisplayLink software connects to Windows update downloads and installs the latest software Automatic Updates DisplayLink Automatic Updates is a product maintenance feature from DisplayLink supported on Windows XP and Vista The automatic update mechanism ensures that the DisplayLink Graphics Adapter has the most up to d...

Page 30: ...omatic updates are configured to check for updated software on the plugging in of a DisplayLink Graphics Adapter or the resume or start of your PC every seven days When newer software is available the Updates Wizard launches 1 Select Download and install now Note You can download and install the software immediately but it is also possible to hide the reminder until a later date or disable the ...

Page 31: ...t update is automatically set to Download whilst others are skipped 2 Click Next to download the latest update The Downloading Updates screen opens 3 If you check the highlighted box then installation of the latest software begins immediately after the download has finished otherwise click Next to begin software installation Manual Updates ...

Page 32: ...menu opens If you have the most recent software the dialog box shown below appears Otherwise the Choose updates to install dialog opens Configuring Updates You can configure the check frequency the updater s action on finding newer software and the download folder To configure updates Click the DisplayLink icon 1 Select Updates Configure The Updates Options dialog opens ...

Page 33: ...elect the options you want to change and click OK DisplayLink software will save your changes You may check the latest version of video driver through below link http www displaylink com support downloads php ...

Page 34: ...which can be determined by turning the equipment off and on the user is encouraged to try to correct the interference by one or more of the following measures Reorient or relocate the receiving antenna Increase the separation between the equipment and receiver Connect the equipment into an outlet on a circuit different from that to which the receiver is connected Consult an authorized dealer or se...

Page 35: ... B est conforme à la norme NMB 003 du Canada WEEE Information For EU European Union member users According to the WEEE Waste electrical and electronic equipment Directive do not dispose of this product as household waste or commercial waste Waste electrical and electronic equipment should be appropriately collected and recycled as required by practices established for your country For information ...

Page 36: ...User s Manual Lenovo USB Video Docking VDK8726 32 ...

Reviews: