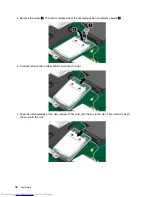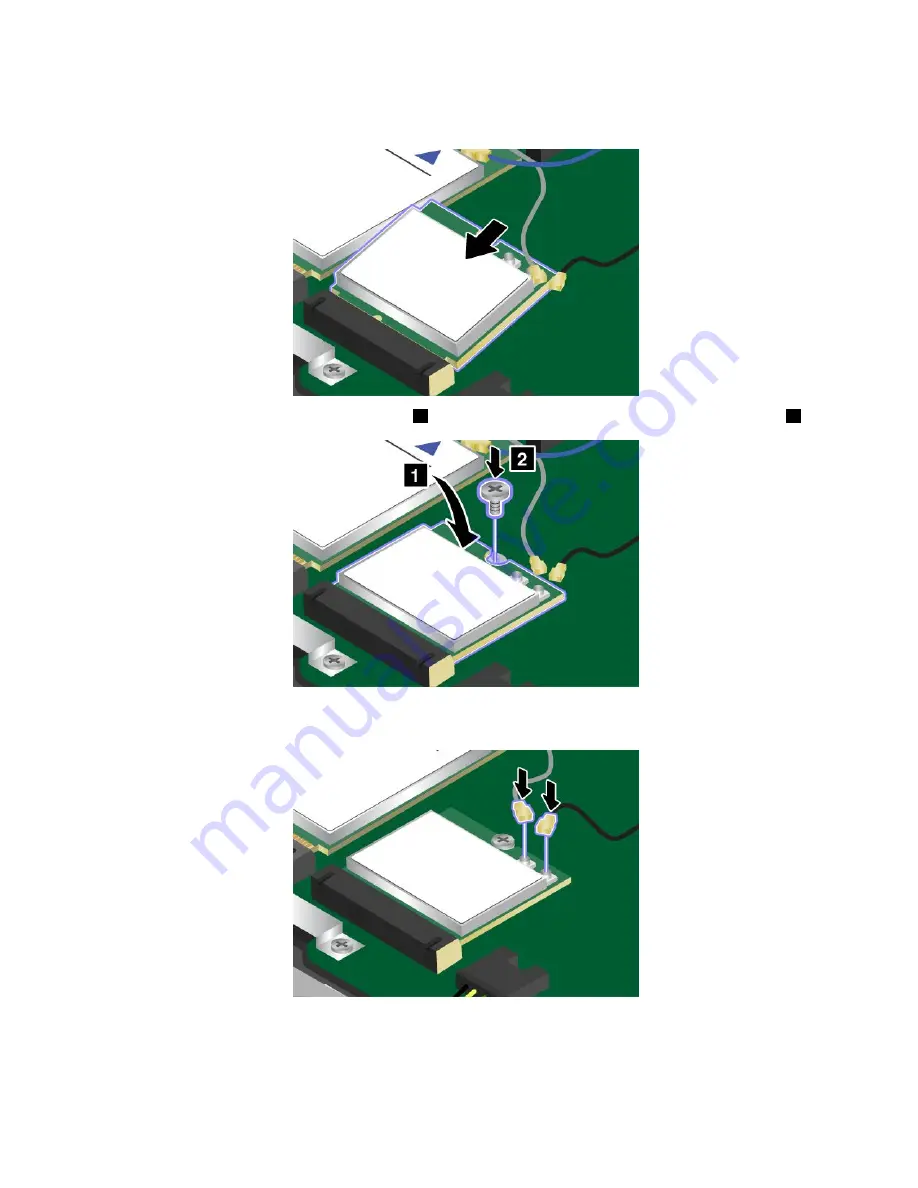
7. Align the notched edge of the new wireless LAN card with the key in the slot. Then carefully insert
the card into the slot.
8. Pivot the new wireless LAN card downward
1
and then install the screw to secure the card in place
2
.
9. Connect the antenna cables to the new wireless LAN card. Ensure that you attach the gray cable to the
main connector on the card, and the black cable to the auxiliary connector on the card.
10. Reinstall the base cover assembly. See “Replacing the base cover assembly” on page 67.
11. Turn the computer over again. Connect the ac power adapter and all cables.
76
User Guide
Summary of Contents for X240s
Page 1: ...User Guide ThinkPad X240s ...
Page 6: ...iv User Guide ...
Page 16: ...xiv User Guide ...
Page 34: ...18 User Guide ...
Page 56: ...40 User Guide ...
Page 72: ...56 User Guide ...
Page 96: ...80 User Guide ...
Page 114: ...98 User Guide ...
Page 120: ...104 User Guide ...
Page 136: ...120 User Guide ...
Page 140: ...124 User Guide ...
Page 146: ...130 User Guide ...
Page 150: ...134 User Guide ...
Page 152: ...Ukraine RoHS 136 User Guide ...
Page 157: ......
Page 158: ......
Page 159: ......


