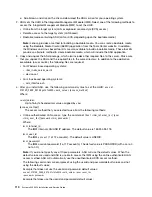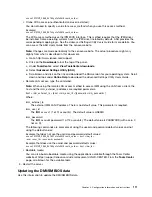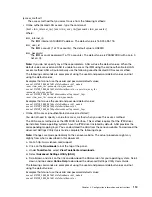
The Desktop Management Interface (DMI) must be updated when the system board is replaced. Use the
Advanced Settings Utility (ASU) to update the DMI in the UEFI-based server. The ASU is an online tool
that supports several operating systems. Make sure that you download the version for your operating
system. You can download the ASU from the Lenovo website. To download the ASU and update the DMI,
complete the following steps.
Note:
Changes are made periodically to the Lenovo website. The actual procedure might vary slightly
from what is described in this document.
1. Download the Advanced Settings Utility (ASU):
a. Go to http://www.lenovo.com/support.
b. Click on the
Downloads
tab at the top of the panel.
c. Under
ToolsCenter
, select
View ToolsCenter downloads
.
d. Select
Advanced Settings Utility (ASU)
.
e. Scroll down and click on the link and download the ASU version for your operating system.
2. ASU sets the DMI in the Integrated Management Module (IMM). Select one of the following methods to
access the Integrated Management Module (IMM) to set the DMI:
• Online from the target system (LAN or keyboard console style (KCS) access)
• Remote access to the target system (LAN based)
• Bootable media containing ASU (LAN or KCS, depending upon the bootable media)
Note:
Lenovo provides a method for building a bootable media. You can create a bootable media
using the Bootable Media Creator (BoMC) application from the Tools Center website. In addition,
the Windows and Linux based tool kits are also available to build a bootable media. These tool kits
provide an alternate method to create bootable media, which will include the ASU application.
3. Copy and unpack the ASU package, which also includes other required files, to the server. Make sure
that you unpack the ASU and the required files to the same directory. In addition to the application
executable (asu or asu64), the following files are required:
• For Windows based operating systems:
– ibm_rndis_server_os.inf
– device.cat
• For Linux based operating systems:
– cdc_interface.sh
4. After you install ASU, type the following commands to set the DMI:
asu set SYSTEM_PROD_DATA.SysInfoProdName <m/t_model> [access_method]
asu set SYSTEM_PROD_DATA.SysInfoSerialNum <s/n> [access_method]
asu set SYSTEM_PROD_DATA.SysEncloseAssetTag <asset_tag> [access_method]
Where:
<m/t_model>
The server machine type and model number. Type
mtm xxxxyyy
, where
xxxx
is the machine type
and
yyy
is the server model number.
<s/n>
The serial number on the server. Type
sn zzzzzzz
, where
zzzzzzz
is the serial number.
<asset_method>
The server asset tag number. Type
asset aaaaaaaaaaaaaaaaaaaaaaaaaaaaaaaaa
, where
aaaaaaaaaaaaaaaaaaaaaaaaaaaaaaaaa
is the asset tag number.
112
System x3300 M4 Installation and Service Guide
Summary of Contents for x3300 M4 7382
Page 1: ...System x3300 M4 Installation and Service Guide Machine Type 7382 ...
Page 6: ...iv System x3300 M4 Installation and Service Guide ...
Page 14: ...xii System x3300 M4 Installation and Service Guide ...
Page 166: ...152 System x3300 M4 Installation and Service Guide ...
Page 176: ...162 System x3300 M4 Installation and Service Guide ...
Page 704: ...690 System x3300 M4 Installation and Service Guide ...
Page 888: ...874 System x3300 M4 Installation and Service Guide ...
Page 896: ...Taiwan BSMI RoHS declaration 882 System x3300 M4 Installation and Service Guide ...
Page 906: ...892 System x3300 M4 Installation and Service Guide ...
Page 907: ......
Page 908: ......


