background image

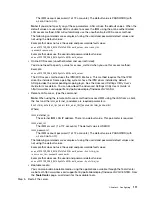
Step 11. Select the updates that you want to install, and click

Install

to start the installation wizard.

Updating the Universal Unique Identifier (UUID)

The Universal Unique Identifier (UUID) must be updated when the system board is replaced. Use the
Advanced Settings Utility to update the UUID in the UEFI-based server.

The ASU is an online tool that supports several operating systems. Make sure that you download the
version for your operating system. You can download the ASU from the website. To download the ASU and
update the UUID, complete the following steps.

Note:

Changes are made periodically to the website. The actual procedure might vary slightly from what is

described in this document.

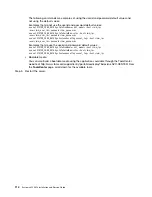
Step 1.

Download the Advanced Settings Utility (ASU) at
http://www.ibm.com/support/entry/portal/docdisplay?lndocid=LNVO-ASU.

Step 2.

ASU sets the UUID in the Integrated Management Module (IMM). Select one of the following
methods to access the Integrated Management Module (IMM) to set the UUID:

• Online from the target system (LAN or keyboard console style (KCS) access)

• Remote access to the target system (LAN based)

• Bootable media containing ASU (LAN or KCS, depending upon the bootable media)

Step 3.

Copy and unpack the ASU package, which also includes other required files, to the server. Make
sure that you unpack the ASU and the required files to the same directory. In addition to the
application executable (asu or asu64), the following files are required:

• For Windows based operating systems:

– ibm_rndis_server_os.inf

– device.cat

• For Linux based operating systems:

– cdc_interface.sh

Step 4.

After you install ASU, use the following command syntax to set the UUID:

asu set SYSTEM_PROD_DATA.SysInfoUUID <uuid_value> [access_method]

Where:

<uuid_value>

Up to 16-byte hexadecimal value assigned by you.

[access_method]

The access method that you selected to use from the following methods:

• Online authenticated LAN access, type the command:

[host <imm_internal_ip>] [user <imm_user_id>][password <imm_password>]

Where:

imm_internal_ip

The IMM internal LAN/USB IP address. The default value is 169.254.95.118.

imm_user_id

The IMM

account

(1 of 12 accounts). The default value is USERID.

imm_password

110

System x3550 M4 Installation and Service Guide

Summary of Contents for x3550 M4

Page 1: ...System x3550 M4 Installation and Service Guide Machine Type 7914 ...

Page 2: ...nformation document and the Safety Information and Environmental Notices and User Guide documents on the Documentation CD Twentieth Edition November 2015 Copyright Lenovo 2012 2015 LIMITED AND RESTRICTED RIGHTS NOTICE If data or software is delivered pursuant a General Services Administration GSA contract use reproduction or disclosure is subject to restrictions set forth in Contract No GS 35F 059...

Page 3: ... drive 39 Installing an optional DVD drive cable 43 Installing a memory module 45 DIMM installation sequence 48 Memory mirrored channel 48 Memory rank sparing 50 Installing a memory module 50 Installing an adapter 52 Installing a ServeRAID SAS SATA controller 55 Installing the ServeRAID adapter memory module 60 Installing a RAID adapter battery or flash power module 61 Installing the dual port net...

Page 4: ...62 Out of band method 162 Automated boot recovery ABR 162 Nx boot failure 162 Chapter 5 Parts listing Lenovo System x3550 M4 Type 7914 165 Replaceable server components 165 Structural parts 175 Power cords 176 Chapter 6 Removing and replacing components 179 Returning a device or component 179 Internal cable routing and connectors 179 Cabling SAS SATA ServeRAID Controller 179 Cabling backplane 181 ...

Page 5: ...e documentation 974 Getting help and information from the World Wide Web 974 How to send DSA data 974 Creating a personalized support web page 974 Software service and support 975 Hardware service and support 975 Taiwan product service 975 Appendix E Notices 977 Trademarks 978 Important notes 978 Recycling information 978 Particulate contamination 979 Telecommunication regulatory statement 979 Ele...

Page 6: ...iv System x3550 M4 Installation and Service Guide ...

Page 7: ...en Ennen kuin asennat tämän tuotteen lue turvaohjeet kohdasta Safety Information Avant d installer ce produit lisez les consignes de sécurité Vor der Installation dieses Produkts die Sicherheitshinweise lesen Prima di installare questo prodotto leggere le Informazioni sulla Sicurezza Les sikkerhetsinformasjonen Safety Information før du installerer dette produktet Antes de instalar este produto le...

Page 8: ...he hazard is and whether you must correct the problem before you work on the product Consider the following conditions and the safety hazards that they present Electrical hazards especially primary power Primary voltage on the frame can cause serious or fatal electrical shock Explosive hazards such as a damaged CRT face or a bulging capacitor Mechanical hazards such as loose or missing hardware To...

Page 9: ...wer off EPO switch disconnecting switch or electrical outlet so that you can turn off the power quickly in the event of an electrical accident Disconnect all power before you perform a mechanical inspection work near power supplies or remove or install main units Before you work on the equipment disconnect the power cord If you cannot disconnect the power cord have the customer power off the wall ...

Page 10: ...ny cables or perform installation maintenance or reconfiguration of this product during an electrical storm Connect all power cords to a properly wired and grounded electrical outlet Connect to properly wired outlets any equipment that will be attached to this product When possible use one hand only to connect or disconnect signal cables Never turn on any equipment when there is evidence of fire w...

Page 11: ...ations Statement 3 CAUTION When laser products such as CD ROMs DVD drives fiber optic devices or transmitters are installed note the following Do not remove the covers Removing the covers of the laser product could result in exposure to hazardous laser radiation There are no serviceable parts inside the device Use of controls or adjustments or performance of procedures other than those specified h...

Page 12: ...evice The device also might have more than one power cord To remove all electrical current from the device ensure that all power cords are disconnected from the power source 1 2 Statement 6 CAUTION If you install a strain relief bracket option over the end of the power cord that is connected to the device you must connect the other end of the power cord to an easily accessible power source Stateme...

Page 13: ... this label attached There are no serviceable parts inside these components If you suspect a problem with one of these parts contact a service technician Statement 12 CAUTION The following label indicates a hot surface nearby Statement 26 CAUTION Do not place any object on top of rack mounted devices Statement 27 CAUTION Hazardous moving parts are nearby Copyright Lenovo 2012 2015 xi ...

Page 14: ...he rack cabinet Always install stabilizer brackets on the rack cabinet Always install servers and optional devices starting from the bottom of the rack cabinet Always install the heaviest devices in the bottom of the rack cabinet xii System x3550 M4 Installation and Service Guide ...

Page 15: ...rmation see What your server offers on page 9 and Reliability availability and serviceability on page 12 You can obtain up to date information about the server and other server products at http shop lenovo com us en systems At http www ibm com support mysupport you can create a personalized support page by identifying products that are of interest to you From this personalized page you can subscri...

Page 16: ...s that are not described in the documentation that comes with the server and the documentation might be updated occasionally to include information about those features or technical updates might be available to provide additional information that is not included in the server documentation To check for updates go to http www lenovo com support Record information about the server in the following ...

Page 17: ...R code http ibm co 114FFrw Figure 4 QR code You can download an ServerGuide Setup and Installation CD to help you configure the hardware install device drivers and install the operating system For a list of supported optional devices for the server see http www lenovo com us en serverproven See the Rack Installation Instructions document on the System x Documentation CD for complete rack installat...

Page 18: ... under Topic Description To select more than one document press and hold the Ctrl key while you select the documents Click View to view the selected document or documents in Acrobat Reader or xpdf If you selected more than one document all the selected documents are opened in Acrobat Reader or xpdf To search all the documents type a word or word string in the Search field and click Search The docu...

Page 19: ...ter for System x and BladeCenter is at http publib boulder ibm com infocenter toolsctr v1r0 The server might have features that are not described in the documentation that you received with the server The documentation might be updated occasionally to include information about those features or technical updates might be available to provide additional information that is not included in the serve...

Page 20: ... inch models Up to three 3 5 inch hot swap SAS SATA or simple swap SATA hard disk drive bays Attention As a general consideration do not mix standard 512 byte and advanced 4 KB format drives in the same RAID array because it may lead to potential performance issues PCI expansion slots Supports two PCI riser slots Slot 1 supports low profile cards PCI Express 3 0 x16 Slot 2 supports half length ful...

Page 21: ...mperature by 1 C for every 175 m increase in altitude Maximum altitude 3 050 m 10 000 ft 5 C to 28 C 41 F to 82 4 F Humidity Non condensing 12 C dew point 10 4 F Relative humidity 8 to 85 Maximum dew point 24 C 75 2 F Maximum rate of temperature change Tape drives 5 C hr 41 F hr Hard disk drives 20 C hr 68 F hr Server off Particulate contamination airborne particulates and reactive gases acting al...

Page 22: ...ordance with ISO 7779 and reported in conformance with ISO 9296 Actual sound pressure levels in a given location might exceed the average values stated because of room reflections and other nearby noise sources The noise emission level stated in the declared upper limit sound power level in bels for a random sample of system EU Regulation 617 2013 Technical Documentation International Business Mac...

Page 23: ... Systems Director and Active Energy Manager see the Systems Director Information Center at http pic dhe ibm com infocenter director pubs index jsp topic 2Fcom ibm director main helps doc 2 Ffqm0_main html or see http www ibm com systems management director downloads html Dynamic System Analysis DSA The server comes with the Dynamic System Analysis DSA Preboot diagnostic program DSA collects and an...

Page 24: ...emand enablement for hardware and firmware options For additional information see Using the integrated management module on page 104 and the Integrated Management Module II Users Guide at http www ibm com support entry portal docdisplay lndocid MIGR 5086346 Integrated network support The server comes with an integrated dual port Intel Gigabit Ethernet controller which supports connection to a 10 M...

Page 25: ... watt or 750 watt hot swap power supplies and six dual motor hot swap fans which provide redundancy and hot swap capability for a typical configuration The redundant cooling by the fans in the server enables continued operation if one of the fans fails The server comes with the minimum of one 550 watt or 750 watt hot swap power supply and four fans You must install the fourth and sixth fans when y...

Page 26: ...rs Chipkill memory protection Double device data correction DDDC for x4 DRAM technology DIMMs available on 16 GB DIMMs only Ensures that data is available on a single x4 DRAM DIMM after a hard failure of up to two DRAM DIMMs One x4 DRAM DIMM in each rank is reserved as a space device Diagnostic support for ServeRAID and Ethernet adapters Error codes and messages Error correcting code ECC L3 cache ...

Page 27: ...egrated Circuit IC protocol bus Uncorrectable error UE detection Upgradeable POST Unified Extensible Firmware Interface UEFI diagnostics IMM firmware and read only memory ROM resident code locally or over the LAN Vital product data VPD on microprocessors system board power supplies and SAS SATA hot swap hard disk drive or solid state drive backplane Wake on LAN capability Systems Director Systems ...

Page 28: ...ocumentation on the Systems Director DVD that comes with the server the Systems Director Information Center at http pic dhe ibm com infocenter director pubs index jsp topic 2Fcom ibm director main helps doc 2 Ffqm0_main html and the Systems Management website at http shop lenovo com us en systems solutions which presents an overview of Systems Management and Systems Director Server controls LEDs a...

Page 29: ...Optional DVD drive activity LED When this LED is lit it indicates that the optional DVD drive is in use Operator information panel This panel contains controls and LEDs that provide information about the status of the server For information about the controls and LEDs on the operator information panel see Operator information panel on page 15 Operator information panel release latch Press the blue...

Page 30: ...LED to visually locate the server among other servers A system locator LED is also on the rear of the server This LED is used as a presence detection button as well You can use Systems Director or IMM web interface to light this LED remotely This LED is controlled by the IMM The locator button is pressed to visually locate the server among the others servers Check log LED When this yellow LED is l...

Page 31: ...t path diagnostics panel press the blue release latch on the operator information panel Pull forward on the panel until the hinge of the operator information panel is free of the server chassis Then pull down on the panel so that you can view the light path diagnostics panel information 00000000000000000000 00000000000000000000 00000000000000000000 00000000000000000000 00000000000000000000 0000000...

Page 32: ...e aware of the last failure but will not take immediate action to correct the problem Reset button Press this button to reset the server and run the power on self test POST You might have to use a pen or the end of a straightened paper clip to press the button The Reset button is in the lower right corner of the light path diagnostics panel Rear view The following illustration shows the connectors...

Page 33: ...nt module II IMM2 The IMM2 can take control of the shared serial port to redirect serial traffic using Serial over LAN SOL USB connectors Connect a USB device such as a USB mouse or keyboard to any of these connectors Systems management Ethernet connector Use this connector to connect the server to a network for full systems management information control This connector is used only by the integra...

Page 34: ...er supply through the power cord During typical operation both the IN OK and OUT OK power LEDs are lit For any other combination of LEDs see DC power supply LEDs on page 130 OUT OK power LED Each hot swap dc power supply has an OUT OK power LED When the OUT OK power LED is lit it indicates that the power supply is supplying adequate dc power to the system During typical operation both the IN OK an...

Page 35: ...g the power control button The server can also be turned on in any of the following ways If a power failure occurs while the server is turned on the server will restart automatically when power is restored If your operating system supports the Wake on LAN feature the Wake on LAN feature can turn on the server Notes 1 When 4 GB or more of memory physical or logical is installed some memory is reser...

Page 36: ...can press the power control button to start an orderly shutdown of the operating system and turn off the server if your operating system supports this feature If the operating system stops functioning you can press and hold the power control button for more than 4 seconds to turn off the server The server can be turned off by Wake on LAN feature with the following limitation Note When you install ...

Page 37: ...sure that the server is working correctly Start the server and make sure that the operating system starts if an operating system is installed or that a 19990305 error code is displayed indicating that an operating system was not found but the server is otherwise working correctly If the server is not working correctly see Running the DSA Preboot diagnostic programs on page 137 for information abou...

Page 38: ...tp www ibm com de support ecurep send_http html Standard upload with the system serial number http www ecurep ibm com app upload_hw Secure upload http www ibm com de support ecurep send_http html secure Secure upload with the system serial number https www ecurep ibm com app upload_hw Server components The following illustration shows the major components in the server The illustrations in this do...

Page 39: ...000000000 000000000000 000000 000000 000000 000000 0000 0000 Figure 14 Server components Blue on a component indicates touch points where you can grip the component to remove it from or install it in the server open or close a latch and so on Orange on a component or an orange label on or near a component indicates that the component can be hot swapped which means that if the server and operating ...

Page 40: ...additional procedures that you might have to perform before you remove or install the component System board internal connectors The following illustration shows the internal connectors on the system board Figure 15 System board internal connectors System board external connectors The following illustration shows the external connectors on the system board 26 System x3550 M4 Installation and Servi...

Page 41: ...onnect all power cords and external cables Review the information in Safety on page v Installation guidelines on page 31 Handling static sensitive devices on page 33 and Turning off the server on page 21 2 Any system board switch or jumper block that is not shown in the illustrations in this document are reserved 3 If there is a clear protective sticker on the top of the switch blocks you must rem...

Page 42: ...are ROM page JP6 System TPM physical presence jumper Pins 1 and 2 Normal default Pins 2 and 3 Indicates a physical presence to the system TPM Notes 1 If no jumper is present the server responds as if the pins are set to the default 2 Changing the position of the UEFI boot backup jumper JP2 from pins 1 and 2 to pins 2 and 3 before the server is turned on alters which flash ROM page is loaded Do not...

Page 43: ...ator password check if an administrator password is set See Passwords on page 101 for additional information about passwords The following table describes the functions of the button on the system board Table 4 Button on the server Button name Function Force NMI button This button is on the rear of the server Press this button to force a nonmaskable interrupt to the microprocessor You might have t...

Page 44: ...re 18 System board LEDs System board optional device connectors The following illustration shows the connectors on the system board for the optional devices 30 System x3550 M4 Installation and Service Guide ...

Page 45: ...t strap or other grounding system when removing or installing a hot swap device Before you install optional devices read the following information Read the safety information in Safety on page v the guidelines in Working inside the server with the power on on page 33 and Handling static sensitive devices on page 33 This information will help you work safely Make sure that the devices that you are ...

Page 46: ...r back lift by standing or by pushing up with your leg muscles Make sure that you have an adequate number of properly grounded electrical outlets for the server monitor and other devices Back up all important data before you make changes to disk drives Have a small flat blade screwdriver a small Phillips screwdriver and a T8 torx screwdriver available To view the error LEDs on the system board and...

Page 47: ... might result in the loss of data To avoid this potential problem always use an electrostatic discharge wrist strap or other grounding system when you work inside the server with the power on You might have to have the server turned on while the cover is off to look at light path diagnostics LEDs or replace hot swap components Follow these guidelines when you work inside a server that is turned on...

Page 48: ...tep 1 Read the safety information that begins on Safety on page v and Installation guidelines on page 31 Step 2 Turn off the server and peripheral devices and disconnect the power cords and all external cables if necessary Step 3 If the server has been installed in a rack slide the server out from the rack enclosure Step 4 Pull up firmly on the blue latch on the top in the center of the front of t...

Page 49: ...h the air baffle removed might damage server components Installing drives The following notes describe the type of hard disk drives that the server supports and other information that you must consider when you install a hard disk drive For a list of supported hard disk drives see http www lenovo com us en serverproven Locate the documentation that comes with the drive and follow those instruction...

Page 50: ...printed on the front of the server The following illustration shows the location of the IDs of the hard disk drives The ID numbers and the drive bay numbers are the same 00000000000000000000000000000000000 00000000000000000000000000000000000 00000000000000000000000000000000000 Figure 22 2 5 inch hot swap hard disk drive IDs 3 5 inch hot swap hard disk drive IDs The hot swap drive ID that is assign...

Page 51: ...0000000000000000000000000 00000000000000000000000000000000000000 00000000000000000000000000000000000000 Figure 25 3 5 inch simple swap hard disk drive IDs Installing hot swap hard disk drives Use this information to install hot swap hard disk drives To install a hot swap SAS or SATA hard disk drive complete the following steps Note If you have only one hard disk drive you must install it in the ba...

Page 52: ...ll simple swap hard disk drives You must turn off the server before installing simple swap drives in the server Before you install a simple swap SATA hard disk drive read the following information For a list of supported hard disk drives see http www lenovo com us en serverproven Locate the documentation that comes with the hard disk drive and follow those instructions in addition to the instructi...

Page 53: ... 000000000000000 000000000000000 000000000000000 000000000000000 000000000000000 000000000000000 00 00 000 000 00 00 000 000 Figure 27 2 5 inch simple swap hard disk drive installation 000 000 000 000 000 000 000000000000000 000000000000000 000000000000000 000000000000000 000000000000000 000000000000000 000000000000000 000000000000000 000000000000000 00000 00000 00000 00000 00000 00000 00000 00000...

Page 54: ...led Locate the blue release tab on the rear of the DVD drive filler panel then while you press the tab push the DVD drive filler panel out of the drive bay 0000000000000 0000000000000 0000000000000 0000000000000 0000000000000 0000000000000 0000000000000 0000000000000 0000000000000 Figure 29 DVD drive filler panel removal Step 5 Remove the retention clip from the side of the DVD drive filler panel ...

Page 55: ...er de Classe 1 Step 6 Touch the static protective package that contains the new optical drive to any unpainted metal surface on the server then remove the optical drive from the package and place it on a static protective surface Step 7 Follow the instructions that come with the DVD drive to set any jumpers or switches Step 8 Attach the drive retention clip that you removed from the DVD drive fill...

Page 56: ...0000 0000000000000 0000000000000 0000000000000 Figure 31 DVD drive installation Step 10 Connect the DVD drive cable see Replacing the DVD drive cable on page 211 The following illustration shows the cable routing for the DVD drive 42 System x3550 M4 Installation and Service Guide ...

Page 57: ...Read the safety information that begins on Safety on page v and Installation guidelines on page 31 Step 2 Turn off the server and peripheral devices and disconnect the power cords and all external cables Step 3 Remove the cover see Removing the cover on page 34 Step 4 Remove the air baffle see Removing the air baffle on page 34 Step 5 Align the cable connector with the connector on the rear of the...

Page 58: ...lustration shows cable routing for the DVD cable Attention Follow the optical drive cable routing as the illustration shows Make sure that the cable is not pinched and does not cover any connectors or obstruct any components on the system board 44 System x3550 M4 Installation and Service Guide ...

Page 59: ...nges When you restart the server the system displays a message that indicates that the memory configuration has changed The server supports only industry standard double data rate 3 DDR3 1066 1333 1600 or 1866 MHz PC3 8500 PC3 10600 PC3 12800 or PC3 14900 registered or unbuffered synchronous dynamic random access memory SDRAM dual inline memory modules DIMMs with error correcting code ECC See http...

Page 60: ...0 66 GBps DDR3 1333 SDRAMs 8 byte primary data bus 12800 12 80 GBps DDR3 1600 SDRAMs 8 byte primary data bus 14900 14 93 GBps DDR3 1866 SDRAMs 8 byte primary data bus m is the DIMM type E Unbuffered DIMM UDIMM with ECC x72 bit module data bus L Load Reduction DIMM LRDIMM R Registered DIMM RDIMM U Unbuffered DIMM with no ECC x64 bit primary data bus aa is the CAS latency in clocks at maximum operat...

Page 61: ... RDIMM 4 GB 96 GB 24 Dual rank RDIMM 4 GB 96 GB 24 Dual rank RDIMM 8 GB 192 GB 24 Dual rank RDIMM 16 GB 384 GB 16 Quad rank RDIMM 8 GB 128 GB 24 Quad rank LRDIMM 32 GB 768 GB The UDIMM option that is available for the server is 4 GB The server supports a minimum of 4 GB and a maximum of 64 GB of system memory using UDIMMs The RDIMM options that are available for the server are 2 GB 4 GB 8 GB and 1...

Page 62: ...installed in slot 1 When you install additional DIMMs install them in the order shown in the following table to optimize system performance In general all three channels on the memory interface for each microprocessor can be populated in any order and have no matching requirements Table 6 Normal mode DIMM installation sequence Number of installed microprocessor DIMM connector population sequence O...

Page 63: ...able when you use memory mirrored channel For UDIMMs DIMM connectors 3 6 7 and 10 for microprocessor 1 and DIMM connectors 15 18 19 and 22 for microprocessor 2 are not used in memory mirrored channel mode The following diagram lists the DIMM connectors on each memory channel Figure 36 Connectors on each memory channel The following table shows the installation sequence for memory mirrored channel ...

Page 64: ...ad rank DIMM in a channel Install at least two single rank or dual rank DIMMs in a channel Table 8 Memory rank sparing mode DIMM population sequence Number of DIMMs Number of installed microprocessor DIMM connector First pair of DIMMs 1 1 2 Second pair of DIMMs 1 4 5 Third pair of DIMMs 1 8 9 Fourth pair of DIMMs 1 11 12 Fifth pair of DIMMs 1 7 10 Sixth pair of DIMMs 1 3 6 Seventh pair of DIMMs 2 ...

Page 65: ...the server Then remove the DIMM from the package Step 7 Turn the DIMM so that the alignment slot align correctly with the alignment tab Step 8 Insert the DIMM into the connector by aligning the edges of the DIMM with the slots at the ends of the DIMM connector see System board optional device connectors on page 30 for the locations of the DIMM connectors Step 9 Firmly press the DIMM straight down ...

Page 66: ... 600 adapter 128 GB Quadro 2000 adapter 512 GB Read the following table before installing NAND flash adapters Table 10 Adapter configurations Description Option part number PCI riser 1 PCI riser 2 Emulex dual port 10GbE SFP embedded adapter 00D8540 Six fans installed required1 Six fans installed required1 365 GB High IOPS MLC mono adapter 46C9078 Six fans installed required1 Six fans installed req...

Page 67: ...erver is powered on locally the active power manager active power management event signal will be enabled by the system board logic The server provides two PCI riser card slots on the system board The following information describes the PCI riser card slots and the type of adapters that the riser cards support If you want to install a PCI Express or PCI X adapter you must order the PCI riser card ...

Page 68: ...y Press the edge of the connector firmly into the PCI riser card assembly Make sure that the adapter snaps into the PCI riser card assembly securely 0000 0000 0000 0000 0000000 0000000 0000000 0000000 0000000 Figure 39 Adapter installation Attention When you install an adapter make sure that the adapter is correctly seated in the riser card assembly and that the riser card assembly is securely sea...

Page 69: ...RAID M5110 SAS SATA or a ServeRAID 5210 adapter before installing a SAS SATA adapter in the dedicated connector on the system board Attention You can not install ServeRAID H1110 when microprocessor Intel Xeon E5 2637 FRU part number 49Y8124 is installed You can not install ServeRAID M1115 or 6Gb performance optimized HBA when Quadro 2000 is installed You can replace the ServeRAID controller with a...

Page 70: ...ctor on the system board until it is firmly seated The retention brackets secure the SAS SATA adapter in place when the adapter is firmly seated into the connector Note Remove the PCI bracket that come with ServeRAID H1110 ServeRAID M1115 or ServeRAID M5110 SAS SATA adapter before installing a SAS SATA adapter in the dedicated connector on the system board Figure 41 ServeRAID adapter installation ...

Page 71: ...00 0000 0000 0000 0000000 0000000 0000000 0000000 0000000 Figure 42 Adapter installation Step 8 Route the backplane signal cables see Cabling backplane on page 181 Chapter 2 Installing optional devices 57 ...

Page 72: ...outing Step 9 Connect the signal cables to the SAS SATA adapter a ServeRAID H1110 adapter Take the signal cable that is attached to the drive backplane for drive bays 0 through 3 and connect it to the SAS SATA connector on the ServeRAID adapter 58 System x3550 M4 Installation and Service Guide ...

Page 73: ...ive bays 0 through 3 and connect it to the other connector port 0 on the adapter Figure 45 ServeRAID M1115 adapter cable routing c ServeRAID M5110 adapter Take the signal cable that is attached to the drive backplane for drive bays 4 through 7 and connect it to the ServeRAID adapter connector for drive bays 4 through 7 port 1 Connect the other signal cable that is attached to the drive backplane f...

Page 74: ...stall the ServeRAID adapter memory module complete the following steps Step 1 Read the safety information that begins on Safety on page v and Installation guidelines on page 31 Step 2 Turn off the server and peripheral devices and disconnect all power cords Step 3 Remove the cover see Removing the cover on page 34 Step 4 Remove the ServeRAID SAS SATA controller see Removing a ServeRAID SAS SATA co...

Page 75: ...r models support up to two batteries or flash power modules To install a RAID adapter battery or flash power module in the server complete the following steps Step 1 Read the safety information that begins on Safety on page v and Installation guidelines on page 31 Step 2 Turn off the server and peripheral devices and disconnect all power cords and external devices Step 3 Remove the cover see Remov...

Page 76: ...em board Step 7 Remove any cable covering or obstructing the battery holder before opening the battery holder Step 8 Install the battery or flash power module a Release the retention clip in the open position b Align the cable connector with the slot on the holder Place the battery or flash power module into the holder and make sure that the holder engages the battery or flash power module securel...

Page 77: ...0 0000000 0000000 0000000 Figure 49 RAID adapter battery or flash power module installation Note The positioning of the battery or flash power module depends on the type of the battery or flash power module that you install c Connect the other end of the cable to the battery or flash power module d Lower and press down on the retention clip until it snaps in place to hold the battery or flash powe...

Page 78: ...d information 3 Press Enter to configure the network adapter settings To convert the NIC iSCSI FCoE for Emulex Dual Port 10GbE SFP Embedded VFA III complete the following steps 1 From the Setup utility main menu see Using the Setup utility on page 97 select System Settings Network and press Enter 2 From the Network Device List select Emulex network adapter Note You might need to enter each item di...

Page 79: ...on guidelines on page 31 Step 2 Turn off the server and peripheral devices and disconnect the power cords and all external cables if necessary Step 3 Remove the cover see Removing the cover on page 34 Step 4 Remove the PCI riser card assembly if installed from PCI riser connector 2 see Removing a PCI riser card assembly on page 220 Step 5 Remove the adapter filler panel on the rear of the chassis ...

Page 80: ...ly seated on the connector on the system board Attention Make sure the port connectors on the adapter are aligned properly with the chassis on the rear of the server An incorrectly seated adapter might cause damage to the system board or the adapter Step 9 Fasten the thumbscrew on the rear side of the chassis 66 System x3550 M4 Installation and Service Guide ...

Page 81: ...tall an additional power supply or replace a power supply with one of a different wattage you may use the Power Configurator utility to determine current system power consumption For more information and to download the utility go to http www ibm com systems bladecenter resources powerconfig html The server comes with one hot swap 12 volt output power supply that connects to power supply bay 1 The...

Page 82: ...r remove the cover on a power supply or any part that has the following label attached Hazardous voltage current and energy levels are present inside any component that has this label attached There are no serviceable parts inside these components If you suspect a problem with one of these parts contact a service technician To install a hot swap ac power supply complete the following steps Step 1 ...

Page 83: ...the handle and cable tie if any so that it does not accidentally become unplugged Step 6 Connect the power cord for the new power supply to the power cord connector on the power supply Step 7 Connect the other end of the power cord to a properly grounded electrical outlet Step 8 Make sure that the ac power LED and the dc power LED on the ac power supply are lit indicating that the power supply is ...

Page 84: ...onsider when you install a power supply Before you install an additional power supply or replace a power supply with one of a different wattage you may use the Power Configurator utility to determine current system power consumption For more information and to download the utility go to http www ibm com systems bladecenter resources powerconfig html The server comes with one hot swap 12 volt outpu...

Page 85: ... 29 CAUTION This equipment is designed to permit the connection of the earthed conductor of the dc supply circuit to the earthing conductor at the equipment This equipment is designed to permit the connection of the earthed conductor of the dc supply circuit to the earthing conductor at the equipment If this connection is made all of the following conditions must be met This equipment shall be con...

Page 86: ...t is to be attached to this product 2 Attach signal cables to the product 3 Attach power cords to the product For ac systems use appliance inlets For dc systems ensure correct polarity of 48 V dc connections RTN is and 48 V dc is Earth ground should use a two hole lug for safety 4 Attach signal cables to other devices 5 Connect power cords to their sources 6 Turn ON all the power sources 1 Turn OF...

Page 87: ...e sure to read the multilingual safety instructions on the CD that comes with the server before you use the product Installing a hot swap dc power supply To install a hot swap dc power supply complete the following steps Attention Only trained service personnel other than Lenovo service technicians are authorized to install and remove the 48 volt dc power supply and make the connections to and dis...

Page 88: ...r supply connects firmly into the power supply connector Step 7 Route the power cord through the handle and cable tie if any so that it does not accidentally become unplugged Step 8 Connect the other ends of the dc power cable to the dc power source Cut the wires to the correct length but do not cut them shorter than 150 mm 6 inch If the power source requires ring terminals you must use a crimping...

Page 89: ...he redundant power information label that comes with this option on the server cover near the power supplies Figure 59 Redundant power information label Installing a hot swap fan Use this information to install a hot swap fan The server comes standard with four dual motor hot swap cooling fans When there is one microprocessor installed install fan 1 2 3 and 5 for proper cooling Attention To ensure...

Page 90: ...0000000000000000000 0000000000000000000 0000000000000000000 0000000000000000000 0000000000000000000 0000000000000000000 0000000000000000000 0000000000000000000 0000000000000000000 Figure 60 Fan installation Step 5 Orient the fan over the fan slot in the fan assembly bracket so that the fan connector aligns with the connector on the system board 76 System x3550 M4 Installation and Service Guide ...

Page 91: ...and the fan connector is seated correctly in the connector on the system board Note Make sure that the newly installed fan aligns horizontally with other correctly seated fans for proper installation If you have other devices to install or remove do so now Otherwise go to Completing the installation on page 89 Installing a USB embedded hypervisor flash device Use this information to install a USB ...

Page 92: ...equire replacing the system board Be extremely careful the microprocessor socket contacts are very fragile Do not touch the microprocessor socket contacts Contaminants on the microprocessor contacts or microprocessor socket contacts such as oil from your skin can cause connection failures between the contacts and the socket Do not allow the thermal grease on the microprocessor and heat sink to com...

Page 93: ...res in microprocessor socket 1 Both microprocessor voltage regulator modules are integrated on the system board Read the documentation that comes with the microprocessor to determine whether you have to update the server firmware To download the latest level of server firmware and other code updates for your server go to http www ibm com support fixcentral The microprocessor speeds are automatical...

Page 94: ...n page 31 Step 2 Turn off the server and peripheral devices and disconnect the power cords and all external cables Attention When you handle static sensitive devices take precautions to avoid damage from static electricity For details about handling these devices see Handling static sensitive devices on page 33 Step 3 Remove the cover see Removing the cover on page 34 Step 4 Remove the air baffle ...

Page 95: ...processor and the microprocessor socket Step 7 Install the microprocessor in the microprocessor socket a Open the packaging that contains the new microprocessor installation tool assembly and carefully remove the installation tool assembly from the package Note Do not touch the microprocessor contacts Contaminants on the microprocessor contacts such as oil from your skin can cause connection failu...

Page 96: ... tool If using Installation Tool A twist the handle on the microprocessor tool assembly counterclockwise to the open position to insert the microprocessor into the socket and lift the installation tool out of the socket If using Installation Tool B twist the handle of the installation tool assembly counterclockwise until the microprocessor is inserted into the socket and lift the installation tool...

Page 97: ...ctly in the socket before you try to close the microprocessor retainer Do not touch the thermal material on the bottom of the heat sink or on top of the microprocessor Touching the thermal material will contaminate it Step 8 Remove the microprocessor socket cover tape or label from the surface of the microprocessor socket if one is present Store the socket cover in a safe place Chapter 2 Installin...

Page 98: ...t levers and retainer engagement a Close the microprocessor retainer on the microprocessor socket b Identify which release lever is labeled as the first release lever to close and close it c Close the second release lever on the microprocessor socket Attention If you are installing a new heat sink do not set down the heat sink after you remove the plastic cover Do not touch the thermal grease on t...

Page 99: ...oper alignment Figure 73 Heat sink installation c Align and place the heat sink on top of the microprocessor in the retention bracket thermal material side down d Press firmly on the heat sink e Rotate the heat sink retention module release lever to the closed position and hook it underneath the lock tab Step 11 If you installed the second microprocessor install the fourth and sixth fans see Repla...

Page 100: ... the following steps Step 1 Place the heat sink on a clean work surface Step 2 Remove the cleaning pad from its package and unfold it completely Step 3 Use the cleaning pad to wipe the thermal grease from the bottom of the heat sink Note Make sure that all of the thermal grease is removed Step 4 Use a clean area of the cleaning pad to wipe the thermal grease from the microprocessor then dispose of...

Page 101: ...Turn off the server and peripheral devices and disconnect the power cords and all external cables if necessary Step 3 Remove the cover see Removing the cover on page 34 Step 4 Install the 2 5 inch hot swap hard disk drive backplane see Replacing the hot swap drive backplane on page 262 Step 5 Pull existing filler panels out of the server Keep them in a safe place 0000000000000000 0000000000000000 ...

Page 102: ...ove the cover see Removing the cover on page 34 Step 4 From the front of the server slide the operator information panel into the server until it clicks into place 000000000 000000000 000000000 000000000 000000000 000000000 Figure 77 Operator information panel installation Step 5 Inside the server connect the cable to the rear of the operator information panel assembly The following illustration s...

Page 103: ...acing the cover on page 190 Step 7 Slide the server into the rack Step 8 Reconnect the power cords and any cables that you removed Step 9 Turn on the peripheral devices and the server Completing the installation Use this information to complete the installation To complete the installation complete the following steps Step 1 If you removed the air baffle reinstall it see Replacing the air baffle o...

Page 104: ...age 31 Step 2 Turn off the server and peripheral devices and disconnect the power cords and all external cables see Turning off the server on page 21 Step 3 Align the air baffle pins with the baffle pin holes on both sides of the chassis then lower the air baffle into the server Press the air baffle down until it is securely seated Note Close the retaining clip on each end of the DIMM connector be...

Page 105: ...the server Step 4 Make sure that the cover correctly engages all the inset tabs on the server Step 5 Press down the blue latch on the top in the center of the front of the server of the cover 00000000000 00000000000 00000000000 00000000000 00000000000 00000000000 00000000000000 00000000000000 00000000000000 00000000000000 00000000000000 00000000000000 00000000000000 00000000000000 0000000 0000000 ...

Page 106: ...rt the server for the first time after you add or remove a device you might receive a message that the configuration has changed The Setup utility starts automatically so that you can save the new configuration settings Some optional devices have device drivers that you must install For information about installing device drivers see the documentation that comes with each device If the server has ...

Page 107: ...pply UpdateXpress System Packs and individual firmware and device driver updates For additional information and to download the UpdateXpress System Pack Installer go to the ToolsCenter for System x and BladeCenter at http www ibm com support entry portal docdisplay lndocid LNVO CENTER and click UpdateXpress System Pack Installer When you click an update an information page is displayed including a...

Page 108: ...ures include templates that enable replication of settings to many servers and automation that reduces hands on time and user errors Wizards and other default settings enable customization capabilities The low touch set once and walk away feature reduces the hands on server setup time from days to minutes particularly for larger deployments For information about this tool see http www ibm com supp...

Page 109: ...an alternative to the Setup utility for modifying UEFI settings and IMM settings Use the ASU program online or out of band to modify UEFI settings from the command line without the need to restart the server to run the Setup utility For more information about using this program see Advanced Settings Utility program on page 108 Configuring RAID arrays For information about configuring RAID arrays s...

Page 110: ...D and view the online overview Not all features are supported on all server models The ServerGuide program has the following features An easy to use interface Diskette free setup and configuration programs that are based on detected hardware Device drivers that are provided for the server model and detected hardware Operating system partition size and file system type that are selectable during se...

Page 111: ... installation program for the operating system takes control to complete the installation Installing your operating system without using ServerGuide Use this information to install the operating system on the server without using ServerGuide If you have already configured the server hardware and you are not using the ServerGuide program to install your operating system you can download operating s...

Page 112: ...you cannot change settings directly in the system summary Product Data Select this choice to view the system board identifier the revision level or issue date of the firmware the integrated management module and diagnostics code and the version and date This choice is on the full Setup utility menu only System Settings Select this choice to view or change the server component settings Adapters and...

Page 113: ...is choice to set the mode of operation after the power lost Commands on USB Interface Select this choice to enable or disable the Ethernet over USB interface on IMM The default is Enable Network Configuration Select this choice to view the system management network interface port the IMM MAC address the current IMM IP address and host name define the static IMM IP address subnet mask and gateway a...

Page 114: ... the operating system supports Wake on LAN functions you can specify a startup sequence for the Wake on LAN functions For example you can define a startup sequence that checks for a disc in the CD RW DVD drive then checks the hard disk drive and then checks a network adapter This choice is on the full Setup utility menu only Boot Manager Select this choice to view add delete or change the device b...

Page 115: ...e made in the settings Restore Settings Select this choice to cancel the changes that you have made in the settings and restore the previous settings Load Default Settings Select this choice to cancel the changes that you have made in the settings and restore the factory settings Exit Setup Select this choice to exit from the Setup utility If you have not saved the changes that you have made in th...

Page 116: ...stem can start You can unlock the keyboard and mouse by typing the power on password If you forget the power on password you can regain access to the server in any of the following ways If an administrator password is set type the administrator password at the password prompt Start the Setup utility and reset the power on password Remove the battery from the server wait 30 seconds and then reinsta...

Page 117: ...Device is displayed press F12 Step 4 Use the Up arrow and Down arrow keys to select an item from the menu and press Enter The next time the server starts it returns to the startup sequence that is set in the Setup utility Starting the backup server firmware The system board contains a backup copy area for the server firmware This is a secondary copy of the server firmware that you update only duri...

Page 118: ... A virtual media key which enables remote presence support remote video remote keyboard mouse and remote storage Boot sequence manipulation Command line interface Configuration save and restore DIMM error assistance The Unified Extensible Firmware Interface UEFI disables a failing DIMM that is detected during POST and the IMM lights the associated system error LED and the failing DIMM error LED En...

Page 119: ...ual drive The blue screen capture feature captures the video display contents before the IMM restarts the server when the IMM detects an operating system hang condition A system administrator can use the blue screen capture to assist in determining the cause of the hang condition Obtaining the IMM host name Use this information to obtain the IMM host name If you are logging on to the IMM for the f...

Page 120: ...web interface complete the following steps Step 1 On a system that is connected to the server open a web browser In the Address or URL field type the IP address or host name of the IMM to which you want to connect Note If you are logging on to the IMM for the first time after installation the IMM defaults to DHCP If a DHCP host is not available the IMM assigns a static IP address of 192 168 70 125...

Page 121: ...e the Up arrow and Down Arrow keys to select Embedded Hypervisor and use the plus and minus keys to move Embedded Hypervisor in the boot order When Embedded Hypervisor is in the correct location in the boot order press Enter Select Commit Changes and press Enter Step 6 Select Save Settings and then select Exit Setup If the embedded hypervisor flash device image becomes corrupt you can download the...

Page 122: ...your RAID controller To access the utility for your RAID controller complete the following steps Step 1 Turn on the server Note Approximately 10 seconds after the server is connected to power the power control button becomes active Step 2 When prompted F1 Setup is displayed press F1 If you have set an administrator password you must type the administrator password to access the full Setup utility ...

Page 123: ... updates and interim fixes complete the following steps Step 1 Make sure that you have run the Discovery and Inventory collection tasks Step 2 On the Welcome page of the Systems Director web interface click View updates Step 3 Click Check for updates The available updates are displayed in a table Step 4 Select the updates that you want to install and click Install to start the installation wizard ...

Page 124: ... target system LAN or keyboard console style KCS access Remote access to the target system LAN based Bootable media containing ASU LAN or KCS depending upon the bootable media Step 3 Copy and unpack the ASU package which also includes other required files to the server Make sure that you unpack the ASU and the required files to the same directory In addition to the application executable asu or as...

Page 125: ... Guide for more details You can download the Advanced Settings Utility User s Guide at http www ibm com support entry portal docdisplay lndocid LNVO ASU Remote LAN access type the command Note When using the remote LAN access method to access IMM using the LAN from a client the host and the imm_external_ip address are required parameters host imm_external_ip user imm_user_id password imm_password ...

Page 126: ...unpack the ASU package which also includes other required files to the server Make sure that you unpack the ASU and the required files to the same directory In addition to the application executable asu or asu64 the following files are required For Windows based operating systems ibm_rndis_server_os inf device cat For Linux based operating systems cdc_interface sh Step 4 After you install ASU type...

Page 127: ... asset_tag Online KCS access unauthenticated and user restricted You do not need to specify a value for access_method when you use this access method The KCS access method uses the IPMI KCS interface This method requires that the IPMI driver be installed Some operating systems have the IPMI driver installed by default ASU provides the corresponding mapping layer You can download the Advanced Setti...

Page 128: ...t_tag host imm_ip user imm_user_id password imm_password Examples that do use the userid and password default values asu set SYSTEM_PROD_DATA SysInfoProdName m t_model host imm_ip asu set SYSTEM_PROD_DATA SysInfoSerialNum s n host imm_ip asu set SYSTEM_PROD_DATA SysEncloseAssetTag asset_tag host imm_ip Bootable media You can also build a bootable media using the applications available through the ...

Page 129: ...rred If any hardware software or firmware was changed before the problem occurred if possible reverse those changes This might include any of the following items Hardware components Device drivers and firmware System software UEFI firmware System input power or network connections Step 2 View the light path diagnostics LEDs and event logs The server is designed for ease of diagnosis of hardware an...

Page 130: ...nning preboot diagnostics For more information about UpdateXpress System Packs see http www ibm com support entry portal docdisplay lndocid SERV XPRESSand Updating the firmware on page 93 For more information about the Bootable Media Creator see http www ibm com support entry portal docdisplay lndocid LNVO BOMC Be sure to separately install any listed critical updates that have release dates that ...

Page 131: ...enovo com support Step 8 Use the troubleshooting tables See Troubleshooting by symptom on page 138 to find a solution to a problem that has identifiable symptoms A single problem might cause multiple symptoms Follow the troubleshooting procedure for the most obvious symptom If that procedure does not diagnose the problem use the procedure for another symptom if possible If the problem remains cont...

Page 132: ...disk drive cluster two or more servers sharing external storage devices If it is part of a cluster you can run all diagnostic programs except the ones that test the storage unit that is a hard disk drive in the storage unit or the storage adapter that is attached to the storage unit The failing server might be part of a cluster if any of the following conditions is true You have identified the fai...

Page 133: ... on page 137 If DSA reports an error follow the instructions in Appendix C DSA diagnostic test results on page 815 If DSA does not report an error but you still suspect a problem see Solving undetermined problems on page 158 Diagnostic tools The section introduces available tools to help you diagnose and solve hardware related problems Light path diagnostics Use light path diagnostics to diagnose ...

Page 134: ...etwork interfaces and settings Option card driver and firmware information RAID controller configuration Service processor integrated management module status and configuration System configuration Vital product data firmware and UEFI configuration DSA Portable creates a DSA log which is a chronologically ordered merge of the system event log as the IPMI event log the integrated management module ...

Page 135: ...ormation on running the DSA Preboot program on the server Troubleshooting by symptom These tables list problem symptoms and actions to correct the problems See Troubleshooting by symptom on page 138 for more information Light path diagnostics Light path diagnostics is a system of LEDs on various external and internal components of the server that leads you to the failed component When an error occ...

Page 136: ...f the operator information panel is free of the server chassis Then pull down on the panel so that you can view the light path diagnostics panel information This reveals the light path diagnostics panel Lit LEDs on this panel indicate the type of error that has occurred 00000000000000000000 00000000000000000000 00000000000000000000 00000000000000000000 00000000000000000000 00000000000000000000 000...

Page 137: ... to reset the server and run the power on self test POST You might have to use a pen or the end of a straightened paper clip to press the button The Reset button is in the lower right corner of the light path diagnostics panel The system service label inside the server cover provides an overview of internal components that correspond to the LEDs on the light path diagnostics panel This information...

Page 138: ...Ds on the light path diagnostics panel and suggested actions to correct the detected problems For additional information see Server controls LEDs and power on page 14 and System board LEDs on page 29 for the location of the system board LEDs 124 System x3550 M4 Installation and Service Guide ...

Page 139: ...y LEDs on page 129 2 Make sure that the power supplies are seated correctly and plugged in a good AC outlet 3 Remove one of the power supplies to isolate the failed power supply 4 Make sure that both power supplies installed in the server are of the same AC input voltage 5 Replace the failed power supply PS PS CONFIGWhen both the PS and CONFIG LEDs are lit the power supply configuration is invalid...

Page 140: ...rrupt has occurred or the NMI button was pressed 1 Check the system error log for information about the error 2 Restart the server CONFIG PS An invalid power configuration error has occurred If the CONFIG LED and the PS LED are lit the system issues an invalid power configuration error Make sure that both power supplies installed in the server are of the same rating or wattage CONFIG CPU A hardwar...

Page 141: ...owing steps to correct the problem 1 Check the microprocessors that were just installed to make sure that they are compatible with each other see Replacing a microprocessor and heat sink on page 290 for additional information about microprocessor requirements 2 Trained technician only Replace the incompatible microprocessor 3 Check the system error logs for information about the error Replace any ...

Page 142: ...been removed The TEMP LED might also be lit 1 Check if your server installed with any of the adapters mentioned in Table 25 Adapter configurations on page 227 and Table 27 Supported dual port network adapters on the network connector on page 239 If yes make sure your server compile with the configuration with six fans installed 2 Reseat the failing fan which is indicated by a lit LED near the fan ...

Page 143: ...uration is required for the server to start One microprocessor in microprocessor socket 1 One 2 GB DIMM on the system board One power supply Power cord Four cooling fans fan 1 2 3 and 5 One PCI riser card assembly in PCI connector 1 AC power supply LEDs Use this information to view AC power supply LEDs The following minimum configuration is required for the DC LED on the power supply to be lit Pow...

Page 144: ...y system board or the power supply has failed 1 Reseat the power supply 2 Follow actions in the Power problems on page 148 3 If the OVER SPEC LED on the light path diagnostics is lit follow the actions in Light path diagnostics LEDs on page 124 4 If the OVER SPEC LED on the light path diagnostics is not lit check the error LEDs on the system board and the IMM2 error messages Follow steps in Power ...

Page 145: ...e power supply This is a normal condition when no dc power is present Off Off On The power supply has failed Replace the power supply Off On Off The power supply has failed Replace the power supply Off On On The power supply has failed Replace the power supply On Off Off Power supply not fully seated faulty system board or the power supply has failed 1 Reseat the power supply 2 Follow actions in t...

Page 146: ...ry 2 If the LED is not blinking trained technician only replace the system board IMM heartbeat IMM2 heartbeat boot process The following steps describe the different stages of the IMM2 heartbeat sequencing process 1 When this LED is blinking fast approximately 4Hz this indicates that the IMM2 code is in the loading process 2 When this LED goes off momentarily this indicates that the IMM2 code has ...

Page 147: ...ated management module II IMM2 error messages on page 309 Messages are listed on the left side of the screen and details about the selected message are displayed on the right side of the screen To move from one entry to the next use the Up Arrow and Down Arrow keys Some IMM sensors cause assertion events to be logged when their setpoints are reached When a setpoint condition no longer exists a cor...

Page 148: ...with a current version of IPMItool For an overview of IPMI go to http www ibm com developerworks linux blueprints and click Using Intelligent Platform Management Interface IPMI on IBM Linux platforms You can view the IMM event log through the Event Log link in the integrated management module II IMM2 web interface For more information see Logging on to the web interface on page 106 The following t...

Page 149: ...t F1 Setup is displayed press F1 If you have set both a power on password and an administrator password you must type the administrator password to view the event logs Step 3 To clear the IMM system event log select System Event Logs Clear System Event Log then press Enter twice POST When you turn on the server it performs a series of tests to check the operation of the server components and some ...

Page 150: ...ed as a self extracting file that you download from the web When you run the file it self extracts to a temporary folder and performs comprehensive collection of hardware and operating system information After it runs it automatically deletes the temporary files and folder and leaves the results of the data collection and diagnostics on the server If you are unable to restart the server use DSA Po...

Page 151: ...ss the stand alone memory diagnostic environment again Step 5 Type gui to display the graphical user interface or type cmd to display the DSA interactive menu Step 6 Follow the instructions on the screen to select the diagnostic test to run If the diagnostic programs do not detect any hardware errors but the problem remains during normal server operation a software error might be the cause If you ...

Page 152: ...ystem resources and can be downloaded from the website For more information and to download Electronic Service Agent go to http www 01 ibm com support esa Error messages This section provides the list of error codes and messages for UEFI POST IMM and DSA that are generated when a problem is detected See Appendix B UEFI POST diagnostic codes on page 791 Appendix A Integrated management module II IM...

Page 153: ...n the Setup utility All cables and jumpers are installed correctly The correct device driver is installed for the DVD drive 2 Run the DVD drive diagnostic programs 3 Reseat the following components a DVD drive b DVD drive cable 4 Replace the components listed in step 3 one at a time in the order shown restarting the server each time 5 Trained technician only Replace the system board A CD or DVD is...

Page 154: ... lit Replace the failed hard disk drive see Removing hot swap hard disk drives on page 198 and Replacing hot swap hard disk drives on page 199 A newly installed hard disk drive is not recognized 1 Make sure that the installed hard disk drive or ServeRAID adapter is supported For a list of supported optional devices see http www lenovo com us en serverproven 2 Observe the associated yellow hard dis...

Page 155: ...ons of problems within the storage subsystem such as backplane or cable problems 2 See Problem determination tips on page 159 A replacement hard disk drive does not rebuild 1 Make sure that the hard disk drive is recognized by the adapter the green hard disk drive activity LED is flashing 2 Review the SAS SATA adapter documentation to determine the correct configuration parameters and settings A g...

Page 156: ...il the problem is solved If an action step is preceded by Trained technician only that step must be performed only by a trained technician Go to the support website at http www lenovo com support to check for technical information hints tips and new device drivers or to submit a request for information Symptom Action A problem occurs only occasionally and is difficult to diagnose 1 Make sure that ...

Page 157: ... or USB device from the hub and connect it directly to the server 3 Replace the mouse or USB device Memory problems Use this information to solve memory problems Follow the suggested actions in the order in which they are listed in the Action column until the problem is solved If an action step is preceded by Trained technician only that step must be performed only by a trained technician Go to th...

Page 158: ...e microprocessor or the DIMM connector 8 Trained technician only Replace the system board Multiple DIMMs in a channel are identified as failing Note Each time you install or remove a DIMM you must disconnect the server from the power source then wait 10 seconds before restarting the server 1 Reseat the DIMMs then restart the server 2 Remove the highest numbered DIMM of those that are identified an...

Page 159: ... the documentation that comes with the monitor for instructions for testing and adjusting the monitor If you cannot diagnose the problem call for service Follow the suggested actions in the order in which they are listed in the Action column until the problem is solved If an action step is preceded by Trained technician only that step must be performed only by a trained technician Go to the suppor...

Page 160: ...es blank when you start some application programs 1 Make sure that The application program is not setting a display mode that is higher than the capability of the monitor You installed the necessary device drivers for the application 2 Run video diagnostics see Running the DSA Preboot diagnostic programs on page 137 If the server passes the video diagnostics the video is good see Solving undetermi...

Page 161: ...this information to solve network connection problems Follow the suggested actions in the order in which they are listed in the Action column until the problem is solved If an action step is preceded by Trained technician only that step must be performed only by a trained technician Go to the support website at http www lenovo com support to check for technical information hints tips and new devic...

Page 162: ...ormation Symptom Action An optional device that was just installed does not work 1 Make sure that The device is designed for the server see http www lenovo com us en serverproven You followed the installation instructions that came with the device and the device is installed correctly You have not loosened any other installed devices or cables You updated the configuration information in the Setup...

Page 163: ...er power cords b Reconnect the power cords c Trained technician only Reseat the operator information panel cable and then repeat steps a on page 149 and b on page 149 Trained technician only If the server starts replace the operator information panel If the server does not start go to 3 on page 149 3 Make sure that both power supplies installed in the server are of the same type Mixing different p...

Page 164: ...ge 300 and Replacing the system board on page 304 4 Reinstall the component then restarting the server If the Pwr Rail 2 error has been recorded in the IMM event log again the component that you just reinstalled is defective Replace the defective component Trained technician only Microprocessor 2 see Removing a microprocessor and heat sink on page 285 and Replacing a microprocessor and heat sink o...

Page 165: ...vent log 1 Disconnect the server power cords 2 Remove the following components if the Pwr rail 4 error has been recorded in the IMM event log Optional PCI adapter power cable if one is present Fan 1 Fan 2 Hard disk drives DIMMs 7 through 12 3 Restart the server If the Pwr rail 4 error has been recorded in the IMM event log again trained technician only replace the system board see Removing the sys...

Page 166: ... component DIMMs 13 through 18 see Removing a memory module on page 213 and Installing a memory module on page 45 Hard disk drives Fan 4 see Removing a hot swap fan on page 243 and Installing a memory module on page 45 Fan 3 DVD drive if one is present see Removing a DVD drive on page 204 and Replacing a DVD drive on page 206 5 Follow actions in Solving power problems on page 156 if the OVER SPEC ...

Page 167: ... is present installed in PCI riser card assembly 2 see Removing an adapter on page 225 and Replacing an adapter on page 226 5 Follow actions in Solving power problems on page 156 if the OVER SPEC LED on the light path diagnostics panel is still lit 6 Replace the power supply if the OVER SPEC LED on the light path diagnostics panel is still lit The server does not turn off 1 Determine whether you a...

Page 168: ... the server each time 4 Trained technician only Replace the system board ServerGuide problems Use this information to solve ServerGuide problems Follow the suggested actions in the order in which they are listed in the Action column until the problem is solved If an action step is preceded by Trained technician only that step must be performed only by a trained technician Go to the support website...

Page 169: ... setup is complete Software problems Use this information to solve software problems Follow the suggested actions in the order in which they are listed in the Action column until the problem is solved If an action step is preceded by Trained technician only that step must be performed only by a trained technician Go to the support website at http www lenovo com support to check for technical infor...

Page 170: ...ower problem use the following general procedure Step 1 Turn off the server and disconnect all power cords Step 2 Check for loose cables in the power subsystem Also check for short circuits for example if a loose screw is causing a short circuit on a circuit board Step 3 Check the lit LEDs on the light path diagnostics panel see Light path diagnostics LEDs on page 124 Step 4 If the check log LED o...

Page 171: ...s to all internal and external devices until the server is at the minimum configuration that is required for the server to start see Power supply LEDs on page 129 for the minimum configuration Step 6 Reconnect all power cords and turn on the server If the server starts successfully reseat the adapters and devices one at a time until the problem is isolated If the server does not start from the min...

Page 172: ... LED is off make sure that the hub and network are operating and that the correct device drivers are installed Step 6 Check for operating system specific causes of the problem Step 7 Make sure that the device drivers on the client and server are using the same protocol If the Ethernet controller still cannot connect to the network but the hardware appears to be working the network administrator mu...

Page 173: ... ID label on the front of the server as shown in the following illustration Note The illustrations in this document might differ slightly from your hardware 00000000000000000 00000000000000000 00000000000000000 00000000000000000 00000000000000000 00000000000000000 00000000000000000 00000000000000000 00000000000000000 00000000000000000 Figure 92 ID label Machine type and model Microprocessor or har...

Page 174: ... update you can recover the server firmware in the following way In band method Recover server firmware using either the boot block jumper Automated Boot Recovery and a server Firmware Update Package Service Pack Out of band method Use the IMM web interface to update the firmware using the latest server firmware update package Notes You can obtain a server update package from one of the following ...

Page 175: ... power cords Step 7 Restart the server The system begins the power on self test POST Step 8 Boot the server to an operating system that is supported by the firmware update package that you downloaded Step 9 Perform the firmware update by following the instructions that are in the firmware update package readme file Step 10 Turn off the server and disconnect all power cords and external cables and ...

Page 176: ... downloaded Step 2 Perform the firmware update by following the instructions that are in the firmware update package readme file Step 3 Restart the server Step 4 At the firmware splash screen press F3 when prompted to restore to the primary bank The server boots from the primary bank Out of band method Use this information to recover the server firmware and restore the server operation to the prim...

Page 177: ...fault UEFI configuration and start the Setup utility so that you can make the necessary corrections to the configuration and restart the server If the server is unable to successfully complete POST with the default configuration there might be a problem with the system board To specify the number of consecutive restart attempts that will trigger the Nx boot failure feature in the Setup utility cli...

Page 178: ...164 System x3550 M4 Installation and Service Guide ...

Page 179: ...stomer replaceable unit CRU Replacement of Tier 1 CRUs is your responsibility If Lenovo installs a Tier 1 CRU at your request you will be charged for the installation Tier 2 customer replaceable unit You may install a Tier 2 CRU yourself or request Lenovo to install it at no additional charge under the type of warranty service that is designated for your server For information about the terms of t...

Page 180: ...000000 00000000000000 00000000000000 00 00 00000000000 00000000000 00000000000 00000000000 00000000000 00000000000 00000000000 000000 000000 000000 000000 0000 0000 000 000 000 000 000 000 Figure 94 Server components The following table lists the part numbers for the server replaceable components 166 System x3550 M4 Installation and Service Guide ...

Page 181: ...GB dual rank 1 35 V DDR3 1333MHz UDIMM 49Y1422 6 Memory 4 GB dual rank 1 35 V DDR3 1333MHz RDIMM 49Y1425 6 Memory 4 GB dual rank 1 5 V DDR3 1600MHz RDIMM 90Y3180 6 Memory 8 GB single rank 1 35 V DDR3 1600MHz RDIMM 00D5038 6 Memory 8 GB single rank 1 5 V DDR3 1866MHz RDIMM 00D5034 6 Memory 8 GB dual rank 1 35 V DDR3 1333MHz RDIMM 49Y1415 6 Memory 8 GB dual rank 1 5 V DDR3 1600MHz RDIMM 90Y3111 6 Me...

Page 182: ... supply 750 Watt 94Y8116 11 DVD ROM drive 44W3254 11 DVD RW drive 44W3256 12 Operator information panel assembly 90Y5821 12 Operator information panel assembly advanced 00AM393 USB assembly front 00J6143 USB assembly front dual port 00J6144 13 Bezel 2 5 inch hard disk bays and 1 optical drive bay 94Y7606 13 Bezel 3 5 inch hard disk bays 94Y7607 15 Hard disk drive 3 5 inch simple swap 500 GB 7 2 K ...

Page 183: ... drive 2 5 inch hot swap SAS 200 GB 49Y6130 18 Solid state drive 2 5 inch hot swap SATA 200 GB 43W7721 18 Solid state drive 2 5 inch hot swap SATA 240 GB 00AJ361 18 Solid state drive 2 5 inch hot swap SATA 256 GB 90Y8644 18 Solid state drive 2 5 inch hot swap SAS 400 GB 49Y6135 18 Solid state drive 2 5 inch hot swap SATA 480 GB 00AJ366 18 Solid state drive 2 5 inch hot swap SATA 512 GB 49Y5845 18 ...

Page 184: ... ECY EDY F2Y G2Y H2Y J2Y L2Y 32Y DDY M2Y EMY ENY 00AM409 00Y8640 23 System board Server base assembly for use with Intel Xeon Processor E5 2600 V2 series Machine Type 7914 23Y 33Y 43Y 53Y 73Y 83Y A3Y B3Y C3Y C5Y D3Y E6Y E7Y E8Y E9Y EFY EGY EHY EJY EKY ELY EOY EPY EQY ESY ETY EVY EWY F3Y G3Y H3Y J3Y L3Y M3Y CCY CEY ERY EUY EXY EYY EZY 00Y8375 23 System board Baidu 00KA904 24 Retention module heat s...

Page 185: ... 25 MB 1866 MHz 130 W 10 core 00Y2787 25 Microprocessor Intel E5 2697 v2 2 7 GHz 30 MB 1866 MHz 130 W 12 core 00Y2777 25 Microprocessor Intel Xeon E5 2637 3 00 GHz 5 MB 1066 MHz 80 W 2 core 49Y8124 25 Microprocessor Intel Xeon E5 2665 2 40 GHz 20 MB 115 W 8 core 49Y8142 25 Microprocessor Intel Xeon E5 2650L 1 80 GHz 20 MB 1600 MHz 70 W 8 core 81Y5160 25 Microprocessor Intel Xeon E5 2603 1 80 GHz 1...

Page 186: ...verged network adapter CNA 00Y3274 Adapter DVI to VGA adapter 25R9043 HBA 4Gb FC PCIe dual port adapter 00Y5627 NetXtreme II 1000 Express Ethernet adapter 39Y6070 Intel PRO 1000 PF server adapter 42C1752 QLogic 10Gb CNA converged network adapter CNA 42C1802 QLogic 10Gb virtual fabric and SR optical transceiver 42C1816 Brocade 10Gb SFP SR optical transceiver 42C1819 Brocade 10Gb adapter 42C1822 Emu...

Page 187: ...GbE virtual fabric adapter III 95Y3766 Solarflare SFN5162F MR dual port 10GbE SFP Adapter 47C9955 Solarflare SFN6122F LL dual port 10GbE SFP Adapter 47C9963 Battery 3 0 volt 33F8354 Battery ServeRAID 81Y4579 Bracket assembly rear I O 94Y7567 Cable 6Gbps external mini SAS 1 m SFF 8088 to SFF 8088 00YE299 Cable 6Gbps external mini SAS 2 m SFF 8088 to SFF 8088 00YE300 Cable 6Gbps external mini SAS 4 ...

Page 188: ...hot swap HDD 81Y6665 Cable backplane 2 5 inch hot swap HDD 81Y6667 Cable operator information panel 81Y6669 Cable SATA DVD 81Y6671 Cable video 81Y6673 Cable adapter power 81Y6676 Cable ServeRAID battery 90Y7309 Cable ServeRAID power module 90Y7310 Cable SPECpower 00W2465 Cable flash power module cable 925 mm for ServRAID M5200 Series Flash 46C9793 Cable MLNX QSFP 1m 00W0051 Drive 5 25 inch 36 GB U...

Page 189: ...r 1 Top cover 94Y7569 1 Safety cover 94Y7575 5 Filler PCI 94Y7608 8 Filler power supply bay 94Y7610 Filler single 2 5 inch hot swap hard disk drive bay 44T2248 Filler DVD drive bay 49Y4868 Filler 2x2 5 inch simple swap hard disk drive bay 59Y3925 14 Filler 3 5 inch hot swap hard disk drive 69Y5364 14 Filler 3 5 inch simple swap hard disk drive 69Y5368 Filler fan 94Y7572 10 Chassis assembly 2 5 inc...

Page 190: ...r cord with a grounded attachment plug is provided to use with this product To avoid electrical shock always use the power cord and plug with a properly grounded outlet Power cords used in the United States and Canada are listed by Underwriter s Laboratories UL and certified by the Canadian Standards Association CSA For units intended to be operated at 115 volts Use a UL listed and CSA certified c...

Page 191: ...enmark 39M5144 Bangladesh Lesotho Macao Maldives Namibia Nepal Pakistan Samoa South Africa Sri Lanka Swaziland Uganda 39M5151 Abu Dhabi Bahrain Botswana Brunei Darussalam Channel Islands China Hong Kong S A R Cyprus Dominica Gambia Ghana Grenada Iraq Ireland Jordan Kenya Kuwait Liberia Malawi Malaysia Malta Myanmar Burma Nigeria Oman Polynesia Qatar Saint Kitts and Nevis Saint Lucia Saint Vincent ...

Page 192: ...Power cord part number Used in these countries and regions 39M5226 India 39M5240 Brazil 178 System x3550 M4 Installation and Service Guide ...

Page 193: ...ocument that comes with the server For more information about getting service and assistance see Appendix D Getting help and technical assistance on page 973 Returning a device or component If you are instructed to return a device or component follow all packaging instructions and use any packaging materials for shipping that are supplied to you Internal cable routing and connectors This section p...

Page 194: ...Figure 95 ServeRAID H1110 cable connection Figure 96 ServeRAID M1115 cable connection 180 System x3550 M4 Installation and Service Guide ...

Page 195: ...ing backplane Use this information to cable the backplane The following illustration shows the internal routing and connectors for the 3 5 inch simple swap hard disk drives SATA signal and power cables Chapter 6 Removing and replacing components 181 ...

Page 196: ...swap backplate assembly cable connection The following illustration shows the internal routing and connectors for the 3 5 inch hot swap hard disk drives SAS SATA signal power and configuration cables with the SAS SATA adapter installed 182 System x3550 M4 Installation and Service Guide ...

Page 197: ...igure 99 3 5 inch hot swap backplane cable connection The following illustration shows the internal routing and connectors for the SAS SATA signal power and configuration cables with the SAS SATA adapter installed Chapter 6 Removing and replacing components 183 ...

Page 198: ...ter battery or flash power module Use this information to cable the RAID adapter battery or flash power module The following illustration shows the internal routing and connectors for the RAID adapter battery or flash power module cable with the RAID adapter memory module installed 184 System x3550 M4 Installation and Service Guide ...

Page 199: ...ry or flash power module cable connection Cabling SPECpower Use this information to cable the SPECpower The following illustration shows the internal routing and connectors for the server models with one 2 5 inch simple swap hard disk drives Chapter 6 Removing and replacing components 185 ...

Page 200: ...rom the connector on the system board Do not disconnect the cable by using excessive force 2 Follow the optical drive cable routing as the illustration shows Route the cable from the connector on the system board along PCI assembly 1 Do not bend the cable under PCI assembly 1 3 Make sure that the cable is not pinched and does not cover any connectors or obstruct any components for example the Serv...

Page 201: ...or information panel cable To remove the operator information panel cable slightly press the cable toward the fan cage then pull to remove the cable from the connector on the system board Pulling the cable out of the connector by excessive force might cause damage to the cable or connector To connect the operator information panel cable on the system board press evenly on the cable Pressing on one...

Page 202: ...ll or remove the front USB and video cables To remove the front USB and video cables slightly press the cables toward the chassis then pull to remove the cables from the connectors on the system board Pulling the cable out of the connector by excessive force might cause damage to the cable or connector To connect the front USB and video cables on the system board press evenly on the cables Pressin...

Page 203: ...talls a structural part at your request you will be charged for the installation The illustrations in this document might differ slightly from your hardware Removing the cover Use this information to remove the cover To remove the server cover complete the following steps Step 1 Read the safety information that begins on Safety on page v and Installation guidelines on page 31 Step 2 Turn off the s...

Page 204: ...the cover Use this information to replace the cover To replace the server cover complete the following steps Step 1 Make sure that all cables adapters and other components are installed and seated correctly and that you have not left loose tools or parts inside the server Also make sure that all internal cables are correctly routed Important Before you slide the cover forward make sure that all th...

Page 205: ... Read the safety information that begins on Safety on page v and Installation guidelines on page 31 Step 2 Turn off the server and peripheral devices and disconnect the power cords and all external cables see Turning off the server on page 21 Step 3 Remove the cover see Removing the cover on page 189 Step 4 Grasp the air baffle disengage pins from pin holes then lift the air baffle up 000 000 000 ...

Page 206: ...ign the air baffle pins with the baffle pin holes on both sides of the chassis then lower the air baffle into the server Press the air baffle down until it is securely seated Note Close the retaining clip on each end of the DIMM connector before installing the air baffle for proper cooling 000 000 000 000 000 000 000 000000000000000 000000000000000 000000000000000 000000000000000 000000000000000 0...

Page 207: ...00000000000000 0000000000000000000 0000000000000000000 0000000000000000000 0000000000000000000 0000000000000000000 0000000000000000000 00000000000000000 00000000000000000 00000000000000000 00000000000000000 00000000000000000 00000000000000000 00000000000000000 00000000000000000 00000000000000000 00000000000000000 00000000000000000 00000000000000 00000000000000 00000000000000 00000000000000 0000000...

Page 208: ...optical drive cage or the backplane The 2 5 inch server models support up to two batteries or flash power modules To install a RAID adapter battery in the server complete the following steps Step 1 Read the safety information that begins on Safety on page v and Installation guidelines on page 31 Step 2 Turn off the server and peripheral devices and disconnect all power cords and external devices S...

Page 209: ...n the system board Step 7 Remove any cable covering or obstructing the holder before opening the holder Step 8 Install the battery or flash power module a Release the retention clip in the open position b Align the cable connector with the slot on the holder Place the battery or flash power module into the holder and make sure that the holder engages the battery or flash power module securely Chap...

Page 210: ...power module that you install c Connect the other end of the cable to the battery or flash power module d Lower and press down on the retention clip until it snaps in place to hold the battery or flash power module firmly in place Step 9 Reinstall the cover see Replacing the cover on page 190 Step 10 Slide the server into the rack Step 11 Reconnect the power cords and all external cables and turn ...

Page 211: ...0 000000 0000000 0000000 0000000 0000000 0000000 Figure 113 RAID adapter battery or flash power module holder removal Step 5 Lift the holder up to remove it from the system tray If you are instructed to return the RAID adapter battery or flash power module holder follow all packaging instructions and use any packaging materials for shipping that are supplied to you Replacing a RAID adapter battery...

Page 212: ...0000 00000000000000 000000 000000 000000 000000 000000 0000000 0000000 0000000 0000000 0000000 Figure 114 RAID adapter battery or flash power module holder installation Step 4 Fasten the two screws come with the holder and make sure that the holder is secured firmly on the system tray Step 5 Replacing the cover see Replacing the cover on page 190 Step 6 Slide the server into the rack Step 7 Reconn...

Page 213: ...0000000000000 0000000000000000 0000000000000000 0000000000000000 0000000000000000 0000000000000000 0000000000000000 0000000000000000 0000000000000000 0000000000000000 000 000 000 000 000 000 Figure 115 Hot swap hard disk drives removal Step 4 Grasp the handle and slide the drive out of the drive bay Step 5 Reinstall the drive bay filler panel Step 6 If you are instructed to return the drive assemb...

Page 214: ...000000000000 000000000000000000 000000000000000000 000000000000000000 000000000000000000 000000000000000000 000000000000000000 000000000000000000 000000000000000000 000000000000000000 0000000000000000 0000000000000000 0000000000000000 0000000000000000 0000000000000000 0000000000000000 0000000000000000 0000000000000000 0000000000000000 000 000 000 000 000 000 Figure 116 Hot swap hard disk drives in...

Page 215: ...tion of the IDs of the hard disk drives The ID numbers and the drive bay numbers are the same 00000000000000000000000000000000000000 00000000000000000000000000000000000000 00000000000000000000000000000000000000 00000000000000000000000000000000000000 0000 0000 0000 0000 0000 Figure 118 3 5 inch hot swap hard disk drive IDs Removing simple swap hard disk drives Use this information to remove simple ...

Page 216: ...0000000000000 000000000000000 000000000000000 000000000000000 00000 00000 00000 00000 00000 00000 00000 00000 000 000 000 Figure 120 3 5 inch simple swap hard disk drive removal Step 4 Reinstall the drive bay filler panel that you removed earlier Step 5 If you are instructed to return the drive assembly follow all packaging instructions and use any packaging materials for shipping that are supplie...

Page 217: ...Step 1 Read the safety information that begins on Safety on page v and Installation guidelines on page 31 Step 2 Turn off the server and peripheral devices and disconnect the power cords and all external cables Step 3 Remove the filler panel from the empty drive bay Step 4 Touch the static protective package that contains the drive to any unpainted metal surface on the server then remove the drive...

Page 218: ...0000000000000000 0000 0000 0000 0000 0000 0000 00000 00000 00000 00000 00000 00000 Figure 123 2 5 inch simple swap hard disk drive IDs 3 5 inch simple swap hard disk drive IDs The simple swap drive ID that is assigned to each drive is printed on the front of the server The following illustration shows the location of the IDs of the hard disk drives The ID numbers and the drive bay numbers are the ...

Page 219: ...the drive retention clip from the side of the drive Save the clip to use when you install the replacement drive or replace the DVD drive filler panel Figure 126 DVD drive retention clip removal Step 6 Attach the drive retention clip to the side of the DVD drive filler panel that you removed in Step 4 on page 206 Step 7 Slide the DVD drive filler panel into the DVD drive bay until the DVD drive fil...

Page 220: ...omes with the drive The server supports one ultra slim SATA optical drive To install an optional DVD drive complete the following steps Step 1 Read the safety information that begins on Safety on page v and Installation guidelines on page 31 Step 2 Turn off the server and peripheral devices and disconnect the power cords and all external cables Note When you disconnect the power source from the se...

Page 221: ...ves fiber optic devices or transmitters are installed note the following Do not remove the covers Removing the covers of the laser product could result in exposure to hazardous laser radiation There are no serviceable parts inside the device Use of controls or adjustments or performance of procedures other than those specified herein might result in hazardous radiation exposure DANGER Some laser p...

Page 222: ...ith the drive to set any jumpers or switches Step 8 Attach the drive retention clip that you removed from the DVD drive filler panel to the side of the new DVD drive Figure 129 DVD drive retention clip installation Step 9 Align the DVD drive in the drive bay and slide the DVD drive into the optical drive bay until the DVD drive clicks into place 0000000000000 0000000000000 0000000000000 0000000000...

Page 223: ...hat you removed Step 12 Turn on the peripheral devices and the server Removing the DVD drive cable Use this information to remove the DVD drive cable To remove the DVD cable complete the following steps Step 1 Read the safety information that begins on Safety on page v and Installation guidelines on page 31 Step 2 Turn off the server and peripheral devices and disconnect the power cords Step 3 Rem...

Page 224: ...the system board Do not disconnect the DVD drive cable by using excessive force 0000000000000000000000000000 0000000000000000000000000000 Figure 132 DVD drive cable routing Step 6 From the rear of the DVD drive cage press and hold the connector latch on the left of the cable connector and grasp the cable connector and slide it to the right then remove the DVD drive cable from the connector on the ...

Page 225: ...1 Read the safety information that begins on Safety on page v and Installation guidelines on page 31 Step 2 Turn off the server and peripheral devices and disconnect the power cords and all external cables Step 3 Remove the cover see Removing the cover on page 189 Step 4 Remove the air baffle see Removing the air baffle on page 191 Step 5 Align the cable connector with the connector on the rear of...

Page 226: ...lustration shows cable routing for the DVD cable Attention Follow the optical drive cable routing as the illustration shows Make sure that the cable is not pinched and does not cover any connectors or obstruct any components on the system board 212 System x3550 M4 Installation and Service Guide ...

Page 227: ... the power cords and any cables that you removed Step 10 Turn on the peripheral devices and the server Removing a memory module Use this information to remove a memory module To remove a dual inline memory module DIMM complete the following steps Step 1 Read the safety information that begins on Safety on page v and Installation guidelines on page 31 Step 2 Turn off the server and peripheral devic...

Page 228: ...remove DIMMs the server configuration information changes When you restart the server the system displays a message that indicates that the memory configuration has changed The server supports only industry standard double data rate 3 DDR3 1066 1333 1600 or 1866 MHz PC3 8500 PC3 10600 PC3 12800 or PC3 14900 registered or unbuffered synchronous dynamic random access memory SDRAM dual inline memory ...

Page 229: ...it primary data bus aa is the CAS latency in clocks at maximum operating frequency bb is the JEDEC SPD Revision Encoding and Additions level cc is the reference design file for the design of the DIMM d is the revision number of the reference design of the DIMM Note To determine the type of a DIMM see the label on the DIMM The information on the label is in the format xxxxx nRxxx PC3v xxxxxx xx xx ...

Page 230: ...of 2 GB and a maximum of 384 GB of system memory using RDIMMs The LRDIMM option that is available for the server is 32 GB The server supports a minimum of 32 GB and a maximum of 768 GB of system memory using LRDIMMs Note The amount of usable memory is reduced depending on the system configuration A certain amount of memory must be reserved for system resources To view the total amount of installed...

Page 231: ...2 24 2 14 5 17 8 20 11 23 3 15 6 18 7 19 10 22 Memory mirrored channel Memory mirrored channel mode replicates and stores data on two pairs of DIMMs within two channels simultaneously If a failure occurs the memory controller switches from the primary pair of memory DIMMs to the backup pair of DIMMs To enable memory mirrored channel through the Setup utility select System Settings Memory For more ...

Page 232: ...DIMM connector First pair of DIMMs 1 1 4 Second pair of DIMMs 1 9 12 Third pair of DIMMs 1 2 5 Fourth pair of DIMMs 1 8 11 Fifth pair of DIMMs 1 3 6 Sixth pair of DIMMs 1 7 10 Seventh pair of DIMMs 2 13 16 Eighth pair of DIMMs 2 21 24 Ninth pair of DIMMs 2 14 17 Tenth pair of DIMMs 2 20 23 Eleventh pair of DIMMs 2 15 18 Twelfth pair of DIMMs 2 19 22 DIMM connectors 3 6 7 10 15 18 19 and 22 are not...

Page 233: ...14 Eighth pair of DIMMs 2 16 17 Ninth pair of DIMMs 2 20 21 Tenth pair of DIMMs 2 23 24 Eleventh pair of DIMMs 2 19 22 Twelfth pair of DIMMs 2 15 18 DIMM connectors 3 6 7 10 15 18 19 and 22 are not used in memory rank sparing mode when UDIMMs are installed in the server Replacing a memory module Use this information to install a memory module To install a memory module complete the following steps...

Page 234: ...applying pressure on both ends of the DIMM simultaneously The retaining clips snap into the locked position when the DIMM is firmly seated in the connector Note If there is a gap between the DIMM and the retaining clips the DIMM has not been correctly inserted open the retaining clips remove the DIMM and then reinsert it Step 10 Reconnect the power cords and any cables that you removed Step 11 Rep...

Page 235: ... present from the PCI riser card assembly see Removing an adapter on page 225 Step 7 Set the adapter and the PCI riser card assembly aside If you are instructed to return the PCI riser card assembly follow all packaging instructions and use any packaging materials for shipping that are supplied to you Replacing a PCI riser card assembly Use this information to replace a PCI riser card assembly Not...

Page 236: ...card assembly 2 Note You can purchase the miscellaneous parts kit FRU part number 94Y7571 to acquire three sets of rubber stoppers Keep additional rubber stoppers for potential future use Step 5 Install the adapter in the new PCI riser card assembly see Replacing an adapter on page 226 Step 6 Set any jumpers or switches on the adapter as directed by the adapter manufacturer Step 7 Remove the PCI f...

Page 237: ...rd Note PCI riser card brackets must be installed even if you do not install a riser card To remove the PCI riser card bracket from the riser card complete the following steps Step 1 Read the safety information that begins on Safety on page v and Installation guidelines on page 31 Step 2 Turn off the server and peripheral devices and disconnect all power cords Step 3 Remove the cover see Removing ...

Page 238: ...rackets must be installed even if you do not install a riser card To install the PCI riser card bracket to the riser card complete the following steps Step 1 Read the safety information that begins on Safety on page v and Installation guidelines on page 31 Step 2 Turn off the server and peripheral devices and disconnect all power cords Step 3 Remove the cover see Removing the cover on page 189 Ste...

Page 239: ...cables that you removed Step 11 Turn on the peripheral devices and the server Removing an adapter Use this information to remove an adapter To remove an adapter complete the following steps Step 1 Read the safety information that begins on Safety on page v and Installation guidelines on page 31 Step 2 Turn off the server and peripheral devices and disconnect all power cords then remove the cover s...

Page 240: ...0000000 0000000 0000000 0000 0000 0000 0000 Figure 147 Adapter removal If you are instructed to return the adapter follow all packaging instructions and use any packaging materials for shipping that are supplied to you Replacing an adapter The following notes describe the types of adapters that the server supports and other information that you must consider when you install an adapter Locate the ...

Page 241: ...s installed required1 Six fans installed required1 785 GB High IOPS MLC mono adapter 46C9081 Six fans installed required1 Six fans installed required1 1 2 TB high IOPS MLC mono adapter 90Y4377 Six fans installed required1 Six fans installed required1 2 4 TB high IOPS MLC duo adapter 90Y4397 Not supported Six fans installed required1 Flash Adapter F825 Enterprise Value 00AE861 Six fans installed re...

Page 242: ...t supports only low profile adapters PCI riser slot 2 This slot supports full height half length adapters The following table lists the supported configurations for the PCI riser card slots Table 26 PCI riser slots supported configurations PCI riser card slot number Configuration 1 Configuration 2 Two microprocessors installed Configuration 3 Slot 1 PCI Express 3 0 x16 card with a PCI Express rise...

Page 243: ...ll an adapter make sure that the adapter is correctly seated in the riser card assembly and that the riser card assembly is securely seated in the riser card connector on the system board before you turn on the server An incorrectly seated adapter might cause damage to the system board the riser card assembly or the adapter Step 6 Install the PCI riser card assembly in the server see Replacing a P...

Page 244: ...er is often referred to as the SAS SATA adapter or the ServeRAID adapter To remove the SAS SATA adapter from the system board complete the following steps Step 1 Read the safety information that begins on Safety on page v and Installation guidelines on page 31 Step 2 Turn off the server and peripheral devices and disconnect all power cords Step 3 Remove the cover see Removing the cover on page 189...

Page 245: ...dapter complete the following steps Depending on the server model the server comes with a ServeRAID H1110 a ServeRAID M1115 a ServeRAID M5110 or a ServeRAID 5210 SAS SATA adapter installed Note Remove the PCI bracket that come with ServeRAID H1110 ServeRAID M1115 ServeRAID M5110 SAS SATA or a ServeRAID 5210 adapter before installing a SAS SATA adapter in the dedicated connector on the system board...

Page 246: ... keys align correctly with the connector on the system board Step 7 Insert the SAS SATA adapter in the dedicated connector on the system board or PCI riser card slots Attention Incomplete insertion might cause damage to the server or the adapter a Insert the SAS SATA adapter into the RAID connector on the system board until it is firmly seated The retention brackets secure the SAS SATA adapter in ...

Page 247: ...000 0000 0000 0000000 0000000 0000000 0000000 0000000 Figure 152 Adapter installation Step 8 Route the backplane signal cables see Cabling backplane on page 181 Chapter 6 Removing and replacing components 233 ...

Page 248: ...outing Step 9 Connect the signal cables to the SAS SATA adapter a ServeRAID H1110 adapter Take the signal cable that is attached to the drive backplane for drive bays 0 through 3 and connect it to the SAS SATA connector on the ServeRAID adapter 234 System x3550 M4 Installation and Service Guide ...

Page 249: ...bays 0 through 3 and connect it to the other connector port 0 on the adapter Figure 155 ServeRAID M1115 adapter cable routing c ServeRAID M5110 adapter Take the signal cable that is attached to the drive backplane for drive bays 4 through 7 and connect it to the ServeRAID adapter connector for drive bays 4 through 7 port 1 Connect the other signal cable that is attached to the drive backplane for ...

Page 250: ...oving the ServeRAID adapter memory module Use this information to remove the ServeRAID adapter memory module To remove the ServeRAID adapter memory module complete the following steps Step 1 Read the safety information that begins on Safety on page v and Installation guidelines on page 31 Step 2 Turn off the server and peripheral devices and disconnect all power cords Step 3 Remove the cover see R...

Page 251: ...teps Step 1 Read the safety information that begins on Safety on page v and Installation guidelines on page 31 Step 2 Turn off the server and peripheral devices and disconnect all power cords Step 3 Remove the cover see Removing the cover on page 189 Step 4 Remove the ServeRAID SAS SATA controller see Removing a ServeRAID SAS SATA controller on page 230 Step 5 Align the memory module with the conn...

Page 252: ...guidelines on page 31 Step 2 Turn off the server and peripheral devices and disconnect the power cords and all external cables if necessary Step 3 Remove the cover see Removing the cover on page 189 Step 4 Remove the PCI riser card assembly if installed from PCI riser connector 2 see Removing a PCI riser card assembly on page 220 Step 5 Loosen the two captive screws on the network adapter from the...

Page 253: ...er Option part number FRU part number Remark Mellanox ConnectX 3 dual port QDR FDR10 mezz card 90Y6338 90Y4956 Qlogic dual port 10GbE SFP Embedded VFA 90Y6454 90Y5099 Six fans installed required1 Emulex dual port 10GbE SFP Embedded VFA III 90Y6456 90Y5100 Dual port FDR embedded adapter 00D4143 90Y6606 Broadcom dual port 10GbE SFP embedded adapter for System x 44T1360 00AL195 Six fans installed req...

Page 254: ...rt System x Product family Lenovo System x3550 M4 7914 3 From the Operating system menu select your operating system and then click Search to display the available drivers 4 Download the latest version of drivers Emulex iSCSI Device Driver for Windows 2008 Emulex FCoE Device Driver for Windows 2008 Note Changes are made periodically to the website The actual procedure might vary slightly from what...

Page 255: ...been removed already Figure 161 Adapter filler panel removal Step 6 Touch the static protective package that contains the new adapter to any unpainted metal surface on the server Then remove the adapter from the package Step 7 Align the adapter so that the port connectors on the adapter line up with the pin and thumbscrew on the chassis then align the connector of the adapter with the adapter conn...

Page 256: ...ly seated on the connector on the system board Attention Make sure the port connectors on the adapter are aligned properly with the chassis on the rear of the server An incorrectly seated adapter might cause damage to the system board or the adapter Step 9 Fasten the thumbscrew on the rear side of the chassis 242 System x3550 M4 Installation and Service Guide ...

Page 257: ...ed Step 15 Turn on the peripheral devices and the server Removing a hot swap fan Use this information to remove a hot swap fan Attention To ensure proper server operation replace a failed hot swap fan within 30 seconds To remove a hot swap fan complete the following steps Step 1 Read the safety information that begins on Safety on page v and Installation guidelines on page 31 Step 2 Remove the cov...

Page 258: ... this information to replace a hot swap fan The server comes standard with four dual motor hot swap cooling fans When there is one microprocessor installed install fan 1 2 3 and 5 for proper cooling Attention To ensure proper operation replace a failed hot swap fan within 30 seconds To replace a hot swap fan complete the following steps Step 1 Read the safety information that begins on Safety on p...

Page 259: ...00 0000000000000000000 0000000000000000000 0000000000000000000 0000000000000000000 0000000000000000000 Figure 165 Fan installation Step 4 Orient the fan over the fan slot in the fan assembly bracket so that the fan connector aligns with the connector on the system board Chapter 6 Removing and replacing components 245 ...

Page 260: ...e slot and the fan connector is seated correctly in the connector on the system board Note Make sure that the newly installed fan aligns horizontally with other correctly seated fans for proper installation Step 6 Replace the cover see Replacing the cover on page 190 Step 7 Slide the server into the rack Removing a power supply Use this information to remove a power supply Removing a hot swap ac p...

Page 261: ...parts contact a service technician To remove a hot swap ac power supply complete the following steps Step 1 Read the safety information that begins on Safety on page v and Installation guidelines on page 31 Step 2 If only one power supply is installed turn off the server and peripheral devices and disconnect all power cords Step 3 If the server is in a rack at the back of the server pull back the ...

Page 262: ...pply circuit to the earthing conductor at the equipment If this connection is made all of the following conditions must be met This equipment shall be connected directly to the dc supply system earthing electrode conductor or to a bonding jumper from an earthing terminal bar or bus to which the dc supply system earthing electrode conductor is connected This equipment shall be located in the same i...

Page 263: ...at is to be attached to this product 2 Attach signal cables to the product 3 Attach power cords to the product For ac systems use appliance inlets For dc systems ensure correct polarity of 48 V dc connections RTN is and 48 V dc is Earth ground should use a two hole lug for safety 4 Attach signal cables to other devices 5 Connect power cords to their sources 6 Turn ON all the power sources 1 Turn O...

Page 264: ... copper wire conductors only See the specifications in the product documentation for the required wire size See the specifications in the product documentation for the required torque values for the wiring terminal screws Important Be sure to read the multilingual safety instructions on the CD that comes with the server before you use the product To remove a hot swap dc power supply complete the f...

Page 265: ...r utility to determine current system power consumption For more information and to download the utility go to http www ibm com systems bladecenter resources powerconfig html The server comes with one hot swap 12 volt output power supply that connects to power supply bay 1 The input voltage is 100 127 V ac or 200 240 V ac auto sensing Power supplies in the server must be with the same power rating...

Page 266: ...his label attached There are no serviceable parts inside these components If you suspect a problem with one of these parts contact a service technician To install a hot swap ac power supply complete the following steps Step 1 Read the safety information that begins on Safety on page v and Installation guidelines on page 31 Step 2 Touch the static protective package that contains the hot swap power...

Page 267: ...come unplugged Step 6 Connect the power cord for the new power supply to the power cord connector on the power supply Step 7 Connect the other end of the power cord to a properly grounded electrical outlet Step 8 Make sure that the ac power LED and the dc power LED on the ac power supply are lit indicating that the power supply is operating correctly The two green LEDs are to the right of the powe...

Page 268: ...onsider when you install a power supply Before you install an additional power supply or replace a power supply with one of a different wattage you may use the Power Configurator utility to determine current system power consumption For more information and to download the utility go to http www ibm com systems bladecenter resources powerconfig html The server comes with one hot swap 12 volt outpu...

Page 269: ... CAUTION This equipment is designed to permit the connection of the earthed conductor of the dc supply circuit to the earthing conductor at the equipment This equipment is designed to permit the connection of the earthed conductor of the dc supply circuit to the earthing conductor at the equipment If this connection is made all of the following conditions must be met This equipment shall be connec...

Page 270: ...t is to be attached to this product 2 Attach signal cables to the product 3 Attach power cords to the product For ac systems use appliance inlets For dc systems ensure correct polarity of 48 V dc connections RTN is and 48 V dc is Earth ground should use a two hole lug for safety 4 Attach signal cables to other devices 5 Connect power cords to their sources 6 Turn ON all the power sources 1 Turn OF...

Page 271: ...ure to read the multilingual safety instructions on the CD that comes with the server before you use the product Replacing a hot swap dc power supply To install a hot swap dc power supply complete the following steps Attention Only trained service personnel other than Lenovo service technicians are authorized to install and remove the 48 volt dc power supply and make the connections to and disconn...

Page 272: ...r supply connects firmly into the power supply connector Step 7 Route the power cord through the handle and cable tie if any so that it does not accidentally become unplugged Step 8 Connect the other ends of the dc power cable to the dc power source Cut the wires to the correct length but do not cut them shorter than 150 mm 6 inch If the power source requires ring terminals you must use a crimping...

Page 273: ...mes with this option on the server cover near the power supplies Figure 175 Redundant power information label Removing the hot swap drive backplane Use this information to remove the hot swap drive backplane To remove the hot swap hard disk drive backplane complete the following steps Step 1 Read the safety information that begins on Safety on page v and Installation guidelines on page 31 Step 2 T...

Page 274: ...000000000 0000000000000000000000000 0000000000000000000000000 0000000000000000000000000 00000000000000000000000 00000000000000000000000 00000000000000000000000 00000000000000000000000 00000000000000000000000 00000000000000000000000 00000000000000000000000 00000000000000000000000 00000000000000000000000 00000000000000000000000 00000000000000000000000 00000000000000000000000 00000000000000000000000 ...

Page 275: ...00000000 00000000000000000000000 00000000000000000000000 00000000000000000000000 00000000000000000000000 00000000000000000000000 00000000000000000000000 00000000000000000000000 00000000000000000000000 00000000000000000000000 00000000000000000000000 00000000000000000000000 00000000000000000000000 00000000000000000000000 0000000 0000000 0000000 0000000 000000 000000 000000 000000 Figure 177 Backplan...

Page 276: ...tion to replace the hot swap drive backplane To install the replacement hot swap hard disk drive backplane complete the following steps Step 1 Read the safety information that begins on Safety on page v and Installation guidelines on page 31 Step 2 Reconnect the cables to the hard disk drive backplane Step 3 Align the sides of the drive backplane with the slots on the backplane bracket Step 4 Inst...

Page 277: ...00 0000000 0000000 0000000 000000 000000 000000 000000 Figure 179 Backplane installation b Adjust the latch to the locked position 0000000000000000000000000 0000000000000000000000000 0000000000000000000000000 0000000000000000000000000 0000000000000000000000000 0000000000000000000000000 0000000000000000000000000 0000000000000000000000000 0000000000000000000000000 0000000000000000000000000 000000000...

Page 278: ...e configuration cable from the drive backplane along the chassis and connect it to the SAS SATA power connector and SAS SATA configuration connector See Cabling backplane on page 181 for more information Step 6 Reinstall the hard disk drives see Replacing hot swap hard disk drives on page 199 Step 7 Install the cover see Replacing the cover on page 190 Step 8 Slide the server into the rack Step 9 ...

Page 279: ...00000000000000000000000 0000000000000000000000000 0000000000000000000000000 0000000000000000000000000 0000000000000000000000000 0000000000000000000000000 0000000000000000000000000 0000000000000000000000000 0000000000000000000000000 0000000000000000000000000 0000000000000000000000000 00000000000000000000000 00000000000000000000000 00000000000000000000000 00000000000000000000000 00000000000000000000...

Page 280: ...0000000 0000000000000000000000000 0000000000000000000000000 0000000000000000000000000 0000000000000000000000000 000000 000000 000000 000000 000000 000000 000000 000000 000000 Figure 183 Backplate assembly removal Step 7 Disconnect the power and signal cables from the system board If you are instructed to return the hard disk drive backplate assembly follow all packaging instructions and use any pa...

Page 281: ...000 000000 000000 000000 000000 000000 000000 000000 000000 000000 Figure 184 Backplate assembly installation b Adjust the latch to the locked position on 3 5 inch server models 0000000000000000000000000 0000000000000000000000000 0000000000000000000000000 0000000000000000000000000 0000000000000000000000000 0000000000000000000000000 0000000000000000000000000 0000000000000000000000000 00000000000000...

Page 282: ... v and Installation guidelines on page 31 Step 2 Turn off the server and peripheral devices and disconnect the power cords Step 3 Remove the cover see Removing the cover on page 189 Step 4 Remove the flash device Figure 186 USB hypervisor flash device removal a Unlock the retention latch on the USB connector by squeezing the two retention clips toward each other b Open the retention latch c Grasp ...

Page 283: ...lacing the cover on page 190 Step 7 Slide the server into the rack Step 8 Turn on the peripheral devices and the server Removing the system battery Use this information to remove the system battery The following notes describe information that you must consider when replacing the battery Lenovo has designed this product with your safety in mind The lithium battery must be handled correctly to avoi...

Page 284: ...the same module type made by the same manufacturer The battery contains lithium and can explode if not properly used handled or disposed of Do not Throw or immerse into water Heat to more than 100 C 212 F Repair or disassemble Dispose of the battery as required by local ordinances or regulations To remove the system battery complete the following steps Step 1 Read the safety information that begin...

Page 285: ... force Failing to remove the battery properly may damage the socket on the system board Any damage to the socket may require replacing the system board Step 6 Dispose of the battery as required by local ordinances or regulations See the Environmental Notices and User s Guide on the Documentation CD for more information Replacing the system battery Use this information to replace the system battery...

Page 286: ...thium and can explode if not properly used handled or disposed of Do not Throw or immerse into water Heat to more than 100 C 212 F Repair or disassemble Dispose of the battery as required by local ordinances or regulations To install the replacement system battery complete the following steps Step 1 Follow any special handling and installation instructions that come with the replacement battery St...

Page 287: ...nector Step 7 Reinstall the PCI riser card assembly 2 see Replacing a PCI riser card assembly on page 221 if necessary Step 8 Install the cover see Replacing the cover on page 190 Step 9 Slide the server into the rack Step 10 Reconnect the external cables then reconnect the power cords and turn on the peripheral devices and the server Step 11 Start the Setup utility and reset the configuration Set...

Page 288: ...see Removing hot swap hard disk drives on page 198 or Removing simple swap hard disk drives on page 201 Step 5 Remove the screws from the bezel Note Use the T8 Torx screwdriver that comes with the new bezel to remove the bezel Figure 192 T8 Torx screwdriver 00000000000000 00000000000000 00000000000000 00000000000000 00000000000000 00000000000000 00000000000000 00000000000000 Figure 193 Bezel screw...

Page 289: ...rver and peripheral devices and disconnect the power cords and all external cables if necessary Step 3 Remove the cover see Removing the cover on page 189 Step 4 Insert the tabs on the bottom of the bezel into the holes on the chassis 00000000000000 00000000000000 00000000000000 00000000000000 00000000000000 00000000000000 00000000000000 00000000000000 00000000000 00000000000 00000000000 000000000...

Page 290: ...al devices and the server Removing the front USB connector assembly Use this information to remove the front USB connector assembly To remove the front USB connector assembly complete the following steps Step 1 Read the safety information that begins on Safety on page v and Installation guidelines on page 31 Step 2 Turn off the server and peripheral devices and disconnect the power cords and all e...

Page 291: ...age screw removal Step 6 Disconnect the cables from the front USB connector 0000000000000000000000000000 0000000000000000000000000000 Figure 199 Front USB and video cables connection Step 7 Pull the front USB connector assembly out slightly then rotate it downward until the tabs on the bottom of the front USB connector assembly disengages from the chassis and set it aside Chapter 6 Removing and re...

Page 292: ...cords and all external cables if necessary Step 3 Insert the tabs on the bottom of the front USB connector assembly into the holes on the chassis 00000000000 00000000000 00000000000 00000000000 00000000000 00000000000 00000000000 Figure 201 Front USB connector assembly installation Step 4 Rotate the front USB connector assembly upward to the server Step 5 Reinstall the USB cage screw to the chassi...

Page 293: ...ing simple swap hard disk drives on page 202 Step 9 Install the cover see Replacing the cover on page 190 Step 10 Reconnect the power cords and any cables that you removed Step 11 Slide the server into the rack Step 12 Turn on the peripheral devices and the server Removing the front video connector assembly Use this information to remove the front video connector assembly To remove the front video...

Page 294: ...0000000000000000000000000 0000000000000000000000000000 Figure 204 Front USB and video cables connection Step 4 Remove the screws from the video connector assembly 0000000000000 0000000000000 0000000000000 0000000000000 0000000000000 0000000000000 0000000000000 0000 0000 0000 0000 Figure 205 Video connector assembly screws removal 280 System x3550 M4 Installation and Service Guide ...

Page 295: ...onnector assembly complete the following steps Step 1 Read the safety information that begins on Safety on page v and Installation guidelines on page 31 Step 2 Turn off the server and peripheral devices and disconnect the power cords and all external cables if necessary Step 3 Insert the front video connector assembly into the holes on the chassis 000000000000000 000000000000000 000000000000000 00...

Page 296: ...he front video connector on the system board 0000000000000000000000000000 0000000000000000000000000000 Figure 209 Front USB and video cables connection Step 6 Install the cover see Replacing the cover on page 190 Step 7 Reconnect the power cords and any cables that you removed Step 8 Slide the server into the rack Step 9 Turn on the peripheral devices and the server 282 System x3550 M4 Installatio...

Page 297: ...l removal Step 6 From the front of the server carefully pull the assembly out of the server while you move it slightly from side to side If you are instructed to return the operator information panel assembly follow all packaging instructions and use any packaging materials for shipping that are supplied to you Replacing the operator information panel assembly Use this information to replace the o...

Page 298: ...or the operator information panel 00000000000000000000000000000000000 00000000000000000000000000000000000 Figure 212 Operator information panel cable connection The following notes describe additional information when you install the cable To connect the operator information panel cable on the system board press evenly on the cable Pressing on one side of the cable might cause damage to the cable ...

Page 299: ... to come in contact with anything Contact with any surface can contaminate the thermal grease and the microprocessor socket Do not use any tools or sharp objects to lift the locking levers on the microprocessor socket Doing so might result in permanent damage to the system board Each microprocessor socket must always contain either a socket cover or a microprocessor and heat sink Be sure to use on...

Page 300: ...le on page 191 Step 5 Locate the microprocessor to be removed see System board internal connectors on page 26 Step 6 Remove the heat sink Attention Do not touch the thermal material on the bottom of the heat sink Touching the thermal material will contaminate it If the thermal material on the microprocessor or heat sink becomes contaminated you must wipe off the contaminated thermal material on th...

Page 301: ...tainer Attention Do not touch the microprocessor contacts Contaminants on the microprocessor contacts such as oil from your skin can cause connection failures between the contacts and the socket Step 8 Remove the microprocessor from the socket a Select the empty installation tool and ensure that the handle is in the open position If the installation tool handle is not in the open position use the ...

Page 302: ... following illustration of the installation tool shows the location of the interlock latch and counterclockwise rotation of the handle before loading the microprocessor H Figure 217 Installation tool handle adjustment b Align the installation tool with the screws as shown in the following graphic and lower the installation tool on the microprocessor The installation tool rests flush on the socket ...

Page 303: ...ed position and lift the microprocessor out of the socket If using Installation Tool B gently twist the handle of the installation tool clockwise until it locks in the H or L position depending on the size of microprocessor and then lift the microprocessor out of the socket Handle Installation tool Microprocessor Figure 219 Installation tool handle adjustment d Lift the microprocessor out of the s...

Page 304: ...ll a microprocessor Failing to use the microprocessor installation tool may damage the microprocessor sockets on the system board Any damage to the microprocessor sockets may require replacing the system board Be extremely careful the microprocessor socket contacts are very fragile Do not touch the microprocessor socket contacts Contaminants on the microprocessor contacts or microprocessor socket ...

Page 305: ... in microprocessor socket 1 Both microprocessor voltage regulator modules are integrated on the system board Read the documentation that comes with the microprocessor to determine whether you have to update the server firmware To download the latest level of server firmware and other code updates for your server go to http www ibm com support fixcentral The microprocessor speeds are automatically ...

Page 306: ...31 Step 2 Turn off the server and peripheral devices and disconnect the power cords and all external cables Attention When you handle static sensitive devices take precautions to avoid damage from static electricity For details about handling these devices see Handling static sensitive devices on page 33 Step 3 Remove the cover see Removing the cover on page 189 Step 4 Remove the air baffle see Re...

Page 307: ...ocessor and the microprocessor socket Step 7 Install the microprocessor in the microprocessor socket a Open the packaging that contains the new microprocessor installation tool assembly and carefully remove the installation tool assembly from the package Note Do not touch the microprocessor contacts Contaminants on the microprocessor contacts such as oil from your skin can cause connection failure...

Page 308: ... tool If using Installation Tool A twist the handle on the microprocessor tool assembly counterclockwise to the open position to insert the microprocessor into the socket and lift the installation tool out of the socket If using Installation Tool B twist the handle of the installation tool assembly counterclockwise until the microprocessor is inserted into the socket and lift the installation tool...

Page 309: ...ly in the socket before you try to close the microprocessor retainer Do not touch the thermal material on the bottom of the heat sink or on top of the microprocessor Touching the thermal material will contaminate it Step 8 Remove the microprocessor socket cover tape or label from the surface of the microprocessor socket if one is present Store the socket cover in a safe place Chapter 6 Removing an...

Page 310: ...t levers and retainer engagement a Close the microprocessor retainer on the microprocessor socket b Identify which release lever is labeled as the first release lever to close and close it c Close the second release lever on the microprocessor socket Attention If you are installing a new heat sink do not set down the heat sink after you remove the plastic cover Do not touch the thermal grease on t...

Page 311: ...ink installation c Align and place the heat sink on top of the microprocessor in the retention bracket thermal material side down d Press firmly on the heat sink e Rotate the heat sink retention module release lever to the closed position and hook it underneath the lock tab Step 11 Reinstall the air baffle see Replacing the air baffle on page 192 Step 12 Install the cover see Replacing the cover o...

Page 312: ...the following steps Step 1 Place the heat sink on a clean work surface Step 2 Remove the cleaning pad from its package and unfold it completely Step 3 Use the cleaning pad to wipe the thermal grease from the bottom of the heat sink Note Make sure that all of the thermal grease is removed Step 4 Use a clean area of the cleaning pad to wipe the thermal grease from the microprocessor then dispose of ...

Page 313: ... four screws that secure the retention module to the system board then lift the retention module from the system board Figure 234 Heat sink retention module removal If you are instructed to return the heat sink retention module follow all the packaging instructions and use any packaging materials for shipping that are supplied to you Replacing the heat sink retention module Use this information to...

Page 314: ...s that were enabled Reactivate any Features on Demand features Instructions for automating the activation of features and installing activation keys is in the Features on Demand User s Guide To download the document go to http www ibm com systems x fod log in and click Help To remove the system board complete the following steps Step 1 Read the safety information that begins on Safety on page v Ha...

Page 315: ...essor for reinstallation Contact with any surface can compromise the thermal grease and the microprocessor socket A mismatch between the microprocessor and its original heat sink can require the installation of a new heat sink Step 12 Remove the system battery see Removing the system battery on page 269 Step 13 Disconnect all cables from the system board Make a list of each cable as you disconnect...

Page 316: ...ar PCI slot 2 and one is between fans 4 and 5 Figure 237 Thumbscrews disengagement Step 17 Grasp the system board handles and slide the system board toward the front of the server until it stops 302 System x3550 M4 Installation and Service Guide ...

Page 317: ...fs Note Make sure that the system board disengage from all system board standoffs Step 18 Grasp the system board handles and lift up the system board and carefully remove it from the server being careful not to damage any surrounding components Chapter 6 Removing and replacing components 303 ...

Page 318: ...o replace the system board Important 1 When you reassemble the components in the server be sure to route all cables carefully so that they are not exposed to excessive pressure 2 When you replace the system board you must either update the server with the latest firmware or restore the pre existing firmware from a diskette or CD image Make sure that you have the latest firmware or a copy of the pr...

Page 319: ... Step 1 Read the safety information that begins on Safety on page v Handling static sensitive devices on page 33 and Installation guidelines on page 31 Step 2 Grasp the system board handles to align the system board with the chassis then lower the system board into the chassis and slide the system board toward the rear of the server until the system board is seated firmly into the locator pins on ...

Page 320: ...00000000000000000000000000 Figure 241 System board standoffs Step 3 Fasten the two thumbscrews one is near PCI slot 2 and one is between fans 4 and 5 Figure 242 Thumbscrews engagement 306 System x3550 M4 Installation and Service Guide ...

Page 321: ... card assemblies and adapters if any were installed see Replacing an adapter on page 226 and Replacing a PCI riser card assembly on page 221 Step 12 Install the air baffle see Replacing the air baffle on page 192 Step 13 Install the cover see Replacing the cover on page 190 Step 14 Push the power supplies back into the server Step 15 Slide the server into the rack Step 16 Reconnect the power cords...

Page 322: ...308 System x3550 M4 Installation and Service Guide ...

Page 323: ...The event was recorded for audit purposes usually a user action or a change of states that is normal behavior Warning The event is not as severe as an error but if possible the condition should be corrected before it becomes an error It might also be a condition that requires additional monitoring or maintenance Error The event is a failure or critical condition that impairs service or an expected...

Page 324: ...information about IMM2 see the Integrated Management Module II User s Guide at http www ibm com support entry portal docdisplay lndocid MIGR 5086346 List of IMM events This section lists all messages that can be sent from the IMM 40000001 00000000 Management Controller arg1 Network Initialization Complete This message is for the use case where a Management Controller network has completed initiali...

Page 325: ...ies the Ethernet Port data rate May also be shown as 4000000300000000 or 0x4000000300000000 Severity Info Serviceable No Automatically notify support No Alert Category none SNMP Trap ID CIM Information Prefix IMM ID 0003 User Response Information only no action is required 40000004 00000000 Ethernet Duplex setting modified from arg1 to arg2 by user arg3 This message is for the use case where A use...

Page 326: ... 4000000500000000 or 0x4000000500000000 Severity Info Serviceable No Automatically notify support No Alert Category none SNMP Trap ID CIM Information Prefix IMM ID 0005 User Response Information only no action is required 40000006 00000000 Ethernet locally administered MAC address modified from arg1 to arg2 by user arg3 This message is for the use case where a user modifies the Ethernet Port MAC a...

Page 327: ...or 0x4000000700000000 Severity Info Serviceable No Automatically notify support No Alert Category none SNMP Trap ID CIM Information Prefix IMM ID 0007 User Response Information only no action is required 40000008 00000000 Hostname set to arg1 by user arg2 This message is for the use case where user modifies the Hostname of a Management Controller May also be shown as 4000000800000000 or 0x40000008...

Page 328: ...Severity Info Serviceable No Automatically notify support No Alert Category System IMM Network event SNMP Trap ID 37 CIM Information Prefix IMM ID 0009 User Response Information only no action is required 4000000a 00000000 IP subnet mask of network interface modified from arg1 to arg2 by user arg3 This message is for the use case where a user modifies the IP subnet mask of a Management Controller ...

Page 329: ...000000 Severity Info Serviceable No Automatically notify support No Alert Category none SNMP Trap ID CIM Information Prefix IMM ID 0011 User Response Information only no action is required 4000000c 00000000 OS Watchdog response arg1 by arg2 This message is for the use case where an OS Watchdog has been enabled or disabled by a user May also be shown as 4000000c00000000 or 0x4000000c00000000 Severi...

Page 330: ...efix IMM ID 0013 User Response Complete the following steps until the problem is solved 1 Make sure that the IMM network cable is connected 2 Make sure that there is a DHCP server on the network that can assign an IP address to the IMM 4000000e 00000000 Remote Login Successful Login ID arg1 from arg2 at IP address arg3 This message is for the use case where a user successfully logs in to a Managem...

Page 331: ...fy support No Alert Category none SNMP Trap ID CIM Information Prefix IMM ID 0015 User Response Information only no action is required 40000010 00000000 Security Userid arg1 had arg2 login failures from WEB client at IP address arg3 This message is for the use case where a user has failed to log in to a Management Controller from a web browser May also be shown as 4000001000000000 or 0x40000010000...

Page 332: ... No Automatically notify support No Alert Category System Remote Login SNMP Trap ID 30 CIM Information Prefix IMM ID 0017 User Response Complete the following steps until the problem is solved 1 Make sure that the correct login ID and password are being used 2 Have the system administrator reset the login ID or password 40000012 00000000 Remote access attempt failed Invalid userid or password rece...

Page 333: ...om a telnet session May also be shown as 4000001300000000 or 0x4000001300000000 Severity Info Serviceable No Automatically notify support No Alert Category System Remote Login SNMP Trap ID 30 CIM Information Prefix IMM ID 0019 User Response Make sure that the correct login ID and password are being used 40000014 00000000 The arg1 on system arg2 cleared by user arg3 This message is for the use case...

Page 334: ...500000000 Severity Info Serviceable No Automatically notify support No Alert Category none SNMP Trap ID CIM Information Prefix IMM ID 0021 User Response Information only no action is required 40000016 00000000 ENET arg1 DHCP HSTN arg2 DN arg3 IP arg4 SN arg5 GW arg6 DNS1 arg7 This message is for the use case where a Management Controller IP address and configuration has been assigned by the DHCP s...

Page 335: ...00000000 or 0x4000001700000000 Severity Info Serviceable No Automatically notify support No Alert Category none SNMP Trap ID CIM Information Prefix IMM ID 0023 User Response Information only no action is required 40000018 00000000 LAN Ethernet arg1 interface is no longer active This message is for the use case where a Management Controller ethernet interface is no longer active May also be shown a...

Page 336: ...4000001900000000 Severity Info Serviceable No Automatically notify support No Alert Category none SNMP Trap ID CIM Information Prefix IMM ID 0025 User Response Information only no action is required 4000001a 00000000 DHCP setting changed to arg1 by user arg2 This message is for the use case where a user changes the DHCP setting May also be shown as 4000001a00000000 or 0x4000001a00000000 Severity I...

Page 337: ...ty Info Serviceable No Automatically notify support No Alert Category none SNMP Trap ID CIM Information Prefix IMM ID 0027 User Response Information only no action is required 4000001c 00000000 Watchdog arg1 Screen Capture Occurred This message is for the use case where an operating system error has occurred and the screen was captured May also be shown as 4000001c00000000 or 0x4000001c00000000 Se...

Page 338: ...pport No Alert Category System other SNMP Trap ID 22 CIM Information Prefix IMM ID 0029 User Response Complete the following steps until the problem is solved 1 Reconfigure the watchdog timer to a higher value 2 Make sure that the IMM Ethernet over USB interface is enabled 3 Reinstall the RNDIS or cdc_ether device driver for the operating system 4 Disable the watchdog Check the integrity of the in...

Page 339: ...ect firmware The Management Controller is unable to match its firmware to the server This message is for the use case where a Management Controller firmware version does not match the server May also be shown as 4000001f00000000 or 0x4000001f00000000 Severity Error Serviceable No Automatically notify support No Alert Category System other SNMP Trap ID 22 CIM Information Prefix IMM ID 0031 User Res...

Page 340: ...CIM Information Prefix IMM ID 0032 User Response Information only no action is required 40000021 00000000 Management Controller arg1 clock has been set from NTP server arg2 This message is for the use case where a Management Controller clock has been set from the Network Time Protocol server May also be shown as 4000002100000000 or 0x4000002100000000 Severity Info Serviceable No Automatically noti...

Page 341: ...until the problem is solved 1 Make sure that the certificate that you are importing is correct 2 Try to import the certificate again 40000023 00000000 Flash of arg1 from arg2 succeeded for user arg3 This message is for the use case where a user has successfully flashed the firmware component MC Main Application MC Boot ROM BIOS Diagnostics System Power Backplane Remote Expansion Enclosure Power Ba...

Page 342: ...ory System other SNMP Trap ID 22 CIM Information Prefix IMM ID 0036 User Response Information only no action is required 40000025 00000000 The arg1 on system arg2 is 75 full This message is for the use case where a Management Controller Event Log on a system is 75 full May also be shown as 4000002500000000 or 0x4000002500000000 Severity Info Serviceable No Automatically notify support No Alert Cat...

Page 343: ...e and clear the log 40000027 00000000 Platform Watchdog Timer expired for arg1 This message is for the use case when an implementation has detected a Platform Watchdog Timer Expired May also be shown as 4000002700000000 or 0x4000002700000000 Severity Error Serviceable No Automatically notify support No Alert Category System OS Timeout SNMP Trap ID 21 CIM Information Prefix IMM ID 0039 User Respons...

Page 344: ... support No Alert Category System other SNMP Trap ID 22 CIM Information Prefix IMM ID 0040 User Response Information only no action is required 40000029 00000000 Security Userid arg1 had arg2 login failures from an SSH client at IP address arg3 This message is for the use case where a user has failed to log in to a Management Controller from SSH May also be shown as 4000002900000000 or 0x400000290...

Page 345: ... has been detected May also be shown as 4000002a00000000 or 0x4000002a00000000 Severity Error Serviceable No Automatically notify support No Alert Category System Other SNMP Trap ID 22 CIM Information Prefix IMM ID 0042 User Response Reflash the IMM firmware to the latest version 4000002b 00000000 Domain name set to arg1 Domain name set by user May also be shown as 4000002b00000000 or 0x4000002b00...

Page 346: ...support No Alert Category none SNMP Trap ID CIM Information Prefix IMM ID 0044 User Response Information only no action is required 4000002d 00000000 DDNS setting changed to arg1 by user arg2 DDNS setting changed by user May also be shown as 4000002d00000000 or 0x4000002d00000000 Severity Info Serviceable No Automatically notify support No Alert Category none SNMP Trap ID CIM Information Prefix IM...

Page 347: ...P Trap ID CIM Information Prefix IMM ID 0046 User Response Information only no action is required 4000002f 00000000 IPv6 enabled by user arg1 IPv6 protocol is enabled by user May also be shown as 4000002f00000000 or 0x4000002f00000000 Severity Info Serviceable No Automatically notify support No Alert Category none SNMP Trap ID CIM Information Prefix IMM ID 0047 User Response Information only no ac...

Page 348: ...n only no action is required 40000031 00000000 IPv6 static IP configuration enabled by user arg1 IPv6 static address assignment method is enabled by user May also be shown as 4000003100000000 or 0x4000003100000000 Severity Info Serviceable No Automatically notify support No Alert Category none SNMP Trap ID CIM Information Prefix IMM ID 0049 User Response Information only no action is required 4000...

Page 349: ...user arg1 IPv6 statless auto assignment method is enabled by user May also be shown as 4000003300000000 or 0x4000003300000000 Severity Info Serviceable No Automatically notify support No Alert Category none SNMP Trap ID CIM Information Prefix IMM ID 0051 User Response Information only no action is required 40000034 00000000 IPv6 static IP configuration disabled by user arg1 IPv6 static assignment ...

Page 350: ...lso be shown as 4000003500000000 or 0x4000003500000000 Severity Info Serviceable No Automatically notify support No Alert Category none SNMP Trap ID CIM Information Prefix IMM ID 0053 User Response Information only no action is required 40000036 00000000 IPv6 stateless auto configuration disabled by user arg1 IPv6 statless auto assignment method is disabled by user May also be shown as 40000036000...

Page 351: ...also be shown as 4000003700000000 or 0x4000003700000000 Severity Info Serviceable No Automatically notify support No Alert Category none SNMP Trap ID CIM Information Prefix IMM ID 0055 User Response Information only no action is required 40000038 00000000 ENET arg1 IPv6 Static HstName arg2 IP arg3 Pref arg4 GW arg5 IPv6 Static address is active May also be shown as 4000003800000000 or 0x4000003800...

Page 352: ...00 or 0x4000003900000000 Severity Info Serviceable No Automatically notify support No Alert Category none SNMP Trap ID CIM Information Prefix IMM ID 0057 User Response Information only no action is required 4000003a 00000000 IPv6 static address of network interface modified from arg1 to arg2 by user arg3 A user modifies the IPv6 static address of a Management Controller May also be shown as 400000...

Page 353: ... notify support No Alert Category none SNMP Trap ID CIM Information Prefix IMM ID 0059 User Response Complete the following steps until the problem is solved 1 Make sure that the IMM network cable is connected 2 Make sure that there is a DHCPv6 server on the network that can assign an IP address to the IMM 4000003c 00000000 Platform Watchdog Timer expired for arg1 An implementation has detected an...

Page 354: ...ing system 4000003d 00000000 Telnet port number changed from arg1 to arg2 by user arg3 A user has modified the telnet port number May also be shown as 4000003d00000000 or 0x4000003d00000000 Severity Info Serviceable No Automatically notify support No Alert Category none SNMP Trap ID CIM Information Prefix IMM ID 0061 User Response Information only no action is required 4000003e 00000000 SSH port n...

Page 355: ...May also be shown as 4000003f00000000 or 0x4000003f00000000 Severity Info Serviceable No Automatically notify support No Alert Category none SNMP Trap ID CIM Information Prefix IMM ID 0063 User Response Information only no action is required 40000040 00000000 Web HTTPS port number changed from arg1 to arg2 by user arg3 A user has modified the Web HTTPS port number May also be shown as 400000400000...

Page 356: ...o be shown as 4000004100000000 or 0x4000004100000000 Severity Info Serviceable No Automatically notify support No Alert Category none SNMP Trap ID CIM Information Prefix IMM ID 0065 User Response Information only no action is required 40000042 00000000 CIM XML HTTPS port number changed from arg1 to arg2 by user arg3 A user has modified the CIM HTTPS port number May also be shown as 400000420000000...

Page 357: ... or 0x4000004300000000 Severity Info Serviceable No Automatically notify support No Alert Category none SNMP Trap ID CIM Information Prefix IMM ID 0067 User Response Information only no action is required 40000044 00000000 SNMP Traps port number changed from arg1 to arg2 by user arg3 A user has modified the SNMP Traps port number May also be shown as 4000004400000000 or 0x4000004400000000 Severity...

Page 358: ...Severity Info Serviceable No Automatically notify support No Alert Category none SNMP Trap ID CIM Information Prefix IMM ID 0069 User Response Information only no action is required 40000046 00000000 Remote Presence port number changed from arg1 to arg2 by user arg3 A user has modified the Remote Presence port number May also be shown as 4000004600000000 or 0x4000004600000000 Severity Info Service...

Page 359: ...port No Alert Category none SNMP Trap ID CIM Information Prefix IMM ID 0071 User Response Information only no action is required 40000048 00000000 Inventory data changed for device arg1 new device data hash arg2 new master data hash arg3 Something has caused the physical inventory to change May also be shown as 4000004800000000 or 0x4000004800000000 Severity Info Serviceable No Automatically notif...

Page 360: ...cally notify support No Alert Category none SNMP Trap ID CIM Information Prefix IMM ID 0073 User Response Information only no action is required 4000004a 00000000 SNMP arg1 disabled by user arg2 A user disabled SNMPv1 or SNMPv3 or Traps May also be shown as 4000004a00000000 or 0x4000004a00000000 Severity Info Serviceable No Automatically notify support No Alert Category none SNMP Trap ID CIM Infor...

Page 361: ...rmation Prefix IMM ID 0075 User Response Information only no action is required 4000004c 00000000 LDAP Server configuration set by user arg1 SelectionMethod arg2 DomainName arg3 Server1 arg4 Server2 arg5 Server3 arg6 Server4 arg7 A user changed the LDAP server configuration May also be shown as 4000004c00000000 or 0x4000004c00000000 Severity Info Serviceable No Automatically notify support No Aler...

Page 362: ...cally notify support No Alert Category none SNMP Trap ID CIM Information Prefix IMM ID 0077 User Response Information only no action is required 4000004e 00000000 Serial Redirection set by user arg1 Mode arg2 BaudRate arg3 StopBits arg4 Parity arg5 SessionTerminateSequence arg6 A user configured the Serial Port mode May also be shown as 4000004e00000000 or 0x4000004e00000000 Severity Info Servicea...

Page 363: ... Prefix IMM ID 0079 User Response Information only no action is required 40000050 00000000 Server General Settings set by user arg1 Name arg2 Contact arg3 Location arg4 Room arg5 RackID arg6 Rack U position arg7 A user configured the Location setting May also be shown as 4000005000000000 or 0x4000005000000000 Severity Info Serviceable No Automatically notify support No Alert Category none SNMP Tra...

Page 364: ...n only no action is required 40000052 00000000 Server arg1 scheduled for arg2 at arg3 by user arg4 A user configured a Server Power action at a specific time May also be shown as 4000005200000000 or 0x4000005200000000 Severity Info Serviceable No Automatically notify support No Alert Category none SNMP Trap ID CIM Information Prefix IMM ID 0082 User Response Information only no action is required ...

Page 365: ...red by user arg3 A user cleared a Server Power Action May also be shown as 4000005400000000 or 0x4000005400000000 Severity Info Serviceable No Automatically notify support No Alert Category none SNMP Trap ID CIM Information Prefix IMM ID 0084 User Response Information only no action is required 40000055 00000000 Synchronize time setting by user arg1 Mode arg2 NTPServerHost arg3 arg4 NTPUpdateFrequ...

Page 366: ...g1 to arg2 arg3 A user configured the SMTP server May also be shown as 4000005600000000 or 0x4000005600000000 Severity Info Serviceable No Automatically notify support No Alert Category none SNMP Trap ID CIM Information Prefix IMM ID 0086 User Response Information only no action is required 40000057 00000000 Telnet arg1 by user arg2 A user enables or disables Telnet services May also be shown as 4...

Page 367: ...Server1 arg7 IPv6Server2 arg8 IPv6Server3 arg9 A user configures the DNS servers May also be shown as 4000005800000000 or 0x4000005800000000 Severity Info Serviceable No Automatically notify support No Alert Category none SNMP Trap ID CIM Information Prefix IMM ID 0088 User Response Information only no action is required 40000059 00000000 LAN over USB arg1 by user arg2 A user configured USB LAN Ma...

Page 368: ... LAN port forwarding May also be shown as 4000005a00000000 or 0x4000005a00000000 Severity Info Serviceable No Automatically notify support No Alert Category none SNMP Trap ID CIM Information Prefix IMM ID 0090 User Response Information only no action is required 4000005b 00000000 Secure Web services HTTPS arg1 by user arg2 A user enables or disables Secure web services May also be shown as 4000005...

Page 369: ... be shown as 4000005c00000000 or 0x4000005c00000000 Severity Info Serviceable No Automatically notify support No Alert Category none SNMP Trap ID CIM Information Prefix IMM ID 0092 User Response Information only no action is required 4000005d 00000000 Secure LDAP arg1 by user arg2 A user enables or disables Secure LDAP services May also be shown as 4000005d00000000 or 0x4000005d00000000 Severity I...

Page 370: ...rviceable No Automatically notify support No Alert Category none SNMP Trap ID CIM Information Prefix IMM ID 0094 User Response Information only no action is required 4000005f 00000000 Server timeouts set by user arg1 EnableOSWatchdog arg2 OSWatchdogTimout arg3 EnableLoaderWatchdog arg4 LoaderTimeout arg5 A user configures Server Timeouts May also be shown as 4000005f00000000 or 0x4000005f00000000 ...

Page 371: ...ity Info Serviceable No Automatically notify support No Alert Category none SNMP Trap ID CIM Information Prefix IMM ID 0096 User Response Information only no action is required 40000061 00000000 License key for arg1 removed by user arg2 A user removes a License Key May also be shown as 4000006100000000 or 0x4000006100000000 Severity Info Serviceable No Automatically notify support No Alert Categor...

Page 372: ...x IMM ID 0098 User Response Information only no action is required 40000063 00000000 Global Login Account Security set by user arg1 PasswordRequired arg2 PasswordExpirationPeriod arg3 MinimumPasswordReuseCycle arg4 MinimumPasswordLength arg5 MinimumPasswordChangeInterval arg6 MaxmumLoginFailures arg7 LockoutAfterMaxFailures arg8 MinimumDifferentCharacters arg9 DefaultIDExpired arg10 ChangePassword...

Page 373: ...erity Info Serviceable No Automatically notify support No Alert Category none SNMP Trap ID CIM Information Prefix IMM ID 0100 User Response Information only no action is required 40000065 00000000 User arg1 removed A user account was deleted May also be shown as 4000006500000000 or 0x4000006500000000 Severity Info Serviceable No Automatically notify support No Alert Category none Appendix A Integr...

Page 374: ...o Serviceable No Automatically notify support No Alert Category none SNMP Trap ID CIM Information Prefix IMM ID 0102 User Response Information only no action is required 40000067 00000000 User arg1 role set to arg2 A user account role assigned May also be shown as 4000006700000000 or 0x4000006700000000 Severity Info Serviceable No Automatically notify support No Alert Category none SNMP Trap ID 36...

Page 375: ...SNMP Trap ID CIM Information Prefix IMM ID 0104 User Response Information only no action is required 40000069 00000000 User arg1 for SNMPv3 set AuthenticationProtocol arg2 PrivacyProtocol arg3 AccessType arg4 HostforTraps arg5 User account SNMPv3 settings changed May also be shown as 4000006900000000 or 0x4000006900000000 Severity Info Serviceable No Automatically notify support No Alert Category ...

Page 376: ...MP Trap ID CIM Information Prefix IMM ID 0106 User Response Information only no action is required 4000006b 00000000 SSH Client key imported for user arg1 from arg2 User imported an SSH Client key May also be shown as 4000006b00000000 or 0x4000006b00000000 Severity Info Serviceable No Automatically notify support No Alert Category none SNMP Trap ID CIM Information Prefix IMM ID 0107 User Response ...

Page 377: ...ontroller arg1 Configuration saved to a file by user arg2 A user saves a Management Controller configuration to a file May also be shown as 4000006d00000000 or 0x4000006d00000000 Severity Info Serviceable No Automatically notify support No Alert Category none SNMP Trap ID CIM Information Prefix IMM ID 0109 User Response Information only no action is required 4000006e 00000000 Alert Configuration G...

Page 378: ...iveryMethod arg3 Address arg4 IncludeLog arg5 Enabled arg6 EnabledAlerts arg7 AllowedFilters arg8 A user adds or updates an Alert Recipient May also be shown as 4000006f00000000 or 0x4000006f00000000 Severity Info Serviceable No Automatically notify support No Alert Category none SNMP Trap ID CIM Information Prefix IMM ID 0111 User Response Information only no action is required 40000070 00000000 ...

Page 379: ...er arg3 Power Cap values changed by user May also be shown as 4000007100000000 or 0x4000007100000000 Severity Info Serviceable No Automatically notify support No Alert Category none SNMP Trap ID CIM Information Prefix IMM ID 0113 User Response Information only no action is required 40000072 00000000 The minimum power cap value changed from arg1 watts to arg2 watts Minimum Power Cap value changed M...

Page 380: ...ged May also be shown as 4000007300000000 or 0x4000007300000000 Severity Info Serviceable No Automatically notify support No Alert Category none SNMP Trap ID CIM Information Prefix IMM ID 0115 User Response Information only no action is required 40000074 00000000 The soft minimum power cap value changed from arg1 watts to arg2 watts Soft Minimum Power Cap value changed May also be shown as 4000007...

Page 381: ...00 or 0x4000007500000000 Severity Warning Serviceable No Automatically notify support No Alert Category Warning Power SNMP Trap ID 164 CIM Information Prefix IMM ID 0117 User Response Information only no action is required 40000076 00000000 The new minimum power cap value exceeded the power cap value Minimum Power Cap exceeds Power Cap May also be shown as 4000007600000000 or 0x4000007600000000 Se...

Page 382: ...007700000000 or 0x4000007700000000 Severity Info Serviceable No Automatically notify support No Alert Category none SNMP Trap ID CIM Information Prefix IMM ID 0119 User Response Information only no action is required 40000078 00000000 Power capping was deactivated by user arg1 Power capping deactivated by user May also be shown as 4000007800000000 or 0x4000007800000000 Severity Info Serviceable No...

Page 383: ...rity Info Serviceable No Automatically notify support No Alert Category none SNMP Trap ID CIM Information Prefix IMM ID 0121 User Response Information only no action is required 4000007a 00000000 Static Power Savings mode has been turned off by user arg1 Static Power Savings mode turned off by user May also be shown as 4000007a00000000 or 0x4000007a00000000 Severity Info Serviceable No Automatical...

Page 384: ... Serviceable No Automatically notify support No Alert Category none SNMP Trap ID CIM Information Prefix IMM ID 0123 User Response Information only no action is required 4000007c 00000000 Dynamic Power Savings mode has been turned off by user arg1 Dynamic Power Savings mode turned off by user May also be shown as 4000007c00000000 or 0x4000007c00000000 Severity Info Serviceable No Automatically noti...

Page 385: ...utomatically notify support No Alert Category none SNMP Trap ID CIM Information Prefix IMM ID 0125 User Response Information only no action is required 4000007e 00000000 External throttling occurred External throttling occurred May also be shown as 4000007e00000000 or 0x4000007e00000000 Severity Info Serviceable No Automatically notify support No Alert Category none SNMP Trap ID CIM Information Pr...

Page 386: ... CIM Information Prefix IMM ID 0127 User Response Information only no action is required 40000080 00000000 Remote Control session started by user arg1 in arg2 mode Remote Control session started May also be shown as 4000008000000000 or 0x4000008000000000 Severity Info Serviceable No Automatically notify support No Alert Category none SNMP Trap ID CIM Information Prefix IMM ID 0128 User Response In...

Page 387: ...0082 00000000 The measured power value has returned below the power cap value Power exceeded cap recovered May also be shown as 4000008200000000 or 0x4000008200000000 Severity Info Serviceable No Automatically notify support No Alert Category Warning Power SNMP Trap ID 164 CIM Information Prefix IMM ID 0130 User Response Information only no action is required 40000083 00000000 The new minimum powe...

Page 388: ...e same level on all nodes A mismatch of IMM firmware has been detected between nodes May also be shown as 4000008400000000 or 0x4000008400000000 Severity Error Serviceable No Automatically notify support No Alert Category System Other SNMP Trap ID 22 CIM Information Prefix IMM ID 0132 User Response Attempt to flash the IMM firmware to the same level on all nodes 40000085 00000000 FPGA firmware mis...

Page 389: ... Home Generated by user arg1 Test Call Home generated by user May also be shown as 4000008600000000 or 0x4000008600000000 Severity Info Serviceable No Automatically notify support Yes Alert Category none SNMP Trap ID CIM Information Prefix IMM ID 0134 User Response Information only no action is required 40000087 00000000 Manual Call Home by user arg1 arg2 Manual Call Home by user May also be shown...

Page 390: ...May also be shown as 4000008800000000 or 0x4000008800000000 Severity Info Serviceable No Automatically notify support No Alert Category none SNMP Trap ID CIM Information Prefix IMM ID 0136 User Response Information only no action is required 40000089 00000000 Management Controller arg1 Configuration restoration from a file by user arg2 failed to complete This message is for the use case where a us...

Page 391: ... file by user arg2 failed to start This message is for the use case where a user restores a Management Controller configuration from a file and the restoration fails to start May also be shown as 4000008a00000000 or 0x4000008a00000000 Severity Error Serviceable No Automatically notify support No Alert Category System Other SNMP Trap ID 22 CIM Information Prefix IMM ID 0138 User Response 1 Turn off...

Page 392: ...ation Prefix IMM ID 0139 User Response Information only no action is required 80010002 0701ffff Numeric sensor NumericSensorElementName going low lower non critical has asserted CMOS Battery This message is for the use case when an implementation has detected a Lower Non critical sensor going low has asserted May also be shown as 800100020701ffff or 0x800100020701ffff Severity Warning Serviceable ...

Page 393: ...r Planar 5V trained technician only replace the system board If the specified sensor is Planar 12V complete the following steps until the problem is solved 1 Check power supply n LED 2 Remove the failing power supply 3 Follow actions in Power Problems and Solving Power Problems 4 Trained technician only Replace the system board n power supply number 80010204 1d01ffff Numeric sensor NumericSensorEl...

Page 394: ...n as 800102041d02ffff or 0x800102041d02ffff Severity Error Serviceable Yes Automatically notify support No Alert Category Critical Fan Failure SNMP Trap ID 11 CIM Information Prefix PLAT ID 0480 User Response 1 Reseat the failing fan n which is indicated by a lit LED near the fan connector on the system board 2 Replace the failing fan n fan number 80010204 1d03ffff Numeric sensor NumericSensorElem...

Page 395: ...itical has asserted Fan 4A 4B Tach This message is for the use case when an implementation has detected a Lower Critical sensor going low has asserted May also be shown as 800102041d04ffff or 0x800102041d04ffff Severity Error Serviceable Yes Automatically notify support No Alert Category Critical Fan Failure SNMP Trap ID 11 CIM Information Prefix PLAT ID 0480 User Response 1 Reseat the failing fan...

Page 396: ... ID 0480 User Response 1 Reseat the failing fan n which is indicated by a lit LED near the fan connector on the system board 2 Replace the failing fan n fan number 80010204 1d06ffff Numeric sensor NumericSensorElementName going low lower critical has asserted Fan 6A 6B Tach This message is for the use case when an implementation has detected a Lower Critical sensor going low has asserted May also ...

Page 397: ...ble Yes Automatically notify support No Alert Category Warning Temperature SNMP Trap ID 12 CIM Information Prefix PLAT ID 0490 User Response 1 Reduce the temperature 2 Check the server airflow Make sure that nothing is blocking the air from coming into or preventing the air from exiting the server 80010701 1001ffff Numeric sensor NumericSensorElementName going high upper non critical has asserted ...

Page 398: ...sensor going high has asserted May also be shown as 800107011002ffff or 0x800107011002ffff Severity Warning Serviceable Yes Automatically notify support No Alert Category Warning Temperature SNMP Trap ID 12 CIM Information Prefix PLAT ID 0490 User Response 1 Reduce the temperature 2 Check the server airflow Make sure that nothing is blocking the air from coming into or preventing the air from exit...

Page 399: ...ting the server 80010701 1402ffff Numeric sensor NumericSensorElementName going high upper non critical has asserted CPU2 VR Temp This message is for the use case when an implementation has detected an Upper Non critical sensor going high has asserted May also be shown as 800107011402ffff or 0x800107011402ffff Severity Warning Serviceable Yes Automatically notify support No Alert Category Warning ...

Page 400: ... Category Warning Temperature SNMP Trap ID 12 CIM Information Prefix PLAT ID 0490 User Response 1 Reduce the temperature 2 Check the server airflow Make sure that nothing is blocking the air from coming into or preventing the air from exiting the server 80010701 1404ffff Numeric sensor NumericSensorElementName going high upper non critical has asserted DIMM CD VR Temp This message is for the use c...

Page 401: ...07011405ffff Severity Warning Serviceable Yes Automatically notify support No Alert Category Warning Temperature SNMP Trap ID 12 CIM Information Prefix PLAT ID 0490 User Response 1 Reduce the temperature 2 Check the server airflow Make sure that nothing is blocking the air from coming into or preventing the air from exiting the server 80010701 1406ffff Numeric sensor NumericSensorElementName going...

Page 402: ... critical has asserted Mezz Card Temp This message is for the use case when an implementation has detected an Upper Non critical sensor going high has asserted May also be shown as 800107012c01ffff or 0x800107012c01ffff Severity Warning Serviceable Yes Automatically notify support No Alert Category Warning Temperature SNMP Trap ID 12 CIM Information Prefix PLAT ID 0490 User Response 1 Reduce the t...

Page 403: ... Reduce the temperature 2 Check the server airflow Make sure that nothing is blocking the air from coming into or preventing the air from exiting the server 80010901 0c01ffff Numeric sensor NumericSensorElementName going high upper critical has asserted Ambient Temp This message is for the use case when an implementation has detected an Upper Critical sensor going high has asserted May also be sho...

Page 404: ...y Error Serviceable Yes Automatically notify support No Alert Category Critical Temperature SNMP Trap ID 0 CIM Information Prefix PLAT ID 0494 User Response 1 Reduce the ambient temperature 2 Ensure the air baffle is installed correctly 3 Check the server airflow Make sure that nothing is blocking the air from coming into or preventing the air from exiting the server 80010901 1002ffff Numeric sens...

Page 405: ...has asserted CPU1 VR Temp This message is for the use case when an implementation has detected an Upper Critical sensor going high has asserted May also be shown as 800109011401ffff or 0x800109011401ffff Severity Error Serviceable Yes Automatically notify support No Alert Category Critical Temperature SNMP Trap ID 0 CIM Information Prefix PLAT ID 0494 User Response 1 Reduce the ambient temperature...

Page 406: ...e the ambient temperature 2 Ensure the air baffle is installed correctly 3 Check the server airflow Make sure that nothing is blocking the air from coming into or preventing the air from exiting the server 80010901 1403ffff Numeric sensor NumericSensorElementName going high upper critical has asserted DIMM AB VR Temp This message is for the use case when an implementation has detected an Upper Cri...

Page 407: ...011404ffff Severity Error Serviceable Yes Automatically notify support No Alert Category Critical Temperature SNMP Trap ID 0 CIM Information Prefix PLAT ID 0494 User Response 1 Reduce the ambient temperature 2 Ensure the air baffle is installed correctly 3 Check the server airflow Make sure that nothing is blocking the air from coming into or preventing the air from exiting the server 80010901 140...

Page 408: ...10901 1406ffff Numeric sensor NumericSensorElementName going high upper critical has asserted DIMM GH VR Temp This message is for the use case when an implementation has detected an Upper Critical sensor going high has asserted May also be shown as 800109011406ffff or 0x800109011406ffff Severity Error Serviceable Yes Automatically notify support No Alert Category Critical Temperature SNMP Trap ID ...

Page 409: ...cal Temperature SNMP Trap ID 0 CIM Information Prefix PLAT ID 0494 User Response 1 Reduce the ambient temperature 2 Ensure the air baffle is installed correctly 3 Check the server airflow Make sure that nothing is blocking the air from coming into or preventing the air from exiting the server 80010901 2d01ffff Numeric sensor NumericSensorElementName going high upper critical has asserted PCH Temp ...

Page 410: ...fff Severity Error Serviceable Yes Automatically notify support Yes Alert Category Critical Voltage SNMP Trap ID 1 CIM Information Prefix PLAT ID 0494 User Response If the specified sensor is Planar 3 3V or Planar 5V Trained technician only replace the system board If the specified sensor is Planar 12V complete the following steps until the problem is solved 1 Check power supply n LED 2 Remove the...

Page 411: ...Temp This message is for the use case when an implementation has detected an Upper Non recoverable sensor going high has asserted May also be shown as 80010b011001ffff or 0x80010b011001ffff Severity Error Serviceable Yes Automatically notify support No Alert Category Critical Temperature SNMP Trap ID 0 CIM Information Prefix PLAT ID 0498 User Response Check the server airflow Make sure that nothin...

Page 412: ...iting the server 80010b01 1401ffff Numeric sensor NumericSensorElementName going high upper non recoverable has asserted CPU1 VR Temp This message is for the use case when an implementation has detected an Upper Non recoverable sensor going high has asserted May also be shown as 80010b011401ffff or 0x80010b011401ffff Severity Error Serviceable Yes Automatically notify support No Alert Category Cri...

Page 413: ... Check the server airflow Make sure that nothing is blocking the air from coming into or preventing the air from exiting the server 80010b01 1403ffff Numeric sensor NumericSensorElementName going high upper non recoverable has asserted DIMM AB VR Temp This message is for the use case when an implementation has detected an Upper Non recoverable sensor going high has asserted May also be shown as 80...

Page 414: ...Alert Category Critical Temperature SNMP Trap ID 0 CIM Information Prefix PLAT ID 0498 User Response Check the server airflow Make sure that nothing is blocking the air from coming into or preventing the air from exiting the server 80010b01 1405ffff Numeric sensor NumericSensorElementName going high upper non recoverable has asserted DIMM EF VR Temp This message is for the use case when an impleme...

Page 415: ...ically notify support No Alert Category Critical Temperature SNMP Trap ID 0 CIM Information Prefix PLAT ID 0498 User Response Check the server airflow Make sure that nothing is blocking the air from coming into or preventing the air from exiting the server 80010b01 2c01ffff Numeric sensor NumericSensorElementName going high upper non recoverable has asserted Mezz Card Temp This message is for the ...

Page 416: ...f or 0x80010b012d01ffff Severity Error Serviceable Yes Automatically notify support No Alert Category Critical Temperature SNMP Trap ID 0 CIM Information Prefix PLAT ID 0498 User Response Check the server airflow Make sure that nothing is blocking the air from coming into or preventing the air from exiting the server 80030006 2101ffff Sensor SensorElementName has deasserted Sig Verify Fail This me...

Page 417: ...iceable No Automatically notify support No Alert Category System Other SNMP Trap ID CIM Information Prefix PLAT ID 0509 User Response No action information only 80030108 1301ffff Sensor SensorElementName has asserted PS Heavy Load This message is for the use case when an implementation has detected a Sensor has asserted May also be shown as 800301081301ffff or 0x800301081301ffff Severity Info Serv...

Page 418: ...10c01ffff or 0x800701010c01ffff Severity Warning Serviceable Yes Automatically notify support No Alert Category Warning Temperature SNMP Trap ID 12 CIM Information Prefix PLAT ID 0520 User Response 1 Check the microprocessor installed is Intel E5 2690 2 Reduce the ambient temperature under 27 Celsius degree 8007010f 2201ffff Sensor SensorElementName has transitioned from normal to non critical sta...

Page 419: ...r the use case when an implementation has detected a Sensor transitioned to non critical from normal May also be shown as 8007010f2582ffff or 0x8007010f2582ffff Severity Warning Serviceable Yes Automatically notify support No Alert Category Warning Other SNMP Trap ID 60 CIM Information Prefix PLAT ID 0520 User Response Complete the following step to solve PCI I O resource errors 1 Go to F1 Setup S...

Page 420: ...e ON position 2 Restore the physical presence switch to the OFF position 3 Reboot the system 4 Trained technician only If the error continues replace the planar 80070201 0301ffff Sensor SensorElementName has transitioned to critical from a less severe state CPU 1 OverTemp This message is for the use case when an implementation has detected a Sensor transitioned to critical from less severe May als...

Page 421: ...ed to critical from less severe May also be shown as 800702010302ffff or 0x800702010302ffff Severity Error Serviceable Yes Automatically notify support No Alert Category Critical Temperature SNMP Trap ID 0 CIM Information Prefix PLAT ID 0522 User Response 1 Make sure that the fans are operating that there are no obstructions to the airflow front and rear of the server that the air baffles are in p...

Page 422: ...ns require specific code levels or coordinated code updates If the device is part of a cluster solution verify that the latest level of code is supported for the cluster solution before you update the code 5 Trained technician only Replace the system board 80070204 0a01ffff Sensor SensorElementName has transitioned to critical from a less severe state PS 1 Fan Fault This message is for the use cas...

Page 423: ...ff Severity Error Serviceable Yes Automatically notify support No Alert Category Critical Fan Failure SNMP Trap ID 11 CIM Information Prefix PLAT ID 0522 User Response 1 Make sure that there are no obstructions such as bundled cables to the airflow from the power supply fan 2 Replace power supply n n power supply number 80070208 0a01ffff Sensor SensorElementName has transitioned to critical from a...

Page 424: ...onfig html 3 Replace power supply n n power supply number 80070208 0a02ffff Sensor SensorElementName has transitioned to critical from a less severe state PS 2 Therm Fault This message is for the use case when an implementation has detected a Sensor transitioned to critical from less severe May also be shown as 800702080a02ffff or 0x800702080a02ffff Severity Error Serviceable Yes Automatically not...

Page 425: ...ceable Yes Automatically notify support No Alert Category Critical Other SNMP Trap ID 50 CIM Information Prefix PLAT ID 0522 User Response 1 If enabling TXT is not required disable TXT from the Setup Utility 2 If enabling TXT is required verify that the TPM is enabled and activated from the Setup Utility 3 If the problem remains contact your service representative 8007020f 2582ffff Sensor SensorEl...

Page 426: ... 0x800702142201ffff Severity Error Serviceable No Automatically notify support No Alert Category Critical Other SNMP Trap ID CIM Information Prefix PLAT ID 0522 User Response 1 Update the server firmware see Recovering the server firmware 2 If the problem persists trained technician only replace the system board see Removing the system board and Installing the system board 80070219 0701ffff Sensor...

Page 427: ...ter solution before you update the code 4 Unplug and restore AC power cord then perform step 1 and 2 again 5 If problems still occurred trained technician only replace the system board 8007021b 0301ffff Sensor SensorElementName has transitioned to critical from a less severe state CPU 1 QPILinkErr This message is for the use case when an implementation has detected a Sensor transitioned to critica...

Page 428: ...rror Serviceable Yes Automatically notify support No Alert Category Critical Other SNMP Trap ID 50 CIM Information Prefix PLAT ID 0522 User Response 1 Check for a server firmware update 2 Make sure that the installed microprocessors are compatible 3 Make sure the microprocessor 2 expansion board is installed correctly see Installing the microprocessor 2 expansion board 4 Trained technician only Re...

Page 429: ... specifications for more information 3 Make sure that the heat sink for microprocessor n 4 Trained technician only Replace microprocessor n n microprocessor number 80070301 0302ffff Sensor SensorElementName has transitioned to non recoverable from a less severe state CPU 2 OverTemp This message is for the use case when an implementation has detected a Sensor transitioned to non recoverable from le...

Page 430: ...essage is for the use case when an implementation has detected a Sensor transitioned to non recoverable May also be shown as 800706030701ffff or 0x800706030701ffff Severity Error Serviceable Yes Automatically notify support No Alert Category Critical Power SNMP Trap ID 4 CIM Information Prefix PLAT ID 0530 User Response If the specified sensor is one of Pwr Rail 1 6 Fault please follow actions in ...

Page 431: ...ed sensor is PS n 12V UV Fault complete the following steps until the problem is solved 1 Check power supply n LED 2 Remove the failing power supply 3 Follow actions in Power Problems and Solving Power Problems 4 Trained technician only Replace the system board n power supply number If the specified sensor is PS n 12Vaux Fault complete the following steps until the problem is solved 1 Check power ...

Page 432: ...3 Follow actions in Power Problems and Solving Power Problems 4 Trained technician only Replace the system board n power supply number If the specified sensor is PS n 12Vaux Fault complete the following steps until the problem is solved 1 Check power supply n LED 2 Replace power supply n n power supply number 80070614 2201ffff Sensor SensorElementName has transitioned to non recoverable TPM Phy Pr...

Page 433: ...No action information only 80080128 2101ffff Device LogicalDeviceElementName has been added Low Security Jmp This message is for the use case when an implementation has detected a Device was inserted May also be shown as 800801282101ffff or 0x800801282101ffff Severity Info Serviceable No Automatically notify support No Alert Category System Other SNMP Trap ID CIM Information Prefix PLAT ID 0536 Us...

Page 434: ...nformation only 800b0108 1301ffff Redundancy Lost for RedundancySetElementName has asserted Power Unit This message is for the use case when Redundancy Lost has asserted May also be shown as 800b01081301ffff or 0x800b01081301ffff Severity Error Serviceable Yes Automatically notify support No Alert Category Critical Redundant Power Supply SNMP Trap ID 9 CIM Information Prefix PLAT ID 0802 User Resp...

Page 435: ...onnectors on fan n are not damaged 2 Make sure that the fan n connectors on the system board are not damaged 3 Make sure that the fans are correctly installed 4 Reseat the fans 5 Replace the fans n fan number 800b010a 1e82ffff Redundancy Lost for RedundancySetElementName has asserted Fan Zone 2 This message is for the use case when Redundancy Lost has asserted May also be shown as 800b010a1e82ffff...

Page 436: ...rror Serviceable Yes Automatically notify support No Alert Category Critical Memory SNMP Trap ID 41 CIM Information Prefix PLAT ID 0802 User Response 1 Check the system event log for DIMM failure events uncorrectable or PFA and correct the failures 2 Re enable mirroring in the Setup utility 800b0309 1301ffff Non redundant Sufficient Resources from Redundancy Degraded or Fully Redundant for Redunda...

Page 437: ...ded or Fully Redundant for RedundancySetElementName has asserted Backup Memory This message is for the use case when a Redundancy Set has transitioned from Redundancy Degraded or Fully Redundant to Non redundant Sufficient May also be shown as 800b030c2581ffff or 0x800b030c2581ffff Severity Warning Serviceable Yes Automatically notify support No Alert Category Warning Memory SNMP Trap ID 43 CIM In...

Page 438: ...hutdown may happen anyway if the power load is too great 2 Reduce the total power consumption by removing newly added or unused options like drives or adaptors 3 Use the IBM Power Configurator utility to determine current system power consumption For more information and to download the utility go to http www 03 ibm com systems bladecenter resources powerconfig html 4 Replace the power supply with...

Page 439: ...e 2 This message is for the use case when a Redundancy Set has transitioned to Non redundant Insufficient Resources May also be shown as 800b050a1e82ffff or 0x800b050a1e82ffff Severity Error Serviceable Yes Automatically notify support No Alert Category Critical Fan Failure SNMP Trap ID 11 CIM Information Prefix PLAT ID 0810 User Response 1 Make sure that the connectors on fan n are not damaged 2 ...

Page 440: ...mation Prefix PLAT ID 0810 User Response 1 Check the system event log for DIMM failure events uncorrectable or PFA and correct the failures 2 Re enable mirroring in the Setup utility 806f0007 0301ffff ProcessorElementName has Failed with IERR CPU 1 This message is for the use case when an implementation has detected a Processor Failed IERR Condition May also be shown as 806f00070301ffff or 0x806f0...

Page 441: ...ion has detected a Processor Failed IERR Condition May also be shown as 806f00070302ffff or 0x806f00070302ffff Severity Error Serviceable Yes Automatically notify support No Alert Category Critical CPU SNMP Trap ID 40 CIM Information Prefix PLAT ID 0042 User Response 1 Make sure that the latest level of firmware and device drivers are installed for all adapters and standard devices such as Etherne...

Page 442: ...IM Information Prefix PLAT ID 0084 User Response No action information only 806f0008 0a02ffff PowerSupplyElementName has been added to container PhysicalPackageElementName Power Supply 2 This message is for the use case when an implementation has detected a Power Supply has been added May also be shown as 806f00080a02ffff or 0x806f00080a02ffff Severity Info Serviceable No Automatically notify supp...

Page 443: ...nse No action information only 806f000d 0400ffff The Drive StorageVolumeElementName has been added Drive 0 This message is for the use case when an implementation has detected a Drive has been Added May also be shown as 806f000d0400ffff or 0x806f000d0400ffff Severity Info Serviceable No Automatically notify support No Alert Category Critical Hard Disk drive SNMP Trap ID 5 CIM Information Prefix PL...

Page 444: ...This message is for the use case when an implementation has detected a Drive has been Added May also be shown as 806f000d0402ffff or 0x806f000d0402ffff Severity Info Serviceable No Automatically notify support No Alert Category Critical Hard Disk drive SNMP Trap ID 5 CIM Information Prefix PLAT ID 0162 User Response No action information only 806f000d 0403ffff The Drive StorageVolumeElementName ha...

Page 445: ...ed May also be shown as 806f000d0404ffff or 0x806f000d0404ffff Severity Info Serviceable No Automatically notify support No Alert Category Critical Hard Disk drive SNMP Trap ID 5 CIM Information Prefix PLAT ID 0162 User Response No action information only 806f000d 0405ffff The Drive StorageVolumeElementName has been added Drive 5 This message is for the use case when an implementation has detected...

Page 446: ...y also be shown as 806f000d0406ffff or 0x806f000d0406ffff Severity Info Serviceable No Automatically notify support No Alert Category Critical Hard Disk drive SNMP Trap ID 5 CIM Information Prefix PLAT ID 0162 User Response No action information only 806f000d 0407ffff The Drive StorageVolumeElementName has been added Drive 7 This message is for the use case when an implementation has detected a Dr...

Page 447: ...0794 User Response 1 Make sure the server meets the minimum configuration to start see Power supply LEDs 2 Recover the server firmware from the backup page a Restart the server b At the prompt press F3 to recover the firmware 3 Update the server firmware on the primary page Important Some cluster solutions require specific code levels or coordinated code updates If the device is part of a cluster ...

Page 448: ...e cluster solutions require specific code levels or coordinated code updates If the device is part of a cluster solution verify that the latest level of code is supported for the cluster solution before you update the code 3 Trained technician only Replace the system board Firmware Error Sys Boot Status 806f000f 220103ff The System ComputerSystemElementName encountered firmware error unrecoverable...

Page 449: ...r Serviceable Yes Automatically notify support No Alert Category Critical Other SNMP Trap ID 50 CIM Information Prefix PLAT ID 0795 User Response This is a UEFI detected event The UEFI diagnostic code for this event can be found in the logged IMM message text Please refer to the UEFI POST error code in the UEFI POST error code section of the Info Center for the appropriate user response Firmware E...

Page 450: ...o device detected has occurred May also be shown as 806f000f22010aff or 0x806f000f22010aff Severity Error Serviceable Yes Automatically notify support No Alert Category Critical Other SNMP Trap ID 50 CIM Information Prefix PLAT ID 0766 User Response This is a UEFI detected event The UEFI POST error for this event can be found in the logged IMM message text Please refer to the UEFI POST error code ...

Page 451: ...the latest level of code is supported for the cluster solution before you update the code 4 Remove components one at a time restarting the server each time to see if the problem goes away 5 If the problem remains trained service technician replace the system board Firmware Error Sys Boot Status 806f000f 22010cff CPU voltage mismatch detected on ProcessorElementName ABR Status This message is for t...

Page 452: ...ritical Other SNMP Trap ID 50 CIM Information Prefix PLAT ID 0184 User Response This is a UEFI detected event The UEFI POST error code for this event can be found in the logged IMM message text Please refer to the UEFI POST error code in the UEFI POST error code section of the Information Center for the appropriate user response Firmware Error Sys Boot Status 806f0013 1701ffff A diagnostic interru...

Page 453: ...tion Prefix PLAT ID 0330 User Response 1 Check the PCI LED 2 Reseat the affected adapters and riser card 3 Update the server firmware UEFI and IMM and adapter firmware Important Some cluster solutions require specific code levels or coordinated code updates If the device is part of a cluster solution verify that the latest level of code is supported for the cluster solution before you update the c...

Page 454: ...code is supported for the cluster solution before you update the code 4 Remove both adapters 5 Replace the riser card 6 Trained service technicians only Replace the system board One of PCI Error 806f0021 2c01ffff Fault in slot PhysicalConnectorSystemElementName on system ComputerSystemElementName Mezz Card Error This message is for the use case when an implementation has detected a Fault in a slot...

Page 455: ...e case when an implementation has detected a Fault in a slot May also be shown as 806f00213001ffff or 0x806f00213001ffff Severity Error Serviceable Yes Automatically notify support Yes Alert Category Critical Other SNMP Trap ID 50 CIM Information Prefix PLAT ID 0330 User Response 1 Check the PCI LED 2 Reseat the affected adapters and riser card 3 Update the server firmware UEFI and IMM and adapter...

Page 456: ...y 806f0028 2101ffff Sensor SensorElementName is unavailable or degraded on management system ComputerSystemElementName TPM Cmd Failures This message is for the use case when an implementation has detected a Sensor is Unavailable or degraded May also be shown as 806f00282101ffff or 0x806f00282101ffff Severity Warning Serviceable Yes Automatically notify support No Alert Category Warning Other SNMP ...

Page 457: ... operating There are no obstructions to the airflow front and rear of the server the air baffles are in place and correctly installed and the server cover is installed and completely closed 2 Make sure that the heat sink for microprocessor n is installed correctly 3 Trained technician only Replace microprocessor n n microprocessor number 806f0107 0302ffff An Over Temperature Condition has been det...

Page 458: ...tation has detected a Power Supply has failed May also be shown as 806f01080a01ffff or 0x806f01080a01ffff Severity Error Serviceable Yes Automatically notify support Yes Alert Category Critical Power SNMP Trap ID 4 CIM Information Prefix PLAT ID 0086 User Response 1 Reseat power supply n 2 If the power on LED is not lit and the power supply error LED is lit replace power supply n 3 If both the pow...

Page 459: ...ee Power problems for more information n power supply number 806f0109 1301ffff PowerSupplyElementName has been Power Cycled Host Power This message is for the use case when an implementation has detected a Power Unit that has been power cycled May also be shown as 806f01091301ffff or 0x806f01091301ffff Severity Info Serviceable No Automatically notify support No Alert Category System Other SNMP Tr...

Page 460: ... If the problem occurs on the same DIMM connector check the DIMM connector If the connector contains any foreign material or is damaged replace the system board 6 Trained technician only Remove the affected microprocessor and check the microprocessor socket pins for any damaged pins If a damage is found replace the system board 7 Trained technician only Replace the affected microprocessor 8 Manual...

Page 461: ...e the affected microprocessor and check the microprocessor socket pins for any damaged pins If a damage is found replace the system board 7 Trained technician only Replace the affected microprocessor 8 Manually re enable all affected DIMMs if the server firmware version is older than UEFI v1 10 If the server firmware version is UEFI v1 10 or newer disconnect and reconnect the server to the power s...

Page 462: ... If a damage is found replace the system board 7 Trained technician only Replace the affected microprocessor 8 Manually re enable all affected DIMMs if the server firmware version is older than UEFI v1 10 If the server firmware version is UEFI v1 10 or newer disconnect and reconnect the server to the power source and restart the server 9 Trained Service technician only Replace the affected micropr...

Page 463: ...mware version is UEFI v1 10 or newer disconnect and reconnect the server to the power source and restart the server 9 Trained Service technician only Replace the affected microprocessor 806f010c 2005ffff Uncorrectable error detected for PhysicalMemoryElementName on Subsystem MemoryElementName DIMM 5 This message is for the use case when an implementation has detected a Memory uncorrectable error M...

Page 464: ...s detected a Memory uncorrectable error May also be shown as 806f010c2006ffff or 0x806f010c2006ffff Severity Error Serviceable Yes Automatically notify support Yes Alert Category Critical Memory SNMP Trap ID 41 CIM Information Prefix PLAT ID 0138 User Response 1 Refer to TIP H212293 for minimum code level 2 Check the IBM support website for an applicable retain tip or firmware update that applies ...

Page 465: ...p or firmware update that applies to this memory error 3 Swap the affected DIMMs as indicated by the error LEDs on the system board or the event logs to a different memory channel or microprocessor 4 If the problem follows the DIMM replace the failing DIMM 5 Trained technician only If the problem occurs on the same DIMM connector check the DIMM connector If the connector contains any foreign mater...

Page 466: ... If the problem occurs on the same DIMM connector check the DIMM connector If the connector contains any foreign material or is damaged replace the system board 6 Trained technician only Remove the affected microprocessor and check the microprocessor socket pins for any damaged pins If a damage is found replace the system board 7 Trained technician only Replace the affected microprocessor 8 Manual...

Page 467: ... the affected microprocessor and check the microprocessor socket pins for any damaged pins If a damage is found replace the system board 7 Trained technician only Replace the affected microprocessor 8 Manually re enable all affected DIMMs if the server firmware version is older than UEFI v1 10 If the server firmware version is UEFI v1 10 or newer disconnect and reconnect the server to the power so...

Page 468: ...If a damage is found replace the system board 7 Trained technician only Replace the affected microprocessor 8 Manually re enable all affected DIMMs if the server firmware version is older than UEFI v1 10 If the server firmware version is UEFI v1 10 or newer disconnect and reconnect the server to the power source and restart the server 9 Trained Service technician only Replace the affected micropro...

Page 469: ...ware version is UEFI v1 10 or newer disconnect and reconnect the server to the power source and restart the server 9 Trained Service technician only Replace the affected microprocessor 806f010c 200cffff Uncorrectable error detected for PhysicalMemoryElementName on Subsystem MemoryElementName DIMM 12 This message is for the use case when an implementation has detected a Memory uncorrectable error M...

Page 470: ...as detected a Memory uncorrectable error May also be shown as 806f010c200dffff or 0x806f010c200dffff Severity Error Serviceable Yes Automatically notify support Yes Alert Category Critical Memory SNMP Trap ID 41 CIM Information Prefix PLAT ID 0138 User Response 1 Refer to TIP H212293 for minimum code level 2 Check the IBM support website for an applicable retain tip or firmware update that applies...

Page 471: ...ip or firmware update that applies to this memory error 3 Swap the affected DIMMs as indicated by the error LEDs on the system board or the event logs to a different memory channel or microprocessor 4 If the problem follows the DIMM replace the failing DIMM 5 Trained technician only If the problem occurs on the same DIMM connector check the DIMM connector If the connector contains any foreign mate...

Page 472: ... If the problem occurs on the same DIMM connector check the DIMM connector If the connector contains any foreign material or is damaged replace the system board 6 Trained technician only Remove the affected microprocessor and check the microprocessor socket pins for any damaged pins If a damage is found replace the system board 7 Trained technician only Replace the affected microprocessor 8 Manual...

Page 473: ... the affected microprocessor and check the microprocessor socket pins for any damaged pins If a damage is found replace the system board 7 Trained technician only Replace the affected microprocessor 8 Manually re enable all affected DIMMs if the server firmware version is older than UEFI v1 10 If the server firmware version is UEFI v1 10 or newer disconnect and reconnect the server to the power so...

Page 474: ...If a damage is found replace the system board 7 Trained technician only Replace the affected microprocessor 8 Manually re enable all affected DIMMs if the server firmware version is older than UEFI v1 10 If the server firmware version is UEFI v1 10 or newer disconnect and reconnect the server to the power source and restart the server 9 Trained Service technician only Replace the affected micropro...

Page 475: ...ware version is UEFI v1 10 or newer disconnect and reconnect the server to the power source and restart the server 9 Trained Service technician only Replace the affected microprocessor 806f010c 2013ffff Uncorrectable error detected for PhysicalMemoryElementName on Subsystem MemoryElementName DIMM 19 This message is for the use case when an implementation has detected a Memory uncorrectable error M...

Page 476: ...as detected a Memory uncorrectable error May also be shown as 806f010c2014ffff or 0x806f010c2014ffff Severity Error Serviceable Yes Automatically notify support Yes Alert Category Critical Memory SNMP Trap ID 41 CIM Information Prefix PLAT ID 0138 User Response 1 Refer to TIP H212293 for minimum code level 2 Check the IBM support website for an applicable retain tip or firmware update that applies...

Page 477: ...ip or firmware update that applies to this memory error 3 Swap the affected DIMMs as indicated by the error LEDs on the system board or the event logs to a different memory channel or microprocessor 4 If the problem follows the DIMM replace the failing DIMM 5 Trained technician only If the problem occurs on the same DIMM connector check the DIMM connector If the connector contains any foreign mate...

Page 478: ... If the problem occurs on the same DIMM connector check the DIMM connector If the connector contains any foreign material or is damaged replace the system board 6 Trained technician only Remove the affected microprocessor and check the microprocessor socket pins for any damaged pins If a damage is found replace the system board 7 Trained technician only Replace the affected microprocessor 8 Manual...

Page 479: ... the affected microprocessor and check the microprocessor socket pins for any damaged pins If a damage is found replace the system board 7 Trained technician only Replace the affected microprocessor 8 Manually re enable all affected DIMMs if the server firmware version is older than UEFI v1 10 If the server firmware version is UEFI v1 10 or newer disconnect and reconnect the server to the power so...

Page 480: ...f a damage is found replace the system board 7 Trained technician only Replace the affected microprocessor 8 Manually re enable all affected DIMMs if the server firmware version is older than UEFI v1 10 If the server firmware version is UEFI v1 10 or newer disconnect and reconnect the server to the power source and restart the server 9 Trained Service technician only Replace the affected microproc...

Page 481: ...sconnect and reconnect the server to the power source and restart the server 9 Trained Service technician only Replace the affected microprocessor One of the DIMMs 806f010d 0400ffff The Drive StorageVolumeElementName has been disabled due to a detected fault Drive 0 This message is for the use case when an implementation has detected a Drive was Disabled due to fault May also be shown as 806f010d0...

Page 482: ...1 minute or more before reinstalling the drive b Cable from the system board to the backplane 3 Replace the following components one at a time in the order shown restarting the server each time a Hard disk drive b Cable from the system board to the backplane c Hard disk drive backplane n hard disk drive number 806f010d 0402ffff The Drive StorageVolumeElementName has been disabled due to a detected...

Page 483: ...403ffff Severity Error Serviceable Yes Automatically notify support Yes Alert Category Critical Hard Disk drive SNMP Trap ID 5 CIM Information Prefix PLAT ID 0164 User Response 1 Run the hard disk drive diagnostic test on drive n 2 Reseat the following components a Hard disk drive wait 1 minute or more before reinstalling the drive b Cable from the system board to the backplane 3 Replace the follo...

Page 484: ...ach time a Hard disk drive b Cable from the system board to the backplane c Hard disk drive backplane n hard disk drive number 806f010d 0405ffff The Drive StorageVolumeElementName has been disabled due to a detected fault Drive 5 This message is for the use case when an implementation has detected a Drive was Disabled due to fault May also be shown as 806f010d0405ffff or 0x806f010d0405ffff Severit...

Page 485: ... Yes Alert Category Critical Hard Disk drive SNMP Trap ID 5 CIM Information Prefix PLAT ID 0164 User Response 1 Run the hard disk drive diagnostic test on drive n 2 Reseat the following components a Hard disk drive wait 1 minute or more before reinstalling the drive b Cable from the system board to the backplane 3 Replace the following components one at a time in the order shown restarting the ser...

Page 486: ...ered a firmware hang Firmware Error This message is for the use case when an implementation has detected a System Firmware Hang May also be shown as 806f010f2201ffff or 0x806f010f2201ffff Severity Error Serviceable Yes Automatically notify support No Alert Category System Boot failure SNMP Trap ID 25 CIM Information Prefix PLAT ID 0186 User Response 1 Make sure the server meets the minimum configu...

Page 487: ... User Response 1 Reseat the microprocessor and then restart the server 2 Replace microprocessor n n microprocessor number 806f0113 0302ffff A bus timeout has occurred on system ComputerSystemElementName CPU 2 PECI This message is for the use case when an implementation has detected a Bus Timeout May also be shown as 806f01130302ffff or 0x806f01130302ffff Severity Error Serviceable Yes Automaticall...

Page 488: ...able on the system board If the specified sensor is front video connector reset the front video cable in the system board If the specified sensor is PwrPaddle cable complete the following steps until problem is solved 1 Reseat the power paddle cable on the system board 2 Replace the power paddle cable 3 Trained technician only Replace the supercap n n supercap number 4 Trained technician only Repl...

Page 489: ... Severity Info Serviceable No Automatically notify support No Alert Category System Other SNMP Trap ID CIM Information Prefix PLAT ID 0392 User Response No action information only 806f0125 1001ffff ManagedElementName detected as absent PCI Riser 1 This message is for the use case when an implementation has detected a Managed Element is Absent May also be shown as 806f01251001ffff or 0x806f01251001...

Page 490: ...o Serviceable No Automatically notify support No Alert Category System Other SNMP Trap ID CIM Information Prefix PLAT ID 0392 User Response No action information only 806f0125 2c01ffff ManagedElementName detected as absent Mezz Card This message is for the use case when an implementation has detected a Managed Element is Absent May also be shown as 806f01252c01ffff or 0x806f01252c01ffff Severity I...

Page 491: ...nd SAS Important Some cluster solutions require specific code levels or coordinated code updates If the device is part of a cluster solution verify that the latest level of code is supported for the cluster solution before you update the code 2 Update the firmware UEFI and IMM to the latest level Updating the firmware 3 Run the DSA program 4 Reseat the adapter 5 Replace the adapter 6 Trained techn...

Page 492: ...pdate the code 2 Update the firmware UEFI and IMM to the latest level Updating the firmware 3 Run the DSA program 4 Reseat the adapter 5 Replace the adapter 6 Trained technician only Replace microprocessor n 7 Trained technician only Replace the system board n microprocessor number 806f0207 2584ffff ProcessorElementName has Failed with FRB1 BIST condition All CPUs This message is for the use case ...

Page 493: ...meElementName for array ComputerSystemElementName Drive 0 This message is for the use case when an implementation has detected an Array Failure is Predicted May also be shown as 806f020d0400ffff or 0x806f020d0400ffff Severity Warning Serviceable Yes Automatically notify support Yes Alert Category System Predicted Failure SNMP Trap ID 27 CIM Information Prefix PLAT ID 0168 User Response 1 Run the h...

Page 494: ...ce the following components one at a time in the order shown restarting the server each time a Hard disk drive b Cable from the system board to the backplane c Hard disk drive backplane n hard disk drive number 806f020d 0402ffff Failure Predicted on drive StorageVolumeElementName for array ComputerSystemElementName Drive 2 This message is for the use case when an implementation has detected an Arr...

Page 495: ... Serviceable Yes Automatically notify support Yes Alert Category System Predicted Failure SNMP Trap ID 27 CIM Information Prefix PLAT ID 0168 User Response 1 Run the hard disk drive diagnostic test on drive n 2 Reseat the following components a Hard disk drive b Cable from the system board to the backplane 3 Replace the following components one at a time in the order shown restarting the server ea...

Page 496: ...sk drive backplane n hard disk drive number 806f020d 0405ffff Failure Predicted on drive StorageVolumeElementName for array ComputerSystemElementName Drive 5 This message is for the use case when an implementation has detected an Array Failure is Predicted May also be shown as 806f020d0405ffff or 0x806f020d0405ffff Severity Warning Serviceable Yes Automatically notify support Yes Alert Category Sy...

Page 497: ...nformation Prefix PLAT ID 0168 User Response 1 Run the hard disk drive diagnostic test on drive n 2 Reseat the following components a Hard disk drive b Cable from the system board to the backplane 3 Replace the following components one at a time in the order shown restarting the server each time a Hard disk drive b Cable from the system board to the backplane c Hard disk drive backplane n hard dis...

Page 498: ...ComputerSystemElementName initiated by WatchdogElementName IPMI Watchdog This message is for the use case when an implementation has detected a Poweroff by Watchdog has occurred May also be shown as 806f02232101ffff or 0x806f02232101ffff Severity Info Serviceable No Automatically notify support No Alert Category System Other SNMP Trap ID CIM Information Prefix PLAT ID 0372 User Response No action ...

Page 499: ...ower Supply 2 This message is for the use case when an implementation has detected a Power Supply that has input that has been lost May also be shown as 806f03080a02ffff or 0x806f03080a02ffff Severity Info Serviceable No Automatically notify support No Alert Category System Other SNMP Trap ID CIM Information Prefix PLAT ID 0100 User Response 1 Reconnect the power cords 2 Check power supply n LED 3...

Page 500: ...he problem is related to a DIMM replace the failing DIMM indicated by the error LEDs 5 If the problem occurs on the same DIMM connector swap the affected DIMMs as indicated by the error LEDs on the system board or the event logs to a different memory channel or microprocessor 6 Trained technician only If the problem occurs on the same DIMM connector check the DIMM connector If the connector contai...

Page 501: ...icated by the error LEDs on the system board or the event logs to a different memory channel or microprocessor 6 Trained technician only If the problem occurs on the same DIMM connector check the DIMM connector If the connector contains any foreign material or is damaged replace the system board 7 Trained service technician only Remove the affected microprocessor and check the microprocessor socke...

Page 502: ... a different memory channel or microprocessor 6 Trained technician only If the problem occurs on the same DIMM connector check the DIMM connector If the connector contains any foreign material or is damaged replace the system board 7 Trained service technician only Remove the affected microprocessor and check the microprocessor socket pins for any damaged pins If a damage is found replace the syst...

Page 503: ...lace the system board 7 Trained service technician only Remove the affected microprocessor and check the microprocessor socket pins for any damaged pins If a damage is found replace the system board 8 Trained service technician only If the problem is related to microprocessor socket pins replace the system board 806f030c 2005ffff Scrub Failure for PhysicalMemoryElementName on Subsystem MemoryEleme...

Page 504: ...emoryElementName on Subsystem MemoryElementName DIMM 6 This message is for the use case when an implementation has detected a Memory Scrub failure May also be shown as 806f030c2006ffff or 0x806f030c2006ffff Severity Error Serviceable Yes Automatically notify support No Alert Category Critical Memory SNMP Trap ID 41 CIM Information Prefix PLAT ID 0136 User Response Note Each time you install or rem...

Page 505: ... remove a DIMM you must disconnect the server from the power source then wait 10 seconds before restarting the server 1 Refer to TIP H212293 for minimum code level 2 Check the IBM support website for an applicable retain tip or firmware update that applies to this memory error 3 Make sure that the DIMMs are firmly seated and no foreign material is found in the DIMM connector Then retry with the sa...

Page 506: ...ake sure that the DIMMs are firmly seated and no foreign material is found in the DIMM connector Then retry with the same DIMM 4 If the problem is related to a DIMM replace the failing DIMM indicated by the error LEDs 5 If the problem occurs on the same DIMM connector swap the affected DIMMs as indicated by the error LEDs on the system board or the event logs to a different memory channel or micro...

Page 507: ...ted by the error LEDs 5 If the problem occurs on the same DIMM connector swap the affected DIMMs as indicated by the error LEDs on the system board or the event logs to a different memory channel or microprocessor 6 Trained technician only If the problem occurs on the same DIMM connector check the DIMM connector If the connector contains any foreign material or is damaged replace the system board ...

Page 508: ...indicated by the error LEDs on the system board or the event logs to a different memory channel or microprocessor 6 Trained technician only If the problem occurs on the same DIMM connector check the DIMM connector If the connector contains any foreign material or is damaged replace the system board 7 Trained service technician only Remove the affected microprocessor and check the microprocessor so...

Page 509: ...rent memory channel or microprocessor 6 Trained technician only If the problem occurs on the same DIMM connector check the DIMM connector If the connector contains any foreign material or is damaged replace the system board 7 Trained service technician only Remove the affected microprocessor and check the microprocessor socket pins for any damaged pins If a damage is found replace the system board...

Page 510: ...aged replace the system board 7 Trained service technician only Remove the affected microprocessor and check the microprocessor socket pins for any damaged pins If a damage is found replace the system board 8 Trained service technician only If the problem is related to microprocessor socket pins replace the system board 806f030c 200dffff Scrub Failure for PhysicalMemoryElementName on Subsystem Mem...

Page 511: ...mentName on Subsystem MemoryElementName DIMM 14 This message is for the use case when an implementation has detected a Memory Scrub failure May also be shown as 806f030c200effff or 0x806f030c200effff Severity Error Serviceable Yes Automatically notify support No Alert Category Critical Memory SNMP Trap ID 41 CIM Information Prefix PLAT ID 0136 User Response Note Each time you install or remove a D...

Page 512: ...nstall or remove a DIMM you must disconnect the server from the power source then wait 10 seconds before restarting the server 1 Refer to TIP H212293 for minimum code level 2 Check the IBM support website for an applicable retain tip or firmware update that applies to this memory error 3 Make sure that the DIMMs are firmly seated and no foreign material is found in the DIMM connector Then retry wi...

Page 513: ... that the DIMMs are firmly seated and no foreign material is found in the DIMM connector Then retry with the same DIMM 4 If the problem is related to a DIMM replace the failing DIMM indicated by the error LEDs 5 If the problem occurs on the same DIMM connector swap the affected DIMMs as indicated by the error LEDs on the system board or the event logs to a different memory channel or microprocesso...

Page 514: ...M indicated by the error LEDs 5 If the problem occurs on the same DIMM connector swap the affected DIMMs as indicated by the error LEDs on the system board or the event logs to a different memory channel or microprocessor 6 Trained technician only If the problem occurs on the same DIMM connector check the DIMM connector If the connector contains any foreign material or is damaged replace the syste...

Page 515: ...d by the error LEDs on the system board or the event logs to a different memory channel or microprocessor 6 Trained technician only If the problem occurs on the same DIMM connector check the DIMM connector If the connector contains any foreign material or is damaged replace the system board 7 Trained service technician only Remove the affected microprocessor and check the microprocessor socket pin...

Page 516: ... a different memory channel or microprocessor 6 Trained technician only If the problem occurs on the same DIMM connector check the DIMM connector If the connector contains any foreign material or is damaged replace the system board 7 Trained service technician only Remove the affected microprocessor and check the microprocessor socket pins for any damaged pins If a damage is found replace the syst...

Page 517: ...lace the system board 7 Trained service technician only Remove the affected microprocessor and check the microprocessor socket pins for any damaged pins If a damage is found replace the system board 8 Trained service technician only If the problem is related to microprocessor socket pins replace the system board 806f030c 2015ffff Scrub Failure for PhysicalMemoryElementName on Subsystem MemoryEleme...

Page 518: ...emoryElementName on Subsystem MemoryElementName DIMM 22 This message is for the use case when an implementation has detected a Memory Scrub failure May also be shown as 806f030c2016ffff or 0x806f030c2016ffff Severity Error Serviceable Yes Automatically notify support No Alert Category Critical Memory SNMP Trap ID 41 CIM Information Prefix PLAT ID 0136 User Response Note Each time you install or re...

Page 519: ...r remove a DIMM you must disconnect the server from the power source then wait 10 seconds before restarting the server 1 Refer to TIP H212293 for minimum code level 2 Check the IBM support website for an applicable retain tip or firmware update that applies to this memory error 3 Make sure that the DIMMs are firmly seated and no foreign material is found in the DIMM connector Then retry with the s...

Page 520: ...r 3 Make sure that the DIMMs are firmly seated and no foreign material is found in the DIMM connector Then retry with the same DIMM 4 If the problem is related to a DIMM replace the failing DIMM indicated by the error LEDs 5 If the problem occurs on the same DIMM connector swap the affected DIMMs as indicated by the error LEDs on the system board or the event logs to a different memory channel or ...

Page 521: ...device drivers to the latest level 4 Update the firmware UEFI and IMM 806f0323 2101ffff Power cycle of system ComputerSystemElementName initiated by watchdog WatchdogElementName IPMI Watchdog This message is for the use case when an implementation has detected a Power Cycle by Watchdog occurred May also be shown as 806f03232101ffff or 0x806f03232101ffff Severity Info Serviceable No Automatically n...

Page 522: ...ging limit reached follow the suggested actions for that error event and restart the server 3 Check the IBM support website for an applicable retain tip or firmware update that applies to this memory event If no memory fault is recorded in the logs and no DIMM connector error LED is lit you can re enable the DIMM through the Setup utility or the Advanced Settings Utility ASU 806f040c 2002ffff Phys...

Page 523: ...o be shown as 806f040c2003ffff or 0x806f040c2003ffff Severity Info Serviceable No Automatically notify support No Alert Category System Other SNMP Trap ID CIM Information Prefix PLAT ID 0131 User Response 1 Make sure the DIMM is installed correctly 2 If the DIMM was disabled because of a memory fault memory uncorrectable error or memory logging limit reached follow the suggested actions for that e...

Page 524: ...e retain tip or firmware update that applies to this memory event If no memory fault is recorded in the logs and no DIMM connector error LED is lit you can re enable the DIMM through the Setup utility or the Advanced Settings Utility ASU 806f040c 2005ffff PhysicalMemoryElementName Disabled on Subsystem MemoryElementName DIMM 5 This message is for the use case when an implementation has detected th...

Page 525: ...able No Automatically notify support No Alert Category System Other SNMP Trap ID CIM Information Prefix PLAT ID 0131 User Response 1 Make sure the DIMM is installed correctly 2 If the DIMM was disabled because of a memory fault memory uncorrectable error or memory logging limit reached follow the suggested actions for that error event and restart the server 3 Check the IBM support website for an a...

Page 526: ...tem MemoryElementName DIMM 8 This message is for the use case when an implementation has detected that Memory has been Disabled May also be shown as 806f040c2008ffff or 0x806f040c2008ffff Severity Info Serviceable No Automatically notify support No Alert Category System Other SNMP Trap ID CIM Information Prefix PLAT ID 0131 User Response 1 Make sure the DIMM is installed correctly 2 If the DIMM wa...

Page 527: ...e suggested actions for that error event and restart the server 3 Check the IBM support website for an applicable retain tip or firmware update that applies to this memory event If no memory fault is recorded in the logs and no DIMM connector error LED is lit you can re enable the DIMM through the Setup utility or the Advanced Settings Utility ASU 806f040c 200affff PhysicalMemoryElementName Disabl...

Page 528: ...ff or 0x806f040c200bffff Severity Info Serviceable No Automatically notify support No Alert Category System Other SNMP Trap ID CIM Information Prefix PLAT ID 0131 User Response 1 Make sure the DIMM is installed correctly 2 If the DIMM was disabled because of a memory fault memory uncorrectable error or memory logging limit reached follow the suggested actions for that error event and restart the s...

Page 529: ...event If no memory fault is recorded in the logs and no DIMM connector error LED is lit you can re enable the DIMM through the Setup utility or the Advanced Settings Utility ASU 806f040c 200dffff PhysicalMemoryElementName Disabled on Subsystem MemoryElementName DIMM 13 This message is for the use case when an implementation has detected that Memory has been Disabled May also be shown as 806f040c20...

Page 530: ...cally notify support No Alert Category System Other SNMP Trap ID CIM Information Prefix PLAT ID 0131 User Response 1 Make sure the DIMM is installed correctly 2 If the DIMM was disabled because of a memory fault memory uncorrectable error or memory logging limit reached follow the suggested actions for that error event and restart the server 3 Check the IBM support website for an applicable retain...

Page 531: ...ElementName DIMM 16 This message is for the use case when an implementation has detected that Memory has been Disabled May also be shown as 806f040c2010ffff or 0x806f040c2010ffff Severity Info Serviceable No Automatically notify support No Alert Category System Other SNMP Trap ID CIM Information Prefix PLAT ID 0131 User Response 1 Make sure the DIMM is installed correctly 2 If the DIMM was disable...

Page 532: ...follow the suggested actions for that error event and restart the server 3 Check the IBM support website for an applicable retain tip or firmware update that applies to this memory event If no memory fault is recorded in the logs and no DIMM connector error LED is lit you can re enable the DIMM through the Setup utility or the Advanced Settings Utility ASU 806f040c 2012ffff PhysicalMemoryElementNa...

Page 533: ...806f040c2013ffff Severity Info Serviceable No Automatically notify support No Alert Category System Other SNMP Trap ID CIM Information Prefix PLAT ID 0131 User Response 1 Make sure the DIMM is installed correctly 2 If the DIMM was disabled because of a memory fault memory uncorrectable error or memory logging limit reached follow the suggested actions for that error event and restart the server 3 ...

Page 534: ... memory event If no memory fault is recorded in the logs and no DIMM connector error LED is lit you can re enable the DIMM through the Setup utility or the Advanced Settings Utility ASU 806f040c 2015ffff PhysicalMemoryElementName Disabled on Subsystem MemoryElementName DIMM 21 This message is for the use case when an implementation has detected that Memory has been Disabled May also be shown as 80...

Page 535: ...tify support No Alert Category System Other SNMP Trap ID CIM Information Prefix PLAT ID 0131 User Response 1 Make sure the DIMM is installed correctly 2 If the DIMM was disabled because of a memory fault memory uncorrectable error or memory logging limit reached follow the suggested actions for that error event and restart the server 3 Check the IBM support website for an applicable retain tip or ...

Page 536: ...m MemoryElementName DIMM 24 This message is for the use case when an implementation has detected that Memory has been Disabled May also be shown as 806f040c2018ffff or 0x806f040c2018ffff Severity Info Serviceable No Automatically notify support No Alert Category System Other SNMP Trap ID CIM Information Prefix PLAT ID 0131 User Response 1 Make sure the DIMM is installed correctly 2 If the DIMM was...

Page 537: ...w the suggested actions for that error event and restart the server 3 Check the IBM support website for an applicable retain tip or firmware update that applies to this memory event If no memory fault is recorded in the logs and no DIMM connector error LED is lit you can re enable the DIMM through the Setup utility or the Advanced Settings Utility ASU One of the DIMMs 806f0413 2582ffff A PCI PERR ...

Page 538: ...ation Mismatch has occurred May also be shown as 806f05070301ffff or 0x806f05070301ffff Severity Error Serviceable Yes Automatically notify support No Alert Category Critical CPU SNMP Trap ID 40 CIM Information Prefix PLAT ID 0062 User Response 1 Check the CPU LED See more information about the CPU LED in Light path diagnostics 2 Check for a server firmware update Important Some cluster solutions ...

Page 539: ...coordinated code updates If the device is part of a cluster solution verify that the latest level of code is supported for the cluster solution before you update the code 3 Make sure that the installed microprocessors are compatible with each other 4 Trained technician only Reseat microprocessor n 5 Trained technician only Replace microprocessor n n microprocessor number 806f0507 2584ffff Processo...

Page 540: ...his message is for the use case when an implementation has detected that the Memory Logging Limit has been Reached May also be shown as 806f050c2001ffff or 0x806f050c2001ffff Severity Warning Serviceable Yes Automatically notify support Yes Alert Category Warning Memory SNMP Trap ID 43 CIM Information Prefix PLAT ID 0144 User Response 1 Refer to TIP H212293 for minimum code level 2 Check the IBM s...

Page 541: ...applies to this memory error 3 Swap the affected DIMMs as indicated by the error LEDs on the system board or the event logs to a different memory channel or microprocessor 4 If the error still occurs on the same DIMM replace the affected DIMM 5 Trained technician only If the problem occurs on the same DIMM connector check the DIMM connector If the connector contains any foreign material or is dama...

Page 542: ...e DIMM connector check the DIMM connector If the connector contains any foreign material or is damaged replace the system board 6 Trained technician only Remove the affected microprocessor and check the microprocessor socket pins for any damaged pins If a damage is found replace the system board 7 Trained technician only Replace the affected microprocessor 806f050c 2004ffff Memory Logging Limit Re...

Page 543: ...cted microprocessor and check the microprocessor socket pins for any damaged pins If a damage is found replace the system board 7 Trained technician only Replace the affected microprocessor 806f050c 2005ffff Memory Logging Limit Reached for PhysicalMemoryElementName on Subsystem MemoryElementName DIMM 5 This message is for the use case when an implementation has detected that the Memory Logging Li...

Page 544: ...May also be shown as 806f050c2006ffff or 0x806f050c2006ffff Severity Warning Serviceable Yes Automatically notify support Yes Alert Category Warning Memory SNMP Trap ID 43 CIM Information Prefix PLAT ID 0144 User Response 1 Refer to TIP H212293 for minimum code level 2 Check the IBM support website for an applicable retain tip or firmware update that applies to this memory error 3 Swap the affecte...

Page 545: ...to a different memory channel or microprocessor 4 If the error still occurs on the same DIMM replace the affected DIMM 5 Trained technician only If the problem occurs on the same DIMM connector check the DIMM connector If the connector contains any foreign material or is damaged replace the system board 6 Trained technician only Remove the affected microprocessor and check the microprocessor socke...

Page 546: ...nector If the connector contains any foreign material or is damaged replace the system board 6 Trained technician only Remove the affected microprocessor and check the microprocessor socket pins for any damaged pins If a damage is found replace the system board 7 Trained technician only Replace the affected microprocessor 806f050c 2009ffff Memory Logging Limit Reached for PhysicalMemoryElementName...

Page 547: ...ned technician only Replace the affected microprocessor 806f050c 200affff Memory Logging Limit Reached for PhysicalMemoryElementName on Subsystem MemoryElementName DIMM 10 This message is for the use case when an implementation has detected that the Memory Logging Limit has been Reached May also be shown as 806f050c200affff or 0x806f050c200affff Severity Warning Serviceable Yes Automatically notif...

Page 548: ...p ID 43 CIM Information Prefix PLAT ID 0144 User Response 1 Refer to TIP H212293 for minimum code level 2 Check the IBM support website for an applicable retain tip or firmware update that applies to this memory error 3 Swap the affected DIMMs as indicated by the error LEDs on the system board or the event logs to a different memory channel or microprocessor 4 If the error still occurs on the same...

Page 549: ...e same DIMM replace the affected DIMM 5 Trained technician only If the problem occurs on the same DIMM connector check the DIMM connector If the connector contains any foreign material or is damaged replace the system board 6 Trained technician only Remove the affected microprocessor and check the microprocessor socket pins for any damaged pins If a damage is found replace the system board 7 Train...

Page 550: ... or is damaged replace the system board 6 Trained technician only Remove the affected microprocessor and check the microprocessor socket pins for any damaged pins If a damage is found replace the system board 7 Trained technician only Replace the affected microprocessor 806f050c 200effff Memory Logging Limit Reached for PhysicalMemoryElementName on Subsystem MemoryElementName DIMM 14 This message ...

Page 551: ...en an implementation has detected that the Memory Logging Limit has been Reached May also be shown as 806f050c200fffff or 0x806f050c200fffff Severity Warning Serviceable Yes Automatically notify support Yes Alert Category Warning Memory SNMP Trap ID 43 CIM Information Prefix PLAT ID 0144 User Response 1 Refer to TIP H212293 for minimum code level 2 Check the IBM support website for an applicable r...

Page 552: ...ror LEDs on the system board or the event logs to a different memory channel or microprocessor 4 If the error still occurs on the same DIMM replace the affected DIMM 5 Trained technician only If the problem occurs on the same DIMM connector check the DIMM connector If the connector contains any foreign material or is damaged replace the system board 6 Trained technician only Remove the affected mi...

Page 553: ...check the DIMM connector If the connector contains any foreign material or is damaged replace the system board 6 Trained technician only Remove the affected microprocessor and check the microprocessor socket pins for any damaged pins If a damage is found replace the system board 7 Trained technician only Replace the affected microprocessor 806f050c 2012ffff Memory Logging Limit Reached for Physica...

Page 554: ...ce the system board 7 Trained technician only Replace the affected microprocessor 806f050c 2013ffff Memory Logging Limit Reached for PhysicalMemoryElementName on Subsystem MemoryElementName DIMM 19 This message is for the use case when an implementation has detected that the Memory Logging Limit has been Reached May also be shown as 806f050c2013ffff or 0x806f050c2013ffff Severity Warning Serviceab...

Page 555: ...CIM Information Prefix PLAT ID 0144 User Response 1 Refer to TIP H212293 for minimum code level 2 Check the IBM support website for an applicable retain tip or firmware update that applies to this memory error 3 Swap the affected DIMMs as indicated by the error LEDs on the system board or the event logs to a different memory channel or microprocessor 4 If the error still occurs on the same DIMM re...

Page 556: ...rs on the same DIMM replace the affected DIMM 5 Trained technician only If the problem occurs on the same DIMM connector check the DIMM connector If the connector contains any foreign material or is damaged replace the system board 6 Trained technician only Remove the affected microprocessor and check the microprocessor socket pins for any damaged pins If a damage is found replace the system board...

Page 557: ...amaged replace the system board 6 Trained technician only Remove the affected microprocessor and check the microprocessor socket pins for any damaged pins If a damage is found replace the system board 7 Trained technician only Replace the affected microprocessor 806f050c 2017ffff Memory Logging Limit Reached for PhysicalMemoryElementName on Subsystem MemoryElementName DIMM 23 This message is for t...

Page 558: ... case when an implementation has detected that the Memory Logging Limit has been Reached May also be shown as 806f050c2018ffff or 0x806f050c2018ffff Severity Warning Serviceable Yes Automatically notify support Yes Alert Category Warning Memory SNMP Trap ID 43 CIM Information Prefix PLAT ID 0144 User Response 1 Refer to TIP H212293 for minimum code level 2 Check the IBM support website for an appl...

Page 559: ...e error LEDs on the system board or the event logs to a different memory channel or microprocessor 4 If the error still occurs on the same DIMM replace the affected DIMM 5 Trained technician only If the problem occurs on the same DIMM connector check the DIMM connector If the connector contains any foreign material or is damaged replace the system board 6 Trained technician only Remove the affecte...

Page 560: ...f050d 0401ffff Array ComputerSystemElementName is in critical condition Drive 1 This message is for the use case when an implementation has detected that an Array is Critical May also be shown as 806f050d0401ffff or 0x806f050d0401ffff Severity Error Serviceable Yes Automatically notify support No Alert Category Critical Hard Disk drive SNMP Trap ID 5 CIM Information Prefix PLAT ID 0174 User Respon...

Page 561: ...esponse 1 Make sure that the RAID adapter firmware and hard disk drive firmware are at the latest level 2 Make sure that the SAS cable is connected correctly 3 Replace the SAS cable 4 Check backplane cable connection 5 Replace the RAID adapter 6 Replace the hard disk drive that is indicated by a lit status LED 806f050d 0403ffff Array ComputerSystemElementName is in critical condition Drive 3 This ...

Page 562: ...implementation has detected that an Array is Critical May also be shown as 806f050d0404ffff or 0x806f050d0404ffff Severity Error Serviceable Yes Automatically notify support No Alert Category Critical Hard Disk drive SNMP Trap ID 5 CIM Information Prefix PLAT ID 0174 User Response 1 Make sure that the RAID adapter firmware and hard disk drive firmware are at the latest level 2 Make sure that the S...

Page 563: ...S cable is connected correctly 3 Replace the SAS cable 4 Check backplane cable connection 5 Replace the RAID adapter 6 Replace the hard disk drive that is indicated by a lit status LED 806f050d 0406ffff Array ComputerSystemElementName is in critical condition Drive 6 This message is for the use case when an implementation has detected that an Array is Critical May also be shown as 806f050d0406ffff...

Page 564: ...f Severity Error Serviceable Yes Automatically notify support No Alert Category Critical Hard Disk drive SNMP Trap ID 5 CIM Information Prefix PLAT ID 0174 User Response 1 Make sure that the RAID adapter firmware and hard disk drive firmware are at the latest level 2 Make sure that the SAS cable is connected correctly 3 Replace the SAS cable 4 Check backplane cable connection 5 Replace the RAID ad...

Page 565: ...at the adapter is supported For a list of supported optional devices see http www ibm com systems info x86servers serverproven compat us 5 Remove both adapters 6 Replace the PCIe adapters 7 Replace the riser card 806f052b 2101ffff Invalid or Unsupported firmware or software was detected on system ComputerSystemElementName IMM2 FW Failover This message is for the use case when an implementation has...

Page 566: ...s asserted CPU 1 This message is for the use case when an SM BIOS Uncorrectable CPU complex error has asserted May also be shown as 806f06070301ffff or 0x806f06070301ffff Severity Error Serviceable Yes Automatically notify support No Alert Category Critical CPU SNMP Trap ID 40 CIM Information Prefix PLAT ID 0816 User Response 1 Make sure that the installed microprocessors are compatible with each ...

Page 567: ...sorElementName has asserted All CPUs This message is for the use case when an SM BIOS Uncorrectable CPU complex error has asserted May also be shown as 806f06072584ffff or 0x806f06072584ffff Severity Error Serviceable Yes Automatically notify support No Alert Category Critical CPU SNMP Trap ID 40 CIM Information Prefix PLAT ID 0816 User Response 1 Make sure that the installed microprocessors are c...

Page 568: ...104 User Response 1 Make sure that the power supplies installed are with the same rating or wattage 2 Reinstall the power supplies with the same rating or wattage 806f060d 0400ffff Array ComputerSystemElementName has failed Drive 0 This message is for the use case when an implementation has detected that an Array Failed May also be shown as 806f060d0400ffff or 0x806f060d0400ffff Severity Error Ser...

Page 569: ...tify support Yes Alert Category Critical Hard Disk drive SNMP Trap ID 5 CIM Information Prefix PLAT ID 0176 User Response 1 Make sure that the RAID adapter firmware and hard disk drive firmware are at the latest level 2 Make sure that the SAS cable is connected correctly 3 Replace the SAS cable 4 Replace the RAID adapter 5 Replace the hard disk drive that is indicated by a lit status LED 806f060d ...

Page 570: ...ase when an implementation has detected that an Array Failed May also be shown as 806f060d0403ffff or 0x806f060d0403ffff Severity Error Serviceable Yes Automatically notify support Yes Alert Category Critical Hard Disk drive SNMP Trap ID 5 CIM Information Prefix PLAT ID 0176 User Response 1 Make sure that the RAID adapter firmware and hard disk drive firmware are at the latest level 2 Make sure th...

Page 571: ...e sure that the SAS cable is connected correctly 3 Replace the SAS cable 4 Replace the RAID adapter 5 Replace the hard disk drive that is indicated by a lit status LED 806f060d 0405ffff Array ComputerSystemElementName has failed Drive 5 This message is for the use case when an implementation has detected that an Array Failed May also be shown as 806f060d0405ffff or 0x806f060d0405ffff Severity Erro...

Page 572: ...le Yes Automatically notify support Yes Alert Category Critical Hard Disk drive SNMP Trap ID 5 CIM Information Prefix PLAT ID 0176 User Response 1 Make sure that the RAID adapter firmware and hard disk drive firmware are at the latest level 2 Make sure that the SAS cable is connected correctly 3 Replace the SAS cable 4 Replace the RAID adapter 5 Replace the hard disk drive that is indicated by a l...

Page 573: ... for the use case when an implementation has detected a Memory DIMM configuration error has been corrected May also be shown as 806f070c2001ffff or 0x806f070c2001ffff Severity Error Serviceable Yes Automatically notify support No Alert Category Critical Memory SNMP Trap ID 41 CIM Information Prefix PLAT ID 0126 User Response Make sure that DIMMs are installed in the correct sequence and have the s...

Page 574: ...entName DIMM 3 This message is for the use case when an implementation has detected a Memory DIMM configuration error has been corrected May also be shown as 806f070c2003ffff or 0x806f070c2003ffff Severity Error Serviceable Yes Automatically notify support No Alert Category Critical Memory SNMP Trap ID 41 CIM Information Prefix PLAT ID 0126 User Response Make sure that DIMMs are installed in the c...

Page 575: ...and technology 806f070c 2005ffff Configuration Error for PhysicalMemoryElementName on Subsystem MemoryElementName DIMM 5 This message is for the use case when an implementation has detected a Memory DIMM configuration error has been corrected May also be shown as 806f070c2005ffff or 0x806f070c2005ffff Severity Error Serviceable Yes Automatically notify support No Alert Category Critical Memory SNM...

Page 576: ...ID 0126 User Response Make sure that DIMMs are installed in the correct sequence and have the same size type speed and technology 806f070c 2007ffff Configuration Error for PhysicalMemoryElementName on Subsystem MemoryElementName DIMM 7 This message is for the use case when an implementation has detected a Memory DIMM configuration error has been corrected May also be shown as 806f070c2007ffff or 0...

Page 577: ...t Category Critical Memory SNMP Trap ID 41 CIM Information Prefix PLAT ID 0126 User Response Make sure that DIMMs are installed in the correct sequence and have the same size type speed and technology 806f070c 2009ffff Configuration Error for PhysicalMemoryElementName on Subsystem MemoryElementName DIMM 9 This message is for the use case when an implementation has detected a Memory DIMM configurat...

Page 578: ... Yes Automatically notify support No Alert Category Critical Memory SNMP Trap ID 41 CIM Information Prefix PLAT ID 0126 User Response Make sure that DIMMs are installed in the correct sequence and have the same size type speed and technology 806f070c 200bffff Configuration Error for PhysicalMemoryElementName on Subsystem MemoryElementName DIMM 11 This message is for the use case when an implementa...

Page 579: ...ror Serviceable Yes Automatically notify support No Alert Category Critical Memory SNMP Trap ID 41 CIM Information Prefix PLAT ID 0126 User Response Make sure that DIMMs are installed in the correct sequence and have the same size type speed and technology 806f070c 200dffff Configuration Error for PhysicalMemoryElementName on Subsystem MemoryElementName DIMM 13 This message is for the use case whe...

Page 580: ...0effff or 0x806f070c200effff Severity Error Serviceable Yes Automatically notify support No Alert Category Critical Memory SNMP Trap ID 41 CIM Information Prefix PLAT ID 0126 User Response Make sure that DIMMs are installed in the correct sequence and have the same size type speed and technology 806f070c 200fffff Configuration Error for PhysicalMemoryElementName on Subsystem MemoryElementName DIMM...

Page 581: ...wn as 806f070c2010ffff or 0x806f070c2010ffff Severity Error Serviceable Yes Automatically notify support No Alert Category Critical Memory SNMP Trap ID 41 CIM Information Prefix PLAT ID 0126 User Response Make sure that DIMMs are installed in the correct sequence and have the same size type speed and technology 806f070c 2011ffff Configuration Error for PhysicalMemoryElementName on Subsystem Memory...

Page 582: ...rrected May also be shown as 806f070c2012ffff or 0x806f070c2012ffff Severity Error Serviceable Yes Automatically notify support No Alert Category Critical Memory SNMP Trap ID 41 CIM Information Prefix PLAT ID 0126 User Response Make sure that DIMMs are installed in the correct sequence and have the same size type speed and technology 806f070c 2013ffff Configuration Error for PhysicalMemoryElementN...

Page 583: ...onfiguration error has been corrected May also be shown as 806f070c2014ffff or 0x806f070c2014ffff Severity Error Serviceable Yes Automatically notify support No Alert Category Critical Memory SNMP Trap ID 41 CIM Information Prefix PLAT ID 0126 User Response Make sure that DIMMs are installed in the correct sequence and have the same size type speed and technology 806f070c 2015ffff Configuration Er...

Page 584: ...ntName DIMM 22 This message is for the use case when an implementation has detected a Memory DIMM configuration error has been corrected May also be shown as 806f070c2016ffff or 0x806f070c2016ffff Severity Error Serviceable Yes Automatically notify support No Alert Category Critical Memory SNMP Trap ID 41 CIM Information Prefix PLAT ID 0126 User Response Make sure that DIMMs are installed in the c...

Page 585: ...nd technology 806f070c 2018ffff Configuration Error for PhysicalMemoryElementName on Subsystem MemoryElementName DIMM 24 This message is for the use case when an implementation has detected a Memory DIMM configuration error has been corrected May also be shown as 806f070c2018ffff or 0x806f070c2018ffff Severity Error Serviceable Yes Automatically notify support No Alert Category Critical Memory SNM...

Page 586: ...Prefix PLAT ID 0126 User Response Make sure that DIMMs are installed in the correct sequence and have the same size type speed and technology One of the DIMMs 806f070d 0400ffff Rebuild in progress for Array in system ComputerSystemElementName Drive 0 This message is for the use case when an implementation has detected that an Array Rebuild is in Progress May also be shown as 806f070d0400ffff or 0x...

Page 587: ...ystem Other SNMP Trap ID CIM Information Prefix PLAT ID 0178 User Response No action information only 806f070d 0402ffff Rebuild in progress for Array in system ComputerSystemElementName Drive 2 This message is for the use case when an implementation has detected that an Array Rebuild is in Progress May also be shown as 806f070d0402ffff or 0x806f070d0402ffff Severity Info Serviceable No Automatical...

Page 588: ...pport No Alert Category System Other SNMP Trap ID CIM Information Prefix PLAT ID 0178 User Response No action information only 806f070d 0404ffff Rebuild in progress for Array in system ComputerSystemElementName Drive 4 This message is for the use case when an implementation has detected that an Array Rebuild is in Progress May also be shown as 806f070d0404ffff or 0x806f070d0404ffff Severity Info S...

Page 589: ... notify support No Alert Category System Other SNMP Trap ID CIM Information Prefix PLAT ID 0178 User Response No action information only 806f070d 0406ffff Rebuild in progress for Array in system ComputerSystemElementName Drive 6 This message is for the use case when an implementation has detected that an Array Rebuild is in Progress May also be shown as 806f070d0406ffff or 0x806f070d0406ffff Sever...

Page 590: ...tify support No Alert Category System Other SNMP Trap ID CIM Information Prefix PLAT ID 0178 User Response No action information only 806f072b 2201ffff A successful software or firmware change was detected on system ComputerSystemElementName Bkup Auto Update This message is for the use case when an implementation has detected a Successful Software or Firmware Change May also be shown as 806f072b22...

Page 591: ...ically notify support No Alert Category System Other SNMP Trap ID CIM Information Prefix PLAT ID 0061 User Response No action information only 806f0807 0302ffff ProcessorElementName has been Disabled CPU 2 This message is for the use case when an implementation has detected a Processor has been Disabled May also be shown as 806f08070302ffff or 0x806f08070302ffff Severity Info Serviceable No Automa...

Page 592: ...tem Other SNMP Trap ID CIM Information Prefix PLAT ID 0061 User Response No action information only One of the CPUs 806f0813 2581ffff A Uncorrectable Bus Error has occurred on system ComputerSystemElementName DIMMs This message is for the use case when an implementation has detected a Bus Uncorrectable Error May also be shown as 806f08132581ffff or 0x806f08132581ffff Severity Error Serviceable Yes...

Page 593: ...Error May also be shown as 806f08132582ffff or 0x806f08132582ffff Severity Error Serviceable Yes Automatically notify support Yes Alert Category Critical Other SNMP Trap ID 50 CIM Information Prefix PLAT ID 0240 User Response 1 Check the system event log 2 Check the PCI LED 3 Remove the adapter from the indicated PCI slot 4 Check for a server firmware update Important Some cluster solutions requir...

Page 594: ...d code updates If the device is part of a cluster solution verify that the latest level of code is supported for the cluster solution before you update the code 4 Make sure that the two microprocessors are matching 5 Trained technician only Replace the system board 806f0823 2101ffff Watchdog Timer interrupt occurred for WatchdogElementName IPMI Watchdog This message is for the use case when an imp...

Page 595: ...tegory System Other SNMP Trap ID 22 CIM Information Prefix PLAT ID 0142 User Response 1 Reseat the DIMM and then restart the server 2 Replace DIMM n n DIMM number 806f090c 2002ffff PhysicalMemoryElementName on Subsystem MemoryElementName Throttled DIMM 2 This message is for the use case when an implementation has detected Memory has been Throttled May also be shown as 806f090c2002ffff or 0x806f090...

Page 596: ... Warning Serviceable Yes Automatically notify support No Alert Category System Other SNMP Trap ID 22 CIM Information Prefix PLAT ID 0142 User Response 1 Reseat the DIMM and then restart the server 2 Replace DIMM n n DIMM number 806f090c 2004ffff PhysicalMemoryElementName on Subsystem MemoryElementName Throttled DIMM 4 This message is for the use case when an implementation has detected Memory has ...

Page 597: ...c2005ffff or 0x806f090c2005ffff Severity Warning Serviceable Yes Automatically notify support No Alert Category System Other SNMP Trap ID 22 CIM Information Prefix PLAT ID 0142 User Response 1 Reseat the DIMM and then restart the server 2 Replace DIMM n n DIMM number 806f090c 2006ffff PhysicalMemoryElementName on Subsystem MemoryElementName Throttled DIMM 6 This message is for the use case when an...

Page 598: ...n has detected Memory has been Throttled May also be shown as 806f090c2007ffff or 0x806f090c2007ffff Severity Warning Serviceable Yes Automatically notify support No Alert Category System Other SNMP Trap ID 22 CIM Information Prefix PLAT ID 0142 User Response 1 Reseat the DIMM and then restart the server 2 Replace DIMM n n DIMM number 806f090c 2008ffff PhysicalMemoryElementName on Subsystem Memory...

Page 599: ...MemoryElementName on Subsystem MemoryElementName Throttled DIMM 9 This message is for the use case when an implementation has detected Memory has been Throttled May also be shown as 806f090c2009ffff or 0x806f090c2009ffff Severity Warning Serviceable Yes Automatically notify support No Alert Category System Other SNMP Trap ID 22 CIM Information Prefix PLAT ID 0142 User Response 1 Reseat the DIMM an...

Page 600: ...ion Prefix PLAT ID 0142 User Response 1 Reseat the DIMM and then restart the server 2 Replace DIMM n n DIMM number 806f090c 200bffff PhysicalMemoryElementName on Subsystem MemoryElementName Throttled DIMM 11 This message is for the use case when an implementation has detected Memory has been Throttled May also be shown as 806f090c200bffff or 0x806f090c200bffff Severity Warning Serviceable Yes Auto...

Page 601: ...Alert Category System Other SNMP Trap ID 22 CIM Information Prefix PLAT ID 0142 User Response 1 Reseat the DIMM and then restart the server 2 Replace DIMM n n DIMM number 806f090c 200dffff PhysicalMemoryElementName on Subsystem MemoryElementName Throttled DIMM 13 This message is for the use case when an implementation has detected Memory has been Throttled May also be shown as 806f090c200dffff or ...

Page 602: ... Warning Serviceable Yes Automatically notify support No Alert Category System Other SNMP Trap ID 22 CIM Information Prefix PLAT ID 0142 User Response 1 Reseat the DIMM and then restart the server 2 Replace DIMM n n DIMM number 806f090c 200fffff PhysicalMemoryElementName on Subsystem MemoryElementName Throttled DIMM 15 This message is for the use case when an implementation has detected Memory has...

Page 603: ...c2010ffff or 0x806f090c2010ffff Severity Warning Serviceable Yes Automatically notify support No Alert Category System Other SNMP Trap ID 22 CIM Information Prefix PLAT ID 0142 User Response 1 Reseat the DIMM and then restart the server 2 Replace DIMM n n DIMM number 806f090c 2011ffff PhysicalMemoryElementName on Subsystem MemoryElementName Throttled DIMM 17 This message is for the use case when a...

Page 604: ...n has detected Memory has been Throttled May also be shown as 806f090c2012ffff or 0x806f090c2012ffff Severity Warning Serviceable Yes Automatically notify support No Alert Category System Other SNMP Trap ID 22 CIM Information Prefix PLAT ID 0142 User Response 1 Reseat the DIMM and then restart the server 2 Replace DIMM n n DIMM number 806f090c 2013ffff PhysicalMemoryElementName on Subsystem Memory...

Page 605: ...MemoryElementName on Subsystem MemoryElementName Throttled DIMM 20 This message is for the use case when an implementation has detected Memory has been Throttled May also be shown as 806f090c2014ffff or 0x806f090c2014ffff Severity Warning Serviceable Yes Automatically notify support No Alert Category System Other SNMP Trap ID 22 CIM Information Prefix PLAT ID 0142 User Response 1 Reseat the DIMM a...

Page 606: ...ion Prefix PLAT ID 0142 User Response 1 Reseat the DIMM and then restart the server 2 Replace DIMM n n DIMM number 806f090c 2016ffff PhysicalMemoryElementName on Subsystem MemoryElementName Throttled DIMM 22 This message is for the use case when an implementation has detected Memory has been Throttled May also be shown as 806f090c2016ffff or 0x806f090c2016ffff Severity Warning Serviceable Yes Auto...

Page 607: ...Alert Category System Other SNMP Trap ID 22 CIM Information Prefix PLAT ID 0142 User Response 1 Reseat the DIMM and then restart the server 2 Replace DIMM n n DIMM number 806f090c 2018ffff PhysicalMemoryElementName on Subsystem MemoryElementName Throttled DIMM 24 This message is for the use case when an implementation has detected Memory has been Throttled May also be shown as 806f090c2018ffff or ...

Page 608: ...the fans are operating that there are no obstructions to the airflow front and rear of the server that the air baffles are in place and correctly installed and that the server cover is installed and completely closed 2 Check the ambient temperature You must be operating within the specifications 3 Make sure that the heat sink for microprocessor n is installed correctly 4 Trained technician only Re...

Page 609: ... n microprocessor number 806f0a0c 2001ffff An Over Temperature Condition has been detected on the PhysicalMemoryElementName on Subsystem MemoryElementName DIMM 1 This message is for the use case when an implementation has detected an Over Temperature Condition for Memory that has been Detected May also be shown as 806f0a0c2001ffff or 0x806f0a0c2001ffff Severity Error Serviceable Yes Automatically ...

Page 610: ...rmation Prefix PLAT ID 0146 User Response 1 Make sure that the fans are operating that there are no obstructions to the airflow that the air baffles are in place and correctly installed and that the server cover is installed and completely closed 2 Make sure that ambient temperature is within the specifications 3 If a fan has failed complete the action for a fan failure 4 Replace DIMM n n DIMM num...

Page 611: ...ame on Subsystem MemoryElementName DIMM 4 This message is for the use case when an implementation has detected an Over Temperature Condition for Memory that has been Detected May also be shown as 806f0a0c2004ffff or 0x806f0a0c2004ffff Severity Error Serviceable Yes Automatically notify support No Alert Category Critical Temperature SNMP Trap ID 0 CIM Information Prefix PLAT ID 0146 User Response 1...

Page 612: ... that there are no obstructions to the airflow that the air baffles are in place and correctly installed and that the server cover is installed and completely closed 2 Make sure that ambient temperature is within the specifications 3 If a fan has failed complete the action for a fan failure 4 Replace DIMM n n DIMM number 806f0a0c 2006ffff An Over Temperature Condition has been detected on the Phys...

Page 613: ... DIMM 7 This message is for the use case when an implementation has detected an Over Temperature Condition for Memory that has been Detected May also be shown as 806f0a0c2007ffff or 0x806f0a0c2007ffff Severity Error Serviceable Yes Automatically notify support No Alert Category Critical Temperature SNMP Trap ID 0 CIM Information Prefix PLAT ID 0146 User Response 1 Make sure that the fans are opera...

Page 614: ...o the airflow that the air baffles are in place and correctly installed and that the server cover is installed and completely closed 2 Make sure that ambient temperature is within the specifications 3 If a fan has failed complete the action for a fan failure 4 Replace DIMM n n DIMM number 806f0a0c 2009ffff An Over Temperature Condition has been detected on the PhysicalMemoryElementName on Subsyste...

Page 615: ...emperature Condition for Memory that has been Detected May also be shown as 806f0a0c200affff or 0x806f0a0c200affff Severity Error Serviceable Yes Automatically notify support No Alert Category Critical Temperature SNMP Trap ID 0 CIM Information Prefix PLAT ID 0146 User Response 1 Make sure that the fans are operating that there are no obstructions to the airflow that the air baffles are in place a...

Page 616: ...hat the server cover is installed and completely closed 2 Make sure that ambient temperature is within the specifications 3 If a fan has failed complete the action for a fan failure 4 Replace DIMM n n DIMM number 806f0a0c 200cffff An Over Temperature Condition has been detected on the PhysicalMemoryElementName on Subsystem MemoryElementName DIMM 12 This message is for the use case when an implemen...

Page 617: ...s 806f0a0c200dffff or 0x806f0a0c200dffff Severity Error Serviceable Yes Automatically notify support No Alert Category Critical Temperature SNMP Trap ID 0 CIM Information Prefix PLAT ID 0146 User Response 1 Make sure that the fans are operating that there are no obstructions to the airflow that the air baffles are in place and correctly installed and that the server cover is installed and complete...

Page 618: ...erature is within the specifications 3 If a fan has failed complete the action for a fan failure 4 Replace DIMM n n DIMM number 806f0a0c 200fffff An Over Temperature Condition has been detected on the PhysicalMemoryElementName on Subsystem MemoryElementName DIMM 15 This message is for the use case when an implementation has detected an Over Temperature Condition for Memory that has been Detected M...

Page 619: ...y Error Serviceable Yes Automatically notify support No Alert Category Critical Temperature SNMP Trap ID 0 CIM Information Prefix PLAT ID 0146 User Response 1 Make sure that the fans are operating that there are no obstructions to the airflow that the air baffles are in place and correctly installed and that the server cover is installed and completely closed 2 Make sure that ambient temperature i...

Page 620: ...3 If a fan has failed complete the action for a fan failure 4 Replace DIMM n n DIMM number 806f0a0c 2012ffff An Over Temperature Condition has been detected on the PhysicalMemoryElementName on Subsystem MemoryElementName DIMM 18 This message is for the use case when an implementation has detected an Over Temperature Condition for Memory that has been Detected May also be shown as 806f0a0c2012ffff ...

Page 621: ...iceable Yes Automatically notify support No Alert Category Critical Temperature SNMP Trap ID 0 CIM Information Prefix PLAT ID 0146 User Response 1 Make sure that the fans are operating that there are no obstructions to the airflow that the air baffles are in place and correctly installed and that the server cover is installed and completely closed 2 Make sure that ambient temperature is within the...

Page 622: ...f An Over Temperature Condition has been detected on the PhysicalMemoryElementName on Subsystem MemoryElementName DIMM 21 This message is for the use case when an implementation has detected an Over Temperature Condition for Memory that has been Detected May also be shown as 806f0a0c2015ffff or 0x806f0a0c2015ffff Severity Error Serviceable Yes Automatically notify support No Alert Category Critica...

Page 623: ...Prefix PLAT ID 0146 User Response 1 Make sure that the fans are operating that there are no obstructions to the airflow that the air baffles are in place and correctly installed and that the server cover is installed and completely closed 2 Make sure that ambient temperature is within the specifications 3 If a fan has failed complete the action for a fan failure 4 Replace DIMM n n DIMM number 806f...

Page 624: ...lementName on Subsystem MemoryElementName DIMM 24 This message is for the use case when an implementation has detected an Over Temperature Condition for Memory that has been Detected May also be shown as 806f0a0c2018ffff or 0x806f0a0c2018ffff Severity Error Serviceable Yes Automatically notify support No Alert Category Critical Temperature SNMP Trap ID 0 CIM Information Prefix PLAT ID 0146 User Re...

Page 625: ... Information Prefix PLAT ID 0244 User Response 1 Reseat the microprocessor and then restart the server 2 Replace microprocessor n n microprocessor number 806f0a13 0302ffff A Fatal Bus Error has occurred on system ComputerSystemElementName CPU 2 PECI This message is for the use case when an implementation has detected a Bus Fatal Error May also be shown as 806f0a130302ffff or 0x806f0a130302ffff Sev...

Page 626: ...020701ffff Severity Info Serviceable No Automatically notify support No Alert Category Warning Voltage SNMP Trap ID 13 CIM Information Prefix PLAT ID 0477 User Response No action information only 81010202 0701ffff Numeric sensor NumericSensorElementName going low lower critical has deasserted CMOS Battery This message is for the use case when an implementation has detected a Lower Critical sensor ...

Page 627: ...Info Serviceable No Automatically notify support No Alert Category Critical Fan Failure SNMP Trap ID 11 CIM Information Prefix PLAT ID 0481 User Response No action information only Fan 1B Tach 81010204 1d02ffff Numeric sensor NumericSensorElementName going low lower critical has deasserted Fan 2A Tach This message is for the use case when an implementation has detected a Lower Critical sensor goin...

Page 628: ...03ffff Severity Info Serviceable No Automatically notify support No Alert Category Critical Fan Failure SNMP Trap ID 11 CIM Information Prefix PLAT ID 0481 User Response No action information only Fan 3B Tach 81010204 1d04ffff Numeric sensor NumericSensorElementName going low lower critical has deasserted Fan 4A Tach This message is for the use case when an implementation has detected a Lower Crit...

Page 629: ...d05ffff Severity Info Serviceable No Automatically notify support No Alert Category Critical Fan Failure SNMP Trap ID 11 CIM Information Prefix PLAT ID 0481 User Response No action information only Fan 5B Tach 81010204 1d06ffff Numeric sensor NumericSensorElementName going low lower critical has deasserted Fan 6A Tach This message is for the use case when an implementation has detected a Lower Cri...

Page 630: ...0107010c01ffff or 0x810107010c01ffff Severity Info Serviceable No Automatically notify support No Alert Category Warning Temperature SNMP Trap ID 12 CIM Information Prefix PLAT ID 0491 User Response No action information only 81010701 1001ffff Numeric sensor NumericSensorElementName going high upper non critical has deasserted PCI Riser 1 Temp This message is for the use case when an implementatio...

Page 631: ...as 810107011002ffff or 0x810107011002ffff Severity Info Serviceable No Automatically notify support No Alert Category Warning Temperature SNMP Trap ID 12 CIM Information Prefix PLAT ID 0491 User Response No action information only 81010701 1401ffff Numeric sensor NumericSensorElementName going high upper non critical has deasserted CPU1 VR Temp This message is for the use case when an implementati...

Page 632: ...so be shown as 810107011402ffff or 0x810107011402ffff Severity Info Serviceable No Automatically notify support No Alert Category Warning Temperature SNMP Trap ID 12 CIM Information Prefix PLAT ID 0491 User Response No action information only 81010701 1403ffff Numeric sensor NumericSensorElementName going high upper non critical has deasserted DIMM AB VR Temp This message is for the use case when ...

Page 633: ...also be shown as 810107011404ffff or 0x810107011404ffff Severity Info Serviceable No Automatically notify support No Alert Category Warning Temperature SNMP Trap ID 12 CIM Information Prefix PLAT ID 0491 User Response No action information only 81010701 1405ffff Numeric sensor NumericSensorElementName going high upper non critical has deasserted DIMM EF VR Temp This message is for the use case whe...

Page 634: ... deasserted May also be shown as 810107011406ffff or 0x810107011406ffff Severity Info Serviceable No Automatically notify support No Alert Category Warning Temperature SNMP Trap ID 12 CIM Information Prefix PLAT ID 0491 User Response No action information only 81010701 2c01ffff Numeric sensor NumericSensorElementName going high upper non critical has deasserted Mezz Card Temp This message is for t...

Page 635: ...easserted May also be shown as 810107012d01ffff or 0x810107012d01ffff Severity Info Serviceable No Automatically notify support No Alert Category Warning Temperature SNMP Trap ID 12 CIM Information Prefix PLAT ID 0491 User Response No action information only 81010901 0c01ffff Numeric sensor NumericSensorElementName going high upper critical has deasserted Ambient Temp This message is for the use c...

Page 636: ... has deasserted May also be shown as 810109011001ffff or 0x810109011001ffff Severity Info Serviceable No Automatically notify support No Alert Category Critical Temperature SNMP Trap ID 0 CIM Information Prefix PLAT ID 0495 User Response No action information only 81010901 1002ffff Numeric sensor NumericSensorElementName going high upper critical has deasserted PCI Riser 2 Temp This message is for...

Page 637: ...sserted May also be shown as 810109011401ffff or 0x810109011401ffff Severity Info Serviceable No Automatically notify support No Alert Category Critical Temperature SNMP Trap ID 0 CIM Information Prefix PLAT ID 0495 User Response No action information only 81010901 1402ffff Numeric sensor NumericSensorElementName going high upper critical has deasserted CPU2 VR Temp This message is for the use cas...

Page 638: ... has deasserted May also be shown as 810109011403ffff or 0x810109011403ffff Severity Info Serviceable No Automatically notify support No Alert Category Critical Temperature SNMP Trap ID 0 CIM Information Prefix PLAT ID 0495 User Response No action information only 81010901 1404ffff Numeric sensor NumericSensorElementName going high upper critical has deasserted DIMM CD VR Temp This message is for ...

Page 639: ...sserted May also be shown as 810109011405ffff or 0x810109011405ffff Severity Info Serviceable No Automatically notify support No Alert Category Critical Temperature SNMP Trap ID 0 CIM Information Prefix PLAT ID 0495 User Response No action information only 81010901 1406ffff Numeric sensor NumericSensorElementName going high upper critical has deasserted DIMM GH VR Temp This message is for the use ...

Page 640: ...igh has deasserted May also be shown as 810109012c01ffff or 0x810109012c01ffff Severity Info Serviceable No Automatically notify support No Alert Category Critical Temperature SNMP Trap ID 0 CIM Information Prefix PLAT ID 0495 User Response No action information only 81010901 2d01ffff Numeric sensor NumericSensorElementName going high upper critical has deasserted PCH Temp This message is for the ...

Page 641: ...be shown as 810109020701ffff or 0x810109020701ffff Severity Info Serviceable No Automatically notify support No Alert Category Critical Voltage SNMP Trap ID 1 CIM Information Prefix PLAT ID 0495 User Response No action information only SysBrd 3 3V SysBrd 5V 81010b01 0c01ffff Numeric sensor NumericSensorElementName going high upper non recoverable has deasserted Ambient Temp This message is for the...

Page 642: ... has deasserted May also be shown as 81010b011001ffff or 0x81010b011001ffff Severity Info Serviceable No Automatically notify support No Alert Category Critical Temperature SNMP Trap ID 0 CIM Information Prefix PLAT ID 0499 User Response No action information only 81010b01 1002ffff Numeric sensor NumericSensorElementName going high upper non recoverable has deasserted PCI Riser 2 Temp This message...

Page 643: ...sserted May also be shown as 81010b011401ffff or 0x81010b011401ffff Severity Info Serviceable No Automatically notify support No Alert Category Critical Temperature SNMP Trap ID 0 CIM Information Prefix PLAT ID 0499 User Response No action information only 81010b01 1402ffff Numeric sensor NumericSensorElementName going high upper non recoverable has deasserted CPU2 VR Temp This message is for the ...

Page 644: ... has deasserted May also be shown as 81010b011403ffff or 0x81010b011403ffff Severity Info Serviceable No Automatically notify support No Alert Category Critical Temperature SNMP Trap ID 0 CIM Information Prefix PLAT ID 0499 User Response No action information only 81010b01 1404ffff Numeric sensor NumericSensorElementName going high upper non recoverable has deasserted DIMM CD VR Temp This message ...

Page 645: ...sserted May also be shown as 81010b011405ffff or 0x81010b011405ffff Severity Info Serviceable No Automatically notify support No Alert Category Critical Temperature SNMP Trap ID 0 CIM Information Prefix PLAT ID 0499 User Response No action information only 81010b01 1406ffff Numeric sensor NumericSensorElementName going high upper non recoverable has deasserted DIMM GH VR Temp This message is for t...

Page 646: ...igh has deasserted May also be shown as 81010b012c01ffff or 0x81010b012c01ffff Severity Info Serviceable No Automatically notify support No Alert Category Critical Temperature SNMP Trap ID 0 CIM Information Prefix PLAT ID 0499 User Response No action information only 81010b01 2d01ffff Numeric sensor NumericSensorElementName going high upper non recoverable has deasserted PCH Temp This message is f...

Page 647: ...erted May also be shown as 810300062101ffff or 0x810300062101ffff Severity Info Serviceable No Automatically notify support No Alert Category System Other SNMP Trap ID CIM Information Prefix PLAT ID 0508 User Response No action information only 81030012 2301ffff Sensor SensorElementName has asserted OS RealTime Mod This message is for the use case when an implementation has detected a Sensor has a...

Page 648: ...301ffff Severity Info Serviceable No Automatically notify support No Alert Category System Other SNMP Trap ID CIM Information Prefix PLAT ID 0509 User Response No action information only 81070101 0c01ffff Sensor SensorElementName has deasserted the transition from normal to non critical state Ambient Status This message is for the use case when an implementation has detected that a Sensor has deas...

Page 649: ... shown as 8107010f2201ffff or 0x8107010f2201ffff Severity Info Serviceable No Automatically notify support No Alert Category Warning Other SNMP Trap ID 60 CIM Information Prefix PLAT ID 0521 User Response No action information only 8107010f 2582ffff Sensor SensorElementName has deasserted the transition from normal to non critical state I O Resources This message is for the use case when an implem...

Page 650: ... May also be shown as 810702010301ffff or 0x810702010301ffff Severity Info Serviceable No Automatically notify support No Alert Category Critical Temperature SNMP Trap ID 0 CIM Information Prefix PLAT ID 0523 User Response No action information only 81070201 0302ffff Sensor SensorElementName has transitioned to a less severe state from critical CPU 2 OverTemp This message is for the use case when ...

Page 651: ...tical May also be shown as 810702020701ffff or 0x810702020701ffff Severity Info Serviceable No Automatically notify support No Alert Category Critical Voltage SNMP Trap ID 1 CIM Information Prefix PLAT ID 0523 User Response No action information only 81070204 0a01ffff Sensor SensorElementName has transitioned to a less severe state from critical PS 1 Fan Fault This message is for the use case when...

Page 652: ... from critical May also be shown as 810702040a02ffff or 0x810702040a02ffff Severity Info Serviceable No Automatically notify support No Alert Category Critical Fan Failure SNMP Trap ID 11 CIM Information Prefix PLAT ID 0523 User Response No action information only 81070208 0a01ffff Sensor SensorElementName has transitioned to a less severe state from critical PS 1 Therm Fault This message is for t...

Page 653: ...critical May also be shown as 810702080a02ffff or 0x810702080a02ffff Severity Info Serviceable No Automatically notify support No Alert Category Critical Power SNMP Trap ID 4 CIM Information Prefix PLAT ID 0523 User Response No action information only 8107020f 2201ffff Sensor SensorElementName has transitioned to a less severe state from critical TXT ACM Module This message is for the use case whe...

Page 654: ...ere from critical May also be shown as 8107020f2582ffff or 0x8107020f2582ffff Severity Info Serviceable No Automatically notify support No Alert Category Critical Other SNMP Trap ID 50 CIM Information Prefix PLAT ID 0523 User Response No action information only 81070214 2201ffff Sensor SensorElementName has transitioned to a less severe state from critical TPM Lock This message is for the use case...

Page 655: ...tical May also be shown as 810702190701ffff or 0x810702190701ffff Severity Info Serviceable No Automatically notify support No Alert Category Critical Other SNMP Trap ID 50 CIM Information Prefix PLAT ID 0523 User Response No action information only 8107021b 0301ffff Sensor SensorElementName has transitioned to a less severe state from critical CPU 1 QPILinkErr This message is for the use case whe...

Page 656: ... be shown as 8107021b0302ffff or 0x8107021b0302ffff Severity Info Serviceable No Automatically notify support No Alert Category Critical Other SNMP Trap ID 50 CIM Information Prefix PLAT ID 0523 User Response No action information only 81070301 0301ffff Sensor SensorElementName has deasserted the transition to non recoverable from a less severe state CPU 1 OverTemp This message is for the use case...

Page 657: ... less severe has deasserted May also be shown as 810703010302ffff or 0x810703010302ffff Severity Info Serviceable No Automatically notify support No Alert Category Critical Temperature SNMP Trap ID 0 CIM Information Prefix PLAT ID 0525 User Response No action information only 81070603 0701ffff Sensor SensorElementName has deasserted the transition to non recoverable Pwr Rail 1 Fault This message i...

Page 658: ...o non recoverable has deasserted May also be shown as 810706080a01ffff or 0x810706080a01ffff Severity Info Serviceable No Automatically notify support No Alert Category Critical Power SNMP Trap ID 4 CIM Information Prefix PLAT ID 0531 User Response No action information only PS1 12V OV Fault PS1 12V UV Fault PS1 12Vaux Fault 81070608 0a02ffff Sensor SensorElementName has deasserted the transition ...

Page 659: ...Redundacy Lost has deasserted May also be shown as 810b010a1e81ffff or 0x810b010a1e81ffff Severity Info Serviceable No Automatically notify support No Alert Category Critical Fan Failure SNMP Trap ID 11 CIM Information Prefix PLAT ID 0803 User Response No action information only 810b010a 1e82ffff Redundancy Lost for RedundancySetElementName has deasserted Fan Zone 2 This message is for the use cas...

Page 660: ...f or 0x810b010c2581ffff Severity Info Serviceable No Automatically notify support No Alert Category Critical Memory SNMP Trap ID 41 CIM Information Prefix PLAT ID 0803 User Response No action information only 810b0309 1301ffff Non redundant Sufficient Resources from Redundancy Degraded or Fully Redundant for RedundancySetElementName has deasserted Power Resource This message is for the use case wh...

Page 661: ...Non redundant Sufficient Resources May also be shown as 810b030c2581ffff or 0x810b030c2581ffff Severity Info Serviceable No Automatically notify support No Alert Category Warning Memory SNMP Trap ID 43 CIM Information Prefix PLAT ID 0807 User Response No action information only 810b0509 1301ffff Non redundant Insufficient Resources for RedundancySetElementName has deasserted Power Resource This me...

Page 662: ...sufficient Resources May also be shown as 810b050a1e81ffff or 0x810b050a1e81ffff Severity Info Serviceable No Automatically notify support No Alert Category Critical Fan Failure SNMP Trap ID 11 CIM Information Prefix PLAT ID 0811 User Response No action information only 810b050a 1e82ffff Non redundant Insufficient Resources for RedundancySetElementName has deasserted Fan Zone 2 This message is for...

Page 663: ...on redundant Insufficient Resources May also be shown as 810b050c2581ffff or 0x810b050c2581ffff Severity Info Serviceable No Automatically notify support No Alert Category Critical Memory SNMP Trap ID 41 CIM Information Prefix PLAT ID 0811 User Response No action information only 816f0007 0301ffff ProcessorElementName has Recovered from IERR CPU 1 This message is for the use case when an implement...

Page 664: ...lso be shown as 816f00070302ffff or 0x816f00070302ffff Severity Info Serviceable No Automatically notify support No Alert Category Critical CPU SNMP Trap ID 40 CIM Information Prefix PLAT ID 0043 User Response No action information only 816f0008 0a01ffff PowerSupplyElementName has been removed from container PhysicalPackageElementName Power Supply 1 This message is for the use case when an impleme...

Page 665: ...wer Supply has been removed May also be shown as 816f00080a02ffff or 0x816f00080a02ffff Severity Info Serviceable No Automatically notify support No Alert Category System Other SNMP Trap ID CIM Information Prefix PLAT ID 0085 User Response No action information only 816f0009 1301ffff PowerSupplyElementName has been turned on Host Power This message is for the use case when an implementation has de...

Page 666: ...816f000d0400ffff or 0x816f000d0400ffff Severity Error Serviceable Yes Automatically notify support No Alert Category Critical Hard Disk drive SNMP Trap ID 5 CIM Information Prefix PLAT ID 0163 User Response 1 Reseat hard disk drive n n hard disk drive number Wait 1 minute or more before reinstalling the drive 2 Replace the hard disk drive 3 Make sure that the disk firmware and RAID controller firm...

Page 667: ...e the hard disk drive 3 Make sure that the disk firmware and RAID controller firmware are at the latest level 4 Check the SAS cable 816f000d 0402ffff The Drive StorageVolumeElementName has been removed from unit PhysicalPackageElementName Drive 2 This message is for the use case when an implementation has detected a Drive has been Removed May also be shown as 816f000d0402ffff or 0x816f000d0402ffff...

Page 668: ...able Yes Automatically notify support No Alert Category Critical Hard Disk drive SNMP Trap ID 5 CIM Information Prefix PLAT ID 0163 User Response 1 Reseat hard disk drive n n hard disk drive number Wait 1 minute or more before reinstalling the drive 2 Replace the hard disk drive 3 Make sure that the disk firmware and RAID controller firmware are at the latest level 4 Check the SAS cable 816f000d 0...

Page 669: ...PhysicalPackageElementName Drive 5 This message is for the use case when an implementation has detected a Drive has been Removed May also be shown as 816f000d0405ffff or 0x816f000d0405ffff Severity Error Serviceable Yes Automatically notify support No Alert Category Critical Hard Disk drive SNMP Trap ID 5 CIM Information Prefix PLAT ID 0163 User Response 1 Reseat hard disk drive n n hard disk driv...

Page 670: ...ive n n hard disk drive number Wait 1 minute or more before reinstalling the drive 2 Replace the hard disk drive 3 Make sure that the disk firmware and RAID controller firmware are at the latest level 4 Check the SAS cable 816f000d 0407ffff The Drive StorageVolumeElementName has been removed from unit PhysicalPackageElementName Drive 7 This message is for the use case when an implementation has de...

Page 671: ...Error has deasserted May also be shown as 816f000f2201ffff or 0x816f000f2201ffff Severity Info Serviceable No Automatically notify support No Alert Category Critical Other SNMP Trap ID 50 CIM Information Prefix PLAT ID 0185 User Response No action information only Firmware Error Sys Boot Status 816f0013 1701ffff System ComputerSystemElementName has recovered from a diagnostic interrupt NMI State T...

Page 672: ... shown as 816f00212201ffff or 0x816f00212201ffff Severity Info Serviceable No Automatically notify support No Alert Category Critical Other SNMP Trap ID 50 CIM Information Prefix PLAT ID 0331 User Response No action information only 816f0021 2582ffff Fault condition removed on slot PhysicalConnectorElementName on system ComputerSystemElementName All PCI Error This message is for the use case when ...

Page 673: ... also be shown as 816f00212c01ffff or 0x816f00212c01ffff Severity Info Serviceable No Automatically notify support No Alert Category Critical Other SNMP Trap ID 50 CIM Information Prefix PLAT ID 0331 User Response No action information only 816f0021 3001ffff Fault condition removed on slot PhysicalConnectorElementName on system ComputerSystemElementName Internal RAID This message is for the use ca...

Page 674: ...ded unavailable failure May also be shown as 816f00282101ffff or 0x816f00282101ffff Severity Info Serviceable No Automatically notify support No Alert Category Warning Other SNMP Trap ID 60 CIM Information Prefix PLAT ID 0399 User Response No action information only 816f0107 0301ffff An Over Temperature Condition has been removed on ProcessorElementName CPU 1 This message is for the use case when ...

Page 675: ...Processor May also be shown as 816f01070302ffff or 0x816f01070302ffff Severity Info Serviceable No Automatically notify support No Alert Category Critical Temperature SNMP Trap ID 0 CIM Information Prefix PLAT ID 0037 User Response No action information only 816f0108 0a01ffff PowerSupplyElementName has returned to OK status Power Supply 1 This message is for the use case when an implementation has...

Page 676: ... be shown as 816f01080a02ffff or 0x816f01080a02ffff Severity Info Serviceable No Automatically notify support No Alert Category Critical Power SNMP Trap ID 4 CIM Information Prefix PLAT ID 0087 User Response No action information only 816f010c 2001ffff Uncorrectable error recovery detected for PhysicalMemoryElementName on Subsystem MemoryElementName DIMM 1 This message is for the use case when an ...

Page 677: ...ry May also be shown as 816f010c2002ffff or 0x816f010c2002ffff Severity Info Serviceable No Automatically notify support No Alert Category Critical Memory SNMP Trap ID 41 CIM Information Prefix PLAT ID 0139 User Response No action information only 816f010c 2003ffff Uncorrectable error recovery detected for PhysicalMemoryElementName on Subsystem MemoryElementName DIMM 3 This message is for the use ...

Page 678: ... error recovery May also be shown as 816f010c2004ffff or 0x816f010c2004ffff Severity Info Serviceable No Automatically notify support No Alert Category Critical Memory SNMP Trap ID 41 CIM Information Prefix PLAT ID 0139 User Response No action information only 816f010c 2005ffff Uncorrectable error recovery detected for PhysicalMemoryElementName on Subsystem MemoryElementName DIMM 5 This message is...

Page 679: ...ecovery May also be shown as 816f010c2006ffff or 0x816f010c2006ffff Severity Info Serviceable No Automatically notify support No Alert Category Critical Memory SNMP Trap ID 41 CIM Information Prefix PLAT ID 0139 User Response No action information only 816f010c 2007ffff Uncorrectable error recovery detected for PhysicalMemoryElementName on Subsystem MemoryElementName DIMM 7 This message is for the...

Page 680: ... error recovery May also be shown as 816f010c2008ffff or 0x816f010c2008ffff Severity Info Serviceable No Automatically notify support No Alert Category Critical Memory SNMP Trap ID 41 CIM Information Prefix PLAT ID 0139 User Response No action information only 816f010c 2009ffff Uncorrectable error recovery detected for PhysicalMemoryElementName on Subsystem MemoryElementName DIMM 9 This message is...

Page 681: ...ecovery May also be shown as 816f010c200affff or 0x816f010c200affff Severity Info Serviceable No Automatically notify support No Alert Category Critical Memory SNMP Trap ID 41 CIM Information Prefix PLAT ID 0139 User Response No action information only 816f010c 200bffff Uncorrectable error recovery detected for PhysicalMemoryElementName on Subsystem MemoryElementName DIMM 11 This message is for th...

Page 682: ... error recovery May also be shown as 816f010c200cffff or 0x816f010c200cffff Severity Info Serviceable No Automatically notify support No Alert Category Critical Memory SNMP Trap ID 41 CIM Information Prefix PLAT ID 0139 User Response No action information only 816f010c 200dffff Uncorrectable error recovery detected for PhysicalMemoryElementName on Subsystem MemoryElementName DIMM 13 This message i...

Page 683: ...ecovery May also be shown as 816f010c200effff or 0x816f010c200effff Severity Info Serviceable No Automatically notify support No Alert Category Critical Memory SNMP Trap ID 41 CIM Information Prefix PLAT ID 0139 User Response No action information only 816f010c 200fffff Uncorrectable error recovery detected for PhysicalMemoryElementName on Subsystem MemoryElementName DIMM 15 This message is for th...

Page 684: ... error recovery May also be shown as 816f010c2010ffff or 0x816f010c2010ffff Severity Info Serviceable No Automatically notify support No Alert Category Critical Memory SNMP Trap ID 41 CIM Information Prefix PLAT ID 0139 User Response No action information only 816f010c 2011ffff Uncorrectable error recovery detected for PhysicalMemoryElementName on Subsystem MemoryElementName DIMM 17 This message i...

Page 685: ...ecovery May also be shown as 816f010c2012ffff or 0x816f010c2012ffff Severity Info Serviceable No Automatically notify support No Alert Category Critical Memory SNMP Trap ID 41 CIM Information Prefix PLAT ID 0139 User Response No action information only 816f010c 2013ffff Uncorrectable error recovery detected for PhysicalMemoryElementName on Subsystem MemoryElementName DIMM 19 This message is for th...

Page 686: ... error recovery May also be shown as 816f010c2014ffff or 0x816f010c2014ffff Severity Info Serviceable No Automatically notify support No Alert Category Critical Memory SNMP Trap ID 41 CIM Information Prefix PLAT ID 0139 User Response No action information only 816f010c 2015ffff Uncorrectable error recovery detected for PhysicalMemoryElementName on Subsystem MemoryElementName DIMM 21 This message i...

Page 687: ...ecovery May also be shown as 816f010c2016ffff or 0x816f010c2016ffff Severity Info Serviceable No Automatically notify support No Alert Category Critical Memory SNMP Trap ID 41 CIM Information Prefix PLAT ID 0139 User Response No action information only 816f010c 2017ffff Uncorrectable error recovery detected for PhysicalMemoryElementName on Subsystem MemoryElementName DIMM 23 This message is for th...

Page 688: ...error recovery May also be shown as 816f010c2018ffff or 0x816f010c2018ffff Severity Info Serviceable No Automatically notify support No Alert Category Critical Memory SNMP Trap ID 41 CIM Information Prefix PLAT ID 0139 User Response No action information only 816f010c 2581ffff Uncorrectable error recovery detected for PhysicalMemoryElementName on Subsystem MemoryElementName All DIMMS This message ...

Page 689: ...bled May also be shown as 816f010d0400ffff or 0x816f010d0400ffff Severity Info Serviceable No Automatically notify support No Alert Category Critical Hard Disk drive SNMP Trap ID 5 CIM Information Prefix PLAT ID 0167 User Response No action information only 816f010d 0401ffff The Drive StorageVolumeElementName has been enabled Drive 1 This message is for the use case when an implementation has dete...

Page 690: ...so be shown as 816f010d0402ffff or 0x816f010d0402ffff Severity Info Serviceable No Automatically notify support No Alert Category Critical Hard Disk drive SNMP Trap ID 5 CIM Information Prefix PLAT ID 0167 User Response No action information only 816f010d 0403ffff The Drive StorageVolumeElementName has been enabled Drive 3 This message is for the use case when an implementation has detected a Driv...

Page 691: ... or 0x816f010d0404ffff Severity Info Serviceable No Automatically notify support No Alert Category Critical Hard Disk drive SNMP Trap ID 5 CIM Information Prefix PLAT ID 0167 User Response No action information only 816f010d 0405ffff The Drive StorageVolumeElementName has been enabled Drive 5 This message is for the use case when an implementation has detected a Drive was Enabled May also be shown...

Page 692: ...ity Info Serviceable No Automatically notify support No Alert Category Critical Hard Disk drive SNMP Trap ID 5 CIM Information Prefix PLAT ID 0167 User Response No action information only 816f010d 0407ffff The Drive StorageVolumeElementName has been enabled Drive 7 This message is for the use case when an implementation has detected a Drive was Enabled May also be shown as 816f010d0407ffff or 0x81...

Page 693: ...o Automatically notify support No Alert Category Critical Other SNMP Trap ID 50 CIM Information Prefix PLAT ID 0187 User Response No action information only 816f0113 0301ffff System ComputerSystemElementName has recovered from a bus timeout CPU 1 PECI This message is for the use case when an implemenation has detected that a system has recovered from a Bus Timeout May also be shown as 816f01130301...

Page 694: ...ted that a system has recovered from a Bus Timeout May also be shown as 816f01130302ffff or 0x816f01130302ffff Severity Info Serviceable No Automatically notify support No Alert Category Critical Other SNMP Trap ID 50 CIM Information Prefix PLAT ID 0225 User Response 1 Trained technician only Replace microprocessor n see Removing a microprocessor and heat sink and Replacing a microprocessor and he...

Page 695: ...Front Video 816f0125 0c01ffff ManagedElementName detected as present Front Panel This message is for the use case when an implementation has detected a Managed Element is now Present May also be shown as 816f01250c01ffff or 0x816f01250c01ffff Severity Info Serviceable No Automatically notify support No Alert Category System Other SNMP Trap ID CIM Information Prefix PLAT ID 0390 User Response No ac...

Page 696: ...on only 816f0125 1002ffff ManagedElementName detected as present PCI Riser 2 This message is for the use case when an implementation has detected a Managed Element is now Present May also be shown as 816f01251002ffff or 0x816f01251002ffff Severity Info Serviceable No Automatically notify support No Alert Category System Other SNMP Trap ID CIM Information Prefix PLAT ID 0390 User Response No action...

Page 697: ...essorElementName has Recovered from FRB1 BIST condition CPU 1 This message is for the use case when an implementation has detected a Processor Recovered FRB1 BIST condition May also be shown as 816f02070301ffff or 0x816f02070301ffff Severity Info Serviceable No Automatically notify support No Alert Category Critical CPU SNMP Trap ID 40 CIM Information Prefix PLAT ID 0045 User Response No action in...

Page 698: ... has Recovered from FRB1 BIST condition All CPUs This message is for the use case when an implementation has detected a Processor Recovered FRB1 BIST condition May also be shown as 816f02072584ffff or 0x816f02072584ffff Severity Info Serviceable No Automatically notify support No Alert Category Critical CPU SNMP Trap ID 40 CIM Information Prefix PLAT ID 0045 User Response No action information onl...

Page 699: ... only 816f020d 0401ffff Failure no longer Predicted on drive StorageVolumeElementName for array ComputerSystemElementName Drive 1 This message is for the use case when an implementation has detected an Array Failure is no longer Predicted May also be shown as 816f020d0401ffff or 0x816f020d0401ffff Severity Info Serviceable No Automatically notify support No Alert Category System Predicted Failure ...

Page 700: ...IM Information Prefix PLAT ID 0169 User Response No action information only 816f020d 0403ffff Failure no longer Predicted on drive StorageVolumeElementName for array ComputerSystemElementName Drive 3 This message is for the use case when an implementation has detected an Array Failure is no longer Predicted May also be shown as 816f020d0403ffff or 0x816f020d0403ffff Severity Info Serviceable No Au...

Page 701: ...mation Prefix PLAT ID 0169 User Response No action information only 816f020d 0405ffff Failure no longer Predicted on drive StorageVolumeElementName for array ComputerSystemElementName Drive 5 This message is for the use case when an implementation has detected an Array Failure is no longer Predicted May also be shown as 816f020d0405ffff or 0x816f020d0405ffff Severity Info Serviceable No Automatica...

Page 702: ...IM Information Prefix PLAT ID 0169 User Response No action information only 816f020d 0407ffff Failure no longer Predicted on drive StorageVolumeElementName for array ComputerSystemElementName Drive 7 This message is for the use case when an implementation has detected an Array Failure is no longer Predicted May also be shown as 816f020d0407ffff or 0x816f020d0407ffff Severity Info Serviceable No Au...

Page 703: ...mation Prefix PLAT ID 0099 User Response No action information only 816f0308 0a02ffff PowerSupplyElementName has returned to a Normal Input State Power Supply 2 This message is for the use case when an implementation has detected a Power Supply that has input that has returned to normal May also be shown as 816f03080a02ffff or 0x816f03080a02ffff Severity Info Serviceable No Automatically notify su...

Page 704: ...IM Information Prefix PLAT ID 0137 User Response No action information only 816f030c 2002ffff Scrub Failure for PhysicalMemoryElementName on Subsystem MemoryElementName has recovered DIMM 2 This message is for the use case when an implementation has detected a Memory Scrub failure recovery May also be shown as 816f030c2002ffff or 0x816f030c2002ffff Severity Info Serviceable No Automatically notify...

Page 705: ...mation Prefix PLAT ID 0137 User Response No action information only 816f030c 2004ffff Scrub Failure for PhysicalMemoryElementName on Subsystem MemoryElementName has recovered DIMM 4 This message is for the use case when an implementation has detected a Memory Scrub failure recovery May also be shown as 816f030c2004ffff or 0x816f030c2004ffff Severity Info Serviceable No Automatically notify support...

Page 706: ...IM Information Prefix PLAT ID 0137 User Response No action information only 816f030c 2006ffff Scrub Failure for PhysicalMemoryElementName on Subsystem MemoryElementName has recovered DIMM 6 This message is for the use case when an implementation has detected a Memory Scrub failure recovery May also be shown as 816f030c2006ffff or 0x816f030c2006ffff Severity Info Serviceable No Automatically notify...

Page 707: ...mation Prefix PLAT ID 0137 User Response No action information only 816f030c 2008ffff Scrub Failure for PhysicalMemoryElementName on Subsystem MemoryElementName has recovered DIMM 8 This message is for the use case when an implementation has detected a Memory Scrub failure recovery May also be shown as 816f030c2008ffff or 0x816f030c2008ffff Severity Info Serviceable No Automatically notify support...

Page 708: ...IM Information Prefix PLAT ID 0137 User Response No action information only 816f030c 200affff Scrub Failure for PhysicalMemoryElementName on Subsystem MemoryElementName has recovered DIMM 10 This message is for the use case when an implementation has detected a Memory Scrub failure recovery May also be shown as 816f030c200affff or 0x816f030c200affff Severity Info Serviceable No Automatically notif...

Page 709: ...mation Prefix PLAT ID 0137 User Response No action information only 816f030c 200cffff Scrub Failure for PhysicalMemoryElementName on Subsystem MemoryElementName has recovered DIMM 12 This message is for the use case when an implementation has detected a Memory Scrub failure recovery May also be shown as 816f030c200cffff or 0x816f030c200cffff Severity Info Serviceable No Automatically notify suppor...

Page 710: ...IM Information Prefix PLAT ID 0137 User Response No action information only 816f030c 200effff Scrub Failure for PhysicalMemoryElementName on Subsystem MemoryElementName has recovered DIMM 14 This message is for the use case when an implementation has detected a Memory Scrub failure recovery May also be shown as 816f030c200effff or 0x816f030c200effff Severity Info Serviceable No Automatically notif...

Page 711: ...mation Prefix PLAT ID 0137 User Response No action information only 816f030c 2010ffff Scrub Failure for PhysicalMemoryElementName on Subsystem MemoryElementName has recovered DIMM 16 This message is for the use case when an implementation has detected a Memory Scrub failure recovery May also be shown as 816f030c2010ffff or 0x816f030c2010ffff Severity Info Serviceable No Automatically notify suppor...

Page 712: ...IM Information Prefix PLAT ID 0137 User Response No action information only 816f030c 2012ffff Scrub Failure for PhysicalMemoryElementName on Subsystem MemoryElementName has recovered DIMM 18 This message is for the use case when an implementation has detected a Memory Scrub failure recovery May also be shown as 816f030c2012ffff or 0x816f030c2012ffff Severity Info Serviceable No Automatically notif...

Page 713: ...mation Prefix PLAT ID 0137 User Response No action information only 816f030c 2014ffff Scrub Failure for PhysicalMemoryElementName on Subsystem MemoryElementName has recovered DIMM 20 This message is for the use case when an implementation has detected a Memory Scrub failure recovery May also be shown as 816f030c2014ffff or 0x816f030c2014ffff Severity Info Serviceable No Automatically notify suppor...

Page 714: ...IM Information Prefix PLAT ID 0137 User Response No action information only 816f030c 2016ffff Scrub Failure for PhysicalMemoryElementName on Subsystem MemoryElementName has recovered DIMM 22 This message is for the use case when an implementation has detected a Memory Scrub failure recovery May also be shown as 816f030c2016ffff or 0x816f030c2016ffff Severity Info Serviceable No Automatically notif...

Page 715: ...mation Prefix PLAT ID 0137 User Response No action information only 816f030c 2018ffff Scrub Failure for PhysicalMemoryElementName on Subsystem MemoryElementName has recovered DIMM 24 This message is for the use case when an implementation has detected a Memory Scrub failure recovery May also be shown as 816f030c2018ffff or 0x816f030c2018ffff Severity Info Serviceable No Automatically notify suppor...

Page 716: ...D 50 CIM Information Prefix PLAT ID 0230 User Response No action information only 816f040c 2001ffff PhysicalMemoryElementName Enabled on Subsystem MemoryElementName DIMM 1 This message is for the use case when an implementation has detected that Memory has been Enabled May also be shown as 816f040c2001ffff or 0x816f040c2001ffff Severity Info Serviceable No Automatically notify support No Alert Cat...

Page 717: ...mation Prefix PLAT ID 0130 User Response No action information only 816f040c 2003ffff PhysicalMemoryElementName Enabled on Subsystem MemoryElementName DIMM 3 This message is for the use case when an implementation has detected that Memory has been Enabled May also be shown as 816f040c2003ffff or 0x816f040c2003ffff Severity Info Serviceable No Automatically notify support No Alert Category System O...

Page 718: ...IM Information Prefix PLAT ID 0130 User Response No action information only 816f040c 2005ffff PhysicalMemoryElementName Enabled on Subsystem MemoryElementName DIMM 5 This message is for the use case when an implementation has detected that Memory has been Enabled May also be shown as 816f040c2005ffff or 0x816f040c2005ffff Severity Info Serviceable No Automatically notify support No Alert Category ...

Page 719: ...mation Prefix PLAT ID 0130 User Response No action information only 816f040c 2007ffff PhysicalMemoryElementName Enabled on Subsystem MemoryElementName DIMM 7 This message is for the use case when an implementation has detected that Memory has been Enabled May also be shown as 816f040c2007ffff or 0x816f040c2007ffff Severity Info Serviceable No Automatically notify support No Alert Category System O...

Page 720: ...IM Information Prefix PLAT ID 0130 User Response No action information only 816f040c 2009ffff PhysicalMemoryElementName Enabled on Subsystem MemoryElementName DIMM 9 This message is for the use case when an implementation has detected that Memory has been Enabled May also be shown as 816f040c2009ffff or 0x816f040c2009ffff Severity Info Serviceable No Automatically notify support No Alert Category ...

Page 721: ...mation Prefix PLAT ID 0130 User Response No action information only 816f040c 200bffff PhysicalMemoryElementName Enabled on Subsystem MemoryElementName DIMM 11 This message is for the use case when an implementation has detected that Memory has been Enabled May also be shown as 816f040c200bffff or 0x816f040c200bffff Severity Info Serviceable No Automatically notify support No Alert Category System ...

Page 722: ...IM Information Prefix PLAT ID 0130 User Response No action information only 816f040c 200dffff PhysicalMemoryElementName Enabled on Subsystem MemoryElementName DIMM 13 This message is for the use case when an implementation has detected that Memory has been Enabled May also be shown as 816f040c200dffff or 0x816f040c200dffff Severity Info Serviceable No Automatically notify support No Alert Category...

Page 723: ...mation Prefix PLAT ID 0130 User Response No action information only 816f040c 200fffff PhysicalMemoryElementName Enabled on Subsystem MemoryElementName DIMM 15 This message is for the use case when an implementation has detected that Memory has been Enabled May also be shown as 816f040c200fffff or 0x816f040c200fffff Severity Info Serviceable No Automatically notify support No Alert Category System ...

Page 724: ...IM Information Prefix PLAT ID 0130 User Response No action information only 816f040c 2011ffff PhysicalMemoryElementName Enabled on Subsystem MemoryElementName DIMM 17 This message is for the use case when an implementation has detected that Memory has been Enabled May also be shown as 816f040c2011ffff or 0x816f040c2011ffff Severity Info Serviceable No Automatically notify support No Alert Category...

Page 725: ...mation Prefix PLAT ID 0130 User Response No action information only 816f040c 2013ffff PhysicalMemoryElementName Enabled on Subsystem MemoryElementName DIMM 19 This message is for the use case when an implementation has detected that Memory has been Enabled May also be shown as 816f040c2013ffff or 0x816f040c2013ffff Severity Info Serviceable No Automatically notify support No Alert Category System ...

Page 726: ...IM Information Prefix PLAT ID 0130 User Response No action information only 816f040c 2015ffff PhysicalMemoryElementName Enabled on Subsystem MemoryElementName DIMM 21 This message is for the use case when an implementation has detected that Memory has been Enabled May also be shown as 816f040c2015ffff or 0x816f040c2015ffff Severity Info Serviceable No Automatically notify support No Alert Category...

Page 727: ...mation Prefix PLAT ID 0130 User Response No action information only 816f040c 2017ffff PhysicalMemoryElementName Enabled on Subsystem MemoryElementName DIMM 23 This message is for the use case when an implementation has detected that Memory has been Enabled May also be shown as 816f040c2017ffff or 0x816f040c2017ffff Severity Info Serviceable No Automatically notify support No Alert Category System ...

Page 728: ...ation Prefix PLAT ID 0130 User Response No action information only 816f040c 2581ffff PhysicalMemoryElementName Enabled on Subsystem MemoryElementName All DIMMS This message is for the use case when an implementation has detected that Memory has been Enabled May also be shown as 816f040c2581ffff or 0x816f040c2581ffff Severity Info Serviceable No Automatically notify support No Alert Category System...

Page 729: ...Prefix PLAT ID 0233 User Response No action information only 816f0507 0301ffff ProcessorElementName has Recovered from a Configuration Mismatch CPU 1 This message is for the use case when an implementation has Recovered from a Processor Configuration Mismatch May also be shown as 816f05070301ffff or 0x816f05070301ffff Severity Info Serviceable No Automatically notify support No Alert Category Crit...

Page 730: ...ation Prefix PLAT ID 0063 User Response No action information only 816f0507 2584ffff ProcessorElementName has Recovered from a Configuration Mismatch All CPUs This message is for the use case when an implementation has Recovered from a Processor Configuration Mismatch May also be shown as 816f05072584ffff or 0x816f05072584ffff Severity Info Serviceable No Automatically notify support No Alert Cate...

Page 731: ...mation Prefix PLAT ID 0145 User Response No action information only 816f050c 2002ffff Memory Logging Limit Removed for PhysicalMemoryElementName on Subsystem MemoryElementName DIMM 2 This message is for the use case when an implementation has detected that the Memory Logging Limit has been Removed May also be shown as 816f050c2002ffff or 0x816f050c2002ffff Severity Info Serviceable No Automaticall...

Page 732: ...IM Information Prefix PLAT ID 0145 User Response No action information only 816f050c 2004ffff Memory Logging Limit Removed for PhysicalMemoryElementName on Subsystem MemoryElementName DIMM 4 This message is for the use case when an implementation has detected that the Memory Logging Limit has been Removed May also be shown as 816f050c2004ffff or 0x816f050c2004ffff Severity Info Serviceable No Auto...

Page 733: ...mation Prefix PLAT ID 0145 User Response No action information only 816f050c 2006ffff Memory Logging Limit Removed for PhysicalMemoryElementName on Subsystem MemoryElementName DIMM 6 This message is for the use case when an implementation has detected that the Memory Logging Limit has been Removed May also be shown as 816f050c2006ffff or 0x816f050c2006ffff Severity Info Serviceable No Automaticall...

Page 734: ...IM Information Prefix PLAT ID 0145 User Response No action information only 816f050c 2008ffff Memory Logging Limit Removed for PhysicalMemoryElementName on Subsystem MemoryElementName DIMM 8 This message is for the use case when an implementation has detected that the Memory Logging Limit has been Removed May also be shown as 816f050c2008ffff or 0x816f050c2008ffff Severity Info Serviceable No Auto...

Page 735: ...mation Prefix PLAT ID 0145 User Response No action information only 816f050c 200affff Memory Logging Limit Removed for PhysicalMemoryElementName on Subsystem MemoryElementName DIMM 10 This message is for the use case when an implementation has detected that the Memory Logging Limit has been Removed May also be shown as 816f050c200affff or 0x816f050c200affff Severity Info Serviceable No Automatical...

Page 736: ...IM Information Prefix PLAT ID 0145 User Response No action information only 816f050c 200cffff Memory Logging Limit Removed for PhysicalMemoryElementName on Subsystem MemoryElementName DIMM 12 This message is for the use case when an implementation has detected that the Memory Logging Limit has been Removed May also be shown as 816f050c200cffff or 0x816f050c200cffff Severity Info Serviceable No Aut...

Page 737: ...mation Prefix PLAT ID 0145 User Response No action information only 816f050c 200effff Memory Logging Limit Removed for PhysicalMemoryElementName on Subsystem MemoryElementName DIMM 14 This message is for the use case when an implementation has detected that the Memory Logging Limit has been Removed May also be shown as 816f050c200effff or 0x816f050c200effff Severity Info Serviceable No Automatical...

Page 738: ...IM Information Prefix PLAT ID 0145 User Response No action information only 816f050c 2010ffff Memory Logging Limit Removed for PhysicalMemoryElementName on Subsystem MemoryElementName DIMM 16 This message is for the use case when an implementation has detected that the Memory Logging Limit has been Removed May also be shown as 816f050c2010ffff or 0x816f050c2010ffff Severity Info Serviceable No Aut...

Page 739: ...mation Prefix PLAT ID 0145 User Response No action information only 816f050c 2012ffff Memory Logging Limit Removed for PhysicalMemoryElementName on Subsystem MemoryElementName DIMM 18 This message is for the use case when an implementation has detected that the Memory Logging Limit has been Removed May also be shown as 816f050c2012ffff or 0x816f050c2012ffff Severity Info Serviceable No Automatical...

Page 740: ...IM Information Prefix PLAT ID 0145 User Response No action information only 816f050c 2014ffff Memory Logging Limit Removed for PhysicalMemoryElementName on Subsystem MemoryElementName DIMM 20 This message is for the use case when an implementation has detected that the Memory Logging Limit has been Removed May also be shown as 816f050c2014ffff or 0x816f050c2014ffff Severity Info Serviceable No Aut...

Page 741: ...mation Prefix PLAT ID 0145 User Response No action information only 816f050c 2016ffff Memory Logging Limit Removed for PhysicalMemoryElementName on Subsystem MemoryElementName DIMM 22 This message is for the use case when an implementation has detected that the Memory Logging Limit has been Removed May also be shown as 816f050c2016ffff or 0x816f050c2016ffff Severity Info Serviceable No Automatical...

Page 742: ...IM Information Prefix PLAT ID 0145 User Response No action information only 816f050c 2018ffff Memory Logging Limit Removed for PhysicalMemoryElementName on Subsystem MemoryElementName DIMM 24 This message is for the use case when an implementation has detected that the Memory Logging Limit has been Removed May also be shown as 816f050c2018ffff or 0x816f050c2018ffff Severity Info Serviceable No Aut...

Page 743: ...CIM Information Prefix PLAT ID 0145 User Response No action information only One of the DIMMs 816f050d 0400ffff Critical Array ComputerSystemElementName has deasserted Drive 0 This message is for the use case when an implementation has detected that an Critiacal Array has deasserted May also be shown as 816f050d0400ffff or 0x816f050d0400ffff Severity Info Serviceable No Automatically notify suppor...

Page 744: ...IM Information Prefix PLAT ID 0175 User Response No action information only 816f050d 0402ffff Critical Array ComputerSystemElementName has deasserted Drive 2 This message is for the use case when an implementation has detected that an Critiacal Array has deasserted May also be shown as 816f050d0402ffff or 0x816f050d0402ffff Severity Info Serviceable No Automatically notify support No Alert Categor...

Page 745: ...No action information only 816f050d 0404ffff Critical Array ComputerSystemElementName has deasserted Drive 4 This message is for the use case when an implementation has detected that an Critiacal Array has deasserted May also be shown as 816f050d0404ffff or 0x816f050d0404ffff Severity Info Serviceable No Automatically notify support No Alert Category Critical Hard Disk drive SNMP Trap ID 5 CIM Inf...

Page 746: ...0d 0406ffff Critical Array ComputerSystemElementName has deasserted Drive 6 This message is for the use case when an implementation has detected that an Critiacal Array has deasserted May also be shown as 816f050d0406ffff or 0x816f050d0406ffff Severity Info Serviceable No Automatically notify support No Alert Category Critical Hard Disk drive SNMP Trap ID 5 CIM Information Prefix PLAT ID 0175 User...

Page 747: ... Uncorrectable CPU complex error for ProcessorElementName has deasserted CPU 1 This message is for the use case when an SM BIOS Uncorrectable CPU complex error has deasserted May also be shown as 816f06070301ffff or 0x816f06070301ffff Severity Info Serviceable No Automatically notify support No Alert Category Critical CPU SNMP Trap ID 40 CIM Information Prefix PLAT ID 0817 User Response No action ...

Page 748: ...ElementName has deasserted All CPUs This message is for the use case when an SM BIOS Uncorrectable CPU complex error has deasserted May also be shown as 816f06072584ffff or 0x816f06072584ffff Severity Info Serviceable No Automatically notify support No Alert Category Critical CPU SNMP Trap ID 40 CIM Information Prefix PLAT ID 0817 User Response No action information only One of the CPUs 816f0608 1...

Page 749: ...a Failed Array has been Restored May also be shown as 816f060d0400ffff or 0x816f060d0400ffff Severity Info Serviceable No Automatically notify support No Alert Category Critical Hard Disk drive SNMP Trap ID 5 CIM Information Prefix PLAT ID 0177 User Response No action information only 816f060d 0401ffff Array in system ComputerSystemElementName has been restored Drive 1 This message is for the use ...

Page 750: ...s been Restored May also be shown as 816f060d0402ffff or 0x816f060d0402ffff Severity Info Serviceable No Automatically notify support No Alert Category Critical Hard Disk drive SNMP Trap ID 5 CIM Information Prefix PLAT ID 0177 User Response No action information only 816f060d 0403ffff Array in system ComputerSystemElementName has been restored Drive 3 This message is for the use case when an impl...

Page 751: ...ed May also be shown as 816f060d0404ffff or 0x816f060d0404ffff Severity Info Serviceable No Automatically notify support No Alert Category Critical Hard Disk drive SNMP Trap ID 5 CIM Information Prefix PLAT ID 0177 User Response No action information only 816f060d 0405ffff Array in system ComputerSystemElementName has been restored Drive 5 This message is for the use case when an implementation ha...

Page 752: ...red May also be shown as 816f060d0406ffff or 0x816f060d0406ffff Severity Info Serviceable No Automatically notify support No Alert Category Critical Hard Disk drive SNMP Trap ID 5 CIM Information Prefix PLAT ID 0177 User Response No action information only 816f060d 0407ffff Array in system ComputerSystemElementName has been restored Drive 7 This message is for the use case when an implementation h...

Page 753: ...May also be shown as 816f070c2001ffff or 0x816f070c2001ffff Severity Info Serviceable No Automatically notify support No Alert Category Critical Memory SNMP Trap ID 41 CIM Information Prefix PLAT ID 0127 User Response No action information only 816f070c 2002ffff Configuration error for PhysicalMemoryElementName on Subsystem MemoryElementName has deasserted DIMM 2 This message is for the use case w...

Page 754: ...deasserted May also be shown as 816f070c2003ffff or 0x816f070c2003ffff Severity Info Serviceable No Automatically notify support No Alert Category Critical Memory SNMP Trap ID 41 CIM Information Prefix PLAT ID 0127 User Response No action information only 816f070c 2004ffff Configuration error for PhysicalMemoryElementName on Subsystem MemoryElementName has deasserted DIMM 4 This message is for the...

Page 755: ...sserted May also be shown as 816f070c2005ffff or 0x816f070c2005ffff Severity Info Serviceable No Automatically notify support No Alert Category Critical Memory SNMP Trap ID 41 CIM Information Prefix PLAT ID 0127 User Response No action information only 816f070c 2006ffff Configuration error for PhysicalMemoryElementName on Subsystem MemoryElementName has deasserted DIMM 6 This message is for the us...

Page 756: ... has deasserted May also be shown as 816f070c2007ffff or 0x816f070c2007ffff Severity Info Serviceable No Automatically notify support No Alert Category Critical Memory SNMP Trap ID 41 CIM Information Prefix PLAT ID 0127 User Response No action information only 816f070c 2008ffff Configuration error for PhysicalMemoryElementName on Subsystem MemoryElementName has deasserted DIMM 8 This message is fo...

Page 757: ...serted May also be shown as 816f070c2009ffff or 0x816f070c2009ffff Severity Info Serviceable No Automatically notify support No Alert Category Critical Memory SNMP Trap ID 41 CIM Information Prefix PLAT ID 0127 User Response No action information only 816f070c 200affff Configuration error for PhysicalMemoryElementName on Subsystem MemoryElementName has deasserted DIMM 10 This message is for the us...

Page 758: ... has deasserted May also be shown as 816f070c200bffff or 0x816f070c200bffff Severity Info Serviceable No Automatically notify support No Alert Category Critical Memory SNMP Trap ID 41 CIM Information Prefix PLAT ID 0127 User Response No action information only 816f070c 200cffff Configuration error for PhysicalMemoryElementName on Subsystem MemoryElementName has deasserted DIMM 12 This message is f...

Page 759: ...sserted May also be shown as 816f070c200dffff or 0x816f070c200dffff Severity Info Serviceable No Automatically notify support No Alert Category Critical Memory SNMP Trap ID 41 CIM Information Prefix PLAT ID 0127 User Response No action information only 816f070c 200effff Configuration error for PhysicalMemoryElementName on Subsystem MemoryElementName has deasserted DIMM 14 This message is for the u...

Page 760: ... has deasserted May also be shown as 816f070c200fffff or 0x816f070c200fffff Severity Info Serviceable No Automatically notify support No Alert Category Critical Memory SNMP Trap ID 41 CIM Information Prefix PLAT ID 0127 User Response No action information only 816f070c 2010ffff Configuration error for PhysicalMemoryElementName on Subsystem MemoryElementName has deasserted DIMM 16 This message is f...

Page 761: ...sserted May also be shown as 816f070c2011ffff or 0x816f070c2011ffff Severity Info Serviceable No Automatically notify support No Alert Category Critical Memory SNMP Trap ID 41 CIM Information Prefix PLAT ID 0127 User Response No action information only 816f070c 2012ffff Configuration error for PhysicalMemoryElementName on Subsystem MemoryElementName has deasserted DIMM 18 This message is for the u...

Page 762: ... has deasserted May also be shown as 816f070c2013ffff or 0x816f070c2013ffff Severity Info Serviceable No Automatically notify support No Alert Category Critical Memory SNMP Trap ID 41 CIM Information Prefix PLAT ID 0127 User Response No action information only 816f070c 2014ffff Configuration error for PhysicalMemoryElementName on Subsystem MemoryElementName has deasserted DIMM 20 This message is f...

Page 763: ...sserted May also be shown as 816f070c2015ffff or 0x816f070c2015ffff Severity Info Serviceable No Automatically notify support No Alert Category Critical Memory SNMP Trap ID 41 CIM Information Prefix PLAT ID 0127 User Response No action information only 816f070c 2016ffff Configuration error for PhysicalMemoryElementName on Subsystem MemoryElementName has deasserted DIMM 22 This message is for the u...

Page 764: ... has deasserted May also be shown as 816f070c2017ffff or 0x816f070c2017ffff Severity Info Serviceable No Automatically notify support No Alert Category Critical Memory SNMP Trap ID 41 CIM Information Prefix PLAT ID 0127 User Response No action information only 816f070c 2018ffff Configuration error for PhysicalMemoryElementName on Subsystem MemoryElementName has deasserted DIMM 24 This message is f...

Page 765: ...n error has deasserted May also be shown as 816f070c2581ffff or 0x816f070c2581ffff Severity Info Serviceable No Automatically notify support No Alert Category Critical Memory SNMP Trap ID 41 CIM Information Prefix PLAT ID 0127 User Response No action information only One of the DIMMs 816f070d 0400ffff Rebuild completed for Array in system ComputerSystemElementName Drive 0 This message is for the u...

Page 766: ...d has Completed May also be shown as 816f070d0401ffff or 0x816f070d0401ffff Severity Info Serviceable No Automatically notify support No Alert Category System Other SNMP Trap ID CIM Information Prefix PLAT ID 0179 User Response No action information only 816f070d 0402ffff Rebuild completed for Array in system ComputerSystemElementName Drive 2 This message is for the use case when an implementation...

Page 767: ...mpleted May also be shown as 816f070d0403ffff or 0x816f070d0403ffff Severity Info Serviceable No Automatically notify support No Alert Category System Other SNMP Trap ID CIM Information Prefix PLAT ID 0179 User Response No action information only 816f070d 0404ffff Rebuild completed for Array in system ComputerSystemElementName Drive 4 This message is for the use case when an implementation has det...

Page 768: ...d has Completed May also be shown as 816f070d0405ffff or 0x816f070d0405ffff Severity Info Serviceable No Automatically notify support No Alert Category System Other SNMP Trap ID CIM Information Prefix PLAT ID 0179 User Response No action information only 816f070d 0406ffff Rebuild completed for Array in system ComputerSystemElementName Drive 6 This message is for the use case when an implementation...

Page 769: ...ebuild has Completed May also be shown as 816f070d0407ffff or 0x816f070d0407ffff Severity Info Serviceable No Automatically notify support No Alert Category System Other SNMP Trap ID CIM Information Prefix PLAT ID 0179 User Response No action information only 816f0807 0301ffff ProcessorElementName has been Enabled CPU 1 This message is for the use case when an implementation has detected a Process...

Page 770: ... also be shown as 816f08070302ffff or 0x816f08070302ffff Severity Info Serviceable No Automatically notify support No Alert Category System Other SNMP Trap ID CIM Information Prefix PLAT ID 0060 User Response No action information only 816f0807 2584ffff ProcessorElementName has been Enabled All CPUs This message is for the use case when an implementation has detected a Processor has been Enabled M...

Page 771: ...so be shown as 816f08132581ffff or 0x816f08132581ffff Severity Info Serviceable No Automatically notify support No Alert Category Critical Other SNMP Trap ID 50 CIM Information Prefix PLAT ID 0241 User Response No action information only 816f0813 2582ffff System ComputerSystemElementName has recovered from an Uncorrectable Bus Error PCIs This message is for the use case when an implementation has ...

Page 772: ...rrectable Error May also be shown as 816f08132584ffff or 0x816f08132584ffff Severity Info Serviceable No Automatically notify support No Alert Category Critical Other SNMP Trap ID 50 CIM Information Prefix PLAT ID 0241 User Response No action information only 816f090c 2001ffff PhysicalMemoryElementName on Subsystem MemoryElementName is no longer Throttled DIMM 1 This message is for the use case wh...

Page 773: ...shown as 816f090c2002ffff or 0x816f090c2002ffff Severity Info Serviceable No Automatically notify support No Alert Category System Other SNMP Trap ID CIM Information Prefix PLAT ID 0143 User Response No action information only 816f090c 2003ffff PhysicalMemoryElementName on Subsystem MemoryElementName is no longer Throttled DIMM 3 This message is for the use case when an implementation has detected...

Page 774: ...shown as 816f090c2004ffff or 0x816f090c2004ffff Severity Info Serviceable No Automatically notify support No Alert Category System Other SNMP Trap ID CIM Information Prefix PLAT ID 0143 User Response No action information only 816f090c 2005ffff PhysicalMemoryElementName on Subsystem MemoryElementName is no longer Throttled DIMM 5 This message is for the use case when an implementation has detected...

Page 775: ...f or 0x816f090c2006ffff Severity Info Serviceable No Automatically notify support No Alert Category System Other SNMP Trap ID CIM Information Prefix PLAT ID 0143 User Response No action information only 816f090c 2007ffff PhysicalMemoryElementName on Subsystem MemoryElementName is no longer Throttled DIMM 7 This message is for the use case when an implementation has detected Memory is no longer Thr...

Page 776: ...16f090c2008ffff Severity Info Serviceable No Automatically notify support No Alert Category System Other SNMP Trap ID CIM Information Prefix PLAT ID 0143 User Response No action information only 816f090c 2009ffff PhysicalMemoryElementName on Subsystem MemoryElementName is no longer Throttled DIMM 9 This message is for the use case when an implementation has detected Memory is no longer Throttled M...

Page 777: ...everity Info Serviceable No Automatically notify support No Alert Category System Other SNMP Trap ID CIM Information Prefix PLAT ID 0143 User Response No action information only 816f090c 200bffff PhysicalMemoryElementName on Subsystem MemoryElementName is no longer Throttled DIMM 11 This message is for the use case when an implementation has detected Memory is no longer Throttled May also be shown...

Page 778: ...y Info Serviceable No Automatically notify support No Alert Category System Other SNMP Trap ID CIM Information Prefix PLAT ID 0143 User Response No action information only 816f090c 200dffff PhysicalMemoryElementName on Subsystem MemoryElementName is no longer Throttled DIMM 13 This message is for the use case when an implementation has detected Memory is no longer Throttled May also be shown as 81...

Page 779: ... Automatically notify support No Alert Category System Other SNMP Trap ID CIM Information Prefix PLAT ID 0143 User Response No action information only 816f090c 200fffff PhysicalMemoryElementName on Subsystem MemoryElementName is no longer Throttled DIMM 15 This message is for the use case when an implementation has detected Memory is no longer Throttled May also be shown as 816f090c200fffff or 0x8...

Page 780: ...No Automatically notify support No Alert Category System Other SNMP Trap ID CIM Information Prefix PLAT ID 0143 User Response No action information only 816f090c 2011ffff PhysicalMemoryElementName on Subsystem MemoryElementName is no longer Throttled DIMM 17 This message is for the use case when an implementation has detected Memory is no longer Throttled May also be shown as 816f090c2011ffff or 0...

Page 781: ... notify support No Alert Category System Other SNMP Trap ID CIM Information Prefix PLAT ID 0143 User Response No action information only 816f090c 2013ffff PhysicalMemoryElementName on Subsystem MemoryElementName is no longer Throttled DIMM 19 This message is for the use case when an implementation has detected Memory is no longer Throttled May also be shown as 816f090c2013ffff or 0x816f090c2013fff...

Page 782: ...pport No Alert Category System Other SNMP Trap ID CIM Information Prefix PLAT ID 0143 User Response No action information only 816f090c 2015ffff PhysicalMemoryElementName on Subsystem MemoryElementName is no longer Throttled DIMM 21 This message is for the use case when an implementation has detected Memory is no longer Throttled May also be shown as 816f090c2015ffff or 0x816f090c2015ffff Severity...

Page 783: ...ystem Other SNMP Trap ID CIM Information Prefix PLAT ID 0143 User Response No action information only 816f090c 2017ffff PhysicalMemoryElementName on Subsystem MemoryElementName is no longer Throttled DIMM 23 This message is for the use case when an implementation has detected Memory is no longer Throttled May also be shown as 816f090c2017ffff or 0x816f090c2017ffff Severity Info Serviceable No Auto...

Page 784: ... SNMP Trap ID CIM Information Prefix PLAT ID 0143 User Response No action information only 816f0a07 0301ffff The Processor ProcessorElementName is no longer operating in a Degraded State CPU 1 This message is for the use case when an implementation has detected a Processor is no longer running in the Degraded state May also be shown as 816f0a070301ffff or 0x816f0a070301ffff Severity Info Serviceab...

Page 785: ...CIM Information Prefix PLAT ID 0039 User Response No action information only 816f0a0c 2001ffff An Over Temperature Condition has been removed on the PhysicalMemoryElementName on Subsystem MemoryElementName DIMM 1 This message is for the use case when an implementation has detected an Over Temperature Condition for Memory that has been Removed May also be shown as 816f0a0c2001ffff or 0x816f0a0c2001...

Page 786: ...lert Category Critical Temperature SNMP Trap ID 0 CIM Information Prefix PLAT ID 0147 User Response No action information only 816f0a0c 2003ffff An Over Temperature Condition has been removed on the PhysicalMemoryElementName on Subsystem MemoryElementName DIMM 3 This message is for the use case when an implementation has detected an Over Temperature Condition for Memory that has been Removed May a...

Page 787: ...pport No Alert Category Critical Temperature SNMP Trap ID 0 CIM Information Prefix PLAT ID 0147 User Response No action information only 816f0a0c 2005ffff An Over Temperature Condition has been removed on the PhysicalMemoryElementName on Subsystem MemoryElementName DIMM 5 This message is for the use case when an implementation has detected an Over Temperature Condition for Memory that has been Rem...

Page 788: ...tically notify support No Alert Category Critical Temperature SNMP Trap ID 0 CIM Information Prefix PLAT ID 0147 User Response No action information only 816f0a0c 2007ffff An Over Temperature Condition has been removed on the PhysicalMemoryElementName on Subsystem MemoryElementName DIMM 7 This message is for the use case when an implementation has detected an Over Temperature Condition for Memory ...

Page 789: ...ically notify support No Alert Category Critical Temperature SNMP Trap ID 0 CIM Information Prefix PLAT ID 0147 User Response No action information only 816f0a0c 2009ffff An Over Temperature Condition has been removed on the PhysicalMemoryElementName on Subsystem MemoryElementName DIMM 9 This message is for the use case when an implementation has detected an Over Temperature Condition for Memory t...

Page 790: ...fo Serviceable No Automatically notify support No Alert Category Critical Temperature SNMP Trap ID 0 CIM Information Prefix PLAT ID 0147 User Response No action information only 816f0a0c 200bffff An Over Temperature Condition has been removed on the PhysicalMemoryElementName on Subsystem MemoryElementName DIMM 11 This message is for the use case when an implementation has detected an Over Temperat...

Page 791: ...everity Info Serviceable No Automatically notify support No Alert Category Critical Temperature SNMP Trap ID 0 CIM Information Prefix PLAT ID 0147 User Response No action information only 816f0a0c 200dffff An Over Temperature Condition has been removed on the PhysicalMemoryElementName on Subsystem MemoryElementName DIMM 13 This message is for the use case when an implementation has detected an Ove...

Page 792: ...16f0a0c200effff Severity Info Serviceable No Automatically notify support No Alert Category Critical Temperature SNMP Trap ID 0 CIM Information Prefix PLAT ID 0147 User Response No action information only 816f0a0c 200fffff An Over Temperature Condition has been removed on the PhysicalMemoryElementName on Subsystem MemoryElementName DIMM 15 This message is for the use case when an implementation ha...

Page 793: ...f or 0x816f0a0c2010ffff Severity Info Serviceable No Automatically notify support No Alert Category Critical Temperature SNMP Trap ID 0 CIM Information Prefix PLAT ID 0147 User Response No action information only 816f0a0c 2011ffff An Over Temperature Condition has been removed on the PhysicalMemoryElementName on Subsystem MemoryElementName DIMM 17 This message is for the use case when an implement...

Page 794: ...shown as 816f0a0c2012ffff or 0x816f0a0c2012ffff Severity Info Serviceable No Automatically notify support No Alert Category Critical Temperature SNMP Trap ID 0 CIM Information Prefix PLAT ID 0147 User Response No action information only 816f0a0c 2013ffff An Over Temperature Condition has been removed on the PhysicalMemoryElementName on Subsystem MemoryElementName DIMM 19 This message is for the us...

Page 795: ...shown as 816f0a0c2014ffff or 0x816f0a0c2014ffff Severity Info Serviceable No Automatically notify support No Alert Category Critical Temperature SNMP Trap ID 0 CIM Information Prefix PLAT ID 0147 User Response No action information only 816f0a0c 2015ffff An Over Temperature Condition has been removed on the PhysicalMemoryElementName on Subsystem MemoryElementName DIMM 21 This message is for the us...

Page 796: ...ved May also be shown as 816f0a0c2016ffff or 0x816f0a0c2016ffff Severity Info Serviceable No Automatically notify support No Alert Category Critical Temperature SNMP Trap ID 0 CIM Information Prefix PLAT ID 0147 User Response No action information only 816f0a0c 2017ffff An Over Temperature Condition has been removed on the PhysicalMemoryElementName on Subsystem MemoryElementName DIMM 23 This messa...

Page 797: ...emory that has been Removed May also be shown as 816f0a0c2018ffff or 0x816f0a0c2018ffff Severity Info Serviceable No Automatically notify support No Alert Category Critical Temperature SNMP Trap ID 0 CIM Information Prefix PLAT ID 0147 User Response No action information only 816f0a13 0301ffff System ComputerSystemElementName has recovered from a Fatal Bus Error CPU 1 PECI This message is for the ...

Page 798: ...rd and Replacing the system board n microprocessor number 816f0a13 0302ffff System ComputerSystemElementName has recovered from a Fatal Bus Error CPU 2 PECI This message is for the use case when an implementation has detected that a system has recovered from a Bus Fatal Error May also be shown as 816f0a130302ffff or 0x816f0a130302ffff Severity Info Serviceable No Automatically notify support No Al...

Page 799: ... 806f0021 2201ffff Fault in slot PhysicalConnectorSystemElementName on system ComputerSystemElementName No Op ROM Space Yes 806f0021 2582ffff Fault in slot PhysicalConnectorSystemElementName on system ComputerSystemElementName All PCI Error Yes 806f0021 2c01ffff Fault in slot PhysicalConnectorSystemElementName on system ComputerSystemElementName Mezz Card Error Yes 806f0021 3001ffff Fault in slot ...

Page 800: ...MM 11 Yes 806f010c 200cffff Uncorrectable error detected for PhysicalMemoryElementName on Subsystem MemoryElementName DIMM 12 Yes 806f010c 200dffff Uncorrectable error detected for PhysicalMemoryElementName on Subsystem MemoryElementName DIMM 13 Yes 806f010c 200effff Uncorrectable error detected for PhysicalMemoryElementName on Subsystem MemoryElementName DIMM 14 Yes 806f010c 200fffff Uncorrectabl...

Page 801: ...mentName has been disabled due to a detected fault Drive 3 Yes 806f010d 0404ffff The Drive StorageVolumeElementName has been disabled due to a detected fault Drive 4 Yes 806f010d 0405ffff The Drive StorageVolumeElementName has been disabled due to a detected fault Drive 5 Yes 806f010d 0406ffff The Drive StorageVolumeElementName has been disabled due to a detected fault Drive 6 Yes 806f010d 0407fff...

Page 802: ... PhysicalMemoryElementName on Subsystem MemoryElementName DIMM 3 Yes 806f050c 2004ffff Memory Logging Limit Reached for PhysicalMemoryElementName on Subsystem MemoryElementName DIMM 4 Yes 806f050c 2005ffff Memory Logging Limit Reached for PhysicalMemoryElementName on Subsystem MemoryElementName DIMM 5 Yes 806f050c 2006ffff Memory Logging Limit Reached for PhysicalMemoryElementName on Subsystem Mem...

Page 803: ...system MemoryElementName DIMM 19 Yes 806f050c 2014ffff Memory Logging Limit Reached for PhysicalMemoryElementName on Subsystem MemoryElementName DIMM 20 Yes 806f050c 2015ffff Memory Logging Limit Reached for PhysicalMemoryElementName on Subsystem MemoryElementName DIMM 21 Yes 806f050c 2016ffff Memory Logging Limit Reached for PhysicalMemoryElementName on Subsystem MemoryElementName DIMM 22 Yes 806...

Page 804: ...ay ComputerSystemElementName has failed Drive 6 Yes 806f060d 0407ffff Array ComputerSystemElementName has failed Drive 7 Yes 806f0813 2581ffff A Uncorrectable Bus Error has occurred on system ComputerSystemElementName DIMMs Yes 806f0813 2582ffff A Uncorrectable Bus Error has occurred on system ComputerSystemElementName PCIs Yes 806f0813 2584ffff A Uncorrectable Bus Error has occurred on system Com...

Page 805: ...a change of states that is normal behavior Warning A warning is not as severe as an error but if possible the condition should be corrected before it becomes an error It might also be a condition that requires additional monitoring or maintenance Error An error typically indicates a failure or critical condition that impairs service or an expected function User response The actions that you should...

Page 806: ... that matching Processors are installed in the correct Processor sockets according to the service information for this product 2 Check IBM support site for an applicable service bulletin that applies to this Processor error 3 Trained Service technician only Replace Processor Inspect Processor socket and replace the system board first if socket is damaged I 18006 I 18006 A mismatch between the maxi...

Page 807: ...is product Add link to Memory chart Correct any configuration issues found 2 Trained Service technician only Replace associated Processor Inspect Processor socket and replace the system board first if socket is damaged I 18009 I 18009 A core speed mismatch has been detected for one or more processor packages Explanation Processors have mismatched Core Speed Severity Error User Response Complete th...

Page 808: ...cessors are installed in the correct processor sockets according to the service information for this product Correct any mismatch found 2 Check IBM support site for an applicable service bulletin or firmware update that applies to this Processor error 3 Trained Service technician only Replace the system board I 1800C I 1800C A cache type mismatch has been detected for one or more processor package...

Page 809: ... support site for an applicable service bulletin or firmware update that applies to this Processor error 3 Trained Service technician only Replace the system board I 1800F I 1800F A processor family mismatch has been detected for one or more processor packages Explanation Processors have mismatched Family Severity Error User Response Complete the following steps 1 Verify that matching Processors a...

Page 810: ...slot If slot not available or error re occurs replace adapter 4 Trained Service technician only If adapter was moved to a different slot and error did not re occur verify that this is not a system limitation and then replace the system board Also if this is not the initial installation and the error persists after adapter replacement replace system board I 2018003 I 2018003 A bad option ROM checks...

Page 811: ...18001 The firmware image capsule signature for the currently booted flash bank is invalid Explanation Current Bank CRTM Capsule Update Signature Invalid Severity Info User Response Complete the following steps 1 Reboot system Will come up on backup UEFI image Reflash the primary UEFI image 2 If error does not persist no additional recovery action is required 3 If error persists or boot is unsucces...

Page 812: ...ian only Replace the system board I 58015 I 58015 Memory spare copy initiated Explanation Spare Copy Started Severity Info User Response Complete the following steps 1 No user required for this event This is for informational purposes only I 580A4 I 580A4 Memory population change detected Explanation DIMM Population Change Detected Severity Info User Response Complete the following steps 1 Check s...

Page 813: ...planation Uncorrectable processor error detected Severity Error User Response Complete the following steps 1 Check IBM support site for an applicable service bulletin or firmware update that applies to this error 2 Reboot system If problem persists escalate to the next level of supprt S 2011001 S 2011001 An Uncorrected PCIe Error has Occurred at Bus Device Function The Vendor ID for the device is ...

Page 814: ...ed reconfiguring slot to Gen1 or Gen2 may be required Gen1 Gen2 settings can be configured via F1 Setup System Settings Devices and I O Ports PCIe Gen1 Gen2 Gen3 Speed Selection or the ASU Utility 2 Check IBM support site for an applicable device driver firmware update version of service information for this product or other information that applies to this error Load new device driver and any req...

Page 815: ...40007 A firmware fault has been detected in the UEFI image Explanation Internal UEFI Firmware Fault Detected System halted Severity Error User Response Complete the following steps 1 Check IBM support site for an applicable service bulletin or firmware update that applies to this error 2 Reflash UEFI image 3 Trained service technician only Replace the system board S 3050007 S 3050007 A firmware fa...

Page 816: ...update that applies to this error 5 Reflash UEFI firmware 6 Remove and re install CMOS battery for 30 seconds to clear CMOS contents 7 Trained service technician only Replace the system board S 3060007 S 3060007 A firmware fault has been detected in the UEFI image Explanation Internal UEFI Firmware Fault Detected System halted Severity Error User Response Complete the following steps 1 Check IBM s...

Page 817: ...cian only Replace the system board S 3818007 S 3818007 The firmware image capsules for both flash banks could not be verified Explanation CRTM image capsule could not be verified Severity Error User Response Complete the following steps 1 If system failed to boot successfully DC cycle system 2 If system boots to F1 steup flash UEFI image and reset bank to primary if required If system boots withou...

Page 818: ...replace system board 6 Trained Service technician only Replace affected Processor 7 Trained Service technician only Replace system board S 51006 S 51006 A memory mismatch has been detected Please verify that the memory configuration is valid Explanation One or More Mismatched DIMMs Detected Severity Error User Response Complete the following steps 1 Could follow an uncorrectable memory error or fa...

Page 819: ...memory channel across channels one at a time to a different memory channel or Processor check service information for this product Install guide for population requirements for sparing paring modes If problem follows a moved DIMM to a different memory channel replace that DIMM 5 Check IBM support site for an applicable service bulletin or firmware update that applies to this memory error 6 Trained...

Page 820: ... Trained Service technician only 4 Trained Service Technician Only Replace the processor S 680B9 S 680B9 External QPI Link Failure Detected Explanation External QPI Link Failure Detected Severity Error User Response Complete the following steps 1 Check IBM support site for an applicable service bulletin or firmware update that applies to this error 2 Inspect processor socket for foreign debris or ...

Page 821: ... to UEFI Recovery section of service information for this product 3 Trained service technician only Replace the system board W 305000A W 305000A An invalid date and time have been detected Explanation RTC Date and Time Incorrect Severity Warning User Response Complete the following steps 1 Check IMM chassis event log This event should immediately precede 0068002 error Service that event or any oth...

Page 822: ...oot Required Controller Explanation DRIVER HEALTH PROTOCOL Reports Reboot Required Controller Severity Warning User Response Complete the following steps 1 No action required system will reboot at the end of POST 2 If problem persists switch to backup UEFI or reflash current UEFI image 3 Trained Service Technician Only Replace system board W 305800C W 305800C DRIVER HEALTH PROTOCOL Reports System ...

Page 823: ...Trained Service Technician Only Replace system board W 3108002 W 305800E DRIVER HEALTH PROTOCOL Reports Invalid Health Status Driver Explanation GPT GUID Partition Table corruption Severity Warning User Response Complete the following steps 1 F1 Setup System Settings Recovery Disk GPT Recovery set to Automatic Save Settings then restart system 2 Boot to F1 setup system will automatically try to re...

Page 824: ...0 seconds to clear CMOS contents 7 Trained Service technician only Replace the system board W 3808003 W 3808003 Unable to retrieve the system configuration from the IMM Explanation Error Retrieving System Configuration from IMM Severity Warning User Response Complete the following steps 1 Use F1 Setup Verify Settings and Save Settings to recover settings 2 Reset the IMM from the CMM 3 Use CMM to r...

Page 825: ...nation DIMM Disabled Severity Info User Response Complete the following steps 1 If the DIMM was disabled because of a memory fault follow the procedure for that event 2 If no memory fault is recorded in the logs and no DIMM connector error LEDs are lit re enable the DIMM through the Setup utility or the Advanced Settings Utility ASU 3 If problem persists Power cycle the node from management consol...

Page 826: ...is memory error Link to IBM support service bulletins 6 Trained service technician only If problem continues to re occur on the same DIMM connector inspect DIMM connector for foreign material and remove if found If connector is damaged replace system board 7 Trained service technician only Remove affected Processor and inspect Processor socket pins for damaged or mis aligned pins If damage is foun...

Page 827: ...onnectors are correctly populated for sparing mode according to the service information for this product W 68002 W 68002 A CMOS battery error has been detected Explanation CMOS Battery Fault Severity Error User Response Complete the following steps 1 If the system was recently Installed Moved or Serviced makesure the batter is properly seated 2 Check IBM support site for an applicable service bull...

Page 828: ...814 System x3550 M4 Installation and Service Guide ...

Page 829: ... result when you run the DSA Broadcom network test 405 000 000 BRCM TestControlRegisters Test Passed The test passed Recoverable No Severity Event Serviceable No Automatically notify support No Related links IBM Support website Latest level of DSA Latest level of BMC IMM 405 001 000 BRCM TestMIIRegisters Test Passed The test passed Recoverable No Severity Event Serviceable No Automatically notify ...

Page 830: ...IMM 405 003 000 BRCM TestInternalMemory Test Passed The test passed Recoverable No Severity Event Serviceable No Automatically notify support No Related links IBM Support website Latest level of DSA Latest level of BMC IMM 405 004 000 BRCM TestInterrupt Test Passed The test passed Recoverable No Severity Event Serviceable No Automatically notify support No 816 System x3550 M4 Installation and Serv...

Page 831: ... No Related links IBM Support website Latest level of DSA Latest level of BMC IMM 405 006 000 BRCM TestLoopbackPhysical Test Passed The test passed Recoverable No Severity Event Serviceable No Automatically notify support No Related links IBM Support website Latest level of DSA Latest level of BMC IMM 405 007 000 BRCM TestLEDs Test Passed The test passed Recoverable No Appendix C DSA diagnostic te...

Page 832: ...able No Severity Warning Serviceable No Automatically notify support No Related links IBM Support website Latest level of DSA Latest level of BMC IMM 405 801 000 BRCM TestMIIRegisters Test Aborted The MII register test was canceled Recoverable No Severity Warning Serviceable No Automatically notify support No Related links IBM Support website Latest level of DSA Latest level of BMC IMM 818 System ...

Page 833: ...3 000 BRCM TestInternalMemory Test Aborted The internal memory test was canceled Recoverable No Severity Warning Serviceable No Automatically notify support No Related links IBM Support website Latest level of DSA Latest level of BMC IMM 405 804 000 BRCM TestInterrupt Test Aborted The interrupt test was canceled Recoverable No Severity Warning Serviceable No Automatically notify support No Appendi...

Page 834: ...M Support website Latest level of DSA Latest level of BMC IMM 405 806 000 BRCM TestLoopbackPhysical Test Aborted Loopback testing at the physical layer was canceled Recoverable No Severity Warning Serviceable No Automatically notify support No Related links IBM Support website Latest level of DSA Latest level of BMC IMM 405 807 000 BRCM TestLEDs Test Aborted Verification of status LEDs was cancele...

Page 835: ...nt firmware level and upgrade if necessary The installed firmware level can be found in the DSA Diagnostic Event Log within the Firmware VPD section for this component 2 Rerun the test 3 If failure remains refer to Troubleshooting by symptom in the system Installation and Service Guide for the next corrective action Related links IBM Support website Latest level of DSA Latest level of BMC IMM 405 ...

Page 836: ...ected while testing non volatile RAM Recoverable No Severity Error Serviceable Yes Automatically notify support No User Response Complete the following steps 1 Check component firmware level and upgrade if necessary The installed firmware level can be found in the DSA Diagnostic Event Log within the Firmware VPD section for this component 2 Rerun the test 3 If failure remains refer to Troubleshoot...

Page 837: ...TestInterrupt Test Failed A failure was detected while testing interrupts Recoverable No Severity Error Serviceable Yes Automatically notify support No User Response Complete the following steps 1 Check component firmware level and upgrade if necessary The installed firmware level can be found in the DSA Diagnostic Event Log within the Firmware VPD section for this component 2 Rerun the test 3 If ...

Page 838: ...evel of BMC IMM 405 906 000 BRCM TestLoopbackPhysical Test Failed A failure was detected during the loopback test at the physical layer Recoverable No Severity Error Serviceable Yes Automatically notify support No User Response Complete the following steps 1 Check component firmware level and upgrade if necessary The installed firmware level can be found in the DSA Diagnostic Event Log within the ...

Page 839: ...mponent 2 Rerun the test 3 If failure remains refer to Troubleshooting by symptom in the system Installation and Service Guide for the next corrective action Related links IBM Support website Latest level of DSA Latest level of BMC IMM DSA Brocade test results The following messages can result when you run the Brocade test Test results for the DSA Brocade test The following messages can result whe...

Page 840: ... Related links IBM Support website Latest level of DSA Latest level of BMC IMM 218 002 000 Brocade SerdesLoopbackTest Passed The test passed Recoverable No Severity Event Serviceable No Automatically notify support No Related links IBM Support website Latest level of DSA Latest level of BMC IMM 218 003 000 Brocade PCILoopbackTest Passed The test passed Recoverable No 826 System x3550 M4 Installati...

Page 841: ...verable No Severity Event Serviceable No Automatically notify support No Related links IBM Support website Latest level of DSA Latest level of BMC IMM 218 005 000 Brocade SerdesEthLoopbackTest Passed The test passed Recoverable No Severity Event Serviceable No Automatically notify support No Related links IBM Support website Latest level of DSA Latest level of BMC IMM Appendix C DSA diagnostic tes...

Page 842: ...M 218 800 000 Brocade MemoryTest Aborted The test was canceled Recoverable No Severity Warning Serviceable No Automatically notify support No Related links IBM Support website Latest level of DSA Latest level of BMC IMM 218 801 000 Brocade ExternalLoopbackTest Aborted The test was canceled Recoverable No Severity Warning Serviceable No Automatically notify support No 828 System x3550 M4 Installati...

Page 843: ...lated links IBM Support website Latest level of DSA Latest level of BMC IMM 218 803 000 Brocade PCILoopbackTest Aborted The test was canceled Recoverable No Severity Warning Serviceable No Automatically notify support No Related links IBM Support website Latest level of DSA Latest level of BMC IMM 218 804 000 Brocade ExternalEthLoopbackTest Aborted The test was canceled Recoverable No Appendix C D...

Page 844: ...e No Severity Warning Serviceable No Automatically notify support No Related links IBM Support website Latest level of DSA Latest level of BMC IMM 218 806 000 Brocade InternalLoopbackTest Aborted The test was canceled Recoverable No Severity Warning Serviceable No Automatically notify support No Related links IBM Support website Latest level of DSA Latest level of BMC IMM 830 System x3550 M4 Insta...

Page 845: ...port representative Related links IBM Support website Latest level of DSA Latest level of BMC IMM 218 901 000 Brocade ExternalLoopbackTest Failed A failure was detected during the Loopback test Recoverable No Severity Error Serviceable Yes Automatically notify support No User Response Complete the following steps 1 Check cable connections 2 Rerun the test 3 Verify whether the firmware is at proper...

Page 846: ... the problem remains contact your IBM technical support representative Related links IBM Support website Latest level of DSA Latest level of BMC IMM 218 903 000 Brocade PCILoopbackTest Failed A failure was detected during the Loopback test Recoverable No Severity Error Serviceable Yes Automatically notify support No User Response Complete the following steps 1 Rerun the test 2 Verify whether the f...

Page 847: ...P cable 2 Rerun the test 3 Verify whether the firmware is at proper level 4 Rerun the test 5 If the problem remains contact your IBM technical support representative Related links IBM Support website Latest level of DSA Latest level of BMC IMM 218 905 000 Brocade SerdesEthLoopbackTest Failed A failure was detected during the Loopback test Recoverable No Severity Error Serviceable Yes Automatically...

Page 848: ...ete the following steps 1 Rerun the test 2 Verify whether the firmware is at proper level 3 Rerun the test 4 If the problem remains contact your IBM technical support representative Related links IBM Support website Latest level of DSA Latest level of BMC IMM DSA checkpoint panel test results The following messages can result when you run the checkpoint panel test Test results for the DSA checkpoi...

Page 849: ... No User Response Complete the following steps 1 Inspect and reseat operator information panel cable at both ends 2 Verify that the Baseboard Management Controller BMC is working 3 Run the test again 4 If failure remains refer to Troubleshooting by symptom in the system Installation and Service Guide for the next corrective action Related links IBM Support website Latest level of DSA Latest level ...

Page 850: ...by symptom in the system Installation and Service Guide for the next corrective action Related links IBM Support website Latest level of DSA Latest level of BMC IMM DSA CPU stress test results The following messages can result when you run the CPU stress test Test results for the DSA CPU stress test The following messages can result when you run the DSA CPU stress test 089 000 000 CPU Stress Test ...

Page 851: ...ction for this component The latest level firmware for this component can be found in reference to this system type at the IBM Support website 5 Run the test again 6 If the system has stopped responding turn off and restart the system and then run the test again 7 If failure remains refer to Troubleshooting by symptom in the system Installation and Service Guide for the next corrective action Rela...

Page 852: ... Troubleshooting by symptom in the system Installation and Service Guide for the next corrective action Related links IBM Support website Latest level of DSA Latest level of BMC IMM 089 803 000 CPU Stress Test Aborted CPU Stress Test Aborted Memory size is insufficient to run the test At least 1GB is required Recoverable No Severity Warning Serviceable Yes Automatically notify support No Related l...

Page 853: ...found in the DSA Diagnostic Event Log within the Firmware VPD section for this component 5 Run the test again 6 If the system has stopped responding turn off and restart the system and then run the test again 7 If failure remains refer to Troubleshooting by symptom in the system Installation and Service Guide for the next corrective action Related links IBM Support website Latest level of DSA Late...

Page 854: ...oopBackTest Passed The test passed Recoverable No Severity Event Serviceable No Automatically notify support No Related links IBM Support website Latest level of DSA Latest level of BMC IMM 516 002 000 ELXUCNA ELXUCNA NIC LED Beacon Test Passed The test passed Recoverable No Severity Event Serviceable No Automatically notify support No Related links 840 System x3550 M4 Installation and Service Gui...

Page 855: ... Latest level of DSA Latest level of BMC IMM 516 801 000 ELXUCNA NIC PHY LoopBackTest Aborted Loopback testing at the physical layer was canceled Recoverable No Severity Warning Serviceable No Automatically notify support No Related links IBM Support website Latest level of DSA Latest level of BMC IMM 516 802 000 ELXUCNA ELXUCNA NIC LED Beacon Test Aborted Verification of status LEDs was canceled ...

Page 856: ...necessary The installed firmware level can be found in the DSA Diagnostic Event Log within the Firmware VPD section for this component 2 Rerun the test 3 If failure remains refer to Troubleshooting by symptom in the system Installation and Service Guide for the next corrective action Related links IBM Support website Latest level of DSA Latest level of BMC IMM 516 901 000 ELXUCNA NIC PHY LoopBackT...

Page 857: ...able No Severity Error Serviceable Yes Automatically notify support No User Response Complete the following steps 1 Check component firmware level and upgrade if necessary The installed firmware level can be found in the DSA Diagnostic Event Log within the Firmware VPD section for this component 2 Rerun the test 3 If failure remains refer to Troubleshooting by symptom in the system Installation an...

Page 858: ...y notify support No User Response Complete the following steps 1 Remove power cables wait for 45 seconds reconnect and rerun the test 2 Make sure that the scalability cable connections are as per specification 3 Make sure that DSA and BIOS uEFI are at the latest level 4 If the problem remains contact your technical service representative Related links IBM Support website Latest level of DSA Latest...

Page 859: ...st level of BMC IMM 401 901 001 EXA Port Ping Test Failed EXA Port Ping Test Failed Recoverable No Severity Error Serviceable Yes Automatically notify support No User Response Complete the following steps 1 Remove power cables wait for 45 seconds reconnect and rerun the test 2 Make sure that the scalability cable connections are as per specification 3 Check scalability cables for loose connections...

Page 860: ... support No Related links IBM Support website Latest level of DSA Latest level of BMC IMM 217 800 000 HDD Test Aborted HDD Test Aborted The test was canceled Recoverable No Severity Warning Serviceable Yes Automatically notify support No User Response Complete the following steps 1 Check cable connections 2 Rerun the test 3 Verify that Hard drive supports self test and self test logging 4 If the p...

Page 861: ...e is at the latest level 4 Rerun the test 5 If the problem remains contact your technical support representative Related links IBM Support website Latest level of DSA Latest level of BMC IMM DSA Intel network test results The following messages can result when you run the Intel network test Test results for the DSA Intel network test The following messages can result when you run the DSA Intel net...

Page 862: ...eable No Automatically notify support No Related links IBM Support website Latest level of DSA Latest level of BMC IMM 406 002 000 IANet FIFO Test Passed The test passed Recoverable No Severity Event Serviceable No Automatically notify support No Related links IBM Support website Latest level of DSA Latest level of BMC IMM 406 003 000 IANet Interrupts Test Passed 848 System x3550 M4 Installation a...

Page 863: ...pback Test Passed The test passed Recoverable No Severity Event Serviceable No Automatically notify support No Related links IBM Support website Latest level of DSA Latest level of BMC IMM 406 800 000 IANet Registers Test Aborted Registers test was canceled Recoverable No Severity Warning Serviceable No Automatically notify support No Related links Appendix C DSA diagnostic test results 849 ...

Page 864: ...upport website Latest level of DSA Latest level of BMC IMM 406 802 000 IANet FIFO Test Aborted FIFO test was canceled Recoverable No Severity Warning Serviceable No Automatically notify support No Related links IBM Support website Latest level of DSA Latest level of BMC IMM 406 803 000 IANet Interrupts Test Aborted Interrupt test was canceled Recoverable No Severity Warning 850 System x3550 M4 Ins...

Page 865: ... Registers Test Failed A failure was detected during the Registers test Recoverable No Severity Error Serviceable Yes Automatically notify support No User Response Complete the following steps 1 Check component firmware level and upgrade if necessary The installed firmware level can be found in the DSA Diagnostic Event Log within the Firmware VPD section for this component 2 Rerun the test 3 If fa...

Page 866: ...nt 2 Rerun the test 3 If failure remains refer to Troubleshooting by symptom in the system Installation and Service Guide for the next corrective action Related links IBM Support website Latest level of DSA Latest level of BMC IMM 406 902 000 IANet FIFO Test Failed A failure was detected during the FIFO test Recoverable No Severity Error Serviceable Yes Automatically notify support No User Respons...

Page 867: ...ound in the DSA Diagnostic Event Log within the Firmware VPD section for this component 2 Rerun the test 3 Check interrupt assignments in the PCI Hardware section of the DSA Diagnostic Log If the ethernet device is sharing interrupts if possible modify the interrupt assignments using F1 Setup to assign a unique interrupt to the device 4 Rerun the test 5 If failure remains refer to Troubleshooting ...

Page 868: ...de for the next corrective action Related links IBM Support website Latest level of DSA Latest level of BMC IMM DSA LSI hard drive test results The following messages can result when you run the LSI hard drive test Test results for the DSA LSI hard drive test The following messages can result when you run the DSA LSI hard drive test 407 000 000 LSIESG DiskDefaultDiagnostic Test Passed The test pas...

Page 869: ... Serviceable Yes Automatically notify support No User Response Complete the following steps 1 Check cable connections 2 Rerun the test 3 Verify whether the firmware is at the latest level 4 Rerun the test 5 If the problem remains contact your IBM technical support representative Related links IBM Support website Latest level of DSA Latest level of BMC IMM DSA Mellanox adapter test results The foll...

Page 870: ...lated links IBM Support website Latest level of DSA Latest level of BMC IMM 408 001 000 MLNX MLNX_DiagnosticTestIBPort Test Passed Port Test Passed Recoverable No Severity Event Serviceable No Automatically notify support No Related links IBM Support website Latest level of DSA Latest level of BMC IMM 408 800 000 MLNX MLNX_DiagnosticTestEthernetPort Test Aborted Port Test was canceled Recoverable ...

Page 871: ...DSA Latest level of BMC IMM 408 900 000 MLNX MLNX_DiagnosticTestEthernetPort Test Failed Port Test Failed Recoverable No Severity Error Serviceable Yes Automatically notify support No User Response Complete the following steps 1 Make sure that the physical link of the port under test in the active state 2 If these condition was met but the test keeps failing the port s adapter might be faulty 3 Tr...

Page 872: ...on was met but the test keeps failing the port s adapter might be faulty 3 Try replacing the adapter and repeating the test Related links IBM Support website Latest level of DSA Latest level of BMC IMM DSA memory isolation test results The following messages can result when you run the memory isolation test Test results for the DSA memory isolation test The following messages can result when you r...

Page 873: ...notify support No Related links IBM Support website Latest level of DSA Latest level of BMC IMM 201 000 002 Standalone Memory Test Passed Quick Full Memory Test CPU 2 Passed Recoverable No Severity Event Serviceable No Automatically notify support No Related links IBM Support website Latest level of DSA Latest level of BMC IMM 201 000 003 Standalone Memory Test Passed Quick Full Memory Test CPU 3 ...

Page 874: ...vent Serviceable No Automatically notify support No Related links IBM Support website Latest level of DSA Latest level of BMC IMM 201 811 000 Standalone Memory Test Aborted Unable to Locate SMBIOS key _SM_ Recoverable No Severity Warning Serviceable No Automatically notify support No User Response Complete the following steps 1 Perform the actions mentioned one at a time and try the test after eac...

Page 875: ... notify support No User Response Complete the following steps 1 Perform the actions mentioned one at a time and try the test after each action 2 If the problem remains contact your technical service representative 3 Turn off the system and disconnect it from power Wait for 45 seconds Reseat DIMM s Reconnect it to power 4 Make sure that DSA and BIOS uEFI are at the latest level Related links IBM Su...

Page 876: ...ate SMBIOS key _SM_ Recoverable No Severity Warning Serviceable No Automatically notify support No User Response Complete the following steps 1 Perform the actions mentioned one at a time and try the test after each action 2 If the problem remains contact your technical service representative 3 Turn off the system and disconnect it from power Wait for 45 seconds Reseat DIMM s Reconnect it to power...

Page 877: ...ne Memory Test Aborted Memory test is not supported for this system Recoverable No Severity Warning Serviceable No Automatically notify support No User Response Complete the following steps 1 Perform the actions mentioned one at a time and try the test after each action 2 If the problem remains contact your technical service representative 3 Turn off the system and disconnect it from power Wait fo...

Page 878: ... of DSA Latest level of BMC IMM 201 812 003 Standalone Memory Test Aborted Memory test is not supported for this system Recoverable No Severity Warning Serviceable No Automatically notify support No User Response Complete the following steps 1 Perform the actions mentioned one at a time and try the test after each action 2 If the problem remains contact your technical service representative 3 Turn...

Page 879: ...BIOS uEFI are at the latest level Related links IBM Support website Latest level of DSA Latest level of BMC IMM 201 813 001 Standalone Memory Test Aborted Chipset Error Can not turn OFF ECC error reporting in CPU Recoverable No Severity Warning Serviceable No Automatically notify support No User Response Complete the following steps 1 Perform the actions mentioned one at a time and try the test af...

Page 880: ... system and disconnect it from power Wait for 45 seconds Reseat DIMM s Reconnect it to power 4 Make sure that DSA and BIOS uEFI are at the latest level Related links IBM Support website Latest level of DSA Latest level of BMC IMM 201 813 003 Standalone Memory Test Aborted Chipset Error Can not turn OFF ECC error reporting in CPU Recoverable No Severity Warning Serviceable No Automatically notify s...

Page 881: ...lete the following steps 1 Perform the actions mentioned one at a time and try the test after each action 2 If the problem remains contact your technical service representative 3 Turn off the system and disconnect it from power Wait for 45 seconds Reseat DIMM s Reconnect it to power 4 Make sure that DSA and BIOS uEFI are at the latest level Related links IBM Support website Latest level of DSA Lat...

Page 882: ...ing feature for CPU Recoverable No Severity Warning Serviceable No Automatically notify support No User Response Complete the following steps 1 Perform the actions mentioned one at a time and try the test after each action 2 If the problem remains contact your technical service representative 3 Turn off the system and disconnect it from power Wait for 45 seconds Reseat DIMM s Reconnect it to power...

Page 883: ...t Aborted Program Error with Quick Memory Menu Option Selection Recoverable No Severity Warning Serviceable No Automatically notify support No User Response Complete the following steps 1 Perform the actions mentioned one at a time and try the test after each action 2 If the problem remains contact your technical service representative 3 Turn off the system and disconnect it from power Wait for 45...

Page 884: ...SA Latest level of BMC IMM 201 815 002 Standalone Memory Test Aborted Program Error with Quick Memory Menu Option Selection Recoverable No Severity Warning Serviceable No Automatically notify support No User Response Complete the following steps 1 Perform the actions mentioned one at a time and try the test after each action 2 If the problem remains contact your technical service representative 3 ...

Page 885: ... BIOS uEFI are at the latest level Related links IBM Support website Latest level of DSA Latest level of BMC IMM 201 816 000 Standalone Memory Test Aborted Program Error with Full Memory Menu Option Selection Recoverable No Severity Warning Serviceable No Automatically notify support No User Response Complete the following steps 1 Perform the actions mentioned one at a time and try the test after ...

Page 886: ... system and disconnect it from power Wait for 45 seconds Reseat DIMM s Reconnect it to power 4 Make sure that DSA and BIOS uEFI are at the latest level Related links IBM Support website Latest level of DSA Latest level of BMC IMM 201 816 002 Standalone Memory Test Aborted Program Error with Full Memory Menu Option Selection Recoverable No Severity Warning Serviceable No Automatically notify suppor...

Page 887: ...ponse Complete the following steps 1 Perform the actions mentioned one at a time and try the test after each action 2 If the problem remains contact your technical service representative 3 Turn off the system and disconnect it from power Wait for 45 seconds Reseat DIMM s Reconnect it to power 4 Make sure that DSA and BIOS uEFI are at the latest level Related links IBM Support website Latest level ...

Page 888: ...ate SMBIOS key _SM_ Recoverable No Severity Warning Serviceable No Automatically notify support No User Response Complete the following steps 1 Perform the actions mentioned one at a time and try the test after each action 2 If the problem remains contact your technical service representative 3 Turn off the system and disconnect it from power Wait for 45 seconds Reseat DIMM s Reconnect it to power...

Page 889: ... Test Aborted Unable to Locate SMBIOS key _SM_ Recoverable No Severity Warning Serviceable No Automatically notify support No User Response Complete the following steps 1 Perform the actions mentioned one at a time and try the test after each action 2 If the problem remains contact your technical service representative 3 Turn off the system and disconnect it from power Wait for 45 seconds Reseat D...

Page 890: ...est level of BMC IMM 201 819 001 Standalone Memory Test Aborted The start end address ranges in the restricted area of the memory Recoverable No Severity Warning Serviceable No Automatically notify support No User Response Complete the following steps 1 Perform the actions mentioned one at a time and try the test after each action 2 If the problem remains contact your technical service representat...

Page 891: ...BIOS uEFI are at the latest level Related links IBM Support website Latest level of DSA Latest level of BMC IMM 201 819 003 Standalone Memory Test Aborted The start end address ranges in the restricted area of the memory Recoverable No Severity Warning Serviceable No Automatically notify support No User Response Complete the following steps 1 Perform the actions mentioned one at a time and try the...

Page 892: ... system and disconnect it from power Wait for 45 seconds Reseat DIMM s Reconnect it to power 4 Make sure that DSA and BIOS uEFI are at the latest level Related links IBM Support website Latest level of DSA Latest level of BMC IMM 201 820 001 Standalone Memory Test Aborted Memory Upper limit is less than 16 Mbytes Recoverable No Severity Warning Serviceable No Automatically notify support No User R...

Page 893: ...lete the following steps 1 Perform the actions mentioned one at a time and try the test after each action 2 If the problem remains contact your technical service representative 3 Turn off the system and disconnect it from power Wait for 45 seconds Reseat DIMM s Reconnect it to power 4 Make sure that DSA and BIOS uEFI are at the latest level Related links IBM Support website Latest level of DSA Lat...

Page 894: ...ange MTRR registers Recoverable No Severity Warning Serviceable No Automatically notify support No User Response Complete the following steps 1 Perform the actions mentioned one at a time and try the test after each action 2 If the problem remains contact your technical service representative 3 Turn off the system and disconnect it from power Wait for 45 seconds Reseat DIMM s Reconnect it to power...

Page 895: ...range MTRR registers are larger than fixed range MTRR registers Recoverable No Severity Warning Serviceable No Automatically notify support No User Response Complete the following steps 1 Perform the actions mentioned one at a time and try the test after each action 2 If the problem remains contact your technical service representative 3 Turn off the system and disconnect it from power Wait for 45...

Page 896: ...st level of DSA Latest level of BMC IMM 201 822 000 Standalone Memory Test Aborted Invalid MTRR service request Recoverable No Severity Warning Serviceable No Automatically notify support No User Response Complete the following steps 1 Perform the actions mentioned one at a time and try the test after each action 2 If the problem remains contact your technical service representative 3 Turn off the...

Page 897: ...BIOS uEFI are at the latest level Related links IBM Support website Latest level of DSA Latest level of BMC IMM 201 822 002 Standalone Memory Test Aborted Invalid MTRR service request Recoverable No Severity Warning Serviceable No Automatically notify support No User Response Complete the following steps 1 Perform the actions mentioned one at a time and try the test after each action 2 If the prob...

Page 898: ...it for 45 seconds Reseat DIMM s Reconnect it to power 4 Make sure that DSA and BIOS uEFI are at the latest level Related links IBM Support website Latest level of DSA Latest level of BMC IMM 201 824 000 Standalone Memory Test Aborted Node Interleave feature must be OFF Go to Setup and disable Node Interleave option and then re run the test Recoverable No Severity Warning Serviceable No Automatical...

Page 899: ...mplete the following steps 1 Perform the actions mentioned one at a time and try the test after each action 2 If the problem remains contact your technical service representative 3 Turn off the system and disconnect it from power Wait for 45 seconds Reseat DIMM s Reconnect it to power 4 Make sure that DSA and BIOS uEFI are at the latest level Related links IBM Support website Latest level of DSA L...

Page 900: ...Interleave option and then re run the test Recoverable No Severity Warning Serviceable No Automatically notify support No User Response Complete the following steps 1 Perform the actions mentioned one at a time and try the test after each action 2 If the problem remains contact your technical service representative 3 Turn off the system and disconnect it from power Wait for 45 seconds Reseat DIMM ...

Page 901: ...Standalone Memory Test Aborted BIOS Memory Controller has been disabled Go to Setup and Enable Memory Controller Recoverable No Severity Warning Serviceable No Automatically notify support No User Response Complete the following steps 1 Perform the actions mentioned one at a time and try the test after each action 2 If the problem remains contact your technical service representative 3 Turn off th...

Page 902: ...s IBM Support website Latest level of DSA Latest level of BMC IMM 201 826 003 Standalone Memory Test Aborted BIOS Memory Controller has been disabled Go to Setup and Enable Memory Controller Recoverable No Severity Warning Serviceable No Automatically notify support No User Response Complete the following steps 1 Perform the actions mentioned one at a time and try the test after each action 2 If t...

Page 903: ... sure that DSA and BIOS uEFI are at the latest level Related links IBM Support website Latest level of DSA Latest level of BMC IMM 201 827 001 Standalone Memory Test Aborted BIOS ECC function has been disabled by BIOS Go to Setup and enable ECC generation Recoverable No Severity Warning Serviceable No Automatically notify support No User Response Complete the following steps 1 Perform the actions ...

Page 904: ...off the system and disconnect it from power Wait for 45 seconds Reseat DIMM s Reconnect it to power 4 Make sure that DSA and BIOS uEFI are at the latest level Related links IBM Support website Latest level of DSA Latest level of BMC IMM 201 827 003 Standalone Memory Test Aborted BIOS ECC function has been disabled by BIOS Go to Setup and enable ECC generation Recoverable No Severity Warning Servic...

Page 905: ...lete the following steps 1 Perform the actions mentioned one at a time and try the test after each action 2 If the problem remains contact your technical service representative 3 Turn off the system and disconnect it from power Wait for 45 seconds Reseat DIMM s Reconnect it to power 4 Make sure that DSA and BIOS uEFI are at the latest level Related links IBM Support website Latest level of DSA Lat...

Page 906: ...trol MASK registers Recoverable No Severity Warning Serviceable No Automatically notify support No User Response Complete the following steps 1 Perform the actions mentioned one at a time and try the test after each action 2 If the problem remains contact your technical service representative 3 Turn off the system and disconnect it from power Wait for 45 seconds Reseat DIMM s Reconnect it to power...

Page 907: ...pset Error Problem clearing MSR machine check control registers Recoverable No Severity Warning Serviceable No Automatically notify support No User Response Complete the following steps 1 Perform the actions mentioned one at a time and try the test after each action 2 If the problem remains contact your technical service representative 3 Turn off the system and disconnect it from power Wait for 45...

Page 908: ...est level of BMC IMM 201 845 002 Standalone Memory Test Aborted Chipset Error Problem clearing MSR machine check control registers Recoverable No Severity Warning Serviceable No Automatically notify support No User Response Complete the following steps 1 Perform the actions mentioned one at a time and try the test after each action 2 If the problem remains contact your technical service representa...

Page 909: ...Make sure that DSA and BIOS uEFI are at the latest level Related links IBM Support website Latest level of DSA Latest level of BMC IMM 201 859 000 Standalone Memory Test Aborted INVALID XSECSRAT type Recoverable No Severity Warning Serviceable No Automatically notify support No User Response Complete the following steps 1 Perform the actions mentioned one at a time and try the test after each acti...

Page 910: ... system and disconnect it from power Wait for 45 seconds Reseat DIMM s Reconnect it to power 4 Make sure that DSA and BIOS uEFI are at the latest level Related links IBM Support website Latest level of DSA Latest level of BMC IMM 201 859 002 Standalone Memory Test Aborted INVALID XSECSRAT type Recoverable No Severity Warning Serviceable No Automatically notify support No User Response Complete the...

Page 911: ...plete the following steps 1 Perform the actions mentioned one at a time and try the test after each action 2 If the problem remains contact your technical service representative 3 Turn off the system and disconnect it from power Wait for 45 seconds Reseat DIMM s Reconnect it to power 4 Make sure that DSA and BIOS uEFI are at the latest level Related links IBM Support website Latest level of DSA La...

Page 912: ...o OEM0 type 1 found Recoverable No Severity Warning Serviceable No Automatically notify support No User Response Complete the following steps 1 Perform the actions mentioned one at a time and try the test after each action 2 If the problem remains contact your technical service representative 3 Turn off the system and disconnect it from power Wait for 45 seconds Reseat DIMM s Reconnect it to power...

Page 913: ...201 860 003 Standalone Memory Test Aborted No OEM0 type 1 found Recoverable No Severity Warning Serviceable No Automatically notify support No User Response Complete the following steps 1 Perform the actions mentioned one at a time and try the test after each action 2 If the problem remains contact your technical service representative 3 Turn off the system and disconnect it from power Wait for 45...

Page 914: ...Latest level of DSA Latest level of BMC IMM 201 861 001 Standalone Memory Test Aborted No SRAT type 1 found Recoverable No Severity Warning Serviceable No Automatically notify support No User Response Complete the following steps 1 Perform the actions mentioned one at a time and try the test after each action 2 If the problem remains contact your technical service representative 3 Turn off the sys...

Page 915: ...BIOS uEFI are at the latest level Related links IBM Support website Latest level of DSA Latest level of BMC IMM 201 861 003 Standalone Memory Test Aborted No SRAT type 1 found Recoverable No Severity Warning Serviceable No Automatically notify support No User Response Complete the following steps 1 Perform the actions mentioned one at a time and try the test after each action 2 If the problem rema...

Page 916: ... system and disconnect it from power Wait for 45 seconds Reseat DIMM s Reconnect it to power 4 Make sure that DSA and BIOS uEFI are at the latest level Related links IBM Support website Latest level of DSA Latest level of BMC IMM 201 862 001 Standalone Memory Test Aborted No OEM1 structure found Recoverable No Severity Warning Serviceable No Automatically notify support No User Response Complete t...

Page 917: ...lete the following steps 1 Perform the actions mentioned one at a time and try the test after each action 2 If the problem remains contact your technical service representative 3 Turn off the system and disconnect it from power Wait for 45 seconds Reseat DIMM s Reconnect it to power 4 Make sure that DSA and BIOS uEFI are at the latest level Related links IBM Support website Latest level of DSA Lat...

Page 918: ...y in OEM1 structure Recoverable No Severity Warning Serviceable No Automatically notify support No User Response Complete the following steps 1 Perform the actions mentioned one at a time and try the test after each action 2 If the problem remains contact your technical service representative 3 Turn off the system and disconnect it from power Wait for 45 seconds Reseat DIMM s Reconnect it to power...

Page 919: ...tandalone Memory Test Aborted No IBMERROR key in OEM1 structure Recoverable No Severity Warning Serviceable No Automatically notify support No User Response Complete the following steps 1 Perform the actions mentioned one at a time and try the test after each action 2 If the problem remains contact your technical service representative 3 Turn off the system and disconnect it from power Wait for 45...

Page 920: ...atest level of DSA Latest level of BMC IMM 201 864 000 Standalone Memory Test Aborted No GAS located in OEM1 Recoverable No Severity Warning Serviceable No Automatically notify support No User Response Complete the following steps 1 Perform the actions mentioned one at a time and try the test after each action 2 If the problem remains contact your technical service representative 3 Turn off the sy...

Page 921: ...BIOS uEFI are at the latest level Related links IBM Support website Latest level of DSA Latest level of BMC IMM 201 864 002 Standalone Memory Test Aborted No GAS located in OEM1 Recoverable No Severity Warning Serviceable No Automatically notify support No User Response Complete the following steps 1 Perform the actions mentioned one at a time and try the test after each action 2 If the problem re...

Page 922: ...em and disconnect it from power Wait for 45 seconds Reseat DIMM s Reconnect it to power 4 Make sure that DSA and BIOS uEFI are at the latest level Related links IBM Support website Latest level of DSA Latest level of BMC IMM 201 865 000 Standalone Memory Test Aborted No XSECSRAT key in OEM0 structure Recoverable No Severity Warning Serviceable No Automatically notify support No User Response Compl...

Page 923: ...lete the following steps 1 Perform the actions mentioned one at a time and try the test after each action 2 If the problem remains contact your technical service representative 3 Turn off the system and disconnect it from power Wait for 45 seconds Reseat DIMM s Reconnect it to power 4 Make sure that DSA and BIOS uEFI are at the latest level Related links IBM Support website Latest level of DSA Lat...

Page 924: ... structure Recoverable No Severity Warning Serviceable No Automatically notify support No User Response Complete the following steps 1 Perform the actions mentioned one at a time and try the test after each action 2 If the problem remains contact your technical service representative 3 Turn off the system and disconnect it from power Wait for 45 seconds Reseat DIMM s Reconnect it to power 4 Make s...

Page 925: ...st Aborted EFI SAL Invalid parameter from GetMemoryMap function Recoverable No Severity Warning Serviceable No Automatically notify support No User Response Complete the following steps 1 Perform the actions mentioned one at a time and try the test after each action 2 If the problem remains contact your technical service representative 3 Turn off the system and disconnect it from power Wait for 45...

Page 926: ...DSA Latest level of BMC IMM 201 866 003 Standalone Memory Test Aborted EFI SAL Invalid parameter from GetMemoryMap function Recoverable No Severity Warning Serviceable No Automatically notify support No User Response Complete the following steps 1 Perform the actions mentioned one at a time and try the test after each action 2 If the problem remains contact your technical service representative 3 ...

Page 927: ...BIOS uEFI are at the latest level Related links IBM Support website Latest level of DSA Latest level of BMC IMM 201 867 001 Standalone Memory Test Aborted EFI SAL Buffer not allocated Recoverable No Severity Warning Serviceable No Automatically notify support No User Response Complete the following steps 1 Perform the actions mentioned one at a time and try the test after each action 2 If the prob...

Page 928: ... system and disconnect it from power Wait for 45 seconds Reseat DIMM s Reconnect it to power 4 Make sure that DSA and BIOS uEFI are at the latest level Related links IBM Support website Latest level of DSA Latest level of BMC IMM 201 867 003 Standalone Memory Test Aborted EFI SAL Buffer not allocated Recoverable No Severity Warning Serviceable No Automatically notify support No User Response Compl...

Page 929: ...lete the following steps 1 Perform the actions mentioned one at a time and try the test after each action 2 If the problem remains contact your technical service representative 3 Turn off the system and disconnect it from power Wait for 45 seconds Reseat DIMM s Reconnect it to power 4 Make sure that DSA and BIOS uEFI are at the latest level Related links IBM Support website Latest level of DSA Lat...

Page 930: ...MemoryMap too small Recoverable No Severity Warning Serviceable No Automatically notify support No User Response Complete the following steps 1 Perform the actions mentioned one at a time and try the test after each action 2 If the problem remains contact your technical service representative 3 Turn off the system and disconnect it from power Wait for 45 seconds Reseat DIMM s Reconnect it to power...

Page 931: ...st Aborted EFI SAL Invalid parameter from GetMemoryMap function Recoverable No Severity Warning Serviceable No Automatically notify support No User Response Complete the following steps 1 Perform the actions mentioned one at a time and try the test after each action 2 If the problem remains contact your technical service representative 3 Turn off the system and disconnect it from power Wait for 45...

Page 932: ...DSA Latest level of BMC IMM 201 869 002 Standalone Memory Test Aborted EFI SAL Invalid parameter from GetMemoryMap function Recoverable No Severity Warning Serviceable No Automatically notify support No User Response Complete the following steps 1 Perform the actions mentioned one at a time and try the test after each action 2 If the problem remains contact your technical service representative 3 ...

Page 933: ...hat DSA and BIOS uEFI are at the latest level Related links IBM Support website Latest level of DSA Latest level of BMC IMM 201 870 000 Standalone Memory Test Aborted CPU Doamin in ACPI not valid Recoverable No Severity Warning Serviceable No Automatically notify support No User Response Complete the following steps 1 Perform the actions mentioned one at a time and try the test after each action 2...

Page 934: ... system and disconnect it from power Wait for 45 seconds Reseat DIMM s Reconnect it to power 4 Make sure that DSA and BIOS uEFI are at the latest level Related links IBM Support website Latest level of DSA Latest level of BMC IMM 201 870 002 Standalone Memory Test Aborted CPU Doamin in ACPI not valid Recoverable No Severity Warning Serviceable No Automatically notify support No User Response Compl...

Page 935: ...lete the following steps 1 Perform the actions mentioned one at a time and try the test after each action 2 If the problem remains contact your technical service representative 3 Turn off the system and disconnect it from power Wait for 45 seconds Reseat DIMM s Reconnect it to power 4 Make sure that DSA and BIOS uEFI are at the latest level Related links IBM Support website Latest level of DSA Lat...

Page 936: ...compare encountered Recoverable No Severity Warning Serviceable No Automatically notify support No User Response Complete the following steps 1 Perform the actions mentioned one at a time and try the test after each action 2 If the problem remains contact your technical service representative 3 Turn off the system and disconnect it from power Wait for 45 seconds Reseat DIMM s Reconnect it to power...

Page 937: ...st Aborted Data Mis compare encountered Recoverable No Severity Warning Serviceable No Automatically notify support No User Response Complete the following steps 1 Perform the actions mentioned one at a time and try the test after each action 2 If the problem remains contact your technical service representative 3 Turn off the system and disconnect it from power Wait for 45 seconds Reseat DIMM s R...

Page 938: ...evel of BMC IMM 201 877 001 Standalone Memory Test Aborted BIOS Sparing in Extended PCI reg must be OFF Go to setup and disable sparing Recoverable No Severity Warning Serviceable No Automatically notify support No User Response Complete the following steps 1 Perform the actions mentioned one at a time and try the test after each action 2 If the problem remains contact your technical service repre...

Page 939: ...BIOS uEFI are at the latest level Related links IBM Support website Latest level of DSA Latest level of BMC IMM 201 877 003 Standalone Memory Test Aborted BIOS Sparing in Extended PCI reg must be OFF Go to setup and disable sparing Recoverable No Severity Warning Serviceable No Automatically notify support No User Response Complete the following steps 1 Perform the actions mentioned one at a time ...

Page 940: ... system and disconnect it from power Wait for 45 seconds Reseat DIMM s Reconnect it to power 4 Make sure that DSA and BIOS uEFI are at the latest level Related links IBM Support website Latest level of DSA Latest level of BMC IMM 201 878 001 Standalone Memory Test Aborted Sparing feature must be turned OFF Go to setup and turn the sparing feature OFF Recoverable No Severity Warning Serviceable No ...

Page 941: ...lete the following steps 1 Perform the actions mentioned one at a time and try the test after each action 2 If the problem remains contact your technical service representative 3 Turn off the system and disconnect it from power Wait for 45 seconds Reseat DIMM s Reconnect it to power 4 Make sure that DSA and BIOS uEFI are at the latest level Related links IBM Support website Latest level of DSA Lat...

Page 942: ...emory without cache Recoverable No Severity Warning Serviceable No Automatically notify support No User Response Complete the following steps 1 Perform the actions mentioned one at a time and try the test after each action 2 If the problem remains contact your technical service representative 3 Turn off the system and disconnect it from power Wait for 45 seconds Reseat DIMM s Reconnect it to power...

Page 943: ...TRR register manipulation Can not write to memory without cache Recoverable No Severity Warning Serviceable No Automatically notify support No User Response Complete the following steps 1 Perform the actions mentioned one at a time and try the test after each action 2 If the problem remains contact your technical service representative 3 Turn off the system and disconnect it from power Wait for 45...

Page 944: ...l of DSA Latest level of BMC IMM 201 886 000 Standalone Memory Test Aborted Memory Upper limit is less than 16 Mbytes Recoverable No Severity Warning Serviceable No Automatically notify support No User Response Complete the following steps 1 Perform the actions mentioned one at a time and try the test after each action 2 If the problem remains contact your technical service representative 3 Turn o...

Page 945: ...BIOS uEFI are at the latest level Related links IBM Support website Latest level of DSA Latest level of BMC IMM 201 886 002 Standalone Memory Test Aborted Memory Upper limit is less than 16 Mbytes Recoverable No Severity Warning Serviceable No Automatically notify support No User Response Complete the following steps 1 Perform the actions mentioned one at a time and try the test after each action ...

Page 946: ...contact your technical service representative 3 Turn off the system and disconnect it from power Wait for 45 seconds Reseat DIMM s Reconnect it to power 4 Make sure that DSA and BIOS uEFI are at the latest level Related links IBM Support website Latest level of DSA Latest level of BMC IMM 201 899 000 Standalone Memory Test Aborted Memory Diagnostics Test Aborted by user Recoverable No Severity War...

Page 947: ...01 899 002 Standalone Memory Test Aborted Memory Diagnostics Test Aborted by user Recoverable No Severity Warning Serviceable No Automatically notify support No Related links IBM Support website Latest level of DSA Latest level of BMC IMM 201 899 003 Standalone Memory Test Aborted Memory Diagnostics Test Aborted by user Recoverable No Severity Warning Serviceable No Automatically notify support No...

Page 948: ...m power Wait for 45 seconds Reseat DIMM s Reconnect it to power 4 Make sure that DSA and BIOS uEFI are at the latest level 5 Replace any DIMMS s mentioned in error one by one 6 Make sure that all DIMMs are enabled in the Configuration Setup Utility program 7 If failure remains refer to Troubleshooting by symptom in the system Installation and Service Guide for the next corrective action Related li...

Page 949: ...IMM 201 901 002 Standalone Memory Test Failed Memory Diagnostics Test Failed Recoverable No Severity Error Serviceable Yes Automatically notify support No User Response Complete the following steps 1 Perform the actions mentioned one at a time and try the test after each action 2 If the problem remains contact your technical service representative 3 Turn off the system and disconnect it from power...

Page 950: ... latest level 5 Replace any DIMMS s mentioned in error one by one 6 Make sure that all DIMMs are enabled in the Configuration Setup Utility program 7 If failure remains refer to Troubleshooting by symptom in the system Installation and Service Guide for the next corrective action Related links IBM Support website Latest level of DSA Latest level of BMC IMM DSA memory stress test results The follow...

Page 951: ...un the test again 4 If the system has stopped responding turn off and restart the system 5 Check the system firmware level and upgrade if necessary 6 Run the memory diagnostic to identify the specific failing DIMM 7 If the failure remains refer to Troubleshooting by symptom in the system Installation and Service Guide for the next corrective action Related links IBM Support website Latest level of...

Page 952: ...Latest level of BMC IMM 202 901 000 MemStr Test Failed Test Failed Recoverable No Severity Error Serviceable Yes Automatically notify support No User Response Complete the following steps 1 Execute the standard DSA memory diagnostics to validate all memory 2 Make sure that the DSA Diagnostic code is at the latest level 3 Turn off the system and disconnect it from power 4 Reseat the memory cards an...

Page 953: ...ed by checking the Available System Memory in the Resource Utilization section of the DSA Diagnostic Event log 2 If necessary access the Configuration Setup Utility program by pressing F1 during system boot and enable all memory 3 Make sure that the DSA Diagnostic code is at the latest level 4 Run the test again 5 Execute the standard DSA memory diagnostics to validate all memory 6 If the failure ...

Page 954: ...ort website Latest level of DSA Latest level of BMC IMM 409 003 000 Nvidia DiagnosticServiceProvider Bandwidth Test Passed Nvidia GPU Bandwidth test passed Recoverable No Severity Event Serviceable No Automatically notify support No Related links IBM Support website Latest level of DSA Latest level of BMC IMM 409 004 000 Nvidia DiagnosticServiceProvider Query Test Passed Nvidia GPU Query test pass...

Page 955: ... support No Related links IBM Support website Latest level of DSA Latest level of BMC IMM 409 006 000 Nvidia DiagnosticServiceProvider Binomial Test Passed Nvidia GPU Binomial test passed Recoverable No Severity Event Serviceable No Automatically notify support No Related links IBM Support website Latest level of DSA Latest level of BMC IMM 409 800 000 NVIDIA User Diagnostic Test Aborted NVIDIA Us...

Page 956: ...as canceled Recoverable No Severity Warning Serviceable No Automatically notify support No Related links IBM Support website Latest level of DSA Latest level of BMC IMM 409 804 000 Nvidia DiagnosticServiceProvider Query Test Aborted Nvidia GPU Query test was canceled Recoverable No Severity Warning Serviceable No Automatically notify support No Related links IBM Support website Latest level of DSA...

Page 957: ...A Latest level of BMC IMM 409 806 000 Nvidia DiagnosticServiceProvider Binomial Test Aborted Nvidia GPU Binomial test was canceled Recoverable No Severity Warning Serviceable No Automatically notify support No Related links IBM Support website Latest level of DSA Latest level of BMC IMM 409 900 000 NVIDIA User Diagnostic Test Failed NVIDIA User Diagnostic Test Failed Recoverable No Severity Event ...

Page 958: ...ServiceProvider Bandwidth Test Failed Nvidia GPU Bandwidth Test Failed Recoverable No Severity Error Serviceable Yes Automatically notify support No User Response Complete the following steps 1 Verify that the GPU is seated in the PCIe slot correctly by reseating the GPU Then power cycle the system 2 Verify that the power connectors to the GPU are connected firmly Then power cycle the system 3 Run...

Page 959: ...ntative Related links IBM Support website Latest level of DSA Latest level of BMC IMM 409 905 000 Nvidia DiagnosticServiceProvider Matrix Test Failed Nvidia GPU Matrix Test Failed Recoverable No Severity Error Serviceable Yes Automatically notify support No User Response Complete the following steps 1 Verify that the GPU is seated in the PCIe slot correctly by reseating the GPU Then power cycle th...

Page 960: ...vidia smi q In some cases this will report a poorly connected power cable 4 Rerun the diagnostics using the same GPU on system that is known to be working A variety of system issues can cause diagnostic failure 5 If the problem remains contact your IBM technical support representative Related links IBM Support website Latest level of DSA Latest level of BMC IMM DSA optical drive test results The f...

Page 961: ...latest level 2 Run the test again 3 Check the drive cabling for loose or broken connections at both ends or damage to the cable Replace the cable if damage is present 4 Run the test again 5 Check system firmware level and upgrade if necessary The installed firmware level can be found in the DSA Diagnostic Event Log within the Firmware VPD section for this component 6 Run the test again Related lin...

Page 962: ...m in the system Installation and Service Guide for the next corrective action Related links IBM Support website Latest level of DSA Latest level of BMC IMM 215 803 000 Optical Drive Test Failed Optical Drive Test Failed Disk may be in use by the operating system Recoverable No Severity Error Serviceable Yes Automatically notify support No User Response Complete the following steps 1 Wait for the s...

Page 963: ...4 Run the test again 5 If failure remains refer to Troubleshooting by symptom in the system Installation and Service Guide for the next corrective action Related links IBM Support website Latest level of DSA Latest level of BMC IMM 215 901 000 Optical Drive Test Aborted Optical Drive Test Aborted Drive media is not detected Recoverable No Severity Warning Serviceable Yes Automatically notify suppo...

Page 964: ... wait for 15 seconds for the media to be recognized Rerun the test 2 Check the drive cabling for loose or broken connections at both ends or damage to the cable Replace the cable if damage is present 3 Run the test again 4 If failure remains refer to Troubleshooting by symptom in the system Installation and Service Guide for the next corrective action Related links IBM Support website Latest level...

Page 965: ...ure remains refer to Troubleshooting by symptom in the system Installation and Service Guide for the next corrective action Related links IBM Support website Latest level of DSA Latest level of BMC IMM DSA system management test results The following messages can result when you run the system management test Test results for the DSA system management test The following messages can result when yo...

Page 966: ...f DSA Latest level of BMC IMM 166 802 001 IMM I2C Test Aborted Test cannot be completed for unknown reason Recoverable No Severity Warning Serviceable Yes Automatically notify support No User Response Perform the actions mentioned one at a time and try the test after each action 1 Turn off the system and disconnect it from power Wait for 45 seconds Reconnect it to power 2 Make sure that DSA and BM...

Page 967: ...evel of BMC IMM 166 804 001 IMM I2C Test Aborted Invalid Command Recoverable No Severity Warning Serviceable Yes Automatically notify support No User Response Perform the actions mentioned one at a time and try the test after each action 1 Turn off the system and disconnect it from power Wait for 45 seconds Reconnect it to power 2 Make sure that DSA and BMC IMM are at the latest level Related link...

Page 968: ...806 001 IMM I2C Test Aborted Timeout while processing command Recoverable No Severity Warning Serviceable Yes Automatically notify support No User Response Perform the actions mentioned one at a time and try the test after each action 1 Turn off the system and disconnect it from power Wait for 45 seconds Reconnect it to power 2 Make sure that DSA and BMC IMM are at the latest level Related links I...

Page 969: ...rted Reservation Canceled or Invalid Reservation ID Recoverable No Severity Warning Serviceable Yes Automatically notify support No User Response Perform the actions mentioned one at a time and try the test after each action 1 Turn off the system and disconnect it from power Wait for 45 seconds Reconnect it to power 2 Make sure that DSA and BMC IMM are at the latest level Related links IBM Support...

Page 970: ...alid Recoverable No Severity Warning Serviceable Yes Automatically notify support No User Response Perform the actions mentioned one at a time and try the test after each action 1 Turn off the system and disconnect it from power Wait for 45 seconds Reconnect it to power 2 Make sure that DSA and BMC IMM are at the latest level Related links IBM Support website Latest level of DSA Latest level of BM...

Page 971: ...lly notify support No User Response Perform the actions mentioned one at a time and try the test after each action 1 Turn off the system and disconnect it from power Wait for 45 seconds Reconnect it to power 2 Make sure that DSA and BMC IMM are at the latest level Related links IBM Support website Latest level of DSA Latest level of BMC IMM 166 813 001 IMM I2C Test Aborted Cannot return number of ...

Page 972: ... action 1 Turn off the system and disconnect it from power Wait for 45 seconds Reconnect it to power 2 Make sure that DSA and BMC IMM are at the latest level Related links IBM Support website Latest level of DSA Latest level of BMC IMM 166 815 001 IMM I2C Test Aborted Invalid data field in Request Recoverable No Severity Warning Serviceable Yes Automatically notify support No User Response Perform...

Page 973: ...Reconnect it to power 2 Make sure that DSA and BMC IMM are at the latest level Related links IBM Support website Latest level of DSA Latest level of BMC IMM 166 817 001 IMM I2C Test Aborted Command response could not be provided Recoverable No Severity Warning Serviceable Yes Automatically notify support No User Response Perform the actions mentioned one at a time and try the test after each actio...

Page 974: ... are at the latest level Related links IBM Support website Latest level of DSA Latest level of BMC IMM 166 819 001 IMM I2C Test Aborted Command response could not be provided SDR Repository in update mode Recoverable No Severity Warning Serviceable Yes Automatically notify support No User Response Perform the actions mentioned one at a time and try the test after each action 1 Turn off the system ...

Page 975: ... latest level Related links IBM Support website Latest level of DSA Latest level of BMC IMM 166 821 001 IMM I2C Test Aborted Command response could not be provided BMC initialization in progress Recoverable No Severity Warning Serviceable Yes Automatically notify support No User Response Perform the actions mentioned one at a time and try the test after each action 1 Turn off the system and discon...

Page 976: ...e Latest level of DSA Latest level of BMC IMM 166 823 001 IMM I2C Test Aborted Cannot execute command Insufficient privilege level Recoverable No Severity Warning Serviceable Yes Automatically notify support No User Response Perform the actions mentioned one at a time and try the test after each action 1 Turn off the system and disconnect it from power Wait for 45 seconds Reconnect it to power 2 M...

Page 977: ...t Failed IMM Indicates failure in H8S 2117 bus BUS 0 Recoverable No Severity Error Serviceable Yes Automatically notify support No User Response Perform the actions mentioned one at a time and try the test after each action 1 Turn off the system and disconnect it from power Wait for 45 seconds Reconnect it to power 2 Make sure that DSA and BMC IMM are at the latest level 3 Run the test again 4 If ...

Page 978: ...the next corrective action Related links IBM Support website Latest level of DSA Latest level of BMC IMM 166 905 001 IMM I2C Test Failed IMM Indicates failure in MAX7319 device bus BUS 4 Recoverable No Severity Error Serviceable Yes Automatically notify support No User Response Perform the actions mentioned one at a time and try the test after each action 1 Turn off the system and disconnect it fr...

Page 979: ...st again 4 If failure remains refer to Troubleshooting by symptom in the system Installation and Service Guide for the next corrective action Related links IBM Support website Latest level of DSA Latest level of BMC IMM 166 908 001 IMM I2C Test Failed IMM Indicates failure in PCA9567 bus BUS 7 Recoverable No Severity Error Serviceable Yes Automatically notify support No User Response Perform the a...

Page 980: ...st results for the DSA tape drive test The following messages can result when you run the DSA tape drive test 264 000 000 Tape Test Passed Tape Test Passed Recoverable No Severity Event Serviceable No Automatically notify support No Related links IBM Support website Latest level of DSA Latest level of BMC IMM 264 901 000 Tape Test Failed An error was found in the tape alert log Recoverable No Seve...

Page 981: ...2 000 Tape Test Failed Tape Test Failed Media is not detected Recoverable No Severity Error Serviceable Yes Automatically notify support No User Response Complete the following steps 1 Clean the tape drive using the appropriate cleaning media and install new media 2 Run the test again 3 Make sure that the drive firmware is at the latest level 4 Rerun the test after upgrading to the latest firmware...

Page 982: ... of BMC IMM 264 904 000 Tape Test Failed Tape Test Failed Drive hardware error Recoverable No Severity Error Serviceable Yes Automatically notify support No User Response Complete the following steps 1 Check the tape drive cabling for loose or broken connections or damage to the cable Replace the cable if damage is present 2 Clean the tape drive using the appropriate cleaning media and install new...

Page 983: ...A Diagnostic Event Log within the Firmware VPD section for this component 3 Run the test again 4 If the system has stopped responding turn off and restart the system 5 Make sure that the drive firmware is at the latest level 6 Run the test again 7 If the failure remains refer to Troubleshooting by symptom in the system Installation and Service Guide for the next corrective action Related links IBM...

Page 984: ...oting by symptom in the system Installation and Service Guide for the next corrective action Related links IBM Support website Latest level of DSA Latest level of BMC IMM 264 907 000 Tape Test Failed An error was found in the block address somewhere Recoverable No Severity Error Serviceable Yes Automatically notify support No User Response Complete the following steps 1 Clean the tape drive using ...

Page 985: ...e Complete the following steps 1 Make sure that medium is present 2 Clean the tape drive using the appropriate cleaning media and install new media Related links IBM Support website Latest level of DSA Latest level of BMC IMM Appendix C DSA diagnostic test results 971 ...

Page 986: ...972 System x3550 M4 Installation and Service Guide ...

Page 987: ...e installed new hardware or software in your environment check http www lenovo com us en serverproven to make sure that the hardware and software is supported by your product Go to http www lenovo com support to check for information to help you solve the problem Gather the following information to provide to the service technician This data will help the service technician quickly provide a solut...

Page 988: ...le at http www lenovo com support The most current version of the product documentation is available in the following product specific Information Centers Flex System products http pic dhe ibm com infocenter flexsys information index jsp System x products http shop lenovo com us en systems NeXtScale System products http pic dhe ibm com infocenter nxtscale documentation index jsp How to send DSA da...

Page 989: ...upport IBM is Lenovo s preferred service provider for the System x Flex System and NeXtScale System products You can receive hardware service through your Lenovo reseller or from IBM To locate a reseller authorized by Lenovo to provide warranty service go to http www ibm com partnerworld and click Business Partner Locator For IBM support telephone numbers see http www ibm com planetwide In the U S...

Page 990: ...976 System x3550 M4 Installation and Service Guide ...

Page 991: ...ublication Lenovo may make improvements and or changes in the product s and or the program s described in this publication at any time without notice The products described in this document are not intended for use in implantation or other life support applications where malfunction may result in injury or death to persons The information contained in this document does not affect or change Lenovo...

Page 992: ... all hard disk drive bays with the largest currently supported drives that are available from Lenovo Maximum memory might require replacement of the standard memory with an optional memory module Each solid state memory cell has an intrinsic finite number of write cycles that the cell can incur Therefore a solid state device has a maximum number of write cycles that it can be subjected to expresse...

Page 993: ...tered to 99 97 efficiency or greater using high efficiency particulate air HEPA filters that meet MIL STD 282 The deliquescent relative humidity of the particulate contamination must be more than 60 2 The room must be free of conductive contamination such as zinc whiskers Gaseous Copper Class G1 as per ANSI ISA 71 04 19853 Silver Corrosion rate of less than 300 Å in 30 days 1 ASHRAE 52 2 2008 Meth...

Page 994: ...y with the protection requirements of EU Council Directive 2004 108 EC on the approximation of the laws of the Member States relating to electromagnetic compatibility Lenovo cannot accept responsibility for any failure to satisfy the protection requirements resulting from a non recommended modification of the product including the installation of option cards from other manufacturers This product ...

Page 995: ...Wohnbereich Funkstörungen verursachen in diesem Fall kann vom Betreiber verlangt werden angemessene Maßnahmen durchzuführen und dafür aufzukommen Nach dem EMVG Geräte dürfen an Orten für die sie nicht ausreichend entstört sind nur mit besonderer Genehmigung des Bundesministers für Post und Telekommunikation oder des Bundesamtes für Post und Telekommunikation betrieben werden Die Genehmigung wird e...

Page 996: ...siness Type A Sellers and users need to pay attention to it This is for any areas other than home Russia Electromagnetic Interference EMI Class A statement People s Republic of China Class A electronic emission statement Taiwan Class A compliance statement 982 System x3550 M4 Installation and Service Guide ...

Page 997: ... 194 battery system removing 269 replacing 271 before you install a legacy operating system 96 bezel removing 274 replacing 275 blue screen capture feature overview 105 blue screen feature 105 Boot Manager 103 Boot Manager program 94 button presence detection 16 buttons system board 27 C cable connecting 91 cabling 179 181 184 185 backplane 181 DVD drive 186 front USB connector 188 video connector...

Page 998: ...214 DIMM installation sequence 48 217 memory mirrored channel 49 217 rank sparing 50 218 display problems 145 documentation 4 CD 3 Documentation Browser 4 updates 1 using 974 documentation updated finding 4 drive IDs 36 201 204 installing 35 DSA edition 136 program overview 135 test log viewing 138 text message format 137 DSA log 133 134 DSA Portable 119 136 DSA Preboot 119 136 DSA sending data 24...

Page 999: ...ront view 14 front view connectors 14 LED location 14 G gaseous contamination 979 general problems 139 Germany Class A statement 980 grease thermal 86 298 guidelines options installation 31 servicing electrical equipment vii system reliability 32 trained service technicians vi H handling static sensitive devices 33 hard disk drive activity LED 14 problems 140 status LED 14 hardware requirements 3 ...

Page 1000: ...disk drives 38 USB hypervisor flash device 77 instructions Business Partners 23 integrated management module overview 9 using 104 integrated management module II error messages 309 event log 133 134 programs 94 intermittent problems 142 internal connectors 26 introduction 1 IP address for the IMM 106 IPMI event log 133 134 IPMItool 134 J Japan Class A electronic emission statement 981 Japan Electr...

Page 1001: ... devices connectors system board 31 out of band 162 P particulate contamination 979 parts listing 165 parts structural 175 password 101 administrator 101 power on 101 password power on switch on system board 102 PCI riser card 223 riser card assembly 220 221 riser card bracket 224 PCI riser slots installation configurations 226 supported configurations 226 PCI riser card LEDs location 132 PCI rise...

Page 1002: ...5 heat sink retention module 299 hot swap ac power supply 246 hot swap dc power supply 248 hot swap drive backplane 259 hot swap fan 243 hot swap hard disk drive 199 memory module 213 microprocessor 285 operator information panel 283 PCI riser card assembly 220 PCI riser card bracket 223 power supply 246 RAID adapter battery 193 RAID adapter battery holder 196 RAID adapter flash power module 193 R...

Page 1003: ... 165 server configuration updating 92 server controls LEDs and power 14 server firmware recovering 160 server shutdown 21 ServeRAID adapter installing 55 removing 230 replacing 231 ServeRAID adapter memory module installing 60 removing 236 replacing 237 ServeRAID support 9 ServerGuide 9 features 96 NOS installation 97 setup 96 Setup and Installation CD 93 using 96 ServerGuide CD 1 service and supp...

Page 1004: ...rver 21 U UEFI boot recovery jumper 160 undetermined problems 158 undocumented problems 117 United States FCC Class A notice 980 Universal Serial Bus USB problems 155 unsafe conditions inspecting for vi UpdateXpress 93 103 updating DMI SMBIOS data 112 firmware 93 server configuration 92 Systems Director 109 Universal Unique Identifier UUID 110 USB connector 14 USB connector assembly front removing...

Page 1005: ......

Page 1006: ......

Reviews: