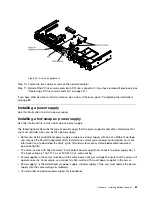
Step 9.
Turn on the circuit breaker for the dc power source to which the new power supply is connected.
Step 10. Make sure that the green power LEDs on the power supply are lit, indicating that the power supply
is operating correctly.
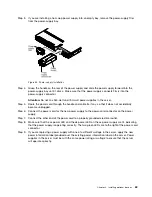
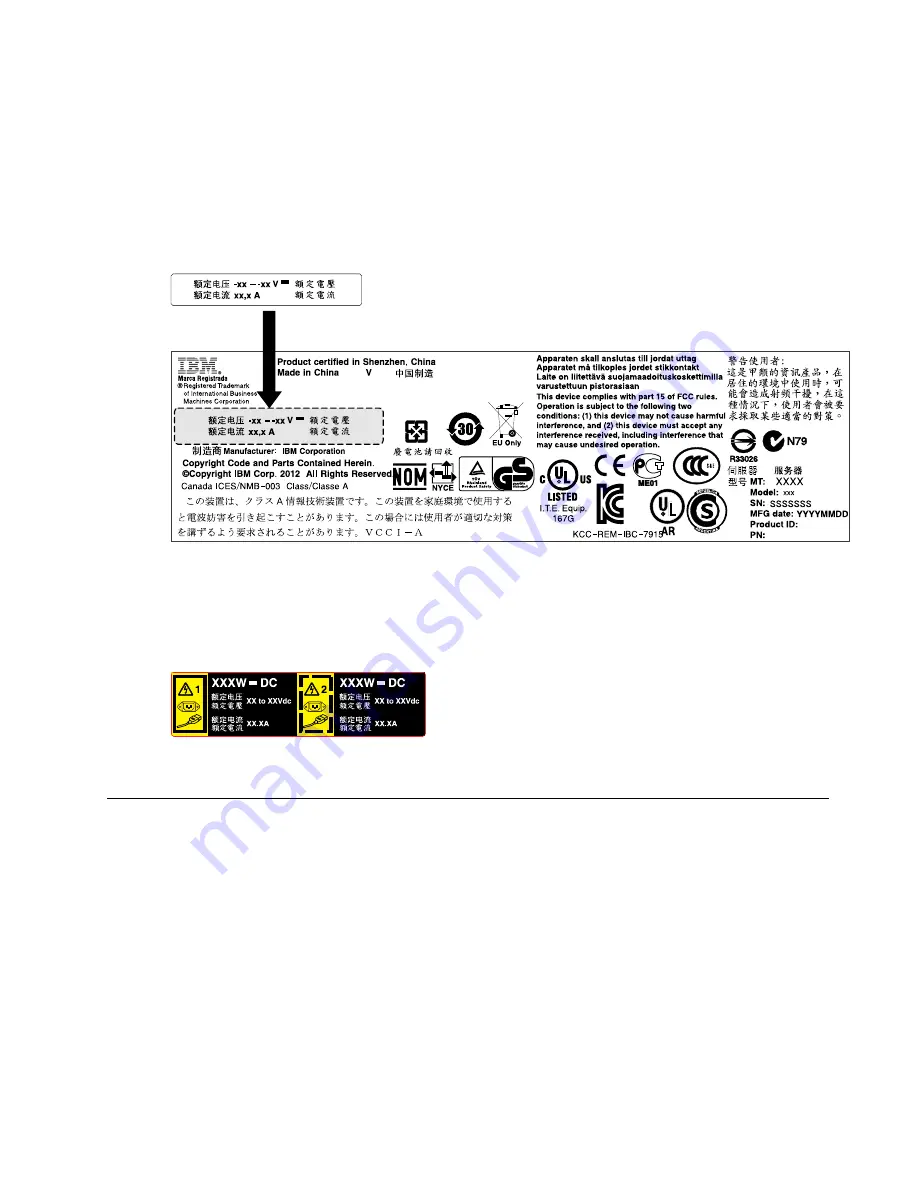
Step 11. If you are replacing a power supply with one of a different wattage in the server, apply the new
power information label provided over the existing power information label on the server. Power
supplies in the server must be with the same power rating or wattage to ensure that the server
will operate correctly.
Figure 58. Power information label
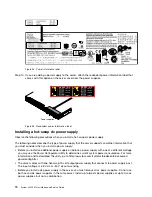
Step 12. If you are adding a power supply to the server, attach the redundant power information label that
comes with this option on the server cover near the power supplies.
Figure 59. Redundant power information label
Installing a hot-swap fan
Use this information to install a hot-swap fan.
The server comes standard with four dual-motor hot-swap cooling fans. When there is one microprocessor
installed, install fan 1, 2, 3, and 5 for proper cooling.
Attention:
To ensure proper operation, replace a failed hot-swap fan within 30 seconds.
To install an additional hot-swap fan, complete the following steps:
Step 1.
Read the safety information that begins on “Safety” on page v and “Installation guidelines”
on page 31.
Step 2.
Remove the cover (see “Removing the cover” on page 34).
Step 3.
Remove the fan filler panel (if it has not been removed already). Keep the filler panel in a safe place.
75
Summary of Contents for x3550 M4
Page 1: ...System x3550 M4 Installation and Service Guide Machine Type 7914 ...
Page 6: ...iv System x3550 M4 Installation and Service Guide ...
Page 178: ...164 System x3550 M4 Installation and Service Guide ...
Page 322: ...308 System x3550 M4 Installation and Service Guide ...
Page 828: ...814 System x3550 M4 Installation and Service Guide ...
Page 986: ...972 System x3550 M4 Installation and Service Guide ...
Page 990: ...976 System x3550 M4 Installation and Service Guide ...
Page 1005: ......
Page 1006: ......

