background image


10 


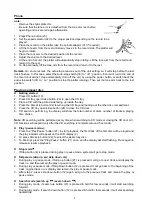
Dubbing at normal speed 

  Press the Tape function button (25). 

  Inset a pre-recorded cassette into deck 2 and a blank cassette tape into deck 1. 

  Press the Pause key and then press the Record and Play key at deck 1. 

  Press the Play key to start playback at deck 2 & then press Pause key at deck 1 to start dubbing. 

  Press Pause key at deck 1 & Stop key at deck 2 when finish. 


Dubbing at high speed 

This unit is equipped with a high-speed dubbing system which can save the time for dubbing by 2/3 when 
compare to normal speed. 
 

  Press the Dubbing speed button (6) to 

“HI “position and then follow the same procedures as 

stipulated in “Dubbing at normal speed”. 

  When dubbing a pre-recorded cassette tape at high speed, a chattering sound is being heard. To 

avoid this, set the volume control to a minimum level. 

  Do no active/de-active the HI-NOR. dubbing button (6) during dubbing, this will vary the speed of 

recording and may be damage the cassette tape. 


B. Recording from radio 

  Press Tuner button (24) to active radio mode 

  Tune to the desired station and insert a blank cassette tape in deck 1. 

  Press Record & Play key to start recording. 

  Press P

ause keys and then “Stop/Eject” key when finish. 


C.    Recording from CD 

  Press the CD button (10). 

  Insert a blank cassette tape in deck 1 which suitable for recording. 

  Press Pause key first and then Record & Play key at cassette. Recording function is now on standby. 

  Activate the CD player, and then press Pause key at cassette to start recording. 

  To  stop  recording,  press  Stop  button  (8)  on  CD  player  first,  then  press  the  Pause  key  and  then 

Stop/Eject key on cassette tape deck. 


D.    Recording from turntable 


press Phono button (23) to active turntable mode 


Insert a blank cassette tape in deck 1. 


press Record & Play key to start recording. 


Select the desire record and start playback 


Press Pause keys and then Stop/Eject key when finish. 


More features 

A.    Sleep setting 

1.  Press  &  hold  the  Sleep/Timer  button  (11),  to  active  &  adjust  the  sleep  timer  in  the  order  of  90  >  80 

>70….10 minutes automatically. 

2.  System will stop and go to standby mode automatically after the selected timing. 
3.  To cancel the sleep mode, press and hold Sleep/T

imer button until “SLEEP” indicator disappears. 


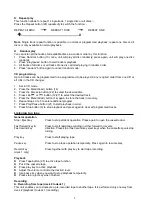
B.    Timer setting (On remote only) 

This function allows the system to turn on automatically and wake you up by soft CD music, Phono, Tape 
or radio. Set the unit at standby mode 

Press the Mode button on remote handset, the LCD display will show the information as following order: - 

1)  Current time   
 
2)  On time setting: Press Mem/clock adj. key & then skip up/down to set the hour, then press Mem/clock 

adj          to  confirm  hour  then  skip  up/down  to  set  the  minute.  then  press 
Mem/clock adj to confirm 

                            the alarm off time. 

3)  Off time setting: Press Mode button again to enter Timer off setting mode. Press Mem/clock adj. key & 

then skip up/down to set the hour, then press Mem/clock adj to confirm hour then 
skip up/down to set the minute. then press Mem/clock adj to confirm 

                            the timer off time. 

Summary of Contents for CD7400N

Page 1: ...MODEL NO CD7400N BATCH NO PR3832 3 CD HI FI SYSTEM WITH AM PLL FM RADIO DUAL CASSETTE AND TURNTBLE INSTRUCTION MANUAL Please read and retain these instructions for future reference ...

Page 2: ... with the cord and plug supplied and do not overload the power outlet If the power cord is damaged do not use the equipment The cord must be replaced by the manufacturer or similarly qualified personnel to avoid a hazard Contact the after sales support line for advice Do not repair the unit yourself This product has no user serviceable parts Only have it serviced by qualified personnel Contact the...

Page 3: ... procedures other than those specified herein may result in hazardous radiation exposure Repairs may not be carried out by anyone except qualified service personnel Getting Started Before First Use The unit may become hot during operation Always leave sufficient space around the unit for ventilation The voltage supplied to the unit should match the voltage that is printed on the back panel If you ...

Page 4: ...t off 2 Insert two 2 AAA size batteries not included into the battery compartment following the polarity markings inside the battery compartment 3 Replace the battery compartment cover Battery precautions Replacement of batteries must be done by an adult Do not mix old and new batteries Do not mix alkaline standard carbon zinc or rechargeable nickel cadmium batteries The supply terminals are not t...

Page 5: ...ode Tape Press to active tape mode Tuner Band Press to active tuner mode and select the radio band Phono Press to active phono mode EQ Press to select EQ mode Volume Control volume up down Disc 1 2 3 Press to select the disc for playback directly Random M down In CD mode press to active the random playback for cd mode In Tuner mode press to call out the preset memory in back Memory clk adj In stan...

Page 6: ... 14 Memory Clock adjust button 15 Deck 1 compartment 16 Deck 1 control key 17 CD tray 18 Headphone jack 19 Remote sensor 20 Pre set EQ button 21 CD play pause button 22 Disc skip button 23 Phono button 24 Tuner Band button 25 Tape button 26 CD tray open close button 27 Skip Search Tuning up button 28 Repeat M up button 29 Deck 2 compartment 30 Deck 2 control keys 31 Spindle adaptor 32 Turntable sp...

Page 7: ...king automatically and stop until a radio station is reached 4 Repeat step 2 3 until the desired radio station is being reached 5 Adjust volume controls to the desired volume level Preset stations You can store up to total of 40 radio stations in the memory FM 20 AM 20 1 Set to radio mode 2 Turn to the desired radio station by Manual or Auto tuning method 3 Press Mem clk adj button 14 to enable pr...

Page 8: ...to turning the CD tray and loading out the other disc compartment 5 Press the CD tray open close button 26 to close the CD door 6 CD search is performing the display will show the total number of discs number of tracks playing time of disc Note CD searching will be performed every time when switching to CD mode or closing the CD door All CD functions will respond only after the CD searching is com...

Page 9: ...t the desired track 5 Press the Mem clk adj button 14 again to store the track in memory 6 Repeat steps 3 to 5 to enter additional program 7 Press Play Pause button 21 to start playback in order 8 Press Stop button 8 to stop playback and press again to clear all programmed tracks Listening to a tape General operation Stop Eject key Press to stop all deck operation Press again to open the cassette ...

Page 10: ... standby Activate the CD player and then press Pause key at cassette to start recording To stop recording press Stop button 8 on CD player first then press the Pause key and then Stop Eject key on cassette tape deck D Recording from turntable press Phono button 23 to active turntable mode Insert a blank cassette tape in deck 1 press Record Play key to start recording Select the desire record and s...

Page 11: ...ds Active de active timer function 1 Press the Sleep Timer button 11 once the timer indicator is shown on LCD 1 2 To cancel alarm function by press again Sleep Timer button until the timer indicator disappear C Presets EQ function This unit provides 5 different sound modes to enhance your listening experience you can select the desired effect by pressing the EQ button 16 repeatedly at following se...

Reviews: