background image

time (00 - 99 minutes). When the indicator

of the cooking zone starts to flash slowly

the time counts down.

To see the remaining time:

 set the

cooking zone with  . The indicator of the

cooking zone starts to flash quickly. The

display shows the remaining time.

To deactivate the function:

 set the

cooking zone with   and touch  . The

remaining time counts back to 00. The

indicator of the cooking zone goes out.

When the time comes to an

end, the sound operates and 00

flashes. The cooking zone

deactivates.

To stop the sound:

 touch  .

Minute Minder

You can use this function as a 

Minute

Minder

 when the hob is activated and the

cooking zones do not operate. The heat
setting display shows  .

To activate the function:

 touch  .

Touch   or   of the timer to set the time.

When the time comes to an end, the sound

operates and 

00

 flashes.

To stop the sound:

 touch  .

The function has no effect on

the operation of the cooking

zones.

STOP+GO

This function sets all cooking zones that

operate to the lowest heat setting.
When the function operates, you cannot

change the heat setting.
The function does not stop the timer

functions.

To activate the function:

 touch  . 

comes on.

To deactivate the function:

 touch  .

The previous heat setting comes on.

Lock

You can lock the control panel while

cooking zones operate. It prevents an

accidental change of the heat setting.

Set the heat setting first.

To activate the function:

 touch  . 

comes on for 4 seconds. The Timer stays

on.

To deactivate the function:

 touch  .

The previous heat setting comes on.

When you deactivate the hob,

you also deactivate this function.

The Child Safety Device

This function prevents an accidental

operation of the hob.

To activate the function:

 activate the hob

with  . Do not set the heat setting. Touch

 for 4 seconds.   comes on. Deactivate

the hob with  .

To deactivate the function:

 activate the

hob with  . Do not set the heat setting.
Touch   for 4 seconds.   comes on.
Deactivate the hob with  .

To override the function for only one
cooking time:

 activate the hob with  . 

comes on. Touch   for 4 seconds. 

Set

the heat setting in 10 seconds.

 You can

operate the hob. When you deactivate the
hob with   the function operates again.

Power management function

• Cooking zones are grouped according

to the location and number of the

phases in the hob. See the illustration.

• Each phase has a maximum electricity

loading of 3700 W.

• The function divides the power between

cooking zones connected to the same

phase.

• The function activates when the total

electricity loading of the cooking zones

26

 Leonard

Summary of Contents for LAI8000F

Page 1: ...LAI8000F Gebruiksaanwijzing User Manual Notice d utilisation Benutzerinformation Kookplaat Hob Table de cuisson Kochfeld...

Page 2: ...n met beperkte lichamelijke zintuiglijke of verstandelijke vermogens of een gebrek aan ervaring en kennis indien zij onder toezicht staan of instructies hebben gekregen over het veilig gebruiken van h...

Page 3: ...n deksels mogen niet op de kookplaat worden geplaatst aangezien ze heet kunnen worden Gebruik geen stoomreiniger om het apparaat schoon te maken Schakel het kookplaatelement uit na elk gebruik met de...

Page 4: ...voor brand en elektrische schokken Alle elektrische aansluitingen moeten door een gediplomeerd elektromonteur worden gemaakt Dit apparaat moet worden aangesloten op een geaard stopcontact Verzeker u e...

Page 5: ...nimaal 30 cm bewaren van de inductiekookzones als het apparaat in werking is Als u eten in de hete olie doet kan het spatten WAARSCHUWING Risico op brand en explosie Verhitte vetten en olie kunnen ont...

Page 6: ...r informatie m b t correcte afvalverwerking van het apparaat Haal de stekker uit het stopcontact Snijd het netsnoer vlak bij het apparaat af en gooi het weg Servicedienst Neem contact op met een erken...

Page 7: ...ecteren 8 De tijd verlengen of verkorten 9 Het instellen van de kookstand 10 Powerfunctie De functie in en uitschakelen Kookstanddisplays Display Beschrijving De kookzone is uitgeschakeld De kookzone...

Page 8: ...uten schakelt de kookzone automatisch uit u een kookzone niet uitschakelt of de kookstand verandert Na enige tijd gaat branden en wordt de kookplaat uitgeschakeld De verhouding tussen kookstand en de...

Page 9: ...wordt uitgeschakeld Het geluidssignaal stopzetten raak aan Kookwekker U kunt deze functie gebruiken als kookwekker terwijl de kookplaat is ingeschakeld en de kookzones niet werken De warmtestand op he...

Page 10: ...naar de andere kookzones aangesloten op dezelfde fase Het warmte instellingsdisplay van de verlaagde zone verandert tussen twee niveaus AANWIJZINGEN EN TIPS WAARSCHUWING Raadpleeg de hoofdstukken Vei...

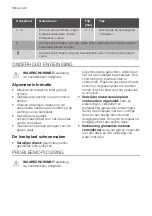
Page 11: ...d minder dan de helft van het vermogen gebruikt De gegevens in de volgende tabel dienen slechts als richtlijn Kookstand Gebruik om Tijd min Tips 1 Bereide gerechten warmhou den zoals nodig Een deksel...

Page 12: ...pervlak van de kookplaat Gebruik een speciale schraper voor de glazen plaat De kookplaat schoonmaken Verwijder direct gesmolten plastic gesmolten folie suiker en suikerhoudende gerechten Anders kan he...

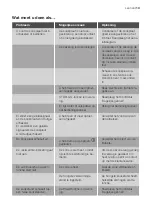
Page 13: ...vetspatten op het bedieningspaneel Reinig het bedieningspaneel Er klinkt een geluidssignaal en de kookplaat wordt uitge schakeld Er weerklinkt een geluids signaal als de kookplaat wordt uitgeschakeld...

Page 14: ...e het hoofdstuk Techni sche informatie en een getal gaat bran den Er heeft zich een fout in de kookplaat voorgedaan Ontkoppel de kookplaat enige tijd van de stroomtoe voer Ontkoppel de zekering uit he...

Page 15: ...iode De instructies over het service center en de garantiebepalingen vindt u in het garantieboekje MONTAGE WAARSCHUWING Raadpleeg de hoofdstukken Veiligheid Voor montage Voordat u de kookplaat install...

Page 16: ...12 mm 28 mm 38 mm B 57 mm 41 mm 31 mm min 30 mm min 500 mm 20 mm 20 mm min 2 mm A B A 12 mm 28 mm 38 mm B 57 mm 41 mm 31 mm min 500 mm R 5mm min 55mm 490 1 mm 750 1mm min 38 mm min 2 mm min 12 mm min...

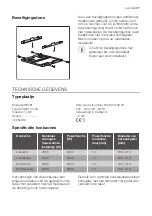
Page 17: ...mmer 949 594 336 02 Type 60 GBD C3 AU 220 240 V 50 60 Hz Inductie 7 4 kW Vervaardigd in Duitsland Serienr 7 4 kW LEONARD Specificatie kookzones Kookzone Nominaal vermogen max warmte instelling W Power...

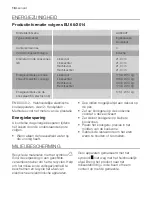
Page 18: ...ergie besparen tijdens het koken door de onderstaande tips te volgen Warm alleen de hoeveelheid water op die u nodig heeft Doe indien mogelijk altijd een deksel op de pan Zet uw kookgerei op de kookzo...

Page 19: ...sons with reduced physical sensory or mental capabilities or lack of experience and knowledge if they have been given supervision or instruction concerning the use of the appliance in a safe way and u...

Page 20: ...not use a steam cleaner to clean the appliance After use switch off the hob element by its control and do not rely on the pan detector If the glass ceramic surface glass surface is cracked switch off...

Page 21: ...applicable can make the terminal become too hot Use the correct electricity mains cable Do not let the electricity mains cable tangle Make sure that a shock protection is installed Use the strain reli...

Page 22: ...o not put a hot pan cover on the glass surface of the hob Do not let cookware to boil dry Be careful not to let objects or cookware fall on the appliance The surface can be damaged Do not activate the...

Page 23: ...s indicators and sounds tell which functions operate Sen sor field Function Comment 1 ON OFF To activate and deactivate the hob 2 Lock The Child Safety De vice To lock unlock the control panel 3 STOP...

Page 24: ...er function operates digit There is a malfunction A cooking zone is still hot residual heat Lock The Child Safety Device function operates Incorrect or too small cookware or no cookware on the cooking...

Page 25: ...cooking zone Automatic Heat Up If you activate this function you can get a necessary heat setting in a shorter time The function sets the highest heat setting for some time and then decreases to the...

Page 26: ...ate the function touch The previous heat setting comes on Lock You can lock the control panel while cooking zones operate It prevents an accidental change of the heat setting Set the heat setting firs...

Page 27: ...e bottom of the cookware must be as thick and flat as possible Cookware dimensions Induction cooking zones adapt to the dimension of the bottom of the cookware automatically to some limit The cooking...

Page 28: ...eat 20 45 Add some tablespoons of liq uid 4 5 Steam potatoes 20 60 Use max l water for 750 g of potatoes 4 5 Cook larger quantities of food stews and soups 60 150 Up to 3 l liquid plus ingredients 6 7...

Page 29: ...ate the hob The hob is not connected to an electrical supply or it is connected incorrectly Check if the hob is correctly connected to the electrical supply Refer to the connec tion diagram The fuse...

Page 30: ...near to the controls Put large cookware on the rear zones if possible comes on Automatic Switch Off oper ates Deactivate the hob and acti vate it again comes on The Child Safety Device or the Lock fu...

Page 31: ...glass ceramic it is in the corner of the glass surface and an error message that comes on Make sure you operated the hob correctly If not the servicing by a service technician or dealer will not be fr...

Page 32: ...0mm min 2mm min 2 mm A B A 12 mm 28 mm 38 mm B 57 mm 41 mm 31 mm min 30 mm min 500 mm 20 mm 20 mm min 2 mm A B A 12 mm 28 mm 38 mm B 57 mm 41 mm 31 mm min 500 mm R 5mm min 55mm 490 1 mm 750 1mm min 38...

Page 33: ...hob are not necessary The protection box accessory may not be available in some countries Please contact your local supplier You can not use the protection box if you install the hob above an oven TE...

Page 34: ...ing technology Induction Diameter of circular cooking zones Left front Left rear Right front Right rear 21 0 cm 21 0 cm 21 0 cm 21 0 cm Energy consumption per cooking zone EC electric cooking Left fro...

Page 35: ...ainers to recycle it Help protect the environment and human health and to recycle waste of electrical and electronic appliances Do not dispose appliances marked with the symbol with the household wast...

Page 36: ...s de plus de 8 ans ainsi que des personnes dont les capacit s physiques sensorielles et mentales sont r duites ou dont les connaissances et l exp rience sont insuffisantes condition d tre surveill s o...

Page 37: ...isque d incendie N entreposez rien sur les surfaces de cuisson Ne posez pas d objets m talliques tels que couteaux fourchettes cuill res ou couvercles sur la table de cuisson car ils pourraient chauff...

Page 38: ...ravail et l avant de l unit qui se trouve dessous La garantie ne couvre pas les dommages caus s par l absence d un espace de ventilation ad quat Branchement lectrique AVERTISSEMENT Risque d incendie o...

Page 39: ...il avec les mains mouill es ou lorsqu il est en contact avec de l eau N utilisez jamais l appareil comme plan de travail ou comme plan de stockage Si la surface de l appareil pr sente des f lures d br...

Page 40: ...on lectrique avant toute op ration de maintenance Ne pulv risez pas d eau ni de vapeur pour nettoyer l appareil Nettoyez l appareil avec un chiffon doux humide Utilisez uniquement des produits de lava...

Page 41: ...curit enfants Pour verrouiller ou d verrouiller le bandeau de commande 3 STOP GO Pour activer et d sactiver la fonction 4 Indicateur du niveau de cuisson Pour indiquer le niveau de cuisson 5 Voyants d...

Page 42: ...ION QUOTIDIENNE AVERTISSEMENT Reportez vous aux chapitres concernant la s curit Activation et d sactivation Appuyez sur pendant 1 seconde pour activer ou d sactiver la table de cuisson Arr t automatiq...

Page 43: ...isson induction La fonction peut tre activ e pour la zone de cuisson induction uniquement pour une dur e limit e Lorsque cette dur e est coul e la zone de cuisson induction revient automatiquement au...

Page 44: ...fonctionnent Vous viterez ainsi une modification accidentelle du r glage du niveau de cuisson R glez d abord le niveau de cuisson Pour activer la fonction appuyez sur s affiche pendant 4 secondes Le m...

Page 45: ...fabricant inadapt s aluminium cuivre laiton verre c ramique porcelaine Les plats de cuisson conviennent pour l induction si une petite quantit d eau contenue dans un r cipient chauffe dans un bref lap...

Page 46: ...g latine 5 25 M langez de temps en temps 1 2 Solidifier omelettes ufs co cotte 10 40 Couvrez pendant la cuisson 2 3 Faire mijoter des plats base de riz et de laitage r chauffer des plats cuisin s 25...

Page 47: ...ces de calcaire et d eau projections de graisse d colorations m talliques luisantes Nettoyez la table de cuisson l aide d un chiffon humide et d un d tergent non abrasif Apr s le nettoyage s chez la t...

Page 48: ...lle ne s allume pas La zone de cuisson n est pas chaude parce qu elle n a fonctionn que peu de temps Si la zone de cuisson a eu assez de temps pour chauff er faites appel votre serv ice apr s vente ag...

Page 49: ...de cuisson Enlevez le r cipient chaud Au bout d environ 30 sec ondes remettez la zone de cuisson en fonctionnement Si le r cipient tait bien le probl me le message d er reur dispara t Le voyant de cha...

Page 50: ...e mises en fonctionnement qu apr s avoir t install es dans des meubles et sur des plans de travail homologu s et adapt s C ble d alimentation La table de cuisson est fournie avec un c ble d alimentati...

Page 51: ...l espace de circulation d air de 2 mm et le fond de protection install directement sous la table de cuisson ne sont plus n cessaires L enceinte de protection n est pas disponible dans tous les pays V...

Page 52: ...ment diff rer des donn es du tableau Elle d pend de la mati re et des dimensions du r cipient Pour des r sultats de cuisson optimaux utilisez des r cipients qui ne d passent pas les diam tres indiqu s...

Page 53: ...son apr s avoir pos le r cipient dessus Placez les plus petits r cipients sur les plus petites zones de cuisson Posez directement le r cipient au centre de la zone de cuisson Vous pouvez utiliser la c...

Page 54: ...sonen mit eingeschr nkten physischen sensorischen oder geistigen F higkeiten oder mit mangelnder Erfahrung und oder mangelndem Wissen nur dann verwendet werden wenn sie durch eine f r ihre Sicherheit...

Page 55: ...NG Brandgefahr Legen Sie keine Gegenst nde auf dem Kochfeld ab Legen Sie keine Metallgegenst nde wie Messer Gabeln L ffel oder Topfdeckel auf die Oberfl che des Kochfelds da diese hei werden k nnen Re...

Page 56: ...stehen sind von der Garantie ausgenommen Elektrischer Anschluss WARNUNG Brand und Stromschlaggefahr Alle elektrischen Anschl sse sind von einem gepr ften Elektriker vorzunehmen Das Ger t muss geerdet...

Page 57: ...hten oder nassen H nden oder wenn es mit Wasser in Kontakt gekommen ist Benutzen Sie das Ger t nicht als Arbeits oder Abstellfl che Hat die Ger teoberfl che einen Sprung trennen Sie das Ger t umgehend...

Page 58: ...Sie das Ger t nicht mit Wasserspray oder Dampf Reinigen Sie das Ger t mit einem weichen feuchten Tuch Verwenden Sie ausschlie lich Neutralreiniger Benutzen Sie keine Scheuermittel scheuernde Reinigung...

Page 59: ...g Verriegeln Entriegeln des Bedienfelds 3 STOP GO Ein und Ausschalten der Funktion 4 Kochstufenanzeige Zeigt die Kochstufe an 5 Kochzonen Anzeigen des Timers Zeigt an f r welche Kochzone die Zeit eing...

Page 60: ...ng um das Kochfeld ein oder auszuschalten Abschaltautomatik Mit dieser Funktion wird das Kochfeld in folgenden F llen automatisch ausgeschaltet Alle Kochzonen sind ausgeschaltet Nach dem Einschalten d...

Page 61: ...n nur f r einen begrenzten Zeitraum eingeschaltet werden Danach schaltet die Induktionskochzone automatisch wieder auf die h chste Kochstufe um Siehe Kapitel Technische Daten Einschalten der Funktion...

Page 62: ...eld ausgeschaltet wird Kindersicherung Diese Funktion verhindert ein versehentliches Einschalten des Kochfelds Einschalten der Funktion Schalten Sie das Kochfeld mit ein Stellen Sie keine Kochstufe ei...

Page 63: ...ie m glich sein Abmessungen des Kochgeschirrs Induktionskochzonen passen sich der Gr e des Geschirrbodens bis zu einer bestimmten Grenze automatisch an Die Kochzoneneffizienz h ngt vom Durchmesser des...

Page 64: ...eckel garen 2 3 K cheln von Reis und Milchger ichten Erhitzen von Fertigger ichten 25 50 Mindestens doppelte Menge Fl ssigkeit zum Reis geben Milchgerichte zwischendurch umr hren 3 4 D nsten von Gem s...

Page 65: ...Abk hlung des Kochfelds entfernt werden Kalk und Wasserr nder Fettspritzer und metallisch schimmernde Verf rbungen Reinigen Sie das Kochfeld mit einem feuchten Tuch und nicht scheuernden Reinigungsmi...

Page 66: ...e den Gegen stand vom Sensorfeld Die Restw rmeanzeige funk tioniert nicht Die Kochzone ist nicht hei da sie nur kurze Zeit in Be trieb war War die Kochzone lange genug eingeschaltet um hei zu sein wen...

Page 67: ...s Kochfeld eine Zeit lang vom Strom netz Schalten Sie die Sicher ung im Sicherungskasten der Hausinstallation aus Schal ten Sie die Sicherung wieder ein Wenn erneut au fleuchtet wenden Sie sich an den...

Page 68: ...ler eine Geb hr an Die Informationen zum Kundendienst und die Garantiebedingungen finden Sie im Garantieheft MONTAGE WARNUNG Siehe Kapitel Sicherheitshinweise Vor der Montage Notieren Sie vor der Mont...

Page 69: ...12 mm 28 mm 38 mm B 57 mm 41 mm 31 mm min 30 mm min 500 mm 20 mm 20 mm min 2 mm A B A 12 mm 28 mm 38 mm B 57 mm 41 mm 31 mm min 500 mm R 5mm min 55mm 490 1 mm 750 1mm min 38 mm min 2 mm min 12 mm min...

Page 70: ...BD C3 AU 220 240 V 50 60 Hz Induktion 7 4 kW Made in Germany Ser Nr 7 4 kW LEONARD Technische Daten der Kochzonen Kochzone Nennleistung h chste Kochstufe W Power Funk tion W Power Funk tion maximale E...

Page 71: ...paren Beachten Sie folgende Tipps um beim t glichen Kochen Energie zu sparen Wenn Sie Wasser erw rmen verwenden Sie nur die ben tigte Menge Decken Sie Kochgeschirr wenn m glich mit einem Deckel ab Ste...

Page 72: ...867331555 A 252016...
Reviews: