- 7 -
INSTALLATION
Caution:
The warranty will be voided, if this product has been improper installation,
not following the installation instruction that mentioned in this user’s guide.
4.1 Preparation
4.1.1
Before you install the UPS, give it a through visual examination to ensure it has not been
subjected to shipping damage. If it is not in perfect condition, please contact your local
distributor or service center or e-mail to marketing@lpsups.com.
4.1.2
Before installing or using this unit, read all instructions and caution markings on the UPS and
all connected loads, and all sections of this user guide.
4.1.3
Check the rating of your AC power source and all connected loads to suit with the UPS rating
4.1.4 Transportation
Transport the UPS with its packaging until it arrive the installation location to avoid
shipping
damages.
4.1.5 Location
Install the UPS at least 30 cm free space from wall for adequate ventilation and easy
access for installation, operation and maintenance.
4.2 Installation
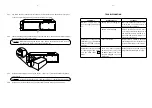
4.2.1
Connect a USB signal cable from computer to the USB port of the UPS for monitoring the
operating status via Easy-Mon V software.
Caution: Before connecting the signal cable, turn off the POWER switch and disconnect
the AC INPUT power cord from the wall outlet.
4.2.2
Connect the telephone cable plug or LAN cable plug into the SURGE PROTECTION FOR TEL./
LAN LINE socket at the rear panel of the UPS.
IN
: Connect telephone or LAN line to the UPS
OUT
: Connect telephone line or LAN line from the UPS to the input socket of the
telephone, fax machine, modem or LAN card.
"
Note: To achieve maximum performance of surge protection, UPS must be connected
to grounded electrical system to work properly. Connecting to non-grounded
electrical system, it will not be able to properly protect your electrical equipment
from
transient
voltage
surge
suppression.
4.2.3
Plug in the computer and peripherals to the UPS OUTPUT outlets at the rear side of the UPS.
4.2.4
Plug in the laser printer to the SURGE PROTECTION FOR LASER PRINTER outlet which is
connected to surge protection system. (This socket does not supply backup power when
power
fails).
4.2.5
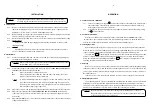
Plug in the AC INPUT power cord to the wall outlet. The LCD screen is lit and shows the input
voltage
and
battery
level.
- 8 -
OPERATION
5.1 Turn on and turn off the UPS
5.1.1
Turn on the UPS by pressing the
button at the front panel. The LCD screen is lit and shows
the input voltage, output voltage, AC mode status and battery level. Wait for alarm stop
beeping then turn on all connected loads.
5.1.2
For turning off the UPS, the computer and peripherals must be turned off before pressing
the button of the UPS.
5.2 Software Installation
After turn on the UPS and computer, insert the software CD into the CD-ROM drive of the
computer. Then, the computer monitor shows the UPSilon program. Choose the “View Manual” to
read the user manual before installation. After that select the “Install Program”.
5.3 Testing Operation
After battery is fully charged for at least 6 hours, you can test operation by turning on the UPS
follow the item 5.1.1. Then, test UPS operation by unplugging the AC INPUT power cord from the wall
outlet to simulate a blackout event, UPS will automatically supply battery backup power.
The LCD shows
with alarm beep sound every 10 seconds. That means UPS supplies backup
power to computer and peripherals. Then, plug the AC INPUT power cord into the wall outlet as
before, the alarm will stop sounding and LCD shows
and computer and peripherals are still
operating both in blacktou and normal situation.
5.4 Storage
Before store the UPS for a long period of time, be sure that the battery is fully charged by turning
on the UPS for 6 hours. Then, turn off the UPS and unplug the UPS power cord. Store the UPS in dry
and cool place. Battery should be fully recharged every three months to preserve the condition of
the internal battery.
If the UPS have to store in above 25°C and 80°F area, it need to be recharged every 2 months.
5.5 Battery Replacement
Typically battery life is 3-6 years at operating temperature below 25°C and 2-3 years at below 35°C,
depending on operating condition. After that battery will deteriorate and finally it can not store
energy. It need to replace new battery every 2-3 years by qualified technician only. Please return the
UPS to your local distributor or service center or follow these instruction carefully.
Caution: The battery may be replaced without having to turn off the UPS due to the hot
swappable battery feature. For your safety, we recommend to turn off all connected
loads and UPS before battery replacement.


