9
INSTALLATION
E27 Gearless - Installation and maintenance
5323 en - 2018.04 / c
The direction of the force applied onto the traction sheave
must be vertical and must be perpendicular to the motor feet.
the force applied must compress the isolation pads.
5.3.4 - Ropes guard
When the ropes have been installed, fit the ropes guard system.
Ropes guard system
: 2 blades
2 screws HM8 x 16
2 washers 8-22/2
Installation
:
- Use one of the 3 appropriate holes on the blade, depending
on ropes wrapping angle on the sheave (centered one in the
most of case).
- Screw one blade on each side of the sheave, using the 2
threated holes on motor housing.
- Use Loctite 242 (or equivalent) on the tap of each bolt
- Adjust the distance between blade and sheave:
distance < 0.8 rope diameter.
- Tighten at a torque of 15 N.m +/- 10%.
There is a high risk of jamming your fingers
between the cables and the sheave.
5.3.5 - Optional
Protection device for sheave and/or brake.
E27 motor is available with 2 additional options:
- Protection device for sheave
- Protection device for brake
Sheave protection
Brake protection
Installation
:
When the ropes have been installed, fit the protection device
for sheave or for brake.
Sheave or brake protection device
: 1 cover blade
2 screws HM8 x 16
2 washers 8-22/2
- Screw the cover blade, using the 2 threated holes on brake
support.
- Use Loctite 242 (or equivalent) on the tap of each bolt
- Tighten at a torque of 15 N.m +/- 10%.
There is a high risk of jamming your fingers
between the cables and the sheave.
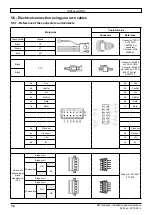
5.4 - Electrical connection using the
cables supplied by Leroy-Somer
5.4.1 - Wiring the motor, the thermal sensor
and the encoder
Remove the cover using a Torx screwdriver or key, reference
TX 30.
When working on the encoder please follow the below
recommendation:
NO
NO
NO
YES
Summary of Contents for E27 Series
Page 4: ...4 E27 Gearless Installation and maintenance 5323 en 2018 04 c...
Page 15: ......
Page 46: ...30 31 NOTES...
Page 109: ......
Page 110: ......
Page 111: ......


