

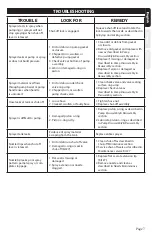

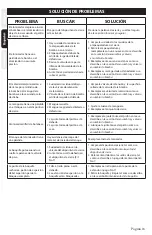
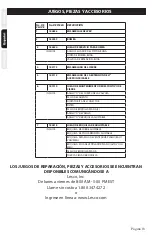

Page 6
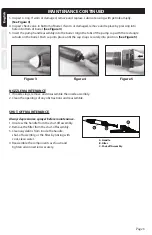
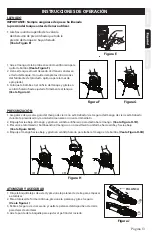
NOZZLE MAINTENANCE
1. If nozzle clogs, remove and disassemble the nozzle assembly.
2. Clean the openings of any obstructions and reassemble.
SHUT-OFF MAINTENANCE
Always depressurize sprayer before maintenance.
1. Unscrew the handle from the shut-off assembly.
2. Remove the filter from the shut-off assembly.
3. Clean any debris from inside the handle,
shut-off assembly, or the filter by rinsing with
cool, clean water.
4. Reassemble the components as shown and
tighten all connections securely.
A. Handle
B. Filter
C. Shut-off Assembly
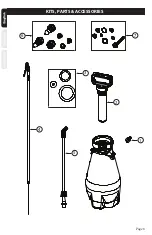
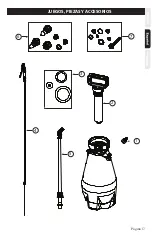
MAINTENANCE CONTINUED
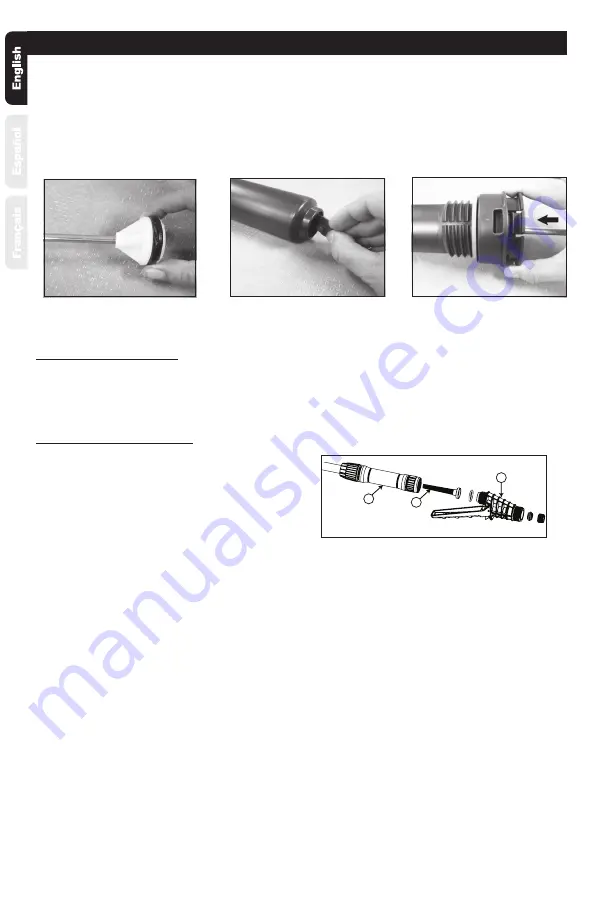
3. Inspect o-ring. If worn or damaged, remove and replace. Lubricate o-ring with petroleum jelly.
(See Figure 3)
4. Inspect check valve in bottom of barrel. If worn or damaged, remove and replace by pressing into
hole in bottom of barrel.
(See Figure 4)
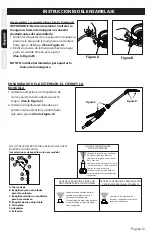
5.
Insert the pump handle assembly into the barrel. Align the tabs of the pump cap with the rectangle
cutouts on the barrel. Push cap into place until the cap snaps securely into position.
(See Figure 5)
Figure 3
Figure 4
Figure 5
A
B
C


