
www.lesscare.com
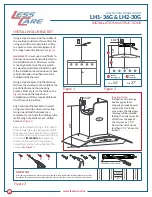
LH1-36G & LH2-30G
WALL MOUNT RANGE HOODS
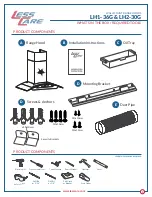
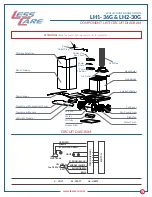
COMPONENT LIST/CIRCUIT DIAGRAM
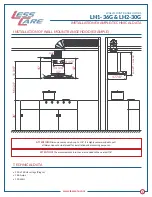
11
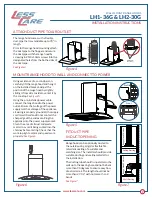
ATTENTION!
Check the box for all components prior to installation!
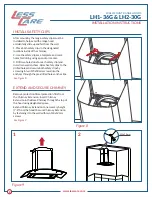
Basic Chimney
Glass Canopy
Touchscreen Module Glass Cover
Touchscreen Module
LED Light Module
Left Fan
Right Fan
Fan Cover Screw
Grease Filter
Oil Tray
Motor Cover
Motor
Chimney Extension
Power
Outlet Plug
Vent Pipe
Power Line
Box Cover
Power
Line Box
Air Outlet
Light Power
Hood Body
Smoke Collector
Fan Cover
Power
Board
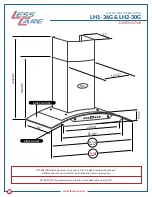
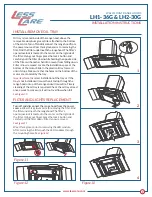
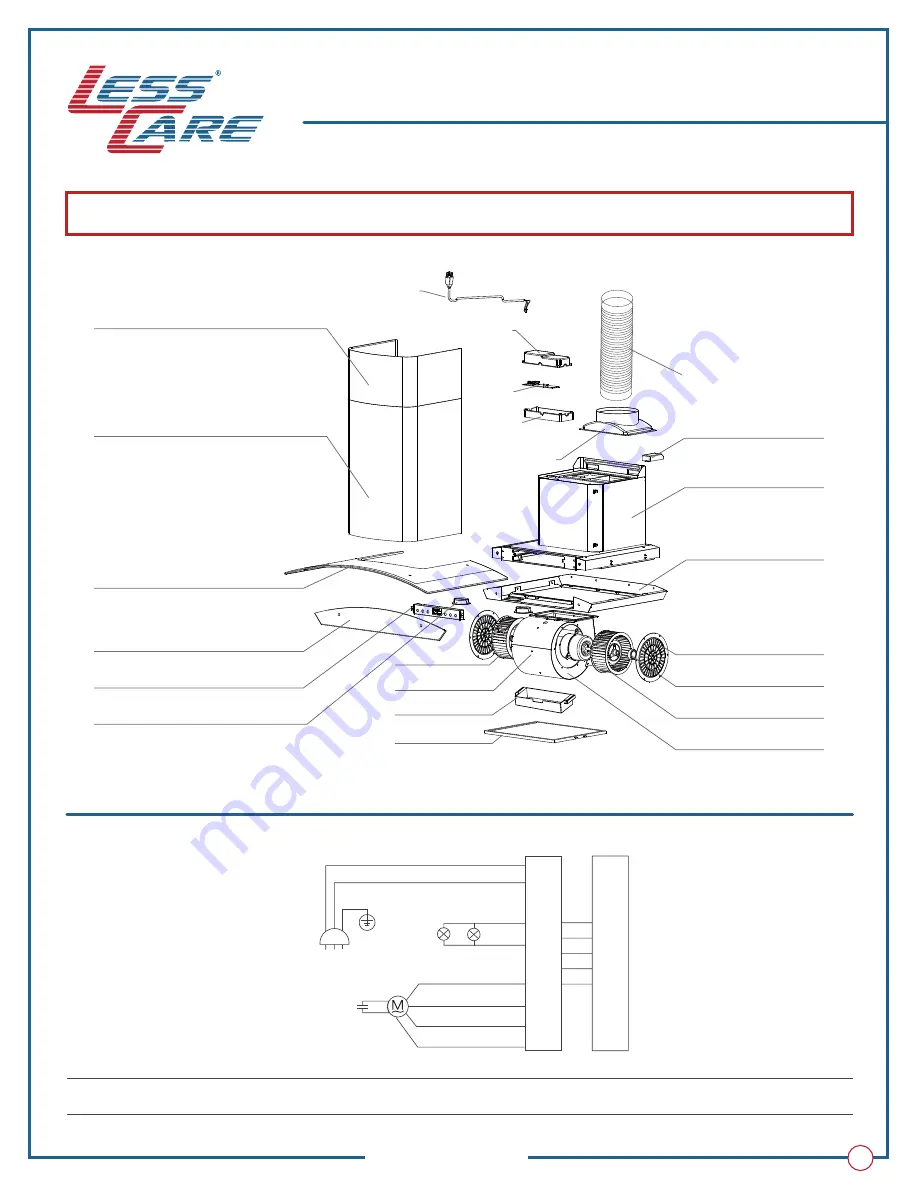
L BROWN
N BLUE
E YELLOW & GREEN
LIGHT
110V~60 Hz
16µF/250V
YELLOW
STRONG (BLACK)
STR
O
NG (BLA
CK)
SWIT
C
H
MIDDLE (WHITE)
SLOW (GREEN)
BLUE
RED
V – VOLT
W – WATT
Hz – HERTZ
CIRCUIT DIAGRAM


