7
USER MANUAL
2 installation
iNStALLAtioN
when installing the Letrika communication gateway be aware that the micro inverter antenna and the Letrika
communication gateway antenna must be in the visible range and the distance between each other should not be more
than 30m. if this is not possible, please use the antenna extension cable.
Please follow next steps during the installation of Letrika communication gateway:
STEP 1
Attach the pylon to the wall using screws and hole-in
anchors.
STEP 2
Attach the other part of the pylon to the Letrika
communication gateway.
STEP 3
Attach the Letrika communication gateway to the wall
using the pylon.
STEP 4
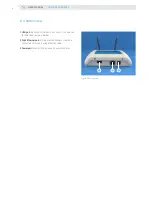
Screw wMbus and wLan antennas to the wMbus
antenna connector and wLan antenna connector on the
Letrika communication gateway.
STEP 5
insert SD card into SD card slot. Note that SD card is not
included in the package.
STEP 6
connect Letrika communication gateway to the power
adapter. Letrika communication gateway can be used when
the communication gateway status LED turns green.
STEP 7
Remember the network iP that can be found at the
Network info menu on the Letrika communication gateway
LcD screen (use Menu keys for navigation).
STEP 8
connect your Pc/tablet/smart phone to the wifi/Ethernet
network and start your preferred web browser.
STEP 9
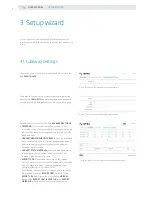
insert the network iP from step 7. into the URL bar of your
preferred web browser and the Setup wizard should start
automatically.


