background image

58

Español

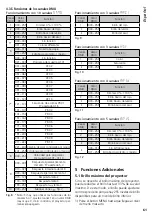
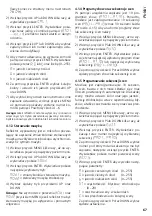
 = duración de la escena en segundos
 = tiempo de fundido

Utilice el botón UP o DOWN para ajustar el 
valor deseado .

6)  Después de ajustar la primera escena, pulse 

el botón MENU . El visualizador muestra el nú-
mero de la escena otra vez . Utilice el botón 
UP para seleccionar la segunda escena, pulse 
ENTER y luego seleccione los ajustes para esta 
escena . Repita este procedimiento para las 
escenas siguientes . Si no se necesitan las 30 
escenas, inserte 0 como valor   para los núme-
ros de las escenas que no se utilizarán .

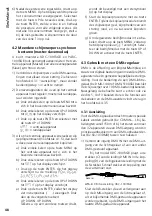
4.2 Control sincronizado de varios 

proyectores  (modo Master / Slave)

Se pueden conectar varios ODC-100 / RGB y PARC-
100 / RGB (incluso mezclar ambos modelos) . El 
aparato Master puede controlar todos los apara-
tos Slave sincronizadamente .
1)  Conecte los proyectores mediante sus tomas 

DMX en cadena . Ver el apartado 4 .3 .1  
“Conexión”, ignorando el paso 1 .

2)  Los aparatos que hay que controlar con el apa-

rato Master tienen que definirse como Slave:
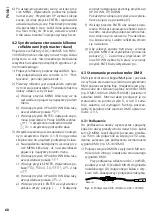
a)  Pulse el botón MENU hasta que llegue al 

nivel de menú más alto .

b)  Pulse el botón UP o DOWN hasta que en 

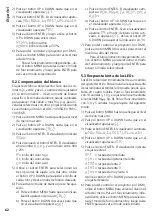
el visualizador aparezca 

 .

c)  Pulse el botón ENTER y luego utilice el 

botón UP o DOWN para seleccionar: 


 = aparato Master 


 = aparato Slave

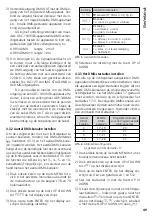
3)  Cualquier secuencia de escenas que se haya 

guardado en el aparato Master (apartado 
4 .1 .5) se puede copiar en los aparatos Slave:
a)  En el aparato Master, pulse el botón MENU 

hasta que llegue al nivel de menú más alto .

b)  Pulse el botón UP o DOWN hasta que en 

el visualizador aparezca 

 .

c)  Pulse el botón ENTER . En el visualizador 

aparecerá 


 .

d)  Pulse el botón UP o DOWN hasta que en 

el visualizador aparezca 

 .

e)  Pulse el botón ENTER de modo que el  

visualizador indique cuatro posiciones de 
entrada ( .  .  .  .) . Luego pulse los siguientes 
botones: 


UP, DOWN, UP, DOWN . 


Cada vez que se pulse uno de estos bo-
tones, aparecerá un asterisco ( ) en el vi-
sualizador .

f)  Pulse ENTER para iniciar la copia . Durante 

la copia, el proyector se ilumina en amari-
llo . Si aparece algún error, el proyector se 
iluminará en rojo . Al completarse con éxito, 
el proyector se iluminará en verde .

g)  Para conectar el modo de funcionamiento 

deseado, pulse el botón MENU hasta que 
en el visualizador aparezca 

 de nuevo . 

Utilice los botones UP y DOWN para selec-
cionar el modo de funcionamiento y pulse 
ENTER para activarlo .

4.3 Funcionamiento con 

un controlador DMX

DMX es la abreviatura de 

D

igital 

M

ultiple

x

 y 

significa control digital de varios aparatos DMX 
mediante una línea de control común . Para el 
funcionamiento mediante un controlador DMX 
(p . ej . DMX-1440 o DMX-510USB), el proyector 
está equipado con 10 canales de control DMX . 
Sin embargo, también puede controlarse sólo 
mediante 5, 4 ó 3 canales si es necesario . Ver 
apartado 4 .3 .5 para más información sobre las 
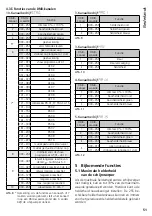
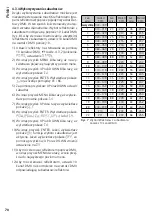
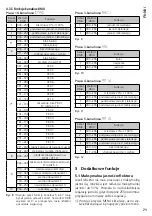
funciones de canal y los valores DMX .

4.3.1 Conexión

Para la transmisión de la señal DMX, deberían  
utilizarse cables especiales (p . ej . CDMXN-…) . 
Para cableados de más de 150 m o para el control 
de más de 32 aparatos mediante una única salida 
DMX, se recomienda insertar un amplificador de 
nivel DMX adecuado (p . ej . SR-103DMX) .
1)  Conecte la entrada DMX IN a la salida de señal 

DMX del controlador de luces o a la salida 
DMX de otro aparato controlado por DMX .

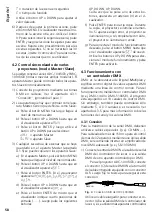
Para el proyector ODC-100 / RGB, conecte 

el conector (C) del cable DMX IN a la toma (D) 
del cable entregado equipado con un conector 
XLR . Luego fije la tuerca para asegurar esta 
conexión .

DMX IN

C

D

Fig. 4   

Conexión DMX del ODC-100 / RGB

Utilice un cable alargador para conectar el co-
nector XLR a la salida DMX del controlador de 
luces o, si se utilizan más aparatos controlados 

Summary of Contents for ODC-100/RGB

Page 1: ...ISTRUZIONI PER L USO GEBRUIKSAANWIJZING MANUAL DE INSTRUCCIONES INSTRUKCJA OBS UGI SIKKERHEDSOPLYSNINGER S KERHETSF RESKRIFTER TURVALLISUUDESTA ODC 100 RGB Bestell Nr Order No 38 7090 PARC 100 RGB Be...

Page 2: ...2 DMX IN DMX OUT SAFETY ROPE POWER IN POWER OUT MENU ENTER UP DOWN PUSH F U S E FUSE DMX IN DMX OUT SAFETY ROPE POWER IN POWER OUT MENU ENTER UP DOWN ODC 100 RGB PARC 100 RGB...

Page 3: ...3 Deutsch Seite 4 English Page 14 Fran ais Page 24 Italiano Pagina 34 Nederlands Pagina 44 Espa ol P gina 54 Polski Strona 64 Dansk Sida 74 Svenska Sidan 75 Suomi Sivulta 76...

Page 4: ...kotheken und Fests len Als Lichtquelle ist eine lichtstarke COB LED einge setzt COB Chip on Board Technologie Viele LED Chips sind eng auf einer Leiterplatte unterge bracht sodass eine gleichm ige Lic...

Page 5: ...als Zubeh r erh ltliche Torblende PARC 100B an der Vorderseite festschrauben 3 3 Stromversorgung Mit dem Anschluss des Scheinwerfers ans Strom netz ist er eingeschaltet Das Display zeigt den zuletzt g...

Page 6: ...zeigt wie die Modi und Funktionen ber das Men angew hlt und vom Display angezeigt werden 4 1 Eigenst ndiger Betrieb 4 1 1 Farbstrahler und Stroboskop In diesem Modus strahlt der Scheinwerfer kon stant...

Page 7: ...inschalten wieder musikgesteuert arbeiten den Men punkt oder nicht mit der Taste MENU verlassen 4 1 4 Showprogramme und Szenenfolgen 10 Showprogramme sind im Scheinwerfer gespeichert Au erdem k nnen 1...

Page 8: ...n anzeigt Dann folgende Tasten dr cken UP DOWN UP DOWN Das Dr cken dieser Tasten wird jeweils mit einem Stern im Display quittiert f Den Kopiervorgang mit der Taste ENTER starten W hrend des Kopiervor...

Page 9: ...trieb m glich sind und w hlen Sie danach die Anzahl der DMX Kan le aus 1 Die Taste MENU so oft dr cken bis die oberste Men ebene erreicht ist in der Men struktur auf den Seiten 78 und 79 ganz links 2...

Page 10: ...auf die Anzeige oder um 9 Die Taste UP oder DOWN so oft dr cken bis das Display anzeigt 10 Die Taste ENTER dr cken Zeigt das Display an ist die Funktion f r die Unteradressen selektion eingeschaltet...

Page 11: ...aktion 4 10 000 255 Unteradressen Abb 7 Abb 8 Hinweis Sollen die Funktionen des Kanals 5 oder 7 genutzt werden den Kanal 1 auf einen DMX Wert von gr er als 0 einstellen sonst bleibt der Scheinwerfer d...

Page 12: ...chte Wei ton ergibt 6 Den eingestellten Wei ton aktivieren a Die Taste MENU so oft dr cken bis das Display wieder anzeigt b Die Taste DOWN zweimal dr cken sodass das Display anzeigt c Die Taste ENTER...

Page 13: ...brechen 7 Damit der Scheinwerfer DMX gesteuert wer den kann mit der Taste MENU zur ck auf die oberste Men ebene springen F r den eigenst ndigen Betrieb mit der Taste MENU den Betriebsmodus w hlen und...

Page 14: ...ight source is a powerful COB LED COB chip on board technology Many individual LED chips are densely packed on a PCB to provide a uniform light distribution The spotlight is designed for control via a...

Page 15: ...30 seconds As soon as a button MENU ENTER UP und DOWN is pressed the display will light up again for 30 seconds WARNING To prevent damage to your eyes never look directly into the light source for an...

Page 16: ...e on pages 78 and 79 2 Press the button UP or DOWN repeatedly until the display indicates 3 Press the button ENTER The display now indi cates or and a number brightness of the colour red 0 255 brightn...

Page 17: ...the button UP or DOWN repeatedly until the display indicates 3 Press the button ENTER The display now in dicates the show programme most recently selected or the sequence of scenes most recently selec...

Page 18: ...e it 4 3 Operation with a DMX controller DMX is short for Digital Multiplex and means dig ital control of multiple DMX units via a common control line For operation via a DMX controller e g DMX 1440 o...

Page 19: ...ls 10 channels chapter 4 3 5 fig 8 3 channels 1 red 2 green 3 blue 4 channels 1 dimmer 2 red 3 green 4 blue 5 channels 1 dimmer 2 red 3 green 4 blue 5 stroboscope 3 channels 1 colour 2 saturation 3 br...

Page 20: ...9 Press the button UP or DOWN repeatedly until the display indicates 10 Press the button ENTER If the display indicates the function for subaddress selection is activated If it indicates use the butt...

Page 21: ...0 255 subaddresses fig 7 Fig 8 Note If the functions of channel 5 or 7 are to be used set channel 1 to a DMX value greater than 0 otherwise the spotlight will remain dark 3 channel mode DMX channel DM...

Page 22: ...shade of white that has been set a Press the button MENU repeatedly until the display indicates again b Press the button DOWN twice so that the display indicates c Press the button ENTER The display c...

Page 23: ...the spotlight by DMX use the button MENU to return to the highest menu level For independent operation use the button MENU to select the operating mode and then press ENTER to activate the mode select...

Page 24: ...rmet de cr er des effets d clairage par exemple sur sc nes en disco th ques et dans des salles des f tes Une LED COB puissante COB technologie Chip on Board est la source de lumi re de nombreuses puce...

Page 25: ...ecteur pour qu ils servent de support Revissez ensuite les vis de fixation 3 2 Volets Pour diminuer l angle du faisceau lumineux les volets PARC 100B disponibles en option se vissent sur la face avant...

Page 26: ...les pages 78 et 79 pr sente la s lection des modes et des fonctions via le menu et les indications sur l affichage 4 1 Fonctionnement ind pendant 4 1 1 Projecteur de couleurs et stroboscope Avec ce m...

Page 27: ...stroboscope g r par la musique 4 Avec la touche UP ou DOWN s lectionnez le mode voulu Important Si apr s l arr t et le red marrage le projecteur doit nouveau fonctionner via la musique ne quittez pas...

Page 28: ...jusqu atteindre la plage sup rieure du menu b Appuyez sur la touche UP ou DOWN de mani re r p t e jusqu ce que l affichage indique c Appuyez sur la touche ENTER L affichage passe ou d Appuyez sur la t...

Page 29: ...bre de canaux DMX Le nombre de canaux DMX d pend des fonc tions n cessaires et ventuellement du nombre de canaux disponibles sur le contr leur Repor tez vous au chapitre 4 3 5 sur les fonctions pos si...

Page 30: ...z la sous adresse avec la touche UP ou DOWN 6 Appuyez sur la touche MENU pour que l af fichage indique maintenant uniquement 7 Appuyez deux fois sur la touche UP pour que l affichage indique 8 Appuyez...

Page 31: ...ch ma 8 Conseil Si les fonctions du canal 5 ou 7 doivent tre utilis es r glez le canal 1 sur une valeur DMX sup rieure 0 sinon le projecteur reste sombre Mode 3 canaux Canal DMX Valeur DMX Fonction 1...

Page 32: ...la touche UP ou DOWN respec tivement la luminosit pour obtenir le ton de blanc voulu 6 Activez le ton de blanc r gl a Appuyez sur la touche MENU de mani re r p t e jusqu ce que l affichage indique no...

Page 33: ...r la touche ENTER l affichage confirme bri vement avec ou annulez le processus avec la touche MENU 7 Pour que le projecteur puisse tre g r par DMX revenez avec la touche MENU la plage sup rieure du me...

Page 34: ...e presente un po tente LED COB COB tecnologia chip on board molti chip con LED sono sistemati strettamente su un circuito stampato In questo modo si ottiene una distribuzione uniforme della luce Il pr...

Page 35: ...alette PARC 100B disponibile come accessorio 3 3 Alimentazione Il proiettore si accende collegandolo con la rete Il display indica la voce del menu scelta per ultima e si spegne dopo 30 s Quando si p...

Page 36: ...te il menu e come saranno visualizzati dal display 4 1 Funzionamento autonomo 4 1 1 Proiettore di colori e stroboscopio In questo modo il proiettore emette costante mente un colore impostabile In pi s...

Page 37: ...te Se dopo lo spegnimento e la riaccen sione il proiettore deve funzionare nuovamente comandato dalla musica non uscire dalla voce del men o usando il tasto MENU 4 1 4 Programmi show e scenari Nel pro...

Page 38: ...TER in modo che il display visualizzi quattro punti d input Quindi premere i seguenti tasti UP DOWN UP DOWN La pressione di questi tasti viene sempre confermata con un asterisco sul display f Avviare...

Page 39: ...U tante volte finch raggiunto il livello superiore del men nella struttura del men a pagine 78 e 79 tutto a sinistra 2 Premere il tasto UP o DOWN tante volte finch il display indica 3 Premere il tasto...

Page 40: ...display passa alla vi sualizzazione o 9 Premere il tasto UP o DOWN tante volte finch il display indica 10 Premere il tasto ENTER Se il display indica significa che attivata la funzione per la selezio...

Page 41: ...one lenta 4 10 000 255 Sottoindirizzi Fig 7 Fig 8 N B Se si devono sfruttare le funzioni del canale 5 o 7 impostare per il canale 1 un valore DMX superiore a 0 altrimenti il proiettore rimane buio Fun...

Page 42: ...l bianco 6 Attivare la tonalit del bianco a Premere il tasto MENU tante volte finch il display indica nuovamente b Premere due volte il tasto DOWN in modo che il display visualizzi c Premere il tasto...

Page 43: ...on il tasto MENU 7 Perch il proiettore possa essere comandato con DMX con il tasto MENU ritornare sul li vello superiore del men Per il funzionamento autonomo con il tasto MENU scegliere il modo di fu...

Page 44: ...el ODC 100 RGB is geschikt voor bui ten toegestaan omgevingstemperatuur bereik 20 tot 40 C Trek onmiddellijk de netstekker uit het stop contact 1 wanneer het apparaat of het netsnoer zicht baar bescha...

Page 45: ...Op het display ver schijnt het laatst geselecteerde menu item dat na 30 seconden verdwijnt Van zodra u op een toets MENU ENTER UP of DOWN drukt licht het display weer gedurende 30 seconden op OPGELET...

Page 46: ...t menu worden geselecteerd en op het display weergegeven 4 1 Autonoom bedrijf 4 1 1 Kleurenstraler en stroboscoop In deze modus straalt de schijnwerper constant in een instelbare kleur Daarnaast kunt...

Page 47: ...tuurd moet wer ken verlaat dan het menu item of niet met de toets MENU 4 1 4 Showprogramma s en sc nereeks 10 showprogramma s zijn in de schijnwerper opgeslagen Bovendien kunnen 10 sc nereeksen met ma...

Page 48: ...voerposities weergeeft Druk dan op de volgende toetsen UP DOWN UP DOWN Telkens u op een van deze toetsen drukt wordt dit bevestigd met een stersymbool op het display f Start de kopieerprocedure met de...

Page 49: ...het aantal DMX kanalen 1 Druk enkele keren op de toets MENU tot u zich in het bovenste menuniveau bevindt in de menustructuur op de pagina s 78 en 79 helemaal links 2 Druk enkele keren op de toets UP...

Page 50: ...s ENTER Op het display ver schijnt nu de melding of 9 Druk enkele keren op de toets UP of DOWN tot op het display verschijnt 10 Druk op de toets ENTER Als op het display verschijnt is de functie voor...

Page 51: ...reactie 4 10 000 255 subadressen afb 7 Afb 8 Opmerking Als de functies van kanaal 5 of 7 moeten worden gebruikt stelt u het kanaal 1 in op een DMX waarde groter dan 0 anders blijft de schijnwerper do...

Page 52: ...zo in dat het de gewenste wittint oplevert 6 De ingestelde wittint activeren a Druk enkele keren op de toets MENU tot op het display verschijnt b Druk tweemaal op de toets DOWN zodat de melding op het...

Page 53: ...stigt dit kort met of breek de procedure af met de toets MENU 7 Voor DMX besturing van de schijnwerper keert u met de toets MENU terug naar het bovenste menuniveau Voor autonoom bedrijf selecteert u d...

Page 54: ...C Desconecte inmediatamente el conector de corriente de la toma si 1 El proyector o el cable de corriente est n visiblemente da ados 2 El proyector ha sufrido da os despu s de una ca da o accidente si...

Page 55: ...de men seleccionado y se apagar 30 segundos despu s En cuanto se pulse un bot n MENU ENTER UP o DOWN el visualizador se iluminar de nuevo otros 30 segundos ADVERTENCIA Para prevenir da os oculares no...

Page 56: ...ualizador 4 1 Funcionamiento independiente 4 1 1 Proyector de color y estroboscopio En este modo el proyector irradia luz constante mente en un color ajustable Adem s est dis ponible la funci n estrob...

Page 57: ...funciona en modo control por m sica despu s de desconectar y conectar 4 1 4 Programas de muestra y secuencias de escenas En el proyector hay 10 programas de muestra memorizados Adem s se pueden progr...

Page 58: ...ro posiciones de entrada Luego pulse los siguientes botones UP DOWN UP DOWN Cada vez que se pulse uno de estos bo tones aparecer un asterisco en el vi sualizador f Pulse ENTER para iniciar la copia Du...

Page 59: ...n corresponda 1 Pulse el bot n MENU hasta que llegue al nivel de men m s alto borde izquierdo de la es tructura de men de las p ginas 78 y 79 2 Pulse el bot n UP o DOWN hasta que en el visualizador a...

Page 60: ...ador apare cer o 9 Pulse el bot n UP o DOWN hasta que en el visualizador aparezca 10 Pulse el bot n ENTER Si el visualizador indica significa que se ha activado la funci n para seleccionar una subdire...

Page 61: ...ta 4 10 000 255 Subdirecciones fig 7 Fig 8 Nota Si hay que utilizar las funciones de los canales 5 7 ajuste el canal 1 en un valor DMX mayor que 0 de lo contrario el proyector per manecer apagado Func...

Page 62: ...visua lizador aparezca de nuevo b Pulse el bot n DOWN dos veces para que en el visualizador aparezca c Pulse el bot n ENTER El visualizador cam biar a o d Pulse el bot n UP o DOWN hasta que en el visu...

Page 63: ...ector por DMX utilice el bot n MENU para volver al nivel m s alto del men Para el funcionamiento independiente uti lice el bot n MENU para seleccionar el modo de funcionamiento y luego pulse ENTER par...

Page 64: ...opuszczalny zakres 0 40 C Reflektor ODC 100 RGB przystosowany jest do zastosowa na zewn trz dopuszczalny zakres temperatur 20 do 40 C Nie nale y w cza lub natychmiast od czy urz dzenie od zasilania w...

Page 65: ...kowe Nale y przykr ci j na przedniej stronie reflektora 3 3 Zasilanie Po pod czeniu zasilania urz dzenie jest w czone Na wy wietlaczu pokazane zostanie ostat nie wybrane polecenie menu po 30 sekundach...

Page 66: ...i s u przyciski MENU ENTER UP oraz DOWN Na rys 14 na stronach 78 i 79 pokazano struktur menu steruj cego 4 1 Praca niezale na 4 1 1 Kolorowy reflektor i stroboskop W tym trybie reflektor wieci jednym...

Page 67: ...rzyciskiem MENU je eli reflektor ma by sterowany muzyk po wy czeniu i ponownym w czeniu 4 1 4 Programy show oraz sekwencje scen W pami ci urz dzenia zapisane jest 10 pro gram w show Ponadto mo liwe je...

Page 68: ...a e lub d Wcisn przycisk UP lub DOWN kilka razy a wy wietlacz poka e e Wcisn przycisk ENTER a wy wietlacz poka e cztery pozycje Nast pnie wcisn nast puj c sekwencj przycisk w UP DOWN UP DOWN Po ka dym...

Page 69: ...cisn przycisk MENU kilka razy a na wy wietlaczu pojawi si najwy szy poziom menu lewy koniec ze struktury menu na stronach 78 i 79 2 Wcisn przycisk UP lub DOWN kilka razy a wy wietlacz poka e 3 Wcisn p...

Page 70: ...ub 9 Wcisn przycisk UP lub DOWN kilka razy a wy wietlacz poka e 10 Wcisn przycisk ENTER Je eli wy wietlacz poka e funkcja wyboru subadres w jest aktywna Je eli wy wietlacz poka e za pomoc przycisk w U...

Page 71: ...55 subadresy Rys 7 Rys 8 Uwaga Je eli funkcje kana w 5 lub 7 maj by u ywane ustawi kana 1 na warto DMX wi ksz ni 0 w przeciwnym razie reflektor pozostanie wygaszony Praca 3 kana owa Kana DMX Warto DMX...

Page 72: ...nie poka e b Wcisn przycisk DOWN dwa razy a wy wietlacz poka e c Wcisn przycisk ENTER Wy wietlacz poka e teraz lub d Wcisn przycisk UP lub DOWN kilka razy a wy wietlacz poka e e Wcisn przycisk ENTER J...

Page 73: ...elu przej cia do najwy szego poziomu menu W przypadku pracy niezale nej za po moc przycisku MENU wybra tryb pracy i aktywowa go przyciskiem ENTER 6 Czyszczenie urz dzenia Przedni panel reflektora nale...

Page 74: ...Tag aldrig netstikket ud af stikkontakten ved at tr kke i kablet tag fat i selve stikket Kun for ODC 100 RGB Er der skader p str m kablet skal dette straks udbedres inden lampen tages i brug Til reng...

Page 75: ...genom att dra i slad den utan ta tag i kontaktkroppen Endast f r ODC 100 RGB En skadade n tkabel f r endast ers ttas av utbildad personal Reng r endast med en mjuk och torr trasa anv nd aldrig kemikal...

Page 76: ...Koskien spottia ODC 100 RGB Vaurioituneen virtajohdon saa vaihtaa vain valtuutettu huol toliike K yt laitteen ulkopuoliseen puhdistamiseen ainoastaan kuivaa pehme kangasta l mil loinkaan k yt vett ta...

Page 77: ...77...

Page 78: ...sequences of scenes Wei entspricht der Einstellung White corresponds to the adjustment Wei Rot Gr n und Blau auf max Helligkeit White red green and blue at max brigthness Max Helligkeit des Scheinwerf...

Page 79: ...esteuertes Stroboskop Music controlled stroboskope Musikgesteuerter Farbwechsel Music controlled colour change Unteradresse Subaddress DMX Startadresse DMX start address Showprogramme Show programme P...

Page 80: ...MONACOR INTERNATIONAL GmbH Co KG Zum Falsch 36 28307 Bremen Germany Copyright by MONACOR INTERNATIONAL All rights reserved A 1653 99 03 04 2019...

Reviews: